Greetings fellow toy photography aficionados, and welcome to the talk I gave at the Toy Photographers Virtual Meet-Up held over the weekend of January 8–10. I was honored to present an hour-long talk via Zoom that gave a bit of a tour of my studio, and the processes I go through to create the images that I do. I went through a shot I made and discussed how it came about. From initial concept to the final image. This post is a modified version of that talk.
Before I dig into the talk, you should be aware of a few things. First of all, I am going to skip entirely the tour of my studio portion of the talk. This is partly because I already posted a tour of my studio to this blog (though it has changed slightly since then—but it’s mostly the same). Also, I cut it so I can fit this into one blog post-sized chunk of information.
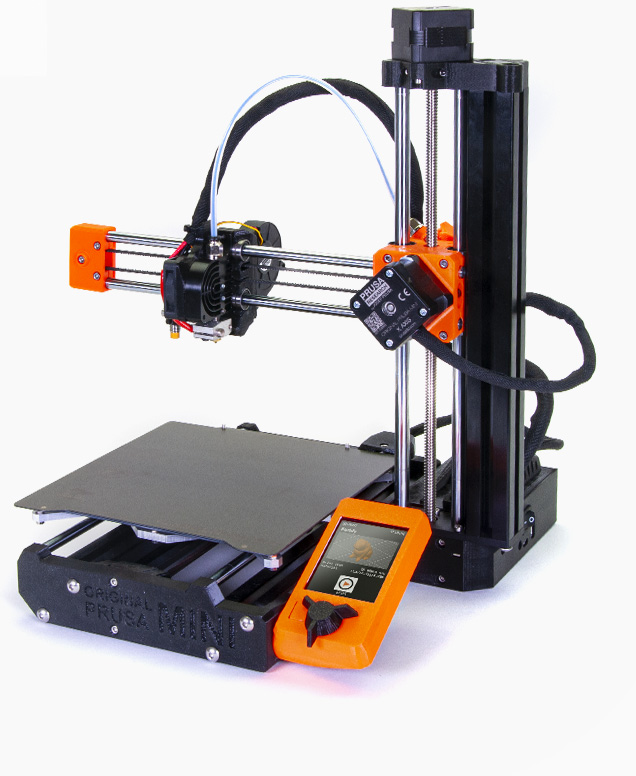
The second thing to note is that when I created the following image, I did not know I was going to use it for this talk. It was also made pre-COVID, so a few liberties have been made with timelines and actual equipment used. The short version is, I used some equipment from the makerspace at my office (namely the 3D printer). Since COVID and the lockdown, I purchased my own printer, which I used for demonstration purposes during my actual talk. However, I can assure you that any changes to the details in no way affect the ideas and concepts presented herein.
With that out of the way, let’s jump in.
The inspiration
Before one can take a photo, one needs to know what sort of photo to take. In other words, it needs a concept.
If I were to describe how I came up with the concept for every toy photograph I have taken, it would quickly become apparent that each one has a slightly different, or sometimes dramatically different, way it came about. But they all follow a similar pattern. My ideas tend to take two or more disparate thoughts about characters/concepts/styles/etc. from various sources, etc. These get mixed around in my brain until the parts gel into a concept that pleases me enough to want to go shoot it.
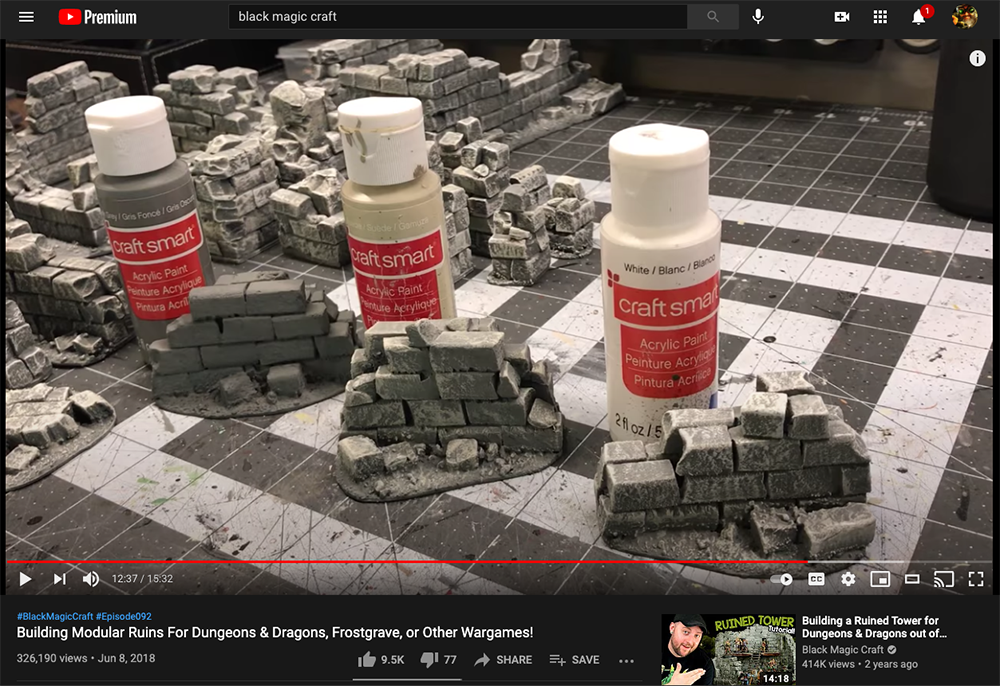
In this case, I specifically set out to create an image that utilized some new skills I have been learning, and tools I acquired recently. Really I wanted an excuse to play with those skills and tools. First, I ran across some YouTube channels about making terrain pieces for D&D-style game tables. It struck me that, despite my illusions to the contrary, making such terrain pieces was both within my skills to accomplish, and scaling them up to action figure sizes would be a great way to make backgrounds for my images.
Specifically, what I wanted to do was try the concepts from this video on making ruins out of foam bricks from Black Magic Craft.
Secondly, I was just starting to get into 3D printing, and I wanted to see how I could use 3D printed things in my toy photography. Like I mentioned at the time, I was using a variety of 3D printers from the makerspace at work. I did purchase a Prusa Mini for my home studio once COVID hit and I lost access to the makerspace.
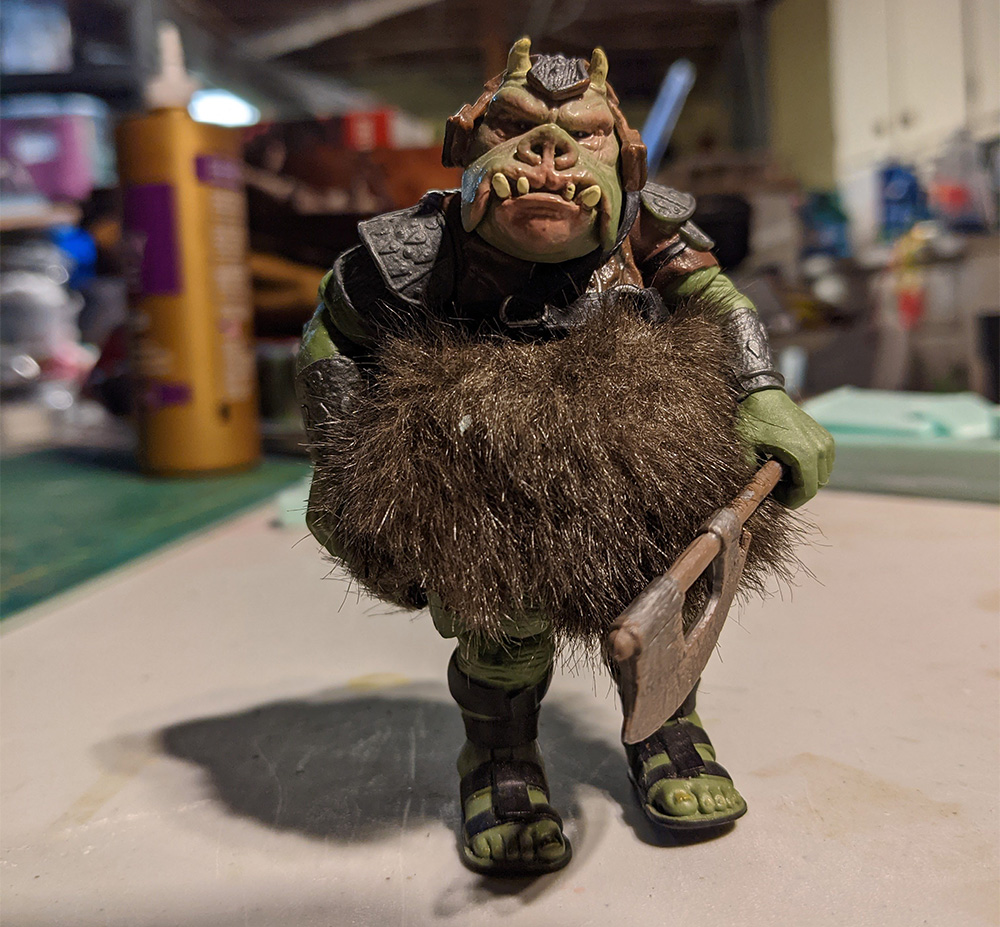
Third, I had come into possession of a 3.75-inch Black Series Gamorrean Guard figure that came with a Rancor. I wanted the Rancor—the guard was just a bonus, but I wanted to take a photo with him. I mean, he does scream, “All right, Mr. DeMille, I’m ready for my close up,” doesn’t he?
Exactly.
Refining the concept
So I had some pieces I needed to merge together. At the time, I happened to be reading an excellent picture book called Sculpting a Galaxy: Inside The Star Wars Model Shop.
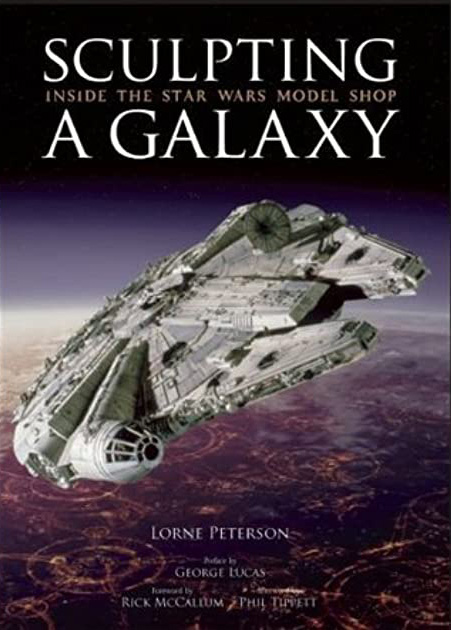
The book is full of images of the models used to create the first six Star Wars movies. It includes extra information on the thoughts and details of how they were constructed, making it a fantastic book for a behind-the-scenes geek like myself.
This book got me thinking about Jabba’s Palace from Return of The Jedi, the only place Gamorrean Guards exist in the movies. I didn’t want to make a throne room scene (mainly because I don’t have a Jabba the Hutt figure—also it’s been done a lot). However, it triggered a memory of a book I read as a kid called Tales From Jabba’s Palace, which is a collection of short stories that follow several of the characters from the movies during the day and night before Jabba gets killed.
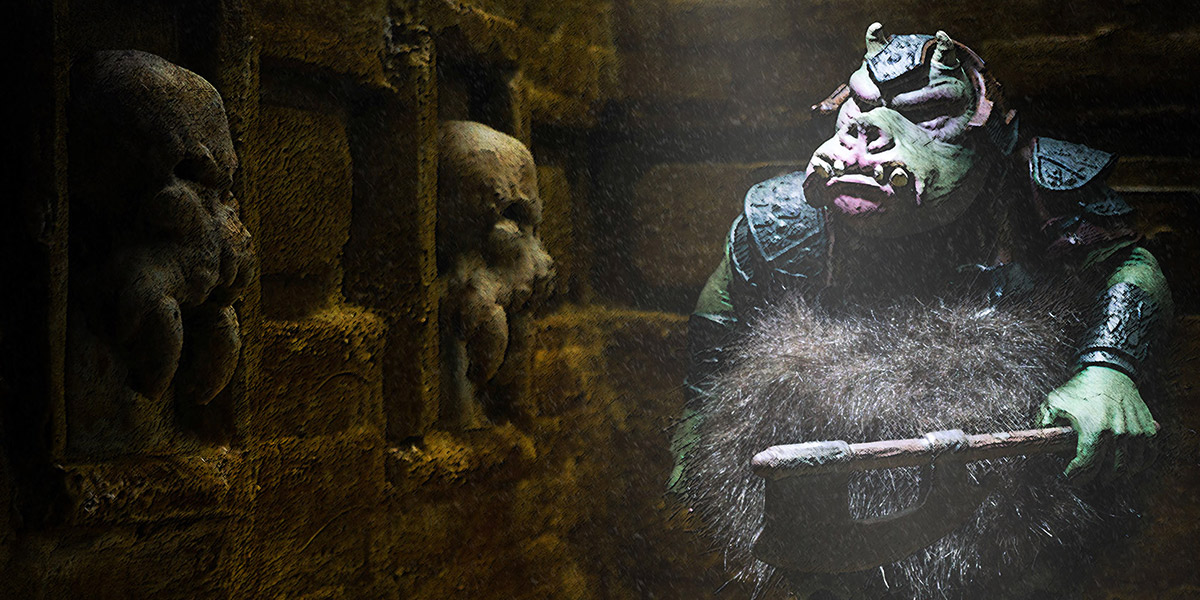
All of this made me think that guards would be patrolling various parts of the palace. That’s when the first ideas clicked in my head of a long dark hallway, spottily lit, dusty, being patrolled by a Gamorrean. Further more, that hallway would be bricked, which checks my “I wanna make a brick-based diorama” check box.
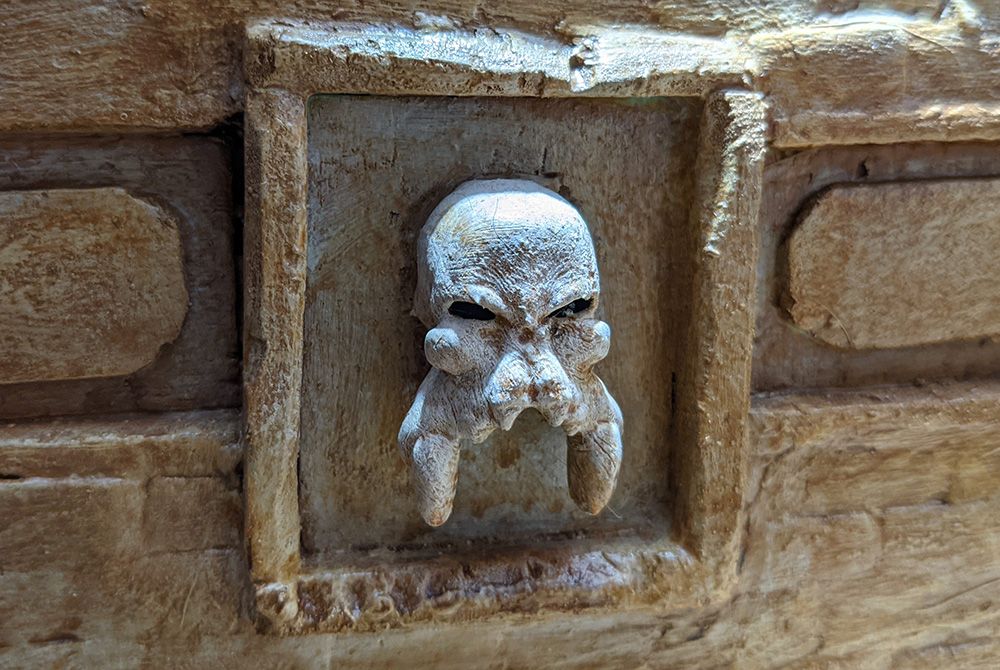
I also thought a long brick wall would be boring. Palaces often have statues and other artwork on the walls. This statuary could be 3D printed—third check box checked. Winning.
I went searching for ideas of statuary I could print. Eventually I found a neat looking skull with horns that would serve as wall-mounted artwork.
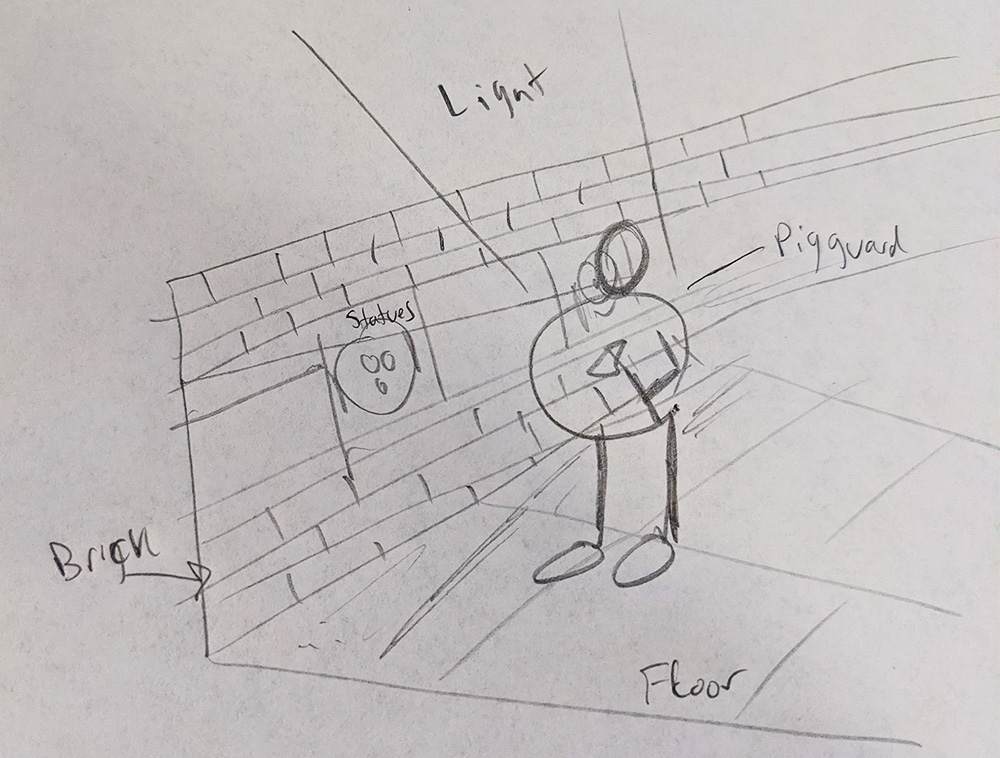
These ideas were all conceived and stored in my head. For a variety of reasons I don’t ever sketch concepts on paper. However, I sketched this for you since you can’t yet read my thoughts. (This also reveals one of the reasons why I don’t sketch concepts: I have the drawing skills of a drunken baby). I present to you the world’s worst concept drawing:
Now that I had a fully conceived concept, it was time to start building.
Bringing concept to reality
As mentioned, I had no plans to use this image as an example for a talk. Ergo, I didn’t take any behind-the-scenes shots of making the diorama. But you can watch the video linked above to get a good idea of how I built the basic structure.
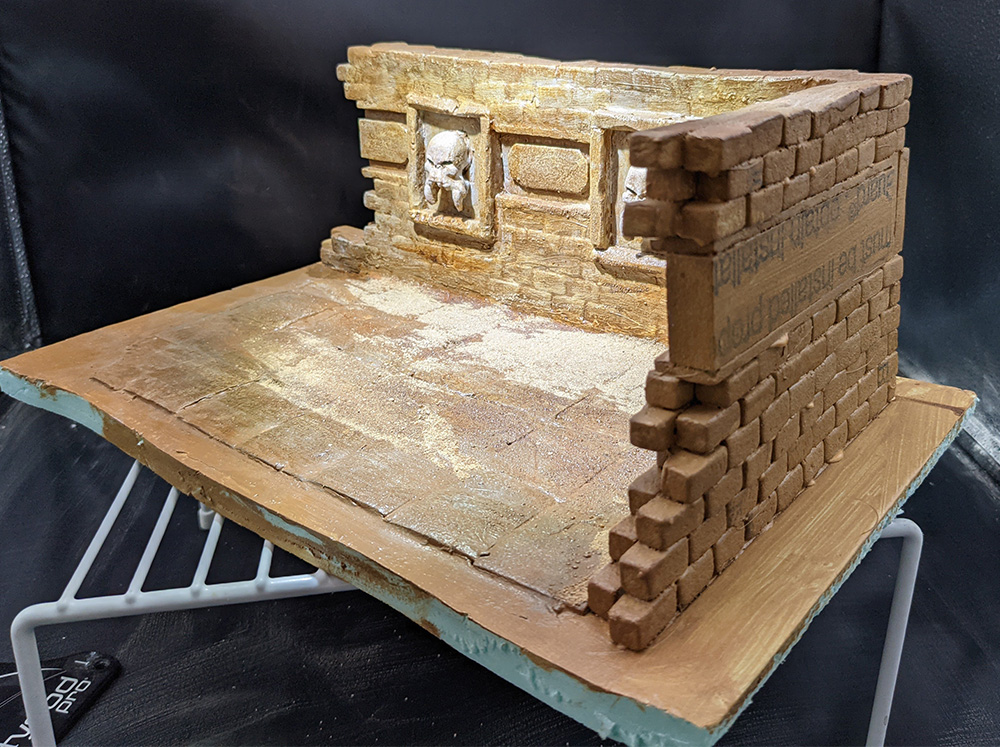
The first thing you may notice that is different from the concept in my head (sketchily sketched above for your (in)convenience), is that the diorama I built is a corner, not a straight wall. This was due to the fact that once I started holding actual materials in my hands I realized that a long straight wall is… well… long. I am a lazy sort of fellow, and I didn’t want to make a wall that was so long it faded into the distance. Instead, I quickly made the executive decision that my hallway would have a corner. Work smarter, not harder.
Similar to the old military saying that the best battle plans never survive first contact with the enemy, it is quite common for my in-head concepts to get modified once they face reality. This hallway exists in my own world, so I can decide to put a corner there if I choose. My world, my rules!
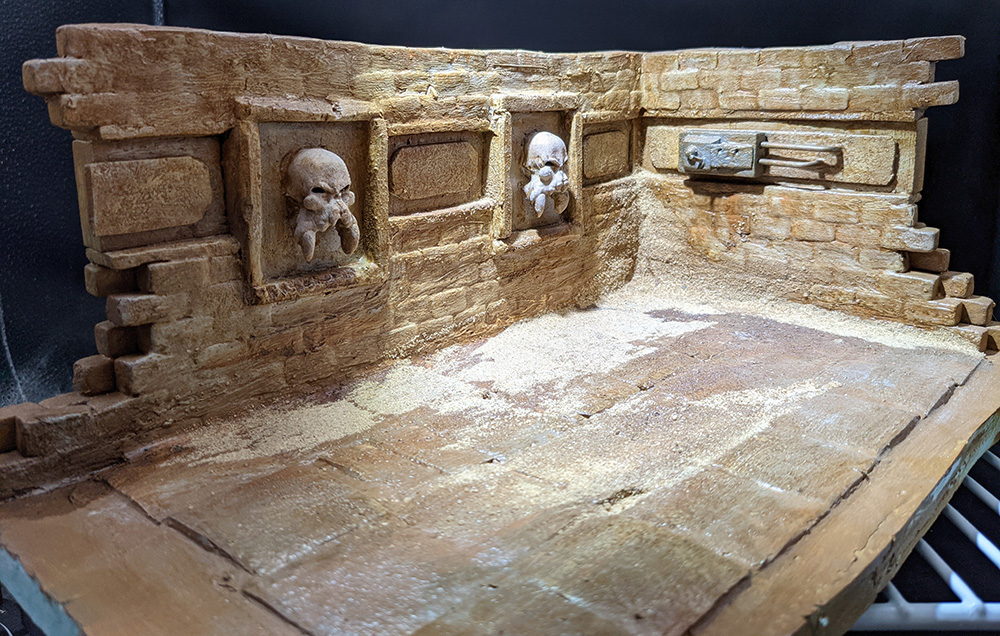
As you can see the structure is basically as I intended it: a brick wall with some visual embellishments. As I was building this, I figured the floor needed some texture. Tatooine is a sandy place and Jabba never struck me as someone who spent a whole lot of money on janitorial services. So odds are, the darker recesses of his palace would have a lot of sand in the corners.
You may also notice I left the ends rough. The back is also painted, but ugly as sin and basically unfinished. This is, unlike some other amazing diorama makers I know, because I don’t make my dioramas for display. These are meant to be scenery for a specific production. Like movie sets, I just make everything that appears onscreen look good. The visual quality of the rest is irrelevant.
The heads are mounted with some white glue. In retrospect, there are some serious problems with them that I don’t like. For one, the prints need to have the print lines sanded off to make it look less 3D printed. Second, I was going for a bone look, but I didn’t get the colors right. It looks ok, but it’s not exactly what I had in mind. It still looked good for next time, so I just considered this a lesson learned.
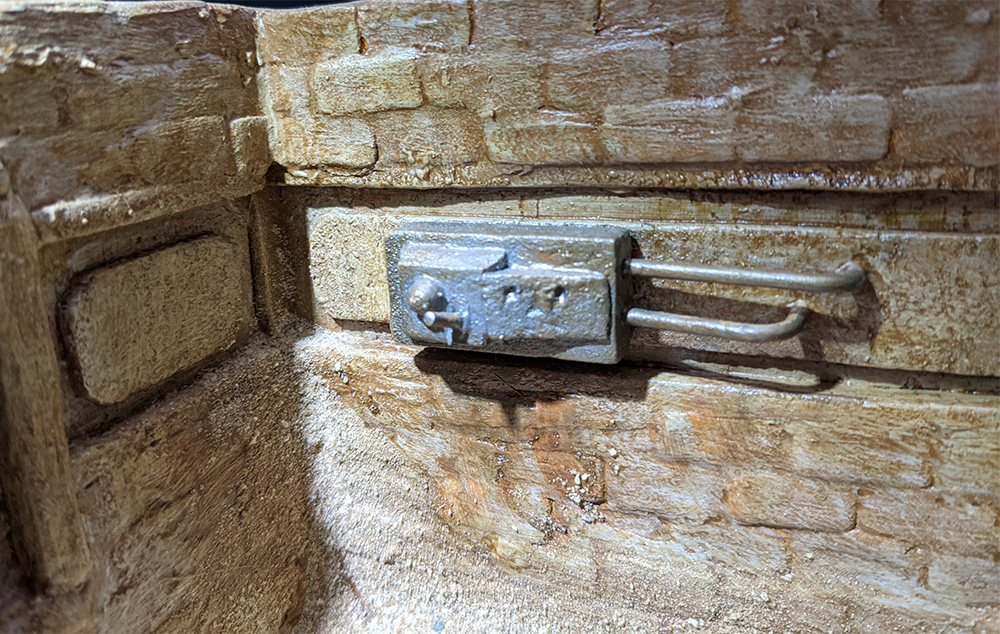
Along the way, I decided the back wall needed some embellishment as it looked a bit bare. I added a greeble made of spare parts to act as an electrical box of some sort. This is the sort of thing that litters the Star Wars landscape. Turns out it doesn’t show up in the photo at all, as the Guard covers it completely, but I had fun putting it in anyway. Besides, it makes these behind-the-scenes images more interesting.
Shooting the concept
Once the glue and paint on the diorama was dry, it’s time to shoot this sucker. I have a 27-inch light box that I shoot the vast majority of my shots in. So I tossed the diorama into that box. I like using the box as it gives me full control over the light in a scene. It also serves a double purpose of reserving a space in my rather cluttered studio where I can work without having to clean up first.
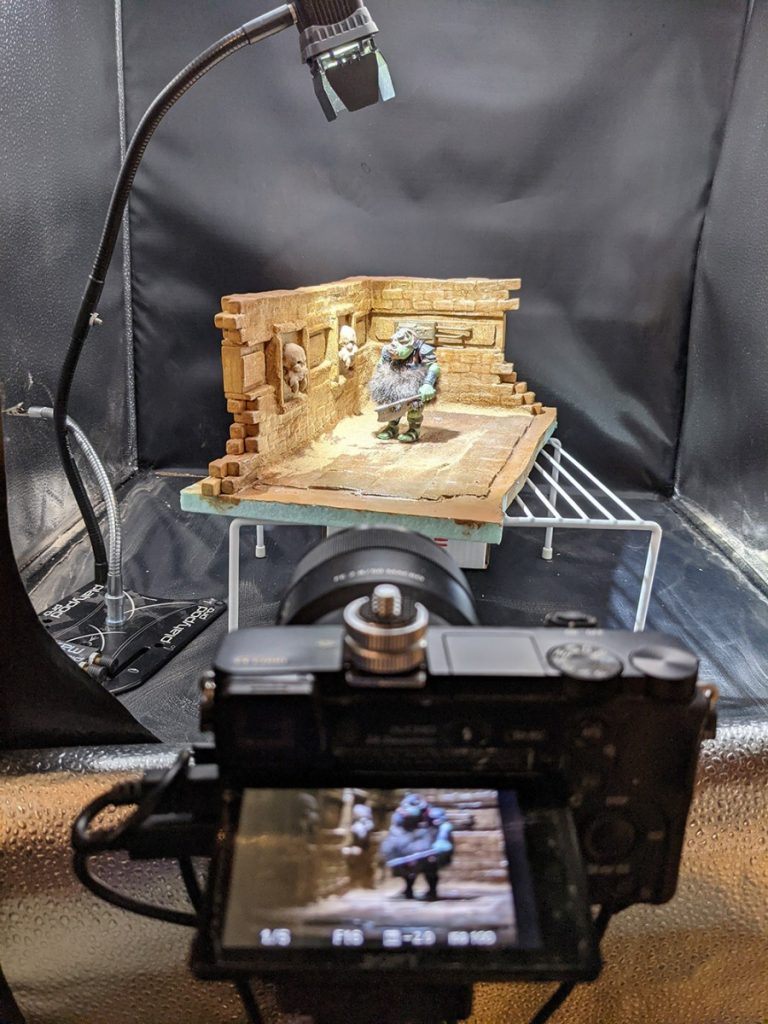
The camera settings are a bit irrelevant unless you have the same lens, lights and setup I do. (You can sort of make out some in the shot above, but that was just for demonstration purposes.) The salient details one should take away from this part is that I framed the shot so I couldn’t see the edges of the diorama. I always have my camera on manual when I am in the studio as that gives me the most control over, well, everything. I try to use as low ISO as possible to reduce noise. Otherwise I expose for the scene in front of me.
Finally, I needed some light. If you recall, I wanted a spottily lit, dark hallway. There is no obvious light source in the scene, like torches or whatnot, so I had to introduce some. In my world, this hallway is in the lower depths of the palace. The lights are from windows built high in the walls on the side. As a result, the light comes from above. To accomplish that, I used a Lume Cube with barn doors to shape the light into a window form. I mounted that on a pair of goosenecks attached to a Platypod.
All that was left is to click the shutter.
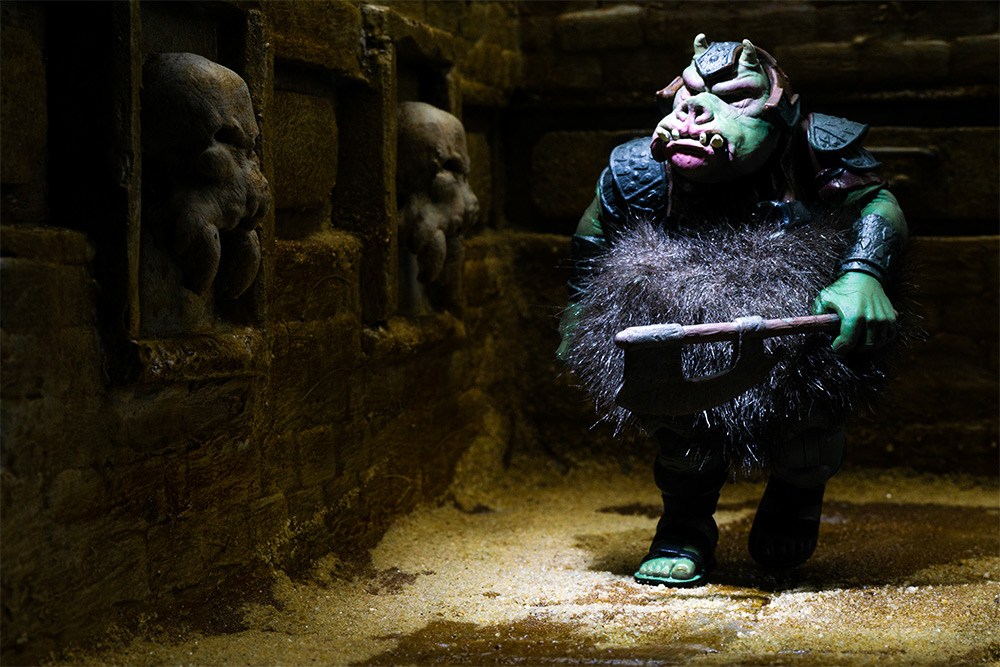
This is the image straight from camera.
Post processing
As you may know I am a huge fan of Photoshop and often heavily alter my images in post. But this time I didn’t really need to change anything. One of the reasons I picked this image for my talk was because I didn’t need to go into Photoshop that much, which was handy as it wasn’t a Photoshop talk.
The main processing I did was some brightness/contrast adjustments, and add a little dust into the image. This is the final image after minor post-processing.

Final thoughts
So that is, in a nutshell, a walk through of the general process I use to create my shots from concept to final image. I really have taken enjoyment out of making my own props and backgrounds myself. I think it has enhanced my work since I started doing that. Plus it adds a lot more fun and enjoyment to the process for me. Win/win.
Before I wrap this up, I want to say one more thing about making dioramas. This particular image was created using some pretty expensive equipment, namely the 3D printers and a foam cutter, but these dioramas don’t need to cost that much. To create the diorama I just needed a simple utility knife. The materials included a bit of XPS foam, a few bottles of simple craft paint and some white glue. All told, I spent $5–6 making this diorama. I used a custom crafting desk, but I could have easily made it on a kitchen table. If I didn’t have the 3D printer I could have carved the skulls out of foam. It is actually easier than you may think. I have the hand-eye coordination of an arthritic gorilla, but I managed to craft a decent enough plague doctor mask out of foam.
If this sort of diorama making interests you, I highly recommend checking out some online tutorials like Black Magic Craft. You will quickly learn that it is easier and cheaper than you may think. Well, the basics are easy. Getting 80% to awesome is easy, getting to jaw dropping is time consuming and expensive. Luckily toy photography falls squarely in the 80%-is-good-enough range.
Follow your passions and your creative journey wherever it takes you. There are no rules, there is just you and the worlds you want to create. How you go about making them is entirely your choice. The only thing that matters is that you are making them.
Thank you for spending some time on this trip through how I make mine.
[dave]
Want more toy photography goodness? Subscribe to our weekly email round up so that you never miss a post. You can also listen to episodes of the podcast! You can follow my work at @therealstudiodave.


![AI is ruining toy photography [a personal viewpoint]](https://toyphotographers.com/wp-content/uploads/2026/03/Together-As-One-Ultra-Magnus-revealed-scaled-500x383.jpg)
Leave A Comment