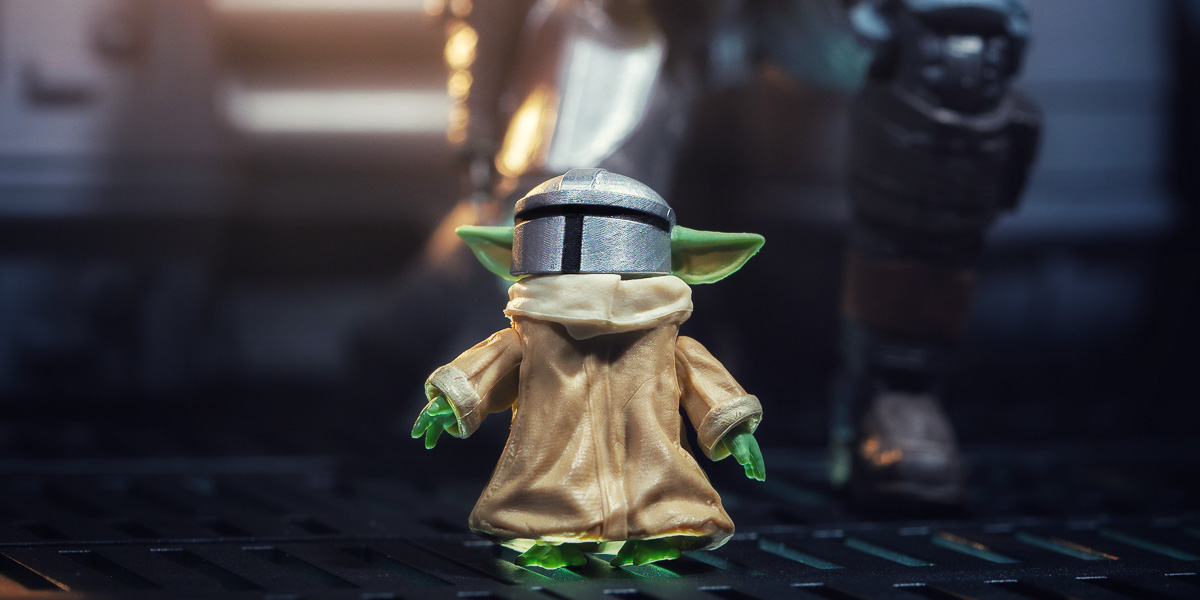
In a previous post about toy customization, I walked you through my process for making a custom beskar Mandalorian figure. I wanted to do something similar for The Mandalorian‘s green little sidekick, but this time I’ll be using a 3D printer to build something completely from scratch. Time to go to work!
My friend, and our editor in chief, Alan (@alanrappa) has been asking me to write an article about 3D printing and toy photography, so why not now? I’m not going to get into the nitty gritty of why you should or shouldn’t buy a 3D printer—there are countless articles and videos out there to help make that decision. But I will cover the process I used from idea to shot.
Things you’ll need:
- 3D printer (I use a Creality Ender-3)
- Filament (I use Inland PLA/PLA+)
- Slicing software (I use Ultimaker Cura 4.6.2)
- Modeling software (I use TinkerCAD)
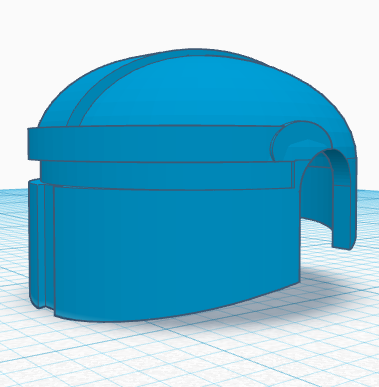
Since I couldn’t find anything to suit my needs on various sites like thingiverse.com, I decided to design and print my own child-sized Mandalorian mask. To do this I used a free site called tinkercad.com. I’ve designed a couple things in the past, but nothing special. If you’re not familiar with the site, you can use basic shapes to create more complex objects. It’s a fun and frustrating place to tinker around (ba-dum-dum). There were a couple of existing Mandalorian helmets out there, so I copied one to use as a model to start from scratch. As you can see in the photos below, I used 14 different shapes to create the helmet.
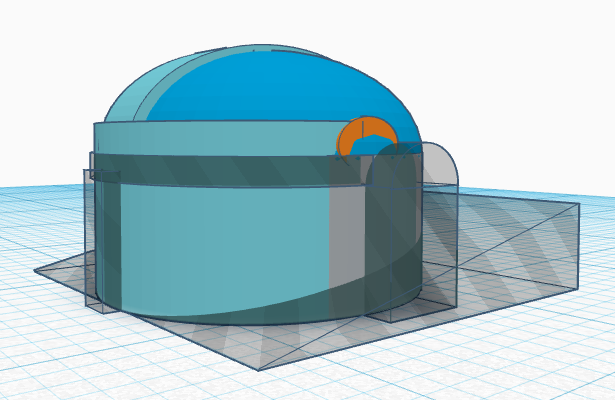
This process took a while just to build the helmet model. The most time was consumed trying to perfect the sizing. For this I used Hasbro’s Star Wars the Black Series The Child (aka Baby Yoda) figure and a 6-inch digital caliper (purchased from Harbor Freight), and took measurements of The Child’s head. It required some eyeballing to make the ear holes, and four versions to get the print right. Each time I’d find something to fix in tinkercad, export the STL file to my computer and reprint. But the fourth time was the charm.
So the actual process of printing isn’t terrible. To put it simply, once you have your model file—in this case a .stl file, you import it into your slicing software and hit “slice.” I use Ultimaker Cura primarily because it works. It’s widely used and it’s free. You import your .stl file, make any sort of tweaks (you can adjust dimensions, orientation, etc) and hit slice. With this software you can also make a lot of modifications to the printer settings. I’m not going to get into all that, but there is a lot you can do to tune up your print jobs.
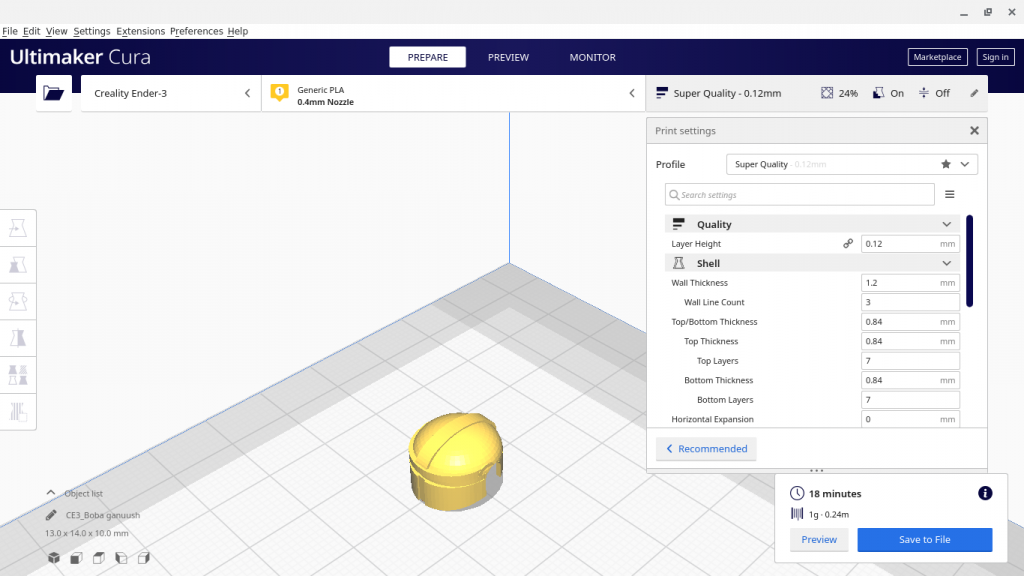
Once you hit slice, you can see all sorts of information. You can see how much length of filament will be used, the cost of the print in relation to the filament cost, estimated time and even a preview of printing each layer. The slicer will output a .gcode file, which is what my printer uses to print. I don’t have a fancy setup for my printer, I simply place the .gcode file on a microSD card and stick it in my printer. Once my printer warms up, I use the menu on the printer to select my print and hit go.
My printer is a Creality Ender 3 I bought last year off woot.com when they had a sale. It’s a filament printer, which means it uses spools of plastic or plastic-like material, warms it up and prints it onto a bed. I’ve only ever used Inalnd PLA or PLA+ for my prints since it’s non-toxic and plant-based. My printer will also print ABS, but I haven’t used it due to its toxicity. If you are using ABS, use it in a well ventilated area. For this particular print, I used a .12mm layer height. This is the best resolution I can print. The layer height determines the print time. In this case, something so small only took about 20 minutes.
When I printed this, I elected to print with supports. Again, Cura handles this quite well. You just check a box, and it automatically adds the supports. These supports allow for a cleaner print, but it can be hit or miss with how easy they are to remove. I’ve been trying to clean the supports off a 1:12 scale Blurgg for longer than I care to mention. In this case, I simply used a pair of needle-nose pliers to grab and twist the supports off the print.
Now that it’s printed, there are a few roads to follow. You can just use it as-is, or use different methods to finish the print. For giggles, I went ahead and applied the Rub ’n Buff and, as you can see, it ended up really accentuating the layer lines. Not awesome.
Don’t get me wrong, I’ve used prints straight off the printer for shots before, but as this shot was going to be a close crop, I wanted the helmet to look as good as possible. So with my first failure, I tried my usual go-to option: spray primer with filler. I used Rust-oleum primer (advertising that it’s a filler and sandable), which is what I have always used when finishing a 3D print. It does a relatively good job with filling in the gaps, though it can have all the usual spray paint problems, like clumping. Another way of finishing is to sand the print. I rarely do this as it sounds too much like real work, and I’m not awesome at it. But I gave it a shot, and went over the helmet with fine sandpaper until it felt smooth. This wasn’t the easiest job as it’s so small and thin, but it did make an improvement. So with those two helmets in hand, I decided to go over them with Rub’nBuff. There’s a side by side below:
Now since I’ve been this far down the road in the name of research, I decided to reach out to my rockstar (literally—he’s in a rock band) co-worker Steve. He’s the proud owner of an Any Cubic Photon resin printer. I’ll probably never get a resin printer due to its cost, print area and the toxic nature of the resin. However, when it comes to print quality, resin is the clear winner. My print had a layer height of .12mm. He printed my helmet at a .02mm layer height; practically invisible. He also went ahead and printed six for me. Unlike my FDM printer, which has a single point of printing (the extruder/nozzle), the resin uses a platform and a light to print a layer of liquid resin onto the platform/bed. So it doesn’t matter if he printed 1 or 15, it would take the same amount of time to print (4 hours), which is another advantage if you’re into manufacturing for profit. He also had to tilt my print and manually add supports in his slicer program (Chitubox).

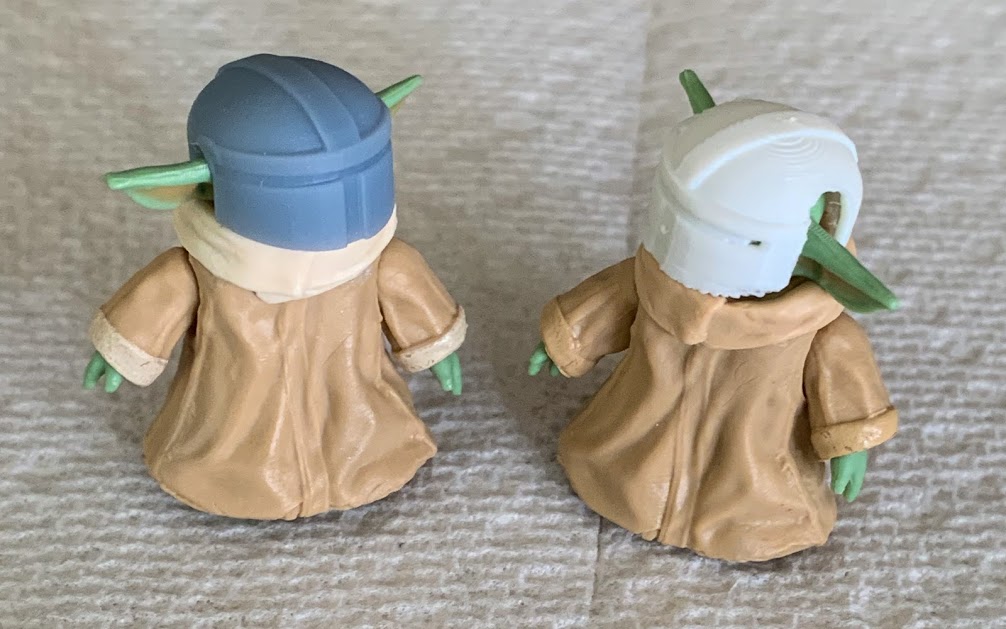
Below you’ll see the final side-by-side, with all the finished helmets:
As you can see above, the resin is hands-down the cleanest, followed by the spray primed, then the sanded. And I’ll allow the argument I didn’t sand enough, because I’m sure I didn’t.
For the final photo, I opted to use the resin helmet since it looked the best after finishing. If you like the idea, and have access to a 3D printer, I’ve placed my .stl file on thingiverse. Hope you enjoy it.
Thanks again for reading,
-Adam (@BurkeHeadToys)


Leave A Comment