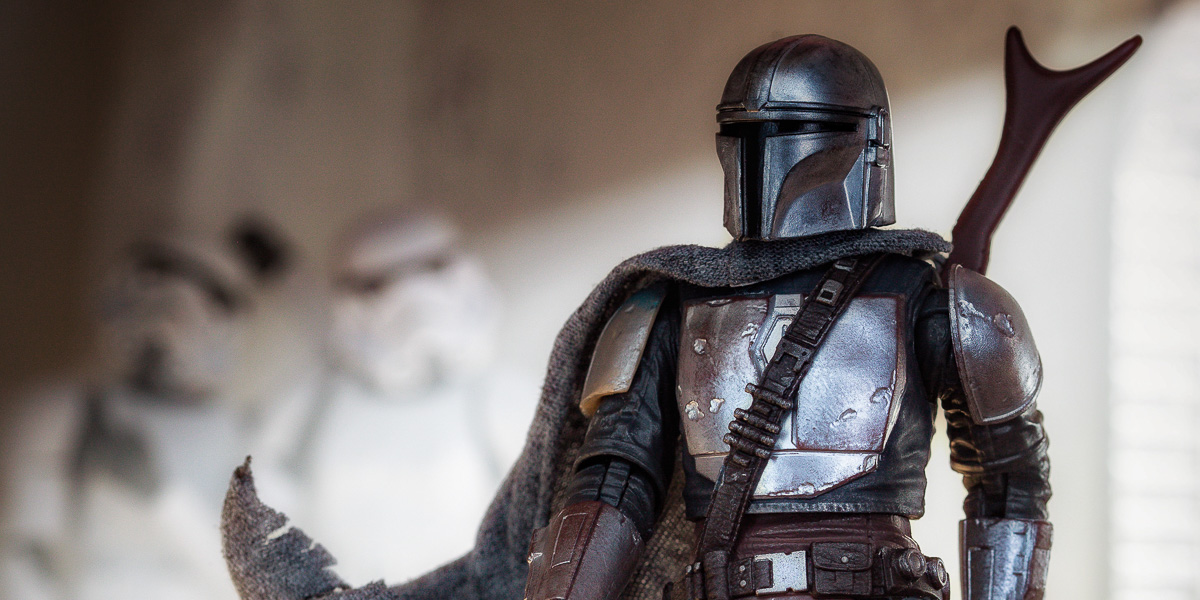
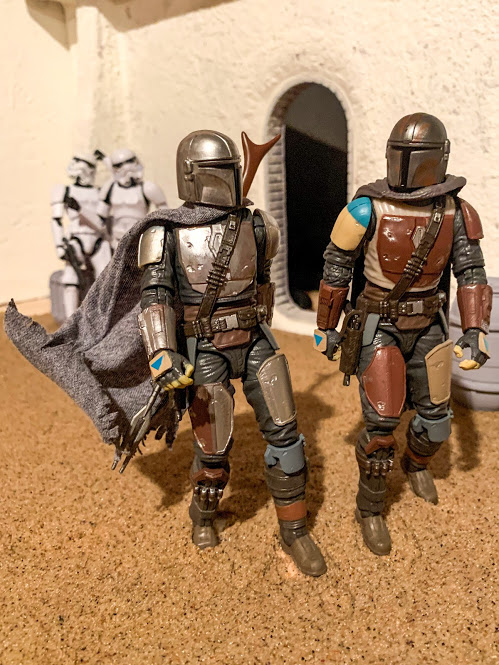
This is the way. Hello again! Adam here. There’s a bit going on in this photo to discuss, it’s my first attempt at a customized toy, and I designed and 3D printed a mini-Mando helmet for The Child aka Baby Yoda. This article will discuss the process I used to customize one of my Mandalorian figures to a beskar armor version. The next installment will talk about how I designed and printed The Child’s helmet.
Looks better in beskar
I’ve wanted to do a beskar armor Mandalorian since the suit premiered on the show. And now that he’s actually in stores, I figured it’s time to actually give it a go! The idea was born earlier this year after talking with @blksrs about this wonderful product called Rub ’n Buff. I also got some input and bounced some ideas with @adam.foxford and @NJTree. So, with an idea, their input and a spare, 6-inch Star Wars the Black Series Mando figure, it was time to get serious.
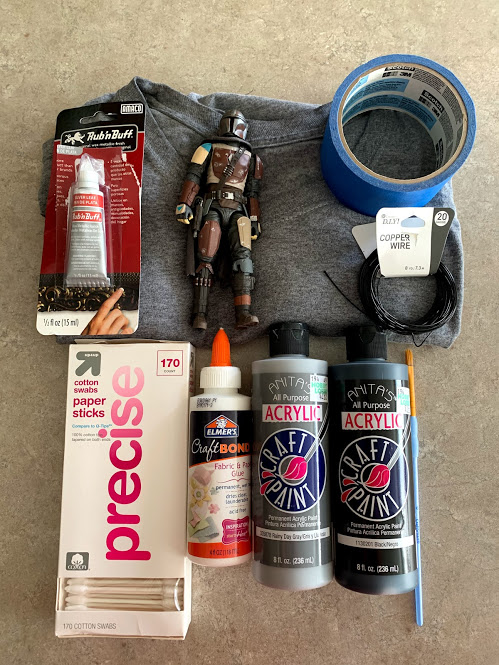
Materials:
- Hasbro Black Series Mandalorian figure
- Rub ‘n Buff silver
- Painters tape
- Anita’s Acrylic Craft Paint
- Precision Q-tips
- Gray undershirt
- Fabric glue
- Jewelry wire
- Rubber gloves
- Microfiber cloth
Loosen up
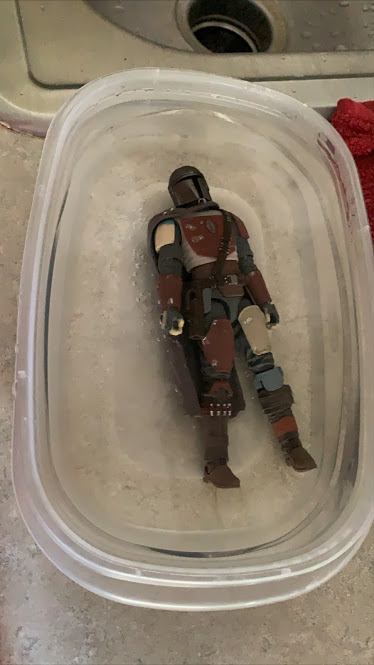
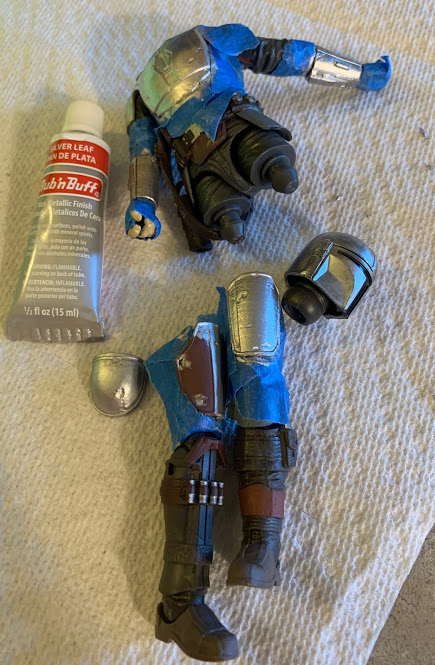
First off, bath time. I let Mando soak in hot water for about 10 minutes to loosen all his joints. This was really the only surface prep he got. Then I proceeded to dismantle him. The head and legs popped off really easy. I fiddled with the arms and torso, but having never done this, I didn’t want to break anything, so I left them on. I did pop off his left shoulder shield, and in retrospect, I wish I would have gotten both off.
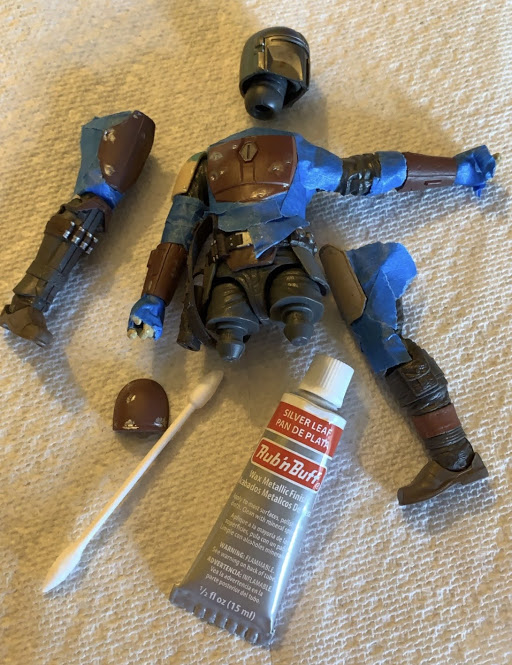
Taping Off
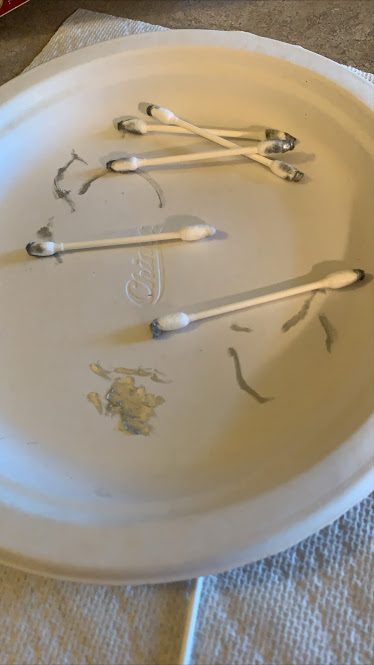
I then proceeded to take plenty of time and care to tape around all the surfaces where I would be applying the Rub ’n Buff. This was the longest part of the whole process. After all the tape was applied, I used one of the precision Q-tips to go along all the edges and ensure a good seal.
A little goes a long way
It was time to dive in. I was told by everyone that a little Run ‘n Buff goes a long way. I too will echo this fact! I pushed out a dollop about the size of half a dime. When applying it, I would barely cover the tip of the Q-tip. I then proceeded to rub it over his thigh pad. It goes on smooth and creamy (for lack of better words). Rub ‘n Buff is not very liquid since it’s wax based, and a little bit does cover quite a lot of area. I’d keep using the same Q-tip until the end became frazzled. After I had covered an area, I’d let it sit a moment or two before grabbing a clean Q-tip and rubbing the area until a majority of the silver had buffed off. You’ll want to be careful where you do this because when buffing, small globs fall off. I got a little bit on our counter, but it does clean up quite easily with acetone.
Day 2
I let this guy sit overnight. The next day, before removing the tape, I went over all the silver areas with the microfiber cloth, until the areas started coming off clean. I then removed the tape. He was looking pretty good, but I wanted to take care of the stark white of his torso. Time to paint! To begin, I used three drops of the gray, and one drop of the black acrylic paint mixed with one drop of water. I then mixed the paints together and, using a small brush, applied a very light coat to the white area of his body. I applied two coats, but thought that it was still too light of a gray, and added one more drop of black to the remaining paint and applied another coat. I thought it matched the arms pretty well. I did notice the rest of the figure is a bit more glossy, so if it bugs me enough, I may repaint the rest of the figure. But for now it works for me.

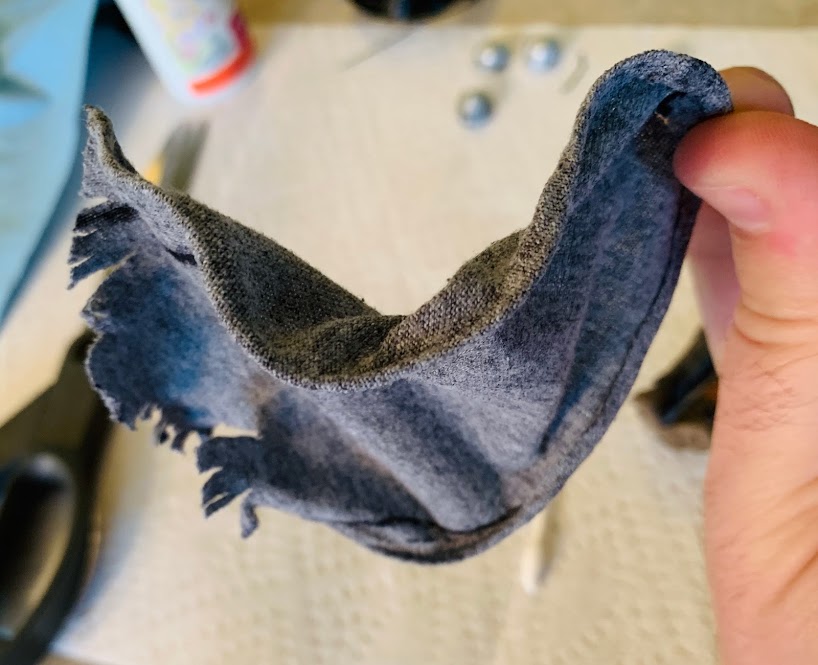
No capes!
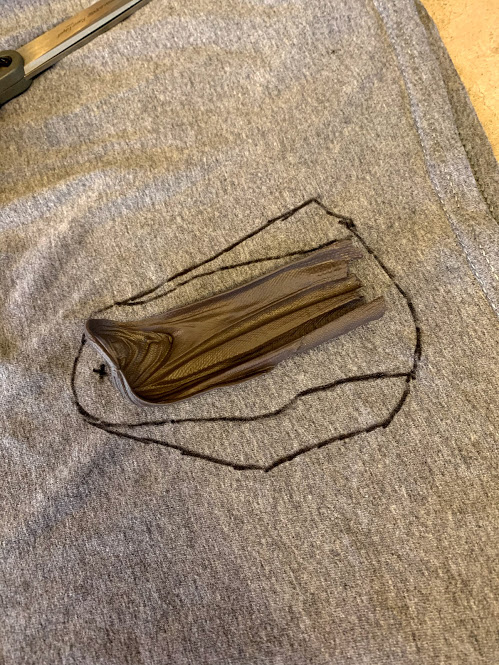
Now that I was letting the paint and silver leaf set, it was time to work on a cape. For this I used an old, used gray undershirt. I used the plastic cape that comes with the figure as a template to get the size and shape and to mark the neck hole.
Cut and glue
I cut out the cape and then laid the wire over the top and sides to figure out the length of wire to use. After cutting off the wire, I bent the ends over so the tips are round and not exposed wire which will poke out of the cape. Using a very fine line of fabric glue, and leaving a very small gap between the glue and the edge, I went around the sides and top of the cape. After placing the wire between the edges of the cape and the glue, I folded the edges over onto the glue and made sure to cover all the glue. It dries a little dark if you use too much, but seems to lighten up the next day.
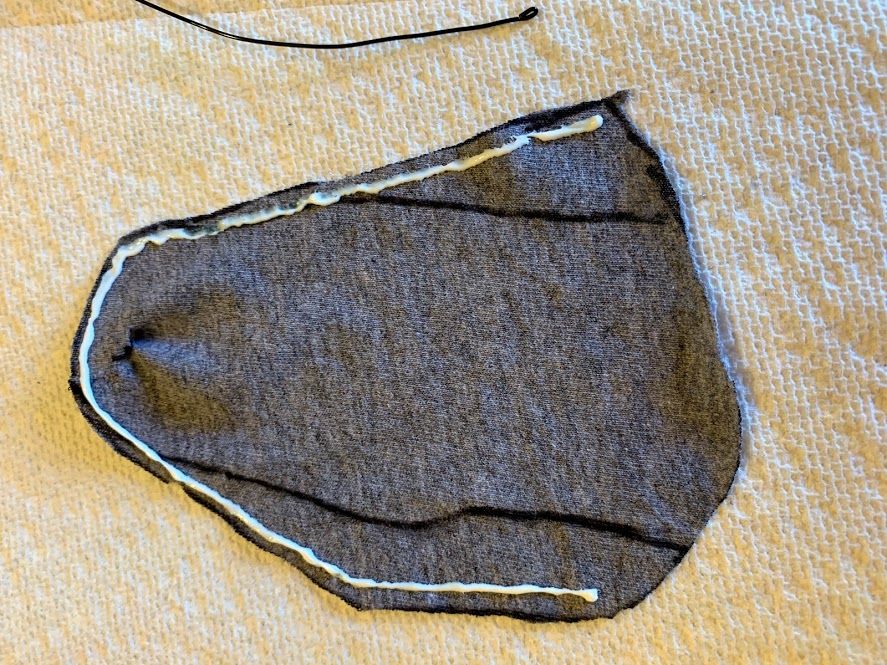
The glue sets pretty quickly, so I felt rushed to get all the seams folded over and I almost forgot to cover the ends of the wire. After that, I used the scissors to tear up the bottom of the cape. I also ran over it with my fingers and stretched it out to really give it a worn out look. Boom! An articulated cape.
Day 3
On the third day, I went ahead and went over all the silver leaf one more time with a microfiber cloth and reassembled. I did have to run the sockets in his legs and neck under hot water for a few seconds to get them to pop back into the torso. And I’m probably going to have to glue the shoulder pad back on, but for now, I’m calling it done.
Hope you enjoyed the read and will give this a try. After completing this project, I may go back and apply this process to my Black Series Jango Fett. I was really digging the silver with the blue painters tape!
Be sure to tune in for the next installment where I cover some aspects of 3D printing for toy photography.
Thanks for reading.
-Adam (@burkeheadtoys)


Leave A Comment