
By the time you read this it will be, odds are, any time but Christmas. However, as I write this Christmas is still a couple of days away. I am sitting on my couch enjoying “family time” watching Tim Allen movies. I find my mind wandering to other Christmas-y things, like snow, eggnog and modern mechanized warfare.
Mainly, I am thinking back to the time I made an image out of a model tank. Let me take you back to the heady days of late September 2020.
As a kid, I was never into model building. I tried making a few now and then, but they ended up being a horrid mess of poorly glued disasters. All those little plastic parts, fast-setting glue and chubby, uncoordinated fingers was not a great combination. But since I was trying new things with making my own props and dioramas, and having some decent success at it (and my fingers being less chubby), I tried my hand at model making again.
I had in my head an idea of a tank in mid-battle, shooting its gun, all dramatic and action-filled. So I went to my local model shop and picked out a suitable model—something not WWII (because the allied tanks didn’t fit my aesthetic, and screw Nazis), and I didn’t want something from the current era. This dramatically limited selection (tanks all seem to be WWII German Panzers or modern M1 Abrams). I ended up buying a Korean War era British M41 Walker Bulldog model kit from Tamiya.
When I got home, I put it all together and painted it up. It took about an hour and it looked pretty slick. I also made some hedgehog-style tank traps out of foam. The shot I had in mind was the tank breaching through enemy lines, so I made some of the traps appear broken and distorted by bombing.
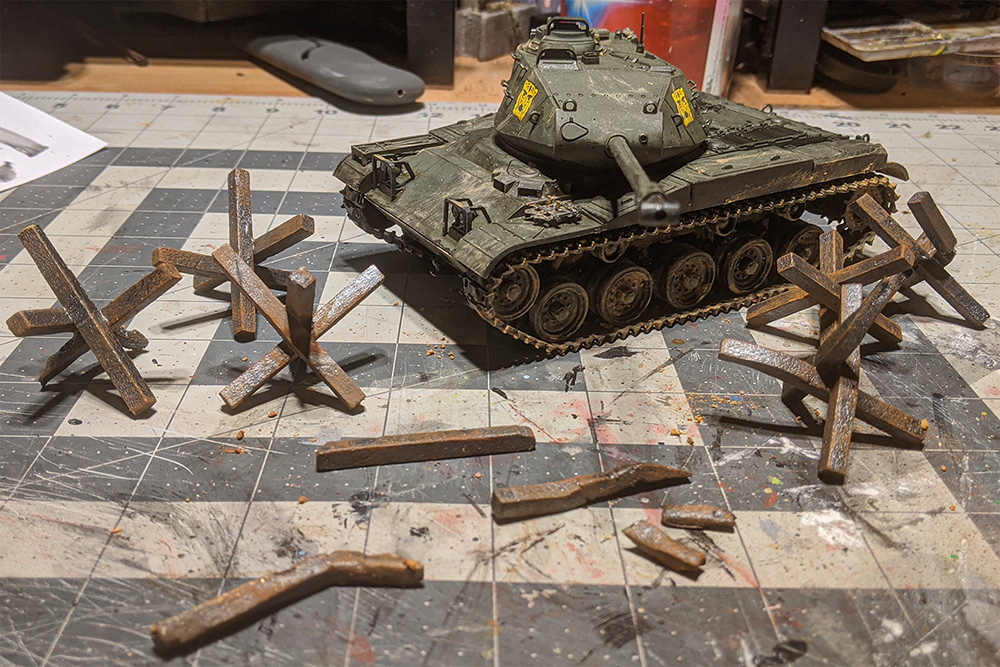
As a final touch to the paint job, I took some dirt from my backyard, made a slurry out of it with some water, and spread it on the treads. That way I wouldn’t have to worry about matching paint colours for the dirt on the tank and the dirt in my scenery. It matched the dirt I would use because it was the dirt I would use. Work smarter, not harder.
Tank photography
Once I had the model painted, it was time to set up the shot. To accomplish this, I grabbed some more dirt from my backyard and put it into an aluminum tray. Then I positioned the tank and the tank traps.
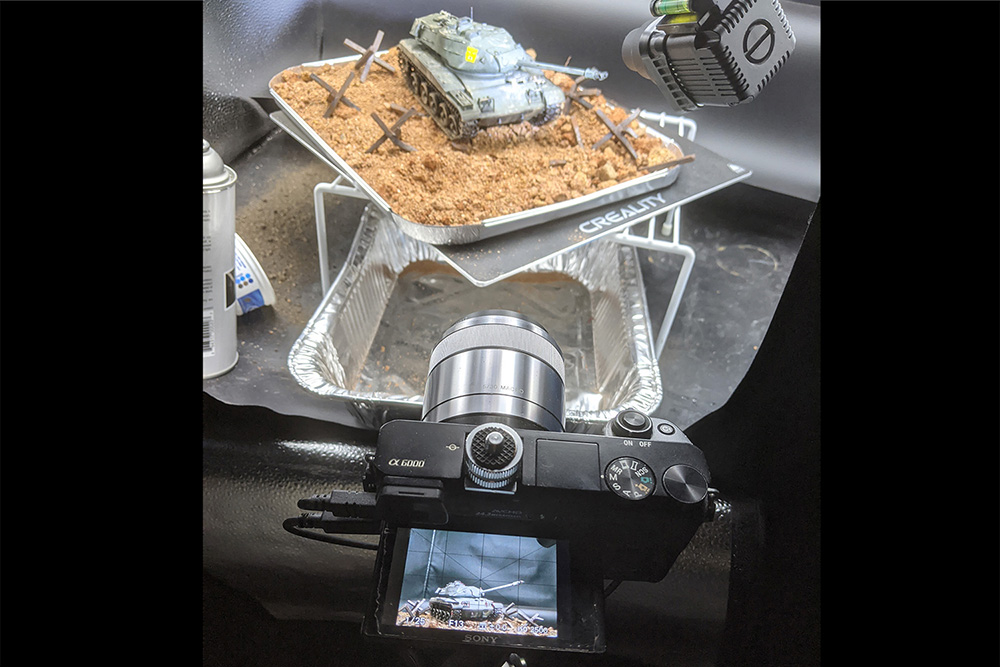
I mounted a Lume Cube on a gooseneck attached to a Platypod. Lighting is an important part of this shot. Mainly, I wanted to show the tank’s gun shooting. This involves a muzzle flash, which looks quite impressive from a tank cannon. I would add the flash in post (not being an armorer, I lack a real tank from which to create a muzzle flash). To make my life easier, I wanted to illuminate the tank and surrounding area just as it would appear from a real muzzle flash.
To accomplish this, I put a snoot attachment on the Lume Cube. A snoot is like a long funnel that directs the light into a point. I then took a couple of shots—one that put light on the bottom of the barrel, and one above it. Muzzle flashes are a tight, harsh, single source of light, and the snoot would help mimic that effect.

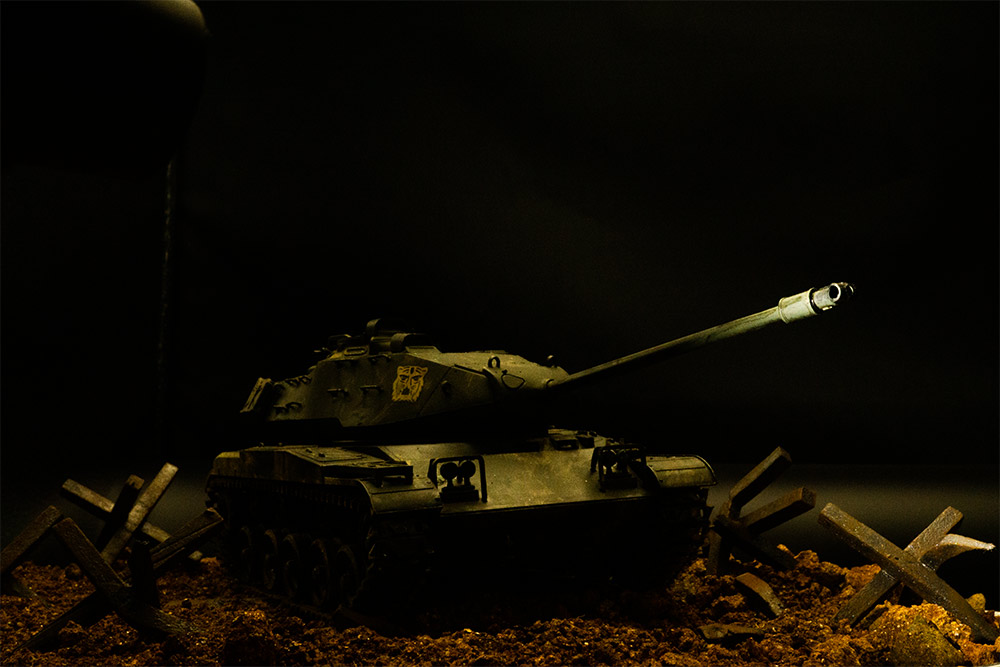
By merging the two together, I was able to get semi-realistic light on the tank.
In post, the muzzle flash would be created by painting in some light with a soft brush. But until then, the light on the tank would suffice.
Background
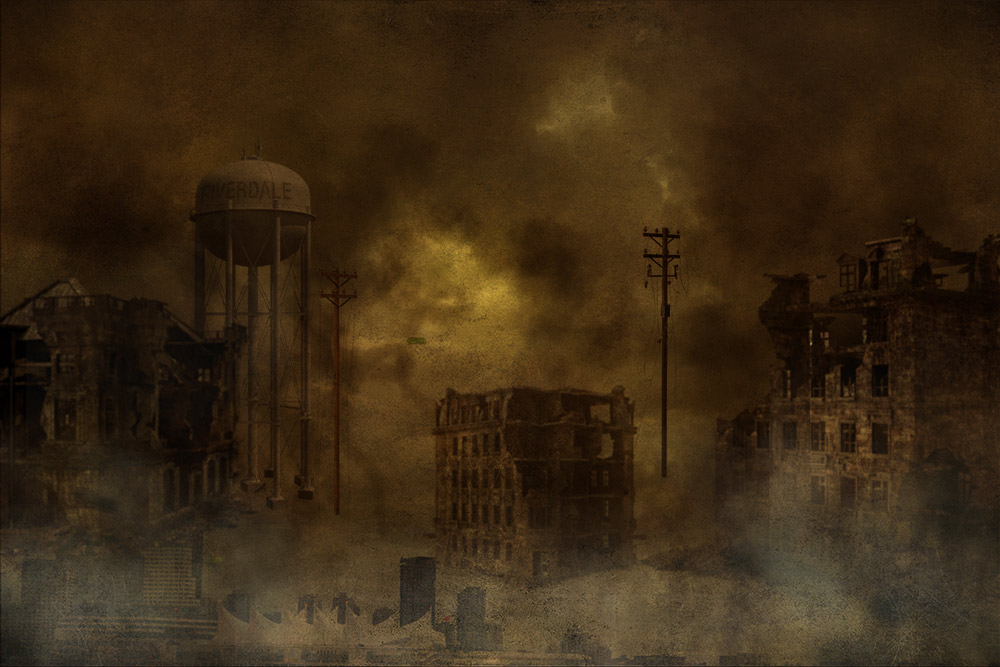
Now all I needed was a suitable background. While the tank is Korean War era, I didn’t necessarily envision the battle it was in to be during the Korean War. I just wanted a random battle, not based in reality. So I set about creating a mid-century scene.
Starting with the sky, I went spelunking through my archives and came across this photo of Vancouver from a few years ago:
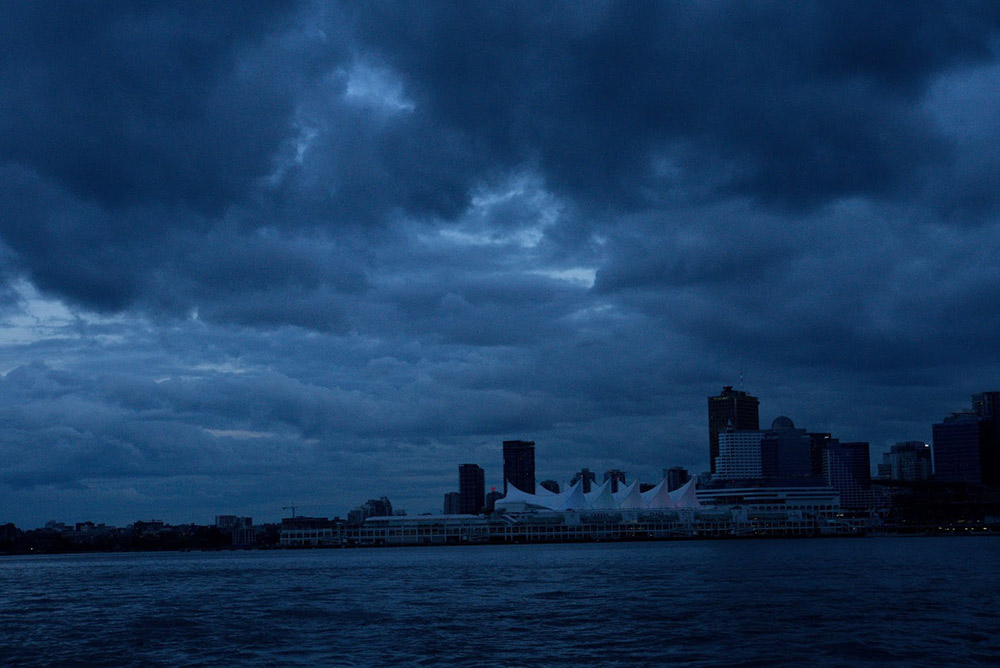
That sky looks perfect for a dark, moody night scene. I added some building elements from Pixel Squid and came up with this background.
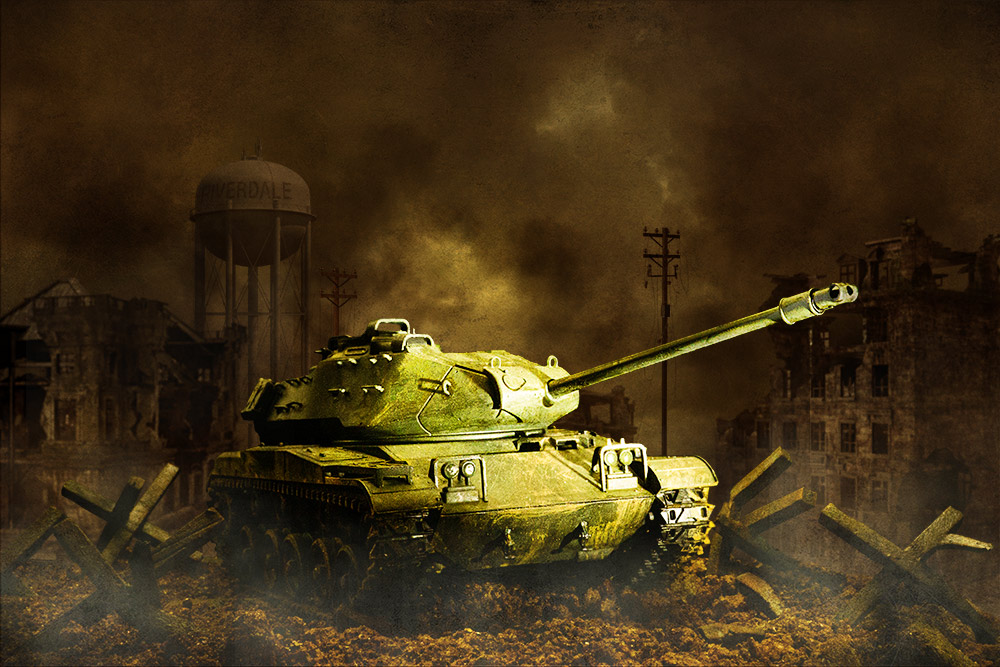
Then it was simple matter of adding back in the merged tank shot. Note that the light on the barrel is bright on both the top and bottom.
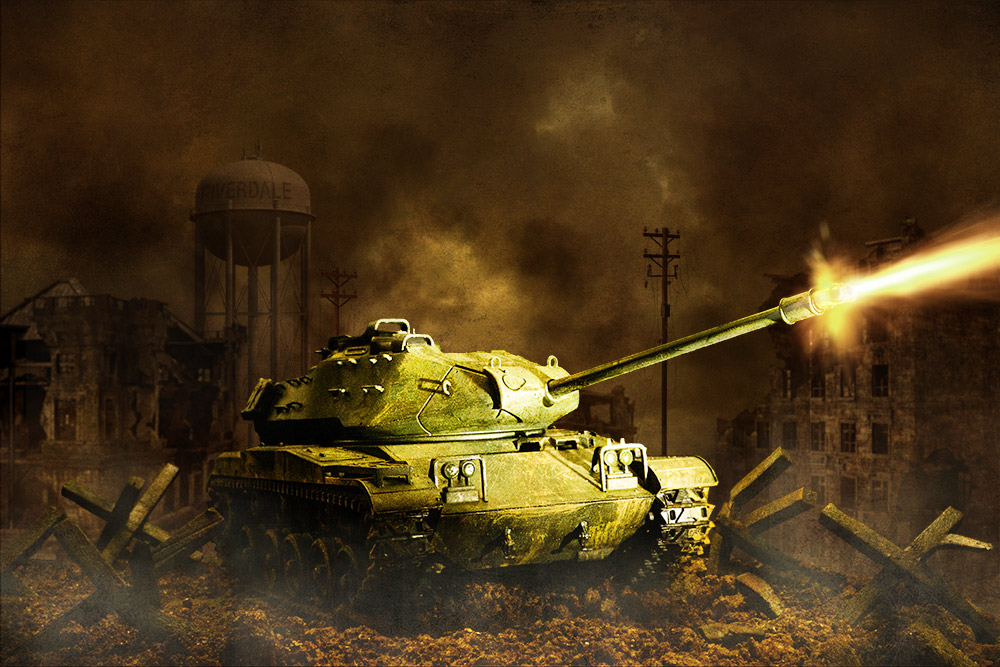
Finishing off the image was a simple matter of some colour grading and adding in the muzzle flash. The final piece looks like this.
Wrapping up
Just like the movie I am being forced to watch ends, so does this post.
Making models for use in toy photography opens a whole new avenue for finding subject matter. Models are not only fun to shoot, they are fun to make. It is a little more work than just pulling a pre-assembled toy from a box, but that work is a creative outlet all on its own.
I wonder what my next model to make will be? Heck, it might be under the Christmas tree right now. I’ll know by the time you read this, but as I write, that future is yet to be written. I have high hopes! If not, the hobby store is just down the road.
[dave]
Want more toy photography goodness? Subscribe to our weekly email round up so that you never miss a post. You can also listen to episodes of the podcast! You can follow my work at @therealstudiodave


It’s amazing that you got the tank put together and painted in such a short time. You must have some laser focus. The tank traps are incredible — hard to imagine them being light as foam because they look metal. The entire photo – and your words here – are very interesting (and often funny) to read!
Thanks Christina! Foam is a wonderful building material. With the right paint you can make almost anything look realistic.