Personally one of the most frustrating parts of toy photography is finding an appropriate setting to place my figures. Regardless of whether one hunts high and low for a setting, or uses compositing to merge toys with background plates, there is always a compromise. I had come to peace with the idea of living with this compromise, then I came across a game changer: the diorama.
If you are not familiar with the term, a diorama is a scaled down but otherwise accurate model of a scene in the real world. If you have ever seen a model railroad layout with all of its scaled down landscapes, buildings and town folk, you know what a diorama is.
Dioramas come in all shapes and sizes. Some are very simple, and some are incredibly complex. The complex ones can take weeks or even months to make, and cost hundreds of dollars in material. But simple dioramas can be made in just a few hours. Not to mention that in these social distance global pandemic times, they’re a great way to create new worlds without having to go out in public.
This series of posts will serve as a tutorial for making a simple diorama that will act as a setting for a scene that is hard to recreate any other way. The diorama should be able to be completed in an afternoon, and cost only a few dollars in parts and materials.
Without further ado, let’s begin.
A confidence boost
We are all different people with different artistic skills. If you are someone who doesn’t feel they are not good building things and painting things, and find the idea of building your own diorama intimidating, let me reassure you I had the same reservations.
I personally consider myself to have relatively poor fine motor skills, so I don’t consider working with tools and paints something I am good at. This is based on 45 years of life experience. If someone suggested a year ago that I would be making my own dioramas, and they turned out half-decent, I would have laughed in your face.
Then I stumbled across a channel on YouTube called Black Magic Craft. It features a Dungeons & Dragons DM that builds practical elements (tiles, houses etc.) for his D&D campaigns. When I saw how simple, and forgiving, the techniques were, and the amazing results he got, I decided to give it a try.
My point is that if I can do it, odds are you can, too. You never know until you try.
Diorama concept
Before building the diorama, the first step is to decide what to build. I had purchased a Silent Bob action figure, and it arrived just as I was starting to think of a new diorama. Silent Bob is famous for hanging out on the side of old brick buildings. This is a screen shot from one of the movies he is in:

It is a fairly simple scene, and would make a decent beginner project, so this tutorial will recreate this scene. Since I already have a Silent Bob figure, I just need to build the wall and ground.
The next question is how accurate do I want to be? The wall is pretty simple, but it has some unusual details. I like the two-tone grey, and the horizontal line between the two tones, so I will include that. I am not crazy about the dark grey vertical element, so I think I am going to leave that part out.
Also, the painted sign on the wall is likely outside my abilities to paint in real life. So I am going to add my own graphic as an element in Photoshop. Also, by keeping the wall generic, I can use it in other shots.
Tools and materials
If you want to follow along, you will need some tools and materials.
Tools you will need:
* Sharp utility knife
* Straight-edge ruler
* Optional but helpful: carpenter’s square ruler
* Paint brushes
* Fine tip Sharpie pen (any colour)
* ballpoint pen (any colour)
Materials you will need:
* Paint: matte black, matte dark grey, matte white acrylic paint, (optional: burnt umber)—I use the Apple Barrel brand, which comes from Walmart, and costs less than a dollar a bottle. So any cheap craft paint will do.
* White glue: Any white glue will work. I use Elmer’s White Craft Glue, and Aileene’s Tacky Glue. Just ensure that it dries clear.
* Tin foil (optional)
* Matte Mod Podge (optional)
* Masking tape
* 1/2 cup sand
* Insulating styrofoam board, 1″ to 2″ thick
* Cardboard—almost anything will do, like from that pile of Amazon boxes you have lying around from all your recent quarantine purchases. (If you don’t have any, you can use more foam board.)
The foam is the tricky bit to explain. What you need is XPS, or extruded polystyrene foam. This is the foam that is used for insulation in construction products, and often comes in pink or green. You don’t want the styrofoam made from compressed pellets that often comes in electronic packaging. The pellets do not hold impressions, and get everywhere. The extruded polystyrene sticks together when cut.
I get my foam board from Lowes. The annoying thing is it comes in 4′ x 8′ boards, which is way more than I need. On the upside, that board costs $25-35 USD depending on thickness, and I can make a couple dozen dioramas with it. Foam products are not universal, so if you don’t live in North America you will have to find your local equivalent.
Diorama sizing
Now that the concept is established , and the tools and materials are collected, construction of the diorama can begin. Starting with the wall, which is made out of the foam board. Not wanting to be wasteful, I want to make the wall just slightly bigger than what I need to fill the camera frame.
I start by measuring the Silent Bob figure:
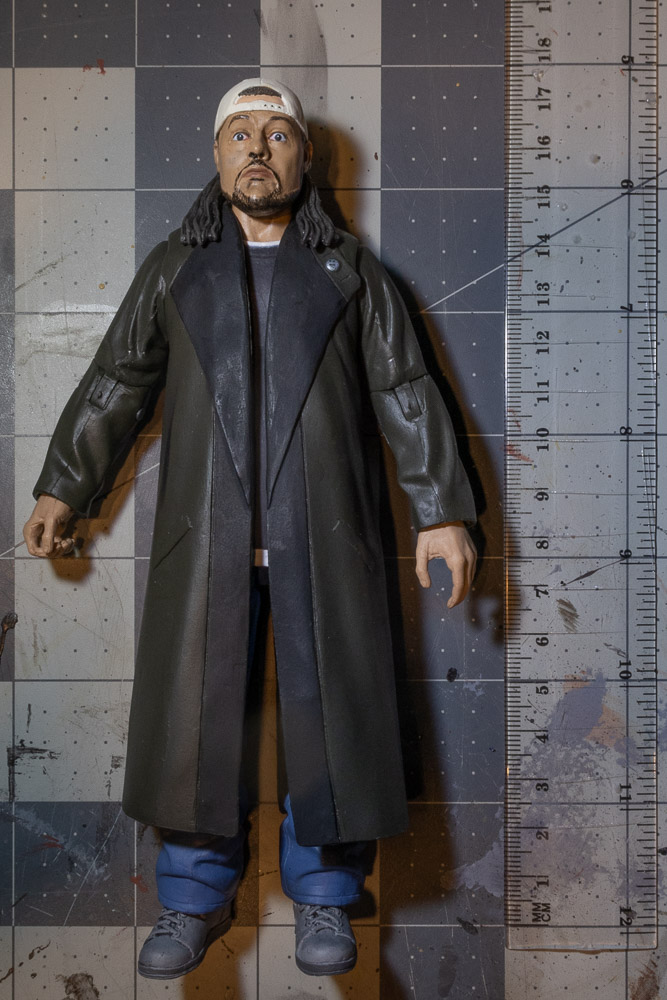
Note that I am going to be working in centimeters. You can work with inches if you want. However I find working with base 10 numbers much easier. If you want to work with inches, just know that 1 inch = 2.54 centimeters (though for mental math use 2.5—measurement accuracy isn’t super important here; hand-waving and estimation often suffice).
Silent Bob is, basically, 18cm tall. I want to leave some headroom in the final shot, so I’ll make the total wall height 24cm high. If I use an 3 x 4 format for the final image, the wall needs to be 32cm wide.
So our first official action is to cut out a 24cm by 32 cm piece of foam.
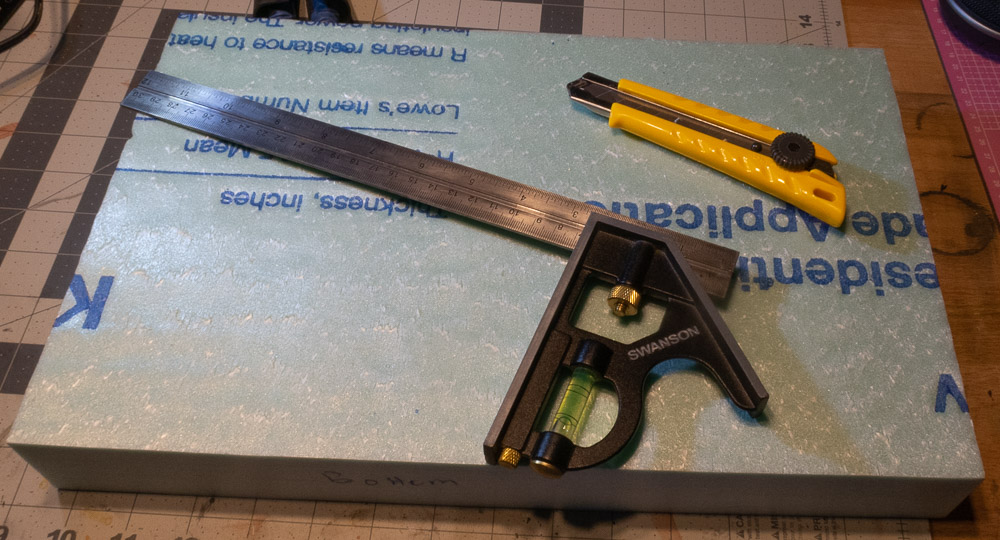
Note that if you are like me and are not super confident in your ability to cut straight lines through thick foam, simply add a bit to the outside edges to account for any slop in the cut. Also ensure that the bottom side uses the factory edge of the foam to ensure it is straight. The bottom side is the only part that needs to be perfectly straight. The rest of the edges will be out of frame, so how it looks is irrelevant.
Determining the brick pattern
Making bricks are easy. They can simply be drawn in with a pen. It doesn’t matter the colour of the pen, since that will be covered up by paint. What matters here is the impression left in the foam by pressing the pen along it when the brick pattern is drawn.
Looking at the photo it looks like Silent Bob is 20 bricks tall. Since he’s 18cm tall, that makes an annoying decimal. To make life easy I am going to make our diorama use bricks sized to 1cm tall.
In reality, bricks can be any shape and size you want, however to make life easy I tend to make my bricks twice as wide as they are tall. So our bricks will be 1cm x 2cm.
Drawing the bricks
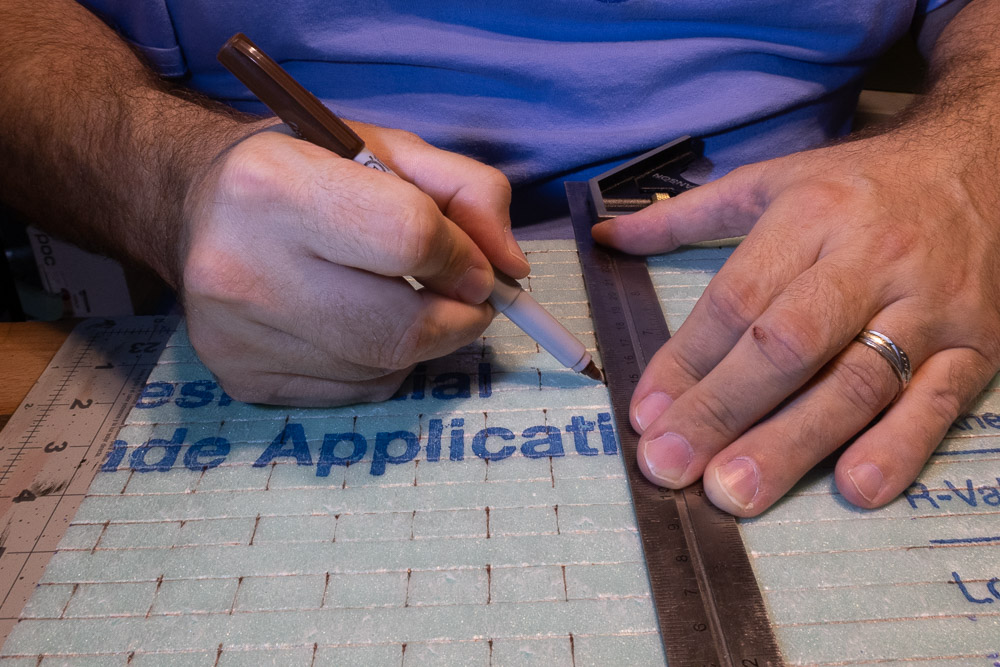
Begin by drawing the horizontal lines. I do this by starting at the bottom edge and marking up every 1cm until I get to the top. Doing this on the left side, right side and middle will ensure the lines are really straight.

Then using a ruler and the fine Sharpie, draw a line to connect those dots.
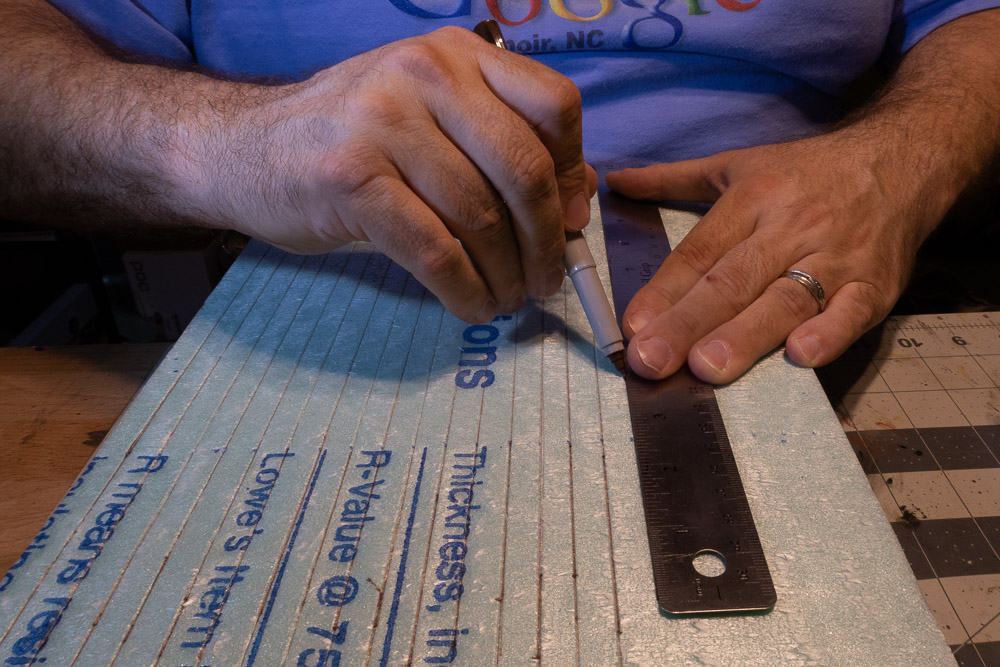
I am told the purpose of the fine sharpie is that the ink melts the foam a bit, allowing the pen to go deeper into the foam. You want this to be at least a millimeter deep, so don’t be afraid to make two or three passes with the pen on each line.
When all the horizontal lines are drawn, the vertical lines can be added. If you look at the reference photo, the bottom row is concrete, not bricks, so on my diorama I am going to leave the bottom row unmarked.
Starting on the second row, measure horizontally every two centimeters. Repeat the process for the top row. Then start drawing vertical lines between the rows, skipping every other row.
When finished you should have alternating rows, one of brick, one blank. Don’t worry if you made a mistake during this. They may not even be noticeable in the final product (I made several, see if you can spot em). If they are noticeable, then just remember that we’re creating a diorama of an old brick building. Old buildings have stories. I just make my mistakes a part of my building’s story, giving it more character.
Now go back to the third row, and measure out every 2cm, offset exactly halfway between the lines on the second row. So if the first row had marks at 0cm, 2cm, 4cm, etc., the third row would have marks at 1cm, 3cm, 5cm, etc.
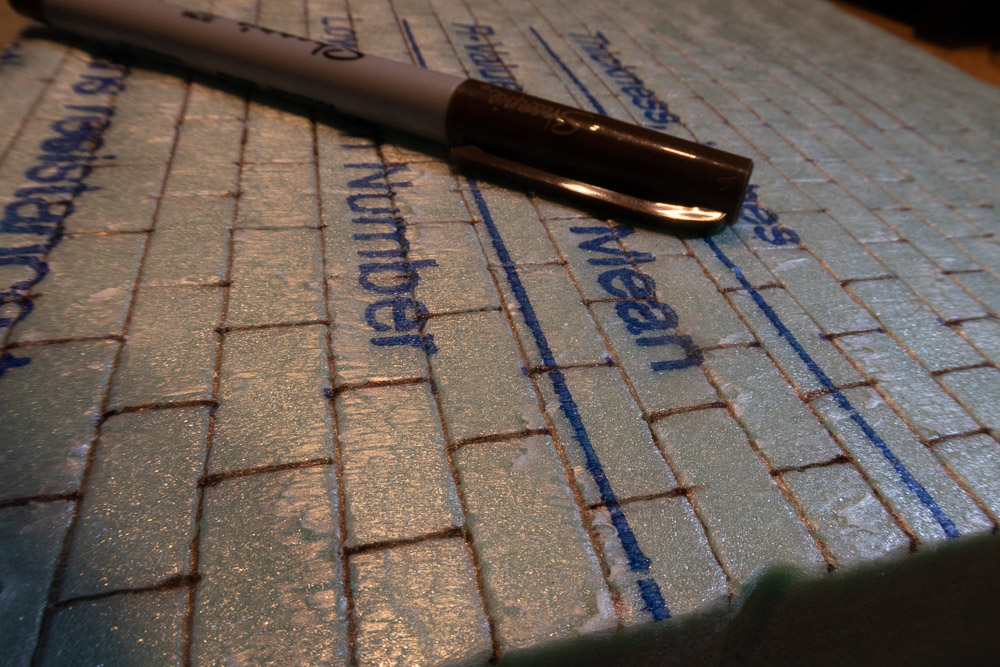
Repeat this process on the second row from the top. Then draw in the vertical lines, skipping every other row. The pattern should end up looking very brick-wall-ish—like this:
Enhancing the bricks
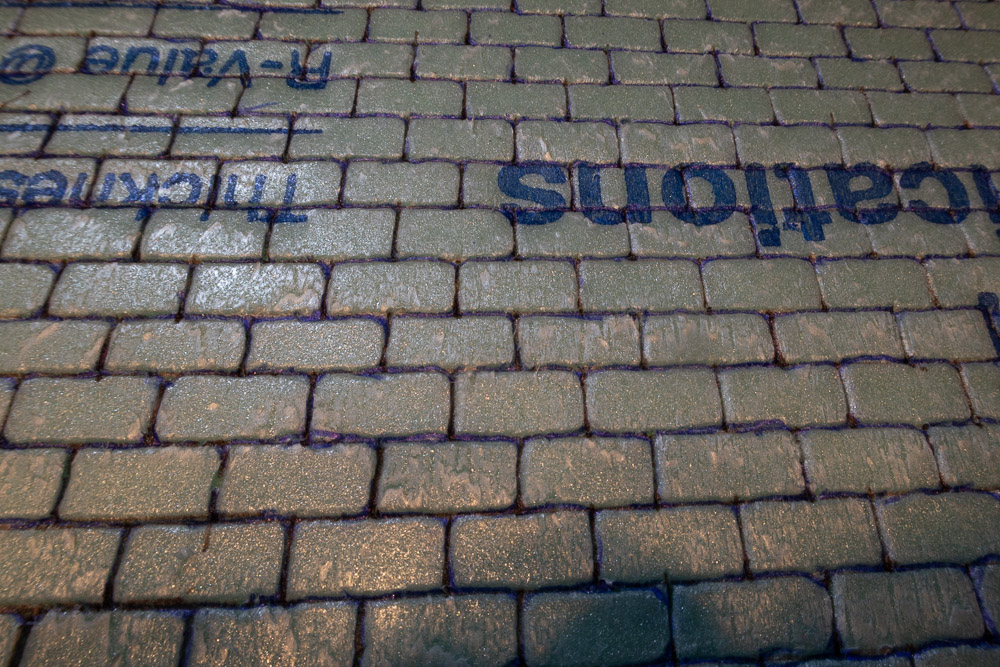
This gives us a nice brick pattern with fine lines. I like a slightly thicker line between my bricks. To accomplish this I take a ball point pen, and trace over each line. The wider pen nib serves to widen the lines.
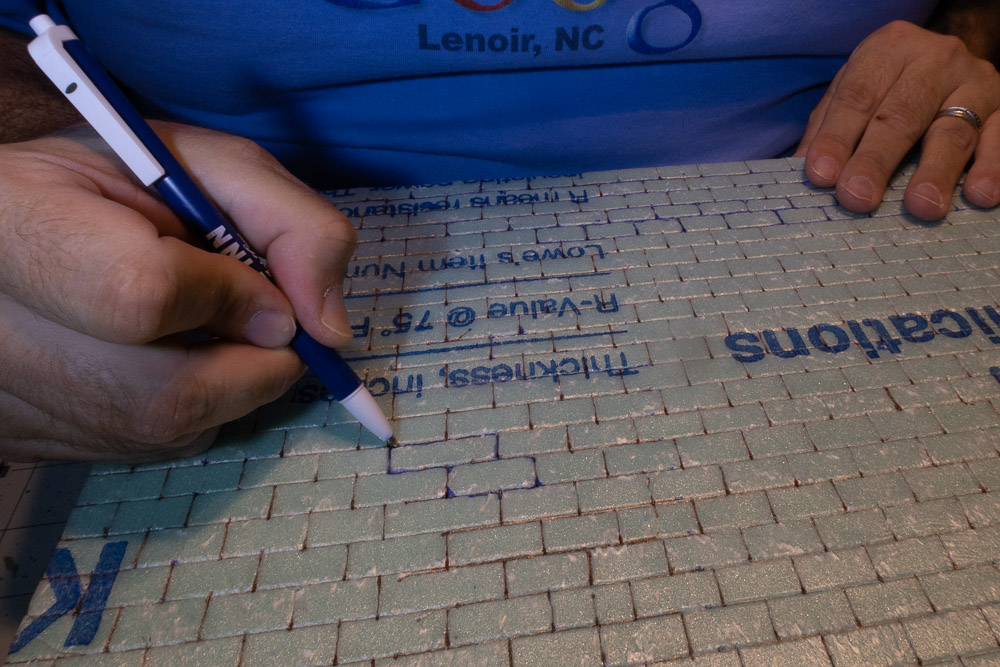
When I trace the bricks, I often round the corners to make the bricks look older. I may also add a few extra lines that look like cracks. Don’t be too exact. Bricks age differently, and the randomness you add by not being exact just sells the idea that these are real bricks.
Next steps
That is enough for one post. We have a brick wall, but it isn’t pretty. Part 2 will cover how to seal and paint the bricks. I’ll also cover how to put on that horizontal wall detail.
Parts 3 and 4 will cover making the ground, and finally adding in some finishing touches to crerate extra realism and bring everything together in one final piece that is ready for the camera.
[dave]
Want more toy photography goodness? Subscribe to our weekly email round up so that you never miss a post. You can also listen to episodes of the podcast!


I’m going to have to give this a try. Thanks for the great post!
The detailed info about the type of foam and where to get it (in the U.S.) is really helpful. I only recently heard of this material, and it seems incredibly useful for diorama building of all kinds. I watched a guy on YouTube use it to create rocky terrain pieces for tabletop gaming. So versatile!
I appreciate your step by step approach, so I’m not overwhelmed by too much information at once. Great job, Dave!
Great tutorial Dave! I’ve tried my hand at making a brick wall and I must say that insulation foam is such a good material for a variety of dios! Drawing the lines is the most time consuming part I reckon.
Looking forward to seeing the other parts!
Thank you a million times over! This is the best tutorial I have found and beats all the books. I am using this information to start building Playmobil dioramas with my grandson not only for fun and creativity development but also to teach him math skills, story building, fine motor skills and even basic chemistry (which substances bind with which other substances and why). As a former teacher, I think building dioramas can teach so many skills. I truly appreciate you taking your time to post your knowledge.
I am glad you found this useful, Lucy! Your comment made my day. Good luck building dioramas with your grandson – sounds like he has an excellent teacher and grandmother in you!
where is part two please?
Lara – were you able to find part 2? If not, here is the link….https://toyphotographers.com/2020/07/14/diorama-a-tutorial-part-2-of-4/
Dave, Thanks for doing this. You make it look so easy! I am excited to try it.
For older buildings, consider marking every 6th row up to represent bricks on end (common bond pattern) or other pattern (English bond, Flemish bond, etc.) rather than running bond as used in the photo (possibly faux brick texture over a concrete block or slsb wall).