Hello again, toy photography enthusiasts! Adam (@burkeheadtoys) here to give you some insight on one of my latest shots, from start to finish.
This shot is the result of an idea I had since starting this hobby more than two years ago. And I’m not going to lie, it feels good to finally scratch that itch! Honestly, I’m happy it took this long because I cringe at the thought of just how bad it would have turned out back then. Not that I have a wealth of knowledge now, but I certainly know more today than I did when I first started.
It’s alive! It’s alive!
So let’s start with the idea. Ideas and inspiration are something I enjoy talking about and listening to others talk about, but the topic is so abstract, it’s rather difficult to cover. For me, I LOVE mashups/crossovers (whatever you want to call them). If you’ve seen my IG gallery, this is pretty obvious. So whenever I’m watching or reading something, random thoughts always pop into my head. Like what would have happened if Deadpool had shown up at the Avenger airport battle in Captain America: Winter Soldier? Thoughts like that act like a raindrop in a puddle. The idea is quick and small and, like the ripple, it just grows and expands until it reaches an end.
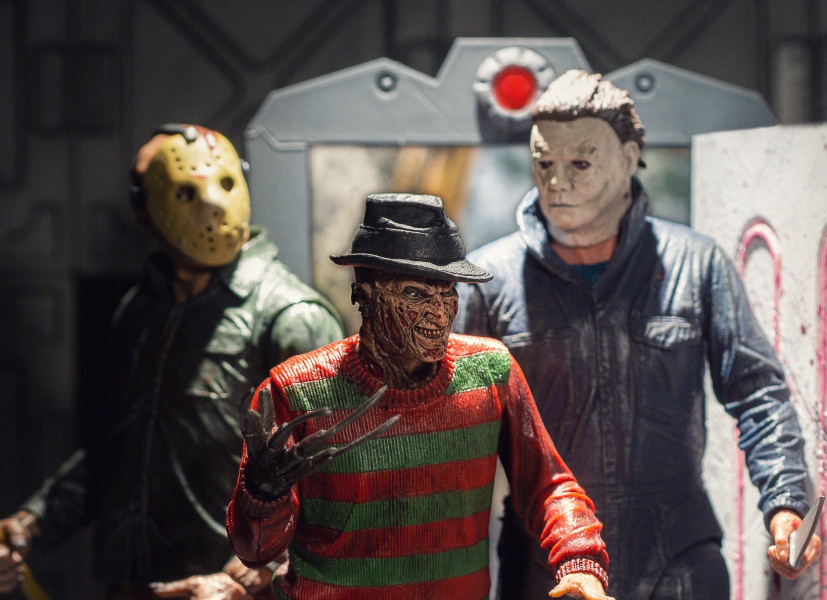
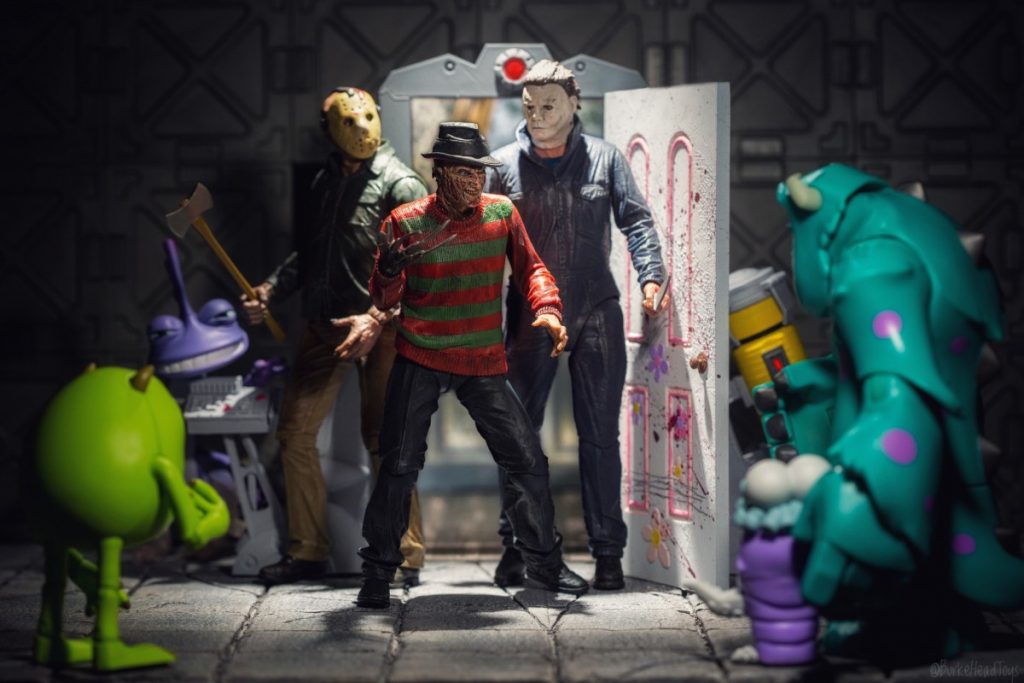
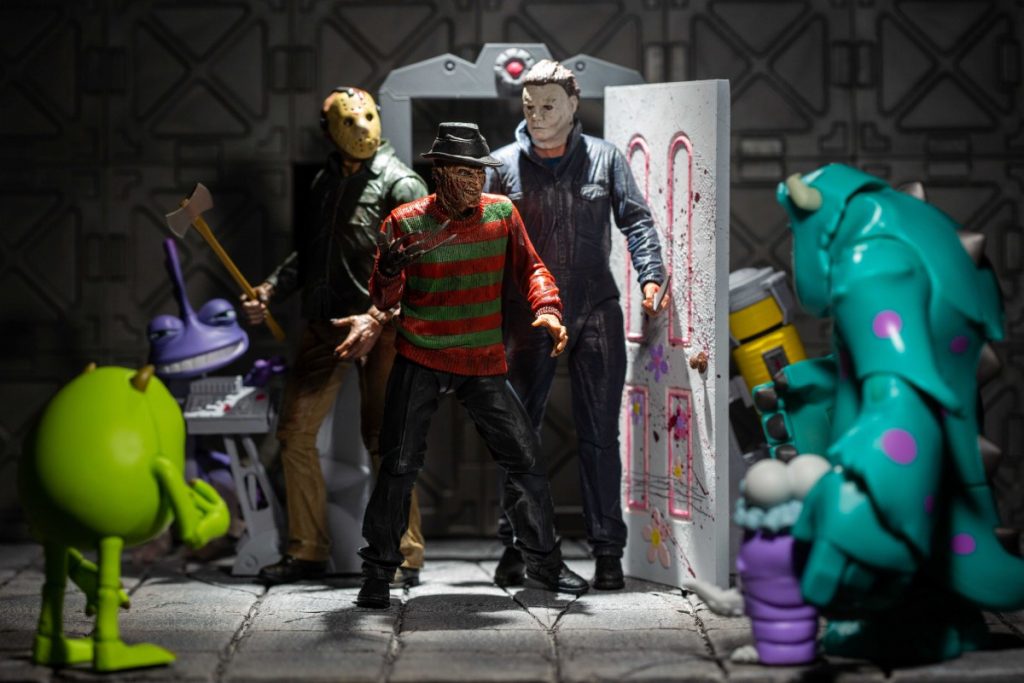
For this shot in particular, I enjoy most things Disney and, at the polar opposite of the spectrum, I’m a horror fan. It’s always fun to find believable ways to combine these things that are so diametrically opposed. So I got to thinking about the rivalry between Randall and Mike and Sulley from Monsters Inc., and the magical monster doors that can access anywhere. Well, if you want to win, you want the best! Obviously Randall would want to recruit the horror icons: Freddy Krueger, Jason Voorhees and Michael Myers! An idea is born.
Now here we are (nearly three years later) and it’s time to shoot. The only things I had to start this shot was the Monsters Inc. floor (a piece of foam board I fashioned into a stone floor) and the room diorama from which the slashers would emerge. The room diorama is the Abandoned House 1.5 from Extreme-Sets, which I got last December. I also used my Ubiquitous UB-1 Diorama set for the scare floor backdrop. I love using this modular system for my sci-fi and industrial shots. Now, as you can see, there are some holes to fill.
They’re here!
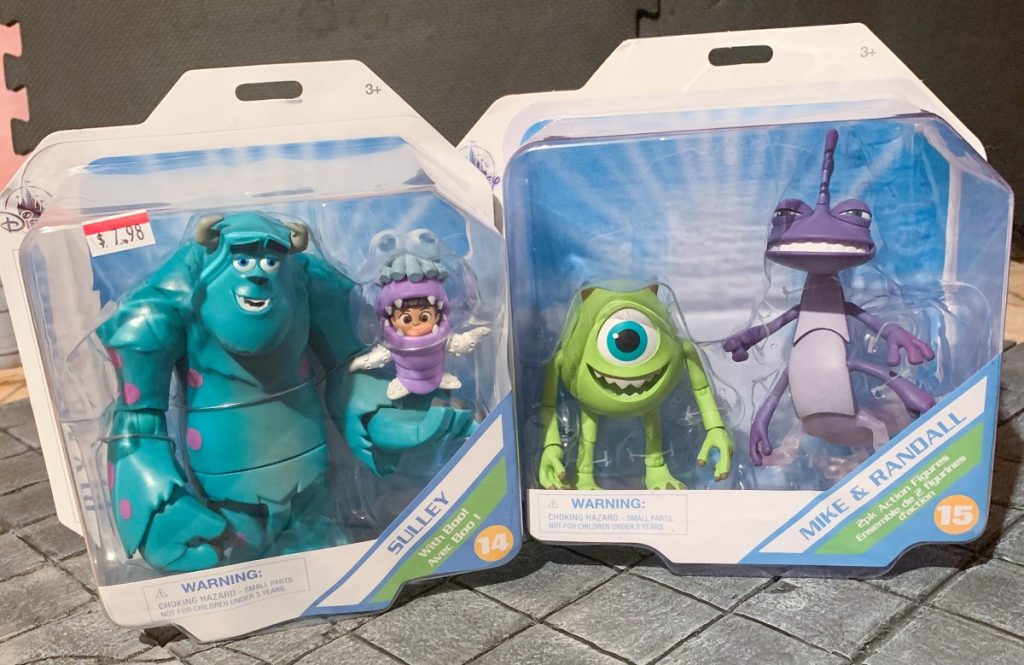
First up—the characters. This shot probably could have been done with just Mike or Sulley, but obviously I’d prefer the set. I’ve held on to hope for years of finding the Revoltech Monsters Inc. characters for a reasonable price, but alas, I never have. Enter the Disney Toybox line. If you’re not familiar with these figures, they’re articulated, larger versions of the characters created as interactive figurines for the Disney Infinity video game. I’m a fan of this line because they’re articulated and cheap (keyword). Often, you’ll also find these on sale at your local Disney Store or ShopDisney.com.
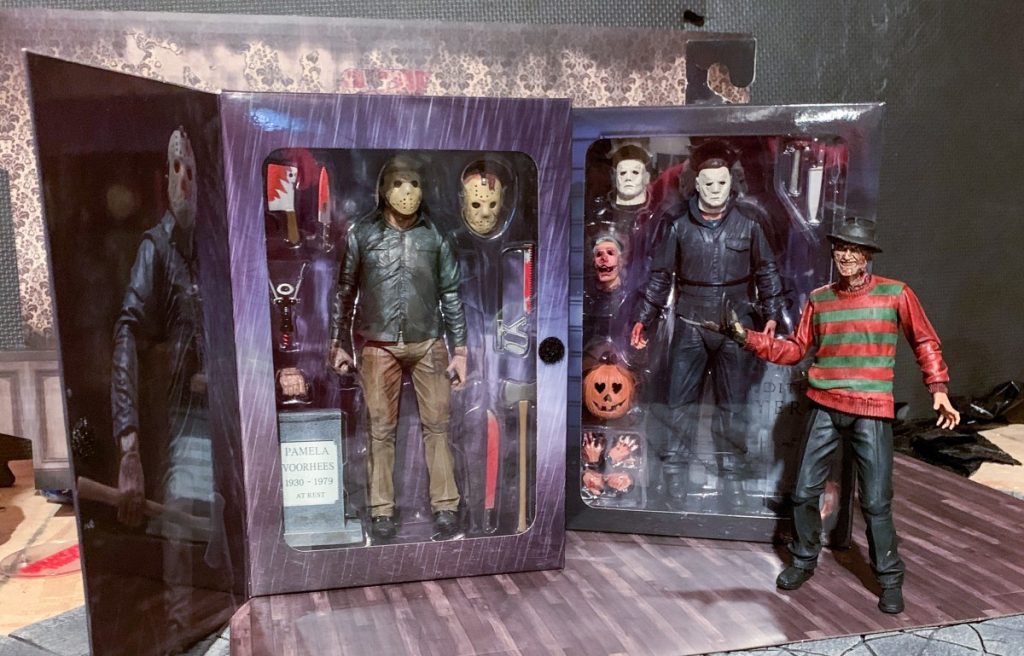
I also needed the horror icons. I got lucky with these because as the spooky season has approached, I’ve noticed an influx of NECA horror toys at my local shops. The hardest part of this search was finding the right ones. If you already collect the NECA lines, you know there’s several versions and variations for each character. I specifically wanted the standard A Nightmare on Elm Street Freddy, the Halloween Ultimate Michael Myers, and the Friday the 13th: The Final Chapter Jason.
One, two, Freddy’s coming for you.
Next—the Monsters Inc. door and platform. I’ve already written an article about 3D printing for toy photography, so I’m not going to get deep into that here. I found the print plans on Thingiverse. There were a couple good ones, but I went with this one because I thought it would be the best for an open door shot.
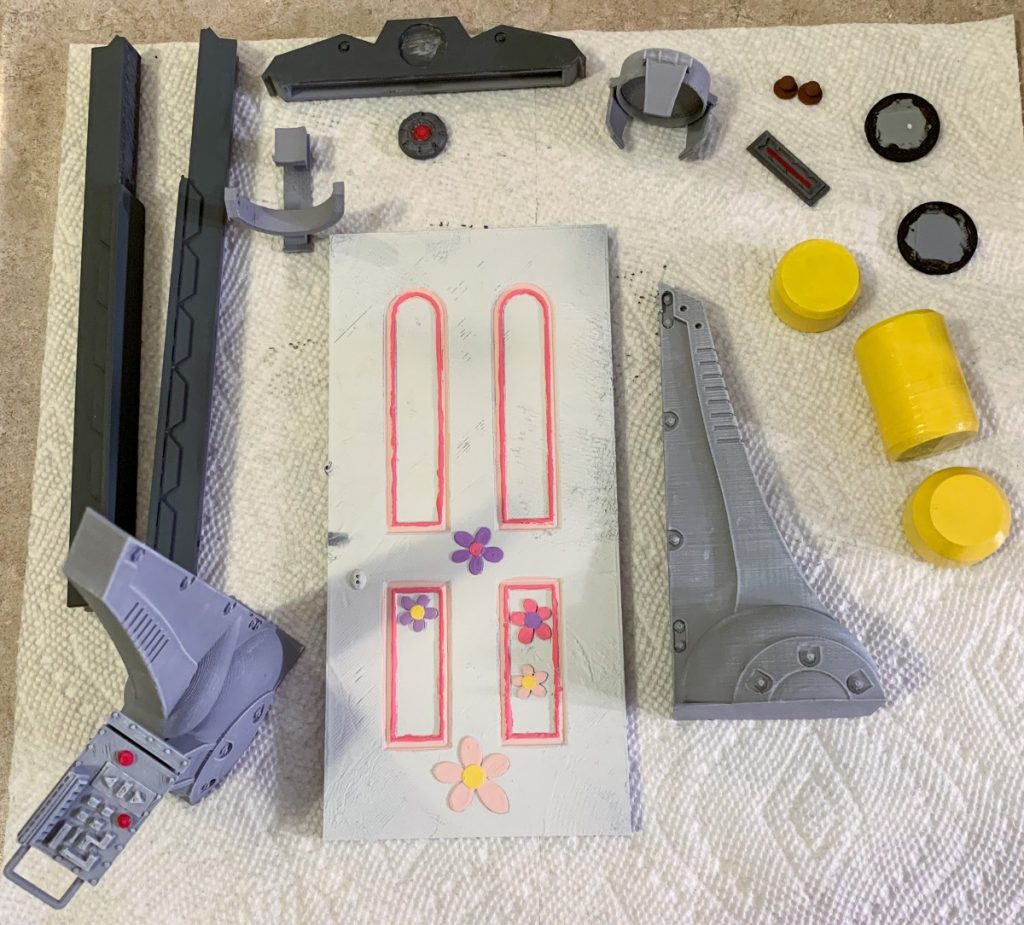
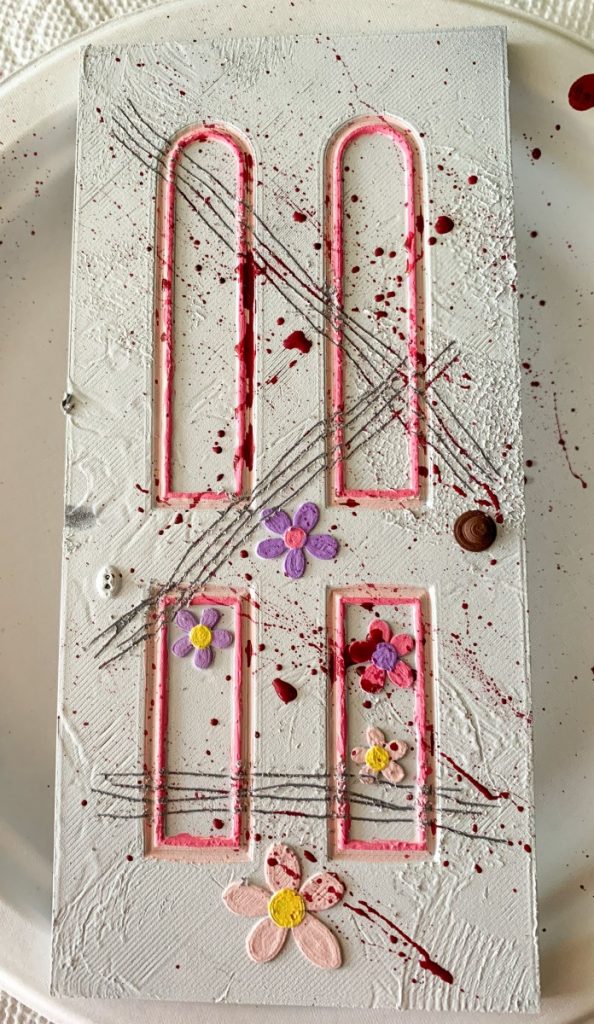
There is a real lemons to lemonade story here with the door. After printing, I always use Rust-Oleum 2-in-1 as a fill-in primer. As I was finishing the paint application to the door, it fell on to the grass (gasp!). The wet paint was very impressionable and you could see all the dirt and grass leaves in the paint. I immediately used a paper towel to clear off the debris, which made it look so much worse. Now what? A perfectionist would have probably let it dry, sanded it down and started again, or even printed another door. I’m just going to say it: I’m lazy. I looked at this trashed door and opted to run with it. So I decided after I painted it, I’d trash it even more! I used a pair of scissors to scratch in some Freddy finger scrapes, then I added a little splattering of red paint. Viola!
This is no dream! This is really happening!
Time to shoot! Since this shot had been stuck in my head for so long, the shooting part of it went rather quickly. I knew I would be combining two images: 1. A shot with a scene through the Monsters Inc. door; and 2. A shot with the Monsters Inc. scare floor background. The real trick was swapping the backgrounds with no changes to my characters. Shockingly, I pulled it off with no one falling over. If that would have happened, I probably would have redone both shots. My Photoshop skills are pretty much nonexistent, so I wanted to do as much as possible in-camera.
For both shots I used the same settings/setup:
- ISO 200
- 2.5 second exposure
- f/6.3
- Focused on Freddy’s face
- Lume Cube 2.0 with snoot attachment shining down on the door
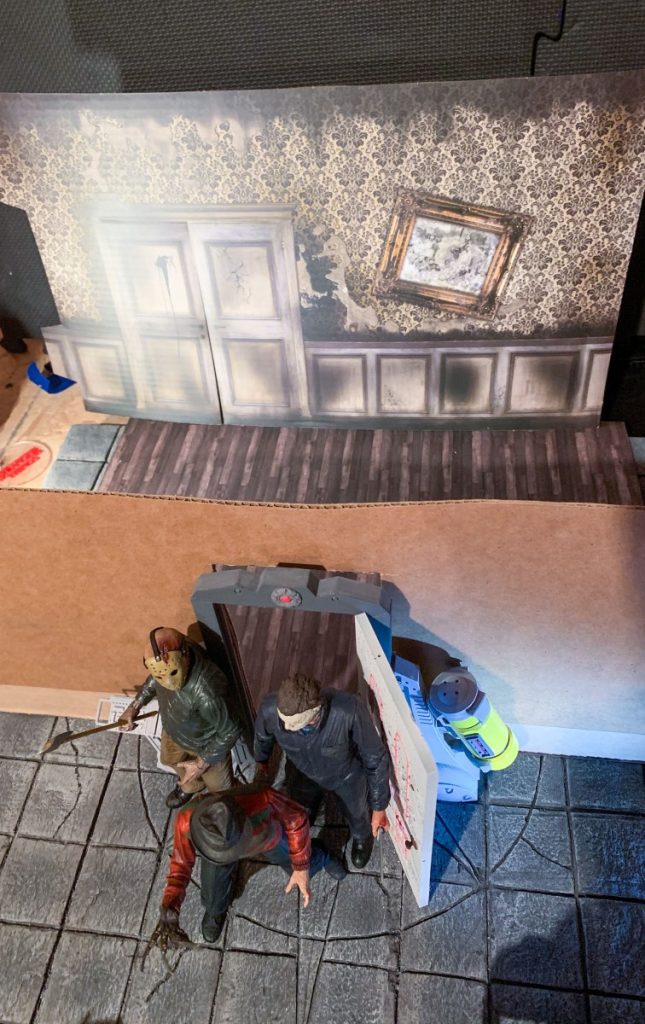
As you can see, I used the wood plank floor and the wall with a picture frame from the Extreme-Sets pop-up diorama. I had originally planned for a lot more monstrous characters and objects to be in the room beyond the door, but soon realized they would be lost by the big three blocking 90% of the view. I used a Manfrotto Lumimuse 3 LED light to illuminate the back wall and made a cardboard cutout to block any light spillage that may have come to the foreground (which was probably overkill).
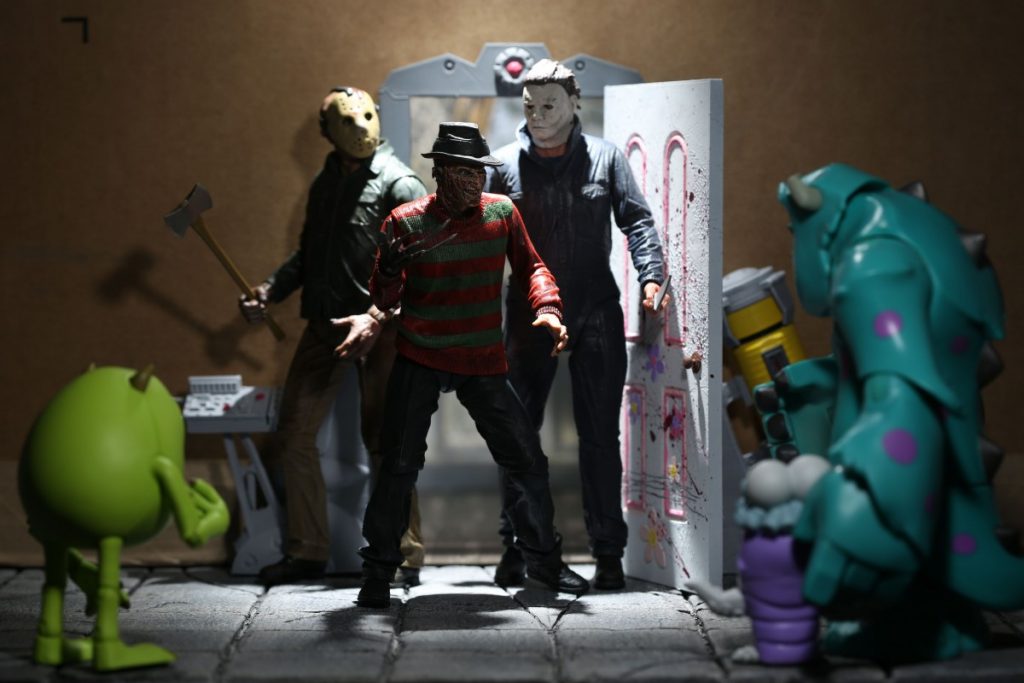
The only thing I really cared about with this photo is what you see past the slashers and through the door. I was happy with this and moved on to the second setup.
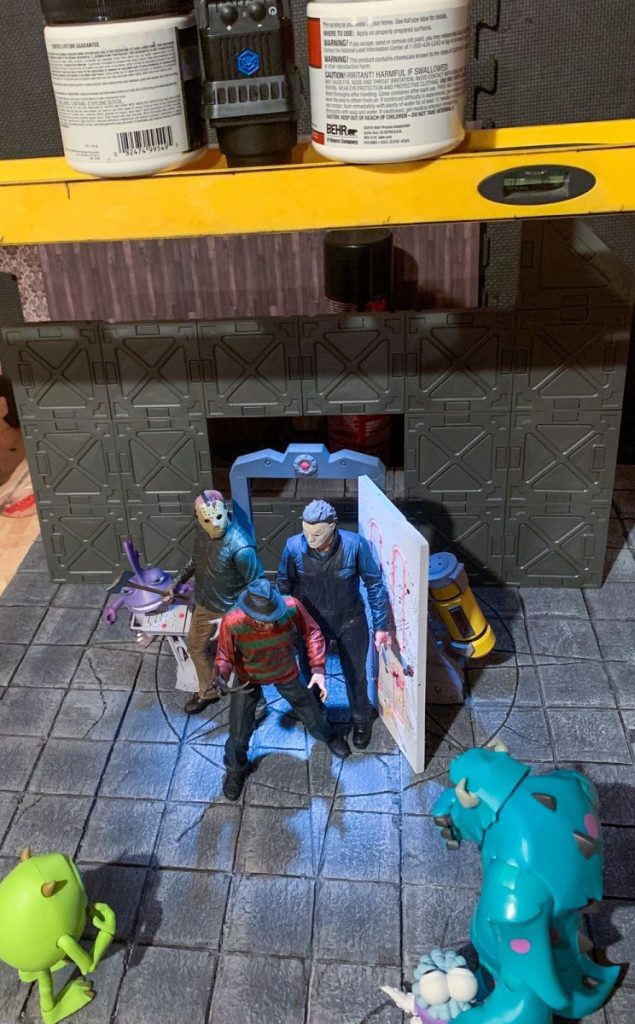
As I said, the goal was to swap the backgrounds without disrupting the foreground. Slowly and carefully, I lifted away the cardboard cutout, and the wood plank floor. I then set down my Ubiquitous Diorama background. Now I didn’t have enough of the blocks handy to fill in the entire area I needed, so I was happy to leave the gap in the doorway. You can also see my Lume Cube with the snoot attachment suspended from above. It’s resting in a crevice of a 4-foot level, which is resting on two stacked one-gallon paint cans (not pictured). If you haven’t realized it by now, I shoot fast and use whatever is handy to make something work. Also for this shot, I used my other Lume Cube in optical mode to act as a handheld flash.
We have such sights to show you.
Now it’s time for the fun part—editing! I’ve previously written an article about editing on my phone, so I won’t go terribly in-depth on it here. Same rules apply. I transferred the photos from my Canon DSLR to my phone and used the following apps:
- Lightroom
- PS Express (for the first time)
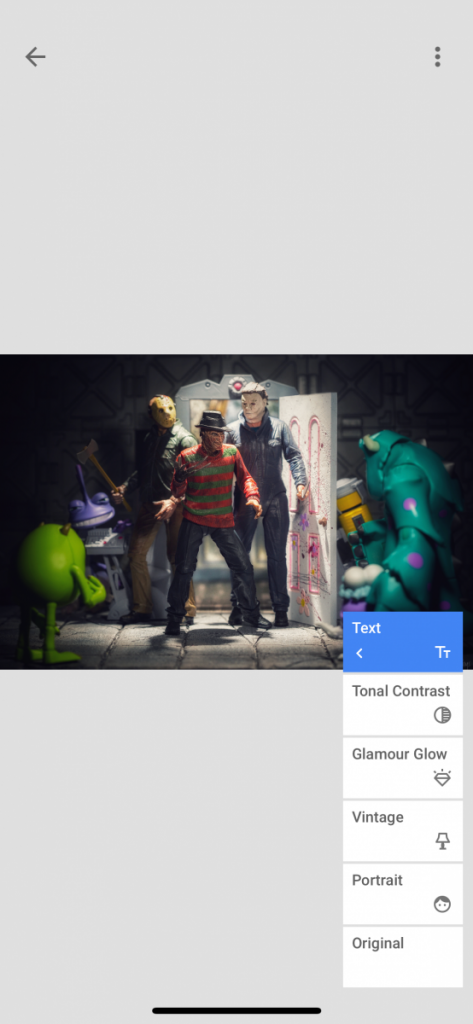
- Snapseed
- Photoshop Fix
- Infinite Painter
I’m sure all this can be done with just one app, but I like all of these for different aspects. For example, I find the cloning capabilities of Photoshop Fix far superior to Lightroom or Snapseed. After years of doing this, I have a system and it works for me. My editing process may seem like a lot, but I’m usually done in 5–30 minutes.
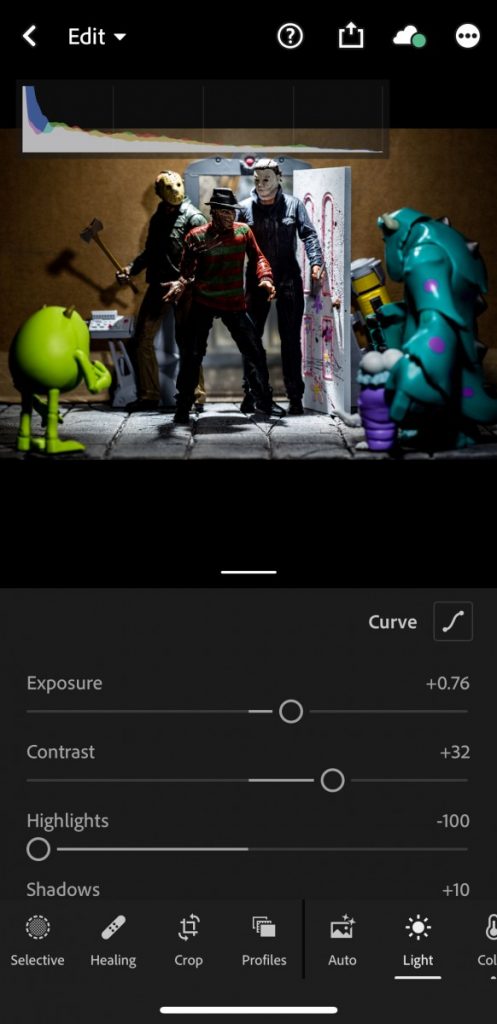
First stop is always Lightroom. I’m enjoying this even more since I discovered you can edit RAW on your phone, so the image manipulation produces far better output now. I tweaked each image here first and exported.
Now to combine the two images, I usually use an app called Photofox and I’m a fan of it, especially because it does a lot for free. But after combining the two images, I wasn’t excited about how it was looking and knew I was going to be in for a lot of manual feathering of the combined layers. I instead opted to give PS Express a chance. After an initial learning curve of figuring out how to select the areas I wanted to remove, I was very pleased with how well it worked.

Once the images were combined, I exported them, opened the image in Snapseed and applied my usual filters.
From here I hopped over to Photoshop Fix to just run a little standard cleanup with the healing tool. Then I wanted to add the little details, which for the most part usually go unnoticed. I wanted to add a red glow to the door light and the scream canister. Onto Infinite Painter.
Now just export one more time and you’re ready to post! I sincerely hope you found something useful, and can put some of this into practice. Thanks for reading!
-Adam
EDITOR’S NOTE:
Can you identify all the horror quotes in this post?
1. “It’s alive! It’s alive!” – Frankenstein (1931)
2. “They’re here!” – Poltergeist (1982)
3. “One, two, Freddy’s coming for you.” – A Nightmare on Elm Street (1984)
4. “This is no dream! This is really happening!” – Rosemary’s Baby (1968)
5. “We have such sights to show you.” – Hellraiser (1987)


![AI is ruining toy photography [a personal viewpoint]](https://toyphotographers.com/wp-content/uploads/2026/03/Together-As-One-Ultra-Magnus-revealed-scaled-500x383.jpg)
Great photo, Adam. And I love how much insight you gave into it’s creation! Well done, sir.
Wonderful step by step look at what it takes to make a great photograph Adam. Great job! Im super impressed that you do this all on your phone. Once again proving that ideas win over tech any day!