
Hey, I’m Adam (IG: @BurkeHeadToys) and I’m a toy photographer, or try to be. For two years I’ve been buying and photographing toys to have a little fun and to hopefully make someone else’s day a little brighter. If you’ve been following me, then you may already know that I primarily edit all of my posts on my phone. So when my friend Alan asked me to write a guest post, I figured I’d take this opportunity to go through my process, from the camera snap to the post. Here’s the pic:
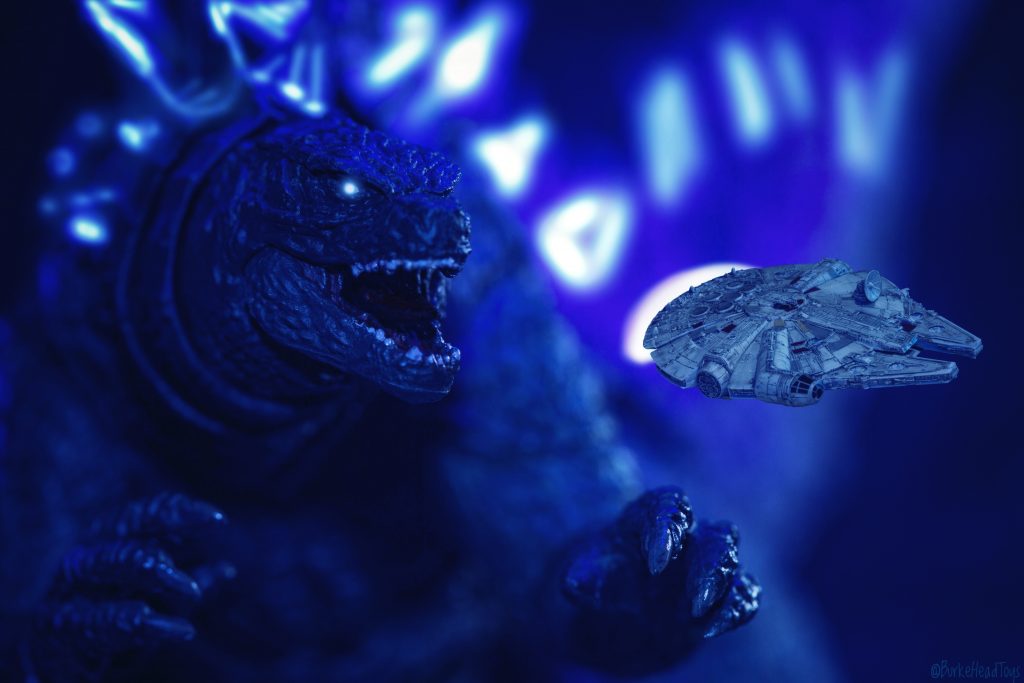
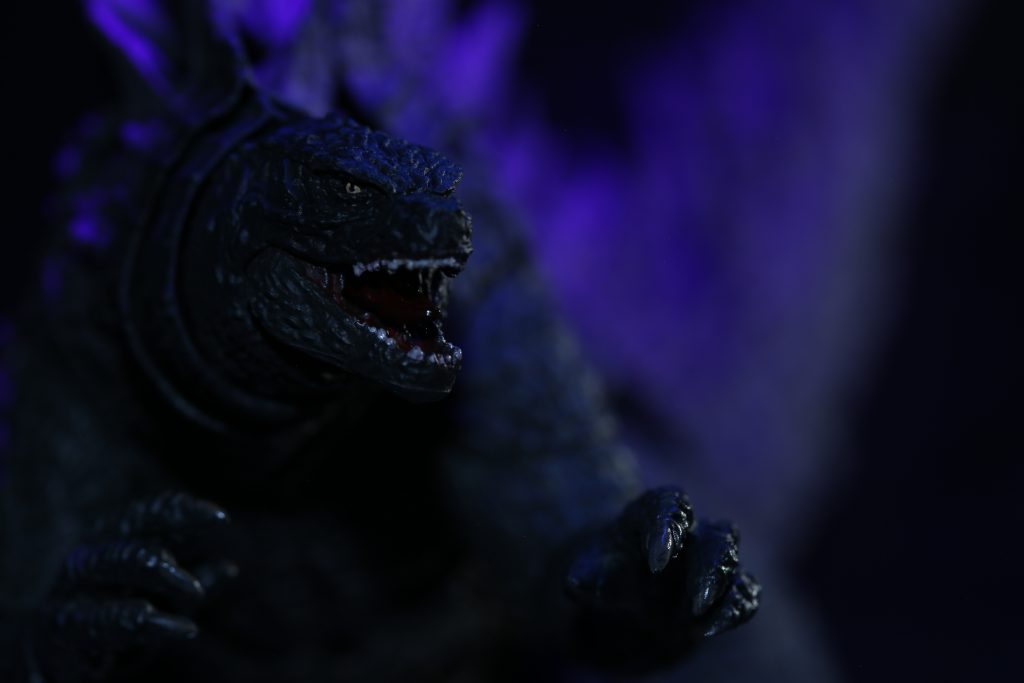
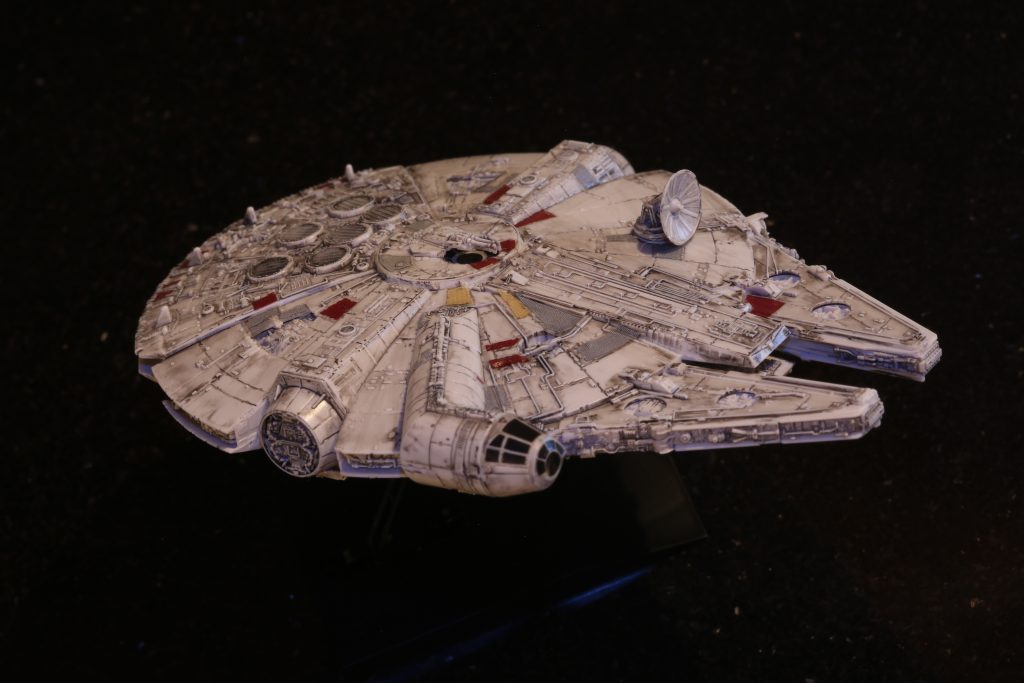
Most of my posts are all done in-camera and simply finished with some adjustments in Lightroom and/or Snapseed. But from time to time, I try to do something a little more complex. I’ve had this idea since June when I won a Godzilla figure. I was inspired by the “This is no cave” scene from The Empire Strikes Back, and I love mashups! So let’s take a look at how we got the above photo from these two below (both are straight out of camera):
Equipment used
- Canon DSLR
- Canon 100mm macro lens
- Manfrotto tripod
- 2 x Lume Cube 2.0
- Blue Strobist flash gels
- Blue light torch
- S.H.MonsterArts Godzilla
- Bandai Millennium Falcon model kit
- Atmosphere Aerosol
- Black reflective floor tile
Taking the shot
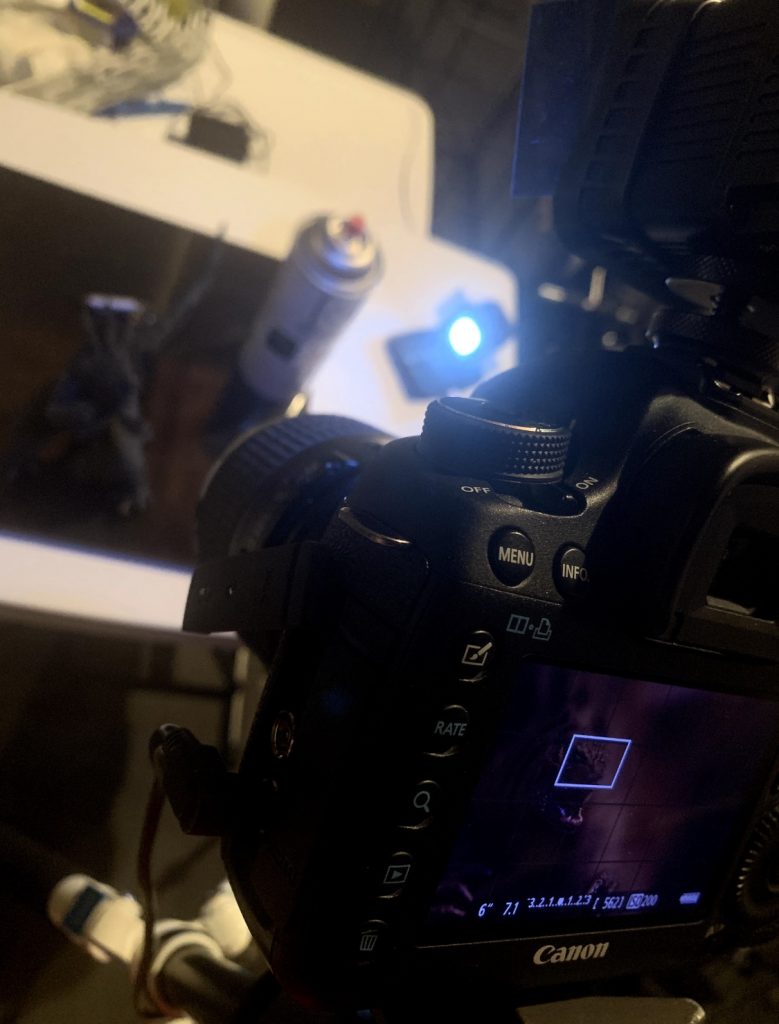
The shot itself was a pretty simple set up. I posed Godzilla in a menacing stance on top of the floor tile, my camera was pointing down at him at a 45 degree angle. I had one Lume Cube on top of my camera, and the other lighting him up from the back left. I covered my Lume Cubes with the supplied diffuser and placed a blue flash gel over each of the lights. Luckily, I had just come into possession of a small torch which emits blue light. It’s used to test blue light blocking glasses. So, as I took the shot, I turned off the room lights, shot a little Atmosphere Aerosol and used that blue light to illuminate Godzilla’s fins.
After several iterations experimenting with camera settings, I settled on the following for the Godzilla shot: ISO 200, 6-second exposure and f/7.1. When I was done with my shot, I then swapped out Godzilla for the Falcon and started experimenting again. The settings for my Falcon shot were: ISO 200, 13-second exposure at f/22, and I ended up leaving the room lights on.
I use a cheap SD card adapter to transfer the files (both jpg and raw) to my iPhone X. This is where the real fun begins, along with a lot more trial and error.
Phone post-processing
As I said earlier, the vast majority of my shots go to Lightroom, then Snapseed, then Instagram. For this shot, I played around with three other apps: Enlight Photofox, Infinite Painter and Photoshop Fix. For this shot, the free or trial versions were enough to suit my needs. But having previously done this type of composite shot, I enjoyed both apps enough to purchase them.
Lightroom
First stop: Lightroom! I imported both shots into Lightroom and played around with most-to-all of the sliders under the Light, Color and Effects settings. I rarely have a need to venture outside these settings. Not to mention, I still consider myself a newbie and don’t really know what some of the other settings do.
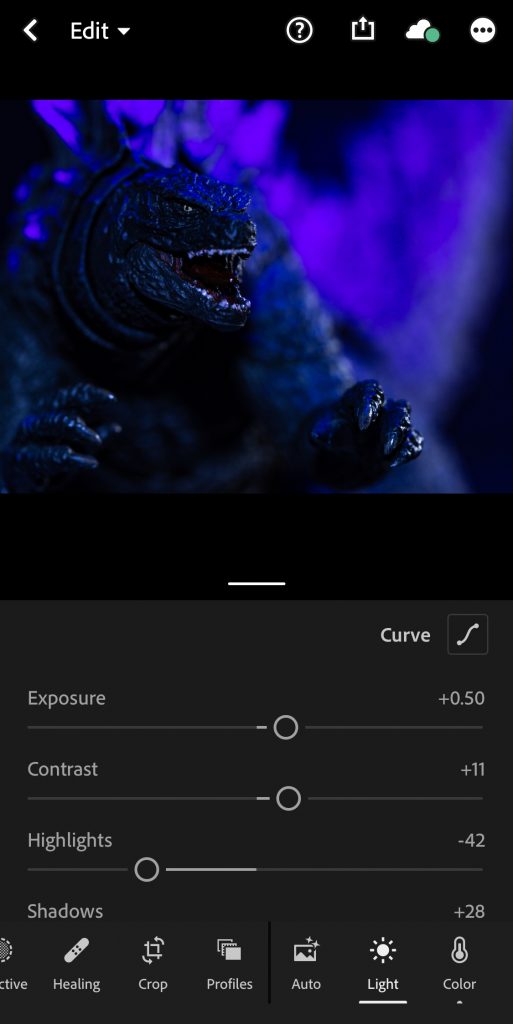
When I like what I’ve got, I go ahead and export both photos and move on to the next app.
Photofox
All you need for the next step is an app capable of erasing to transparency. I’ve found that Photofox is great for this. Their eraser has an option to turn on/off edge avoidance and it’s really pretty good at erasing and not too far. So I imported the Falcon photo and proceeded to erase the background.
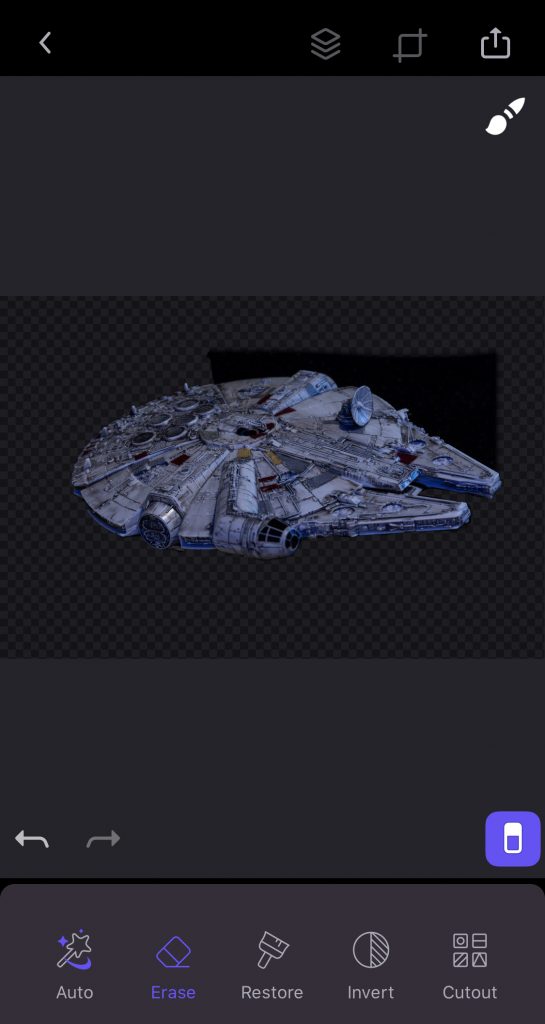
Next, I imported the Godzilla shot as a new layer and then resized and moved the Falcon till I felt it scaled well.
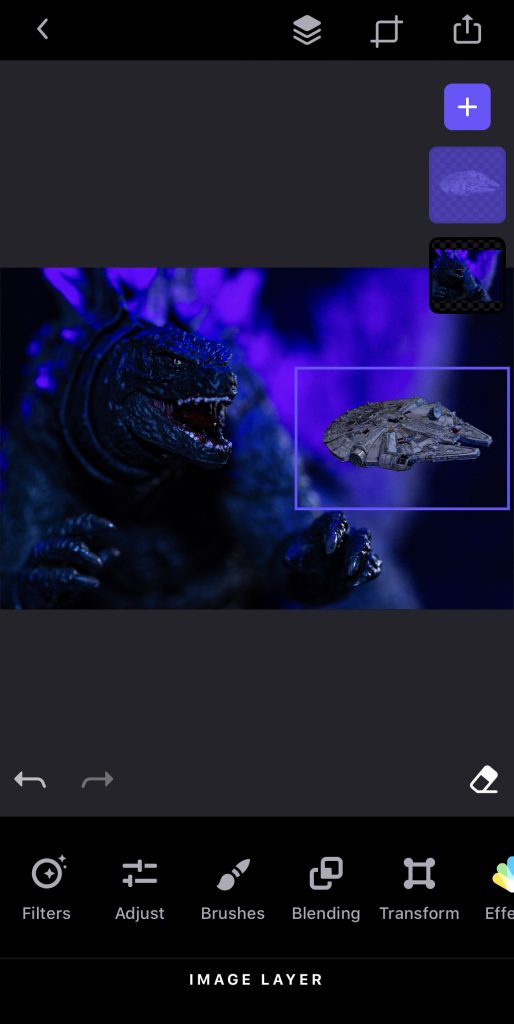
Once the layers are combined, we export again.
Infinite Painter
I still have very little experience with this app. And I’m sure I’m hardly utilizing its full potential. In fact, I’d say 90% of my time editing was spent just reacquainting myself with this app. I have only seriously used it once before and that was back in August. Nevertheless, I persisted. I used this app to paint with a soft glow brush the Falcon’s afterburn and the luminescence in Godzilla’s eye and fins.
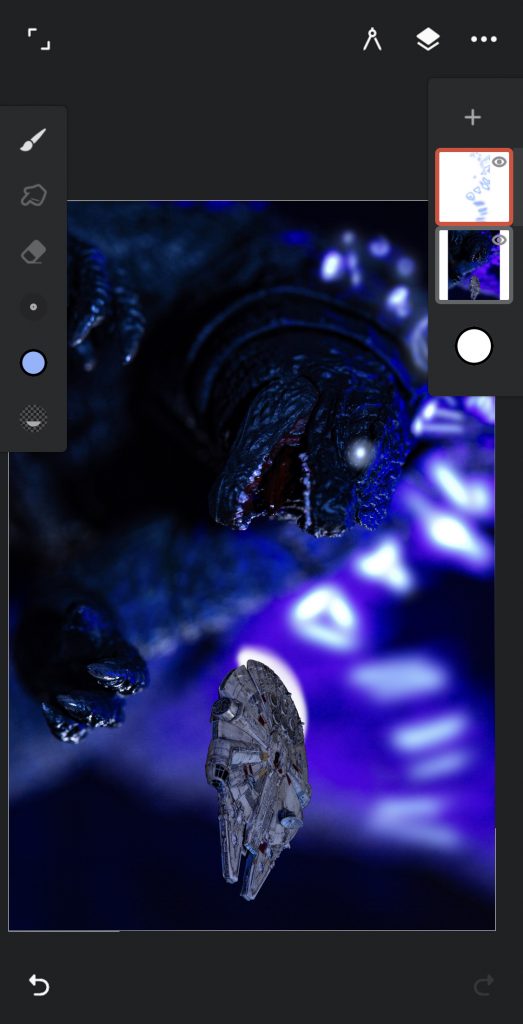
I also used this app to add an overlay layer of blue linear color gradient to give the King of the Monsters a general glow of blue. Now what do we do? We export!
Photoshop Fix
Primarily, I only use the healing feature of this app. I like how the spot heal and clone stamp work within the app. I’ve tried others and they never quite work the way I’d like. Again, it’s probably due to my lack of knowledge in proper post-processing. Everything I’ve learned has been through trial and error. Anyway, I use the healing tools to clean up dust and imperfections in the photo. For composite shots like this, I also use the clone stamp to blend in the edges of my cropped-in photo—in this case the Falcon. So I took my time going all the way around the Falcon, as you can see with the red highlight below.
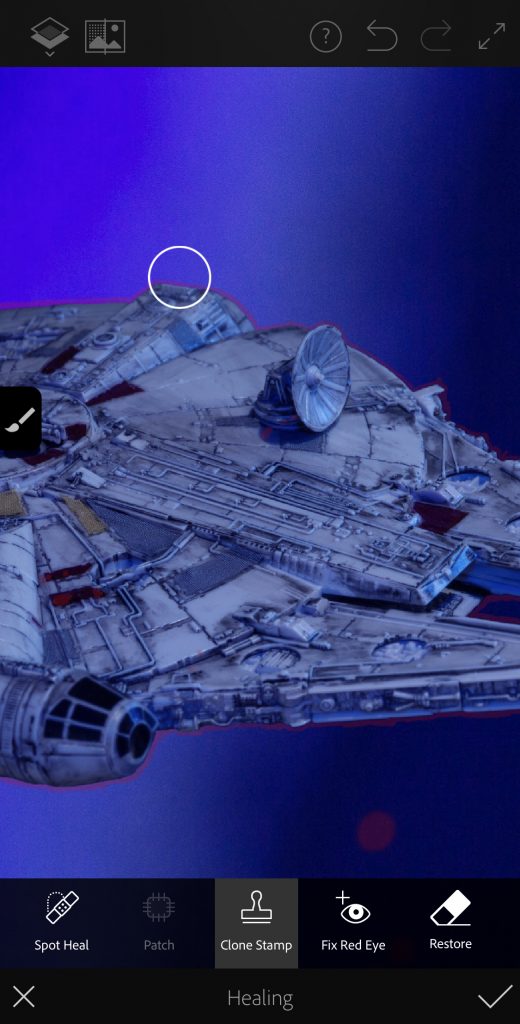
Now what? That’s right, say it with me…Export! And onto the next.
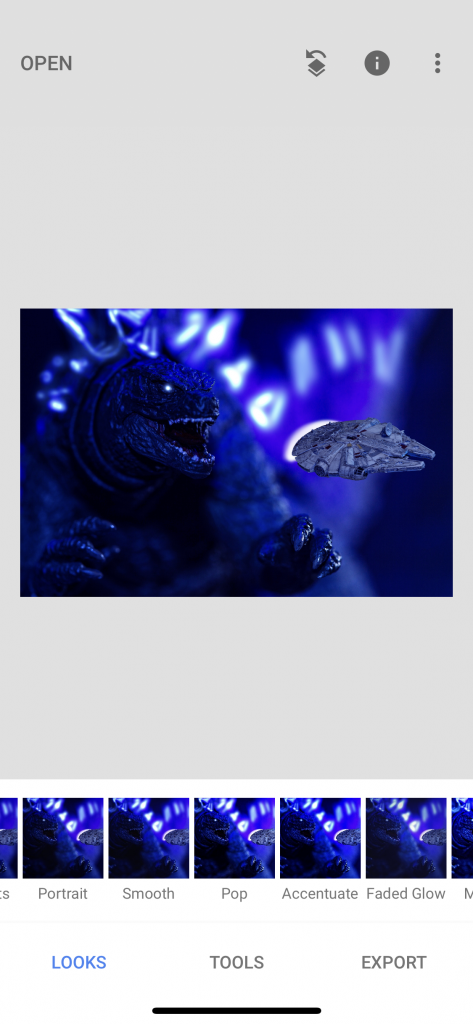
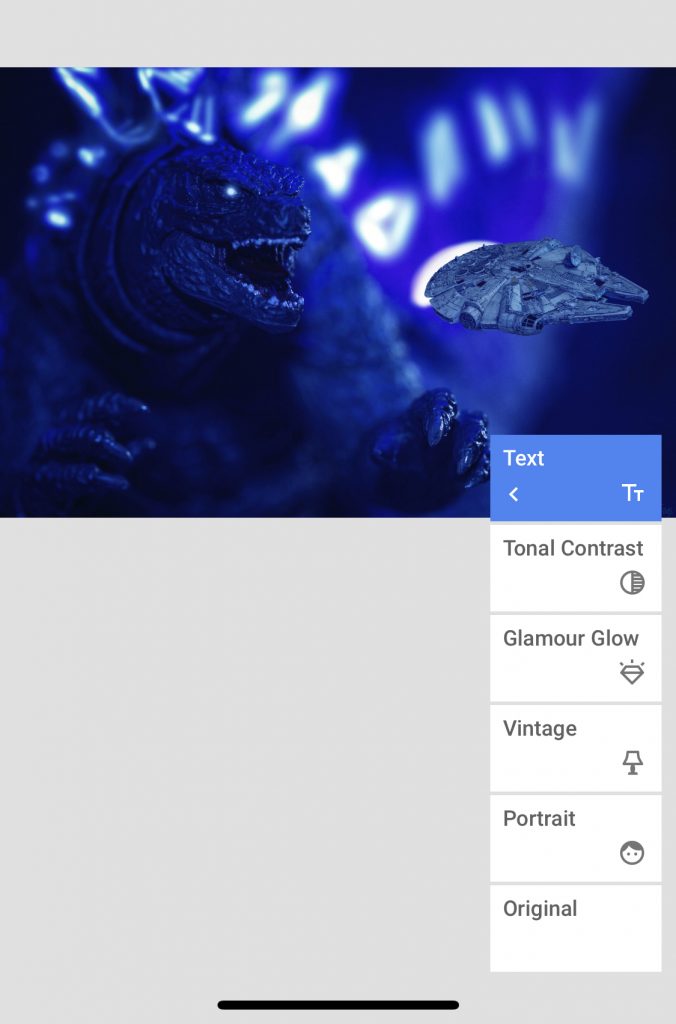
Snapseed
And welcome to Snapseed! It’s been a long road, but we’ve reached the final step in our journey. I import the export and usually take a cursory look at applying their “Looks.” I don’t always apply these filters, but when I do, I tend to use Faded Glow, Pop, or Portrait. For this particular photo, I used the Faded Glow.
Another reason I like this app is to apply a watermark. I’m well aware of the strong feelings both for and against a watermark, and personally I like them to give the photo a finished feel. I’ve yet to produce an image that’s awesome enough to get stolen and reposted, so I’m not really doing it for that reason. Like I said, I just like the look of a well placed watermark. Now after I’ve done all that, I’ll usually go to View Edits and do some tweaking.
And there we go! One last export and you’re ready to import to Instagram. After reading all this, it may seem like a lot, and undoubtedly seems silly when you could have just done all this in Photoshop on an actual computer. But if I wasn’t documenting all this whilst I did it, I can usually get a shot like this done in 20 minutes, depending on the complexity. Usually my edits only take me about 10 minutes on my phone. And I’m sure, to the professional eye, it shows. But I like them and I hope you will, too.
Thanks for reading! Feel free to hit me up with questions, I’m always happy to share what little I know.
-Adam


Thanks for walking us through this, Adam. I need to get out of my old school, desktop editing mentality. I’ve scratched the surface a bit on occasion with Lightroom Mobile, but nowhere near what you have put together here.
No worries! I’ve only edited a handful of my shots on a PC. Phone is just easier for me since it’s always around me and I can edit anywhere. Lightroom is great for what I do, and even better since I’ve figured how to transfer raw files and edit those on my phone. And I’m always happy to share what I’ve learned through my trials
Can you please specify if the apps you are using are free or paid?
Thanks!
Snapseed is free. I believe Photofox, Lightroom and Photoshop offer limited free capabilities (for example, I don’t think you can use the healing tool in the free version of Lightroom) and infinite painter offered a free week trial. It has been awhile since I used the free versions of all these apps, but I’m 99% sure I did a Harry Potter vs Boba Fett shot using the same process above with the free versions of all the apps. I was then impressed with them enough to purchase.
I’d suggest waiting until you have a particular shot in mind and ready to go then try downloading the apps. I do apologize if my info is outdated