Back in April, DPReview ran a series of posts from their team about the one piece of gear that changed their (photographic) life. It was a very interesting read, and I couldn’t help but pose the question to the Toy Photographers team to see how they would weigh in. We put our heads together and came up with this article about the critical gear that changed our team members’ photography.
Shelly Corbett – Focus Peaking
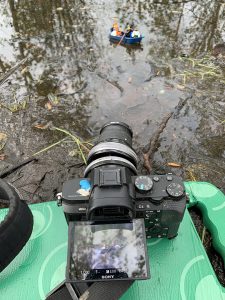
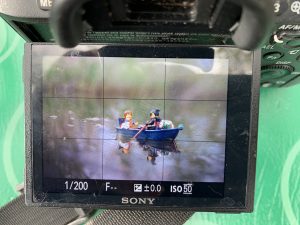
Without a doubt, focus peaking is the one camera feature that has helped me bring my vision to life more than any other. What is focus peaking? It’s a bright color on your LCD screen indicating the area of highest contrast and also the most in-focus. You can choose your own color, like red, green or white. I chose red. Whenever I see those beautiful red lines, there is no doubt what is in focus.
Focus peaking is usually only available on cameras that use live view or have electronic view finders (EVF). I was first introduced to this clever feature when I was videoing live bands. It was my responsibility to make sure the singer was in focus and focus peaking made that possible. Especially when my subject was in constant motion. It turns out that focus peaking is super handy when using a manual focus lens with small minifigures too!
One of the reasons I like using a Lensbaby is that it only gives you a slice of focus across the image plane. The farther you pivot the lens, the more radical this plane of focus becomes. Combine this feature with a wide-open aperture and you have a focusing nightmare.
Without focus peaking there would a lot more trial and error in my photography. With focus peaking, my success rate has improved and I can concentrate on other aspects of an image, such as composition and point of view.
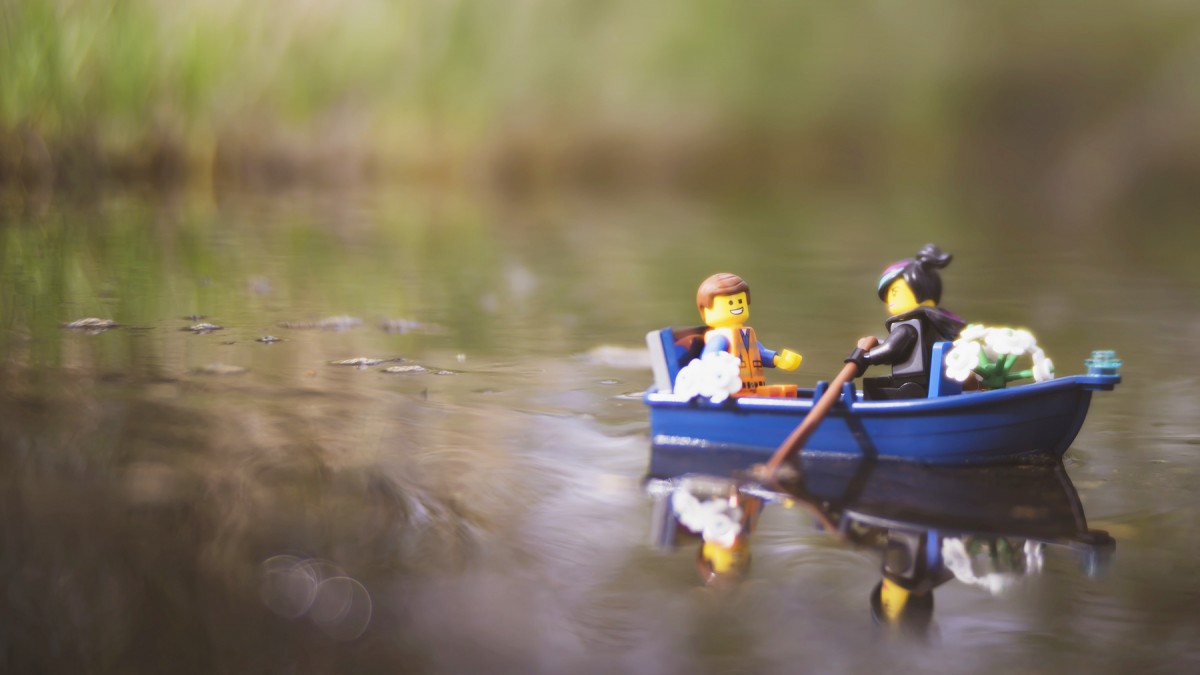
If you have any interest in playing around with vintage or manual focus lenses, then I think you will enjoy focus peaking. Maybe it will even change your toy photography, much as it did mine.
Shelly
Dave DeBaeremaeker – Photoshop Adjustment Layers
By far the thing that has made a difference in my creative output is Photoshop. A lot of the work I do involves compositing parts of multiple photos together to create a new unique piece that doesn’t exist in the real world.
Often those elements are shot at wildly different times of day, in different parts of the world, different lighting conditions, different cameras and, in some cases, decades apart from each other. As a result I spend a lot of time correcting colours, adjusting white balances, tweaking tonality and fixing lighting on the various elements that make up one of my images.
Adjustment layers are the thing that allows all of those corrections to be made. Here are a few examples. In each case, extra work was done to merge the two images, but I turned off all the adjustment layers to see the impact.
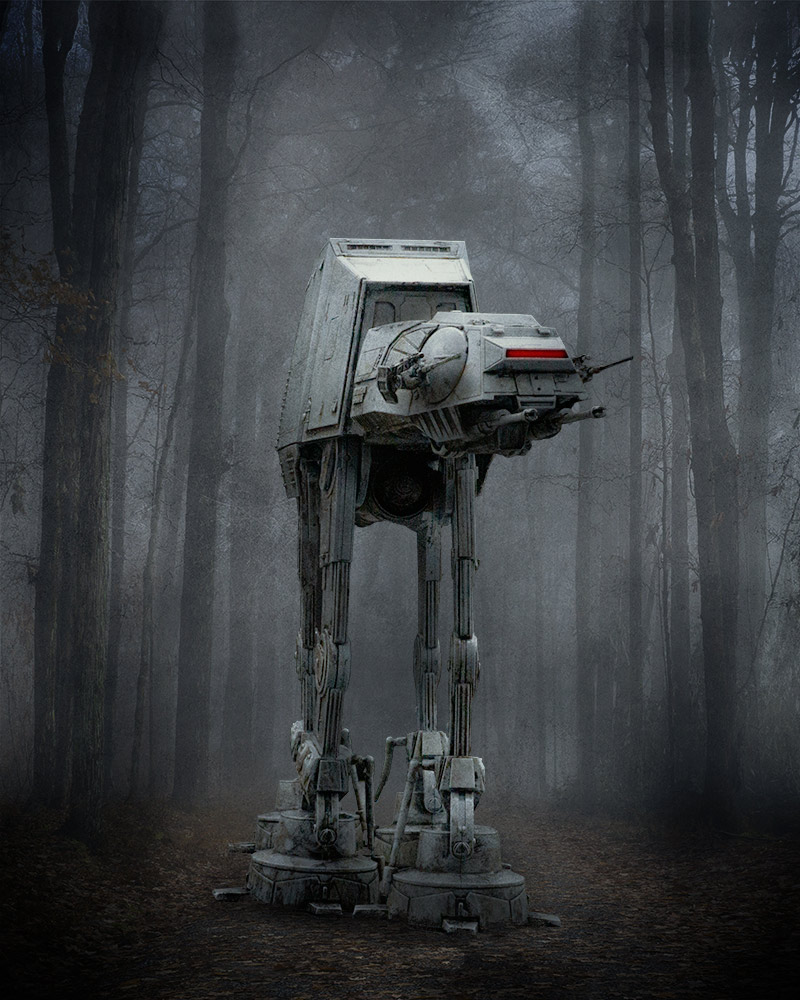
First is this shot of an AT-AT in the woods. The background was photographed up in the mountains above my house, and I shot the AT-AT model in my studio.
Before adjustments:

As you can see the colour balance is all wrong for this image. With a few colour adjustments I brought it all together into one cohesive piece:
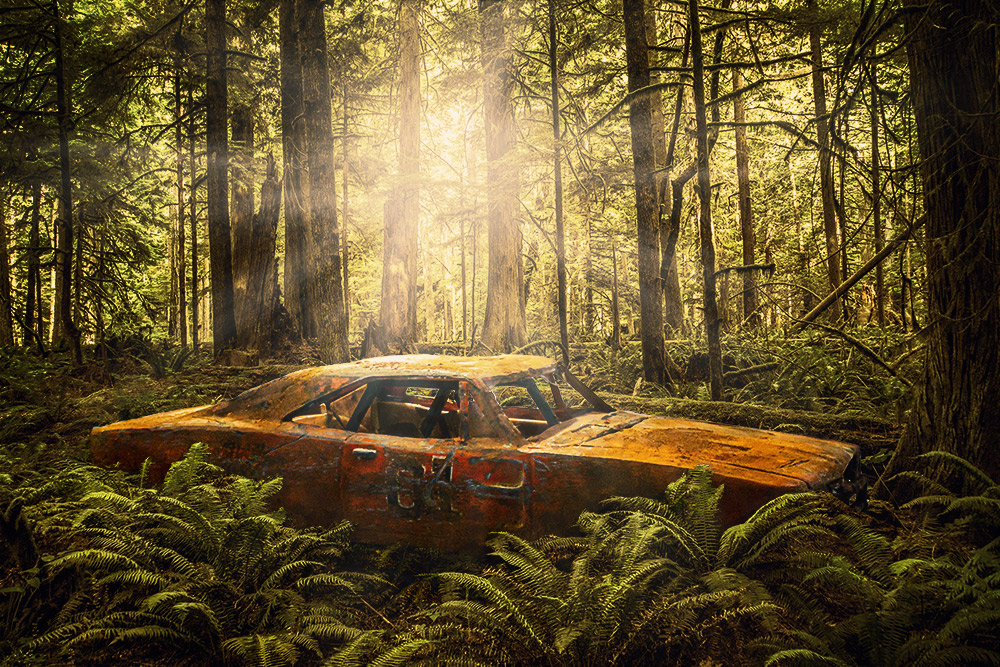
One more example is this old car in the woods. The background for the shot was taken many years ago in the woods of British Columbia. The car was shot in-studio. Here it is before adjustments:
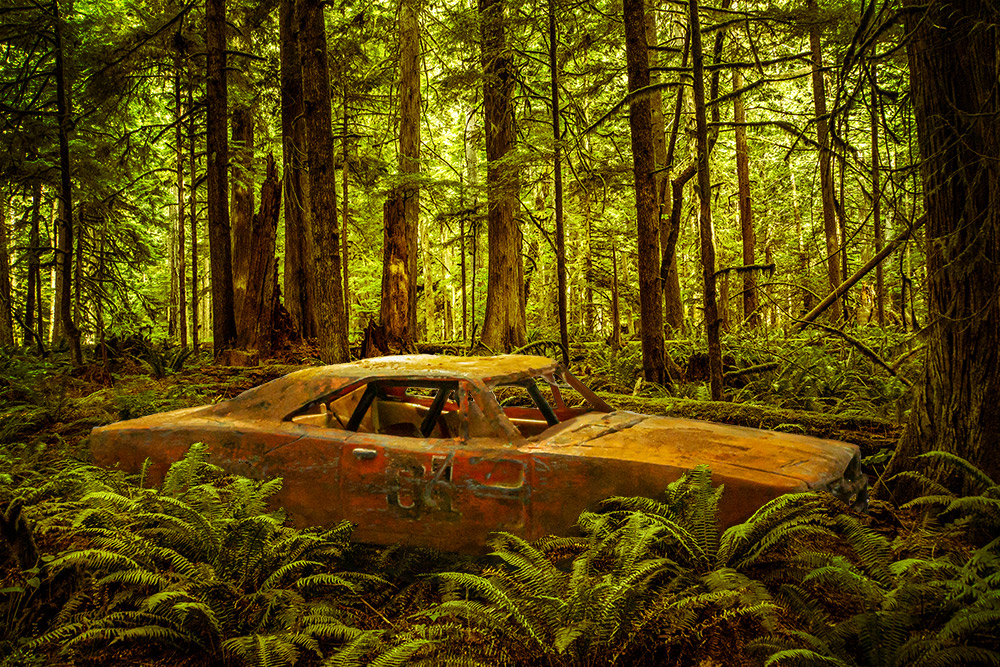
Again, some Photoshop adjustment layers made the piece more cohesive and interesting.
It is a rare image that escapes my studio without some sort of adjustment layer being applied.
Dave
Oliver Peterson – Camera Remote Control
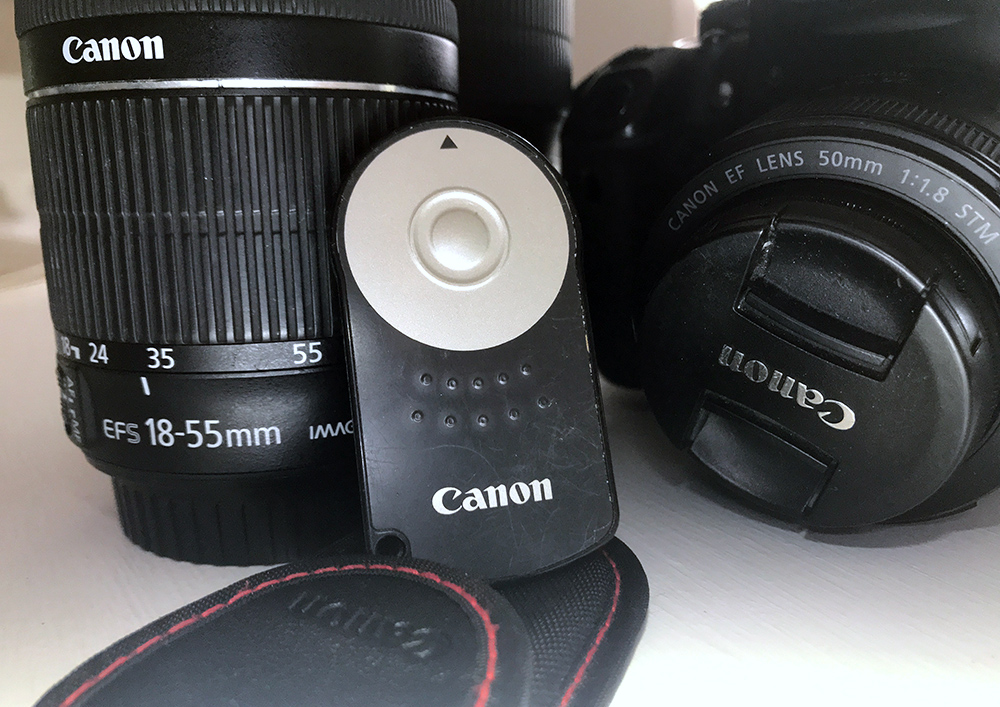
There have been a number of things that improved my photography—learning to lower my ISO, Lume Cubes, Atmosphere Aerosol, new lenses, finally getting a decent and sturdy tripod—but buying a remote control is probably one of the most helpful and essential tools in my arsenal.
For about $20, my Canon R6 Wireless Remote Control (see below) suddenly made it possible for me to keep my camera perfectly still, avoiding camera shake that often occurs when pressing the shutter release button. It also frees my hands for using multiple effects when alone, like spraying Atmosphere Aerosol and/or canned air (to kick up dirt or sand), sprinkling snow and/or holding a light at the same time.
Additionally, the remote helps if you need to stand somewhere away from the camera to hold a reflector, bounce card or something to block the light from a certain area. If you have the right camera, you can also get a wired remote trigger, which are actually more responsive, but the wireless is nice—just make sure it works from where you’re standing or sitting, and that the battery isn’t drained.
If you can’t or don’t want to get one of these, I later realized you can also use your camera’s shot timer for similar results in a pinch, but a remote won’t break the bank, so I say go for it.
Oliver (@oliversees)
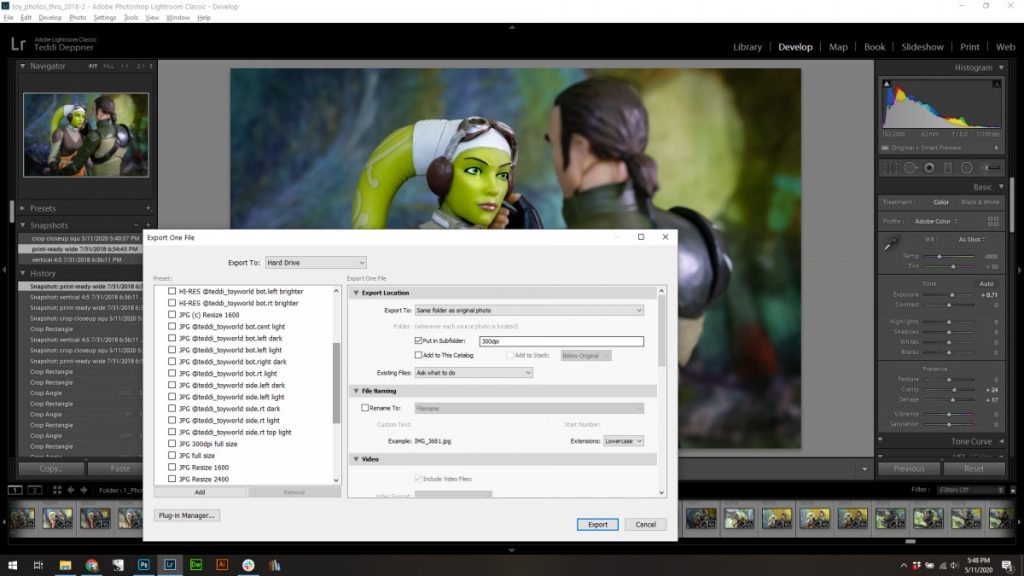
Teddi Deppner – Lightroom Snapshots & Exports
There are a half-dozen pieces of gear or software that have revolutionized my toy photography. But Lightroom‘s way of managing and editing photos without changing the original file is a big one. The snapshots and export features specifically have made my photos incredibly useful outside of the single use of posting to Instagram. With these tools, my photos are transformed into assets I can use as Facebook cover photos, profile pictures, greeting cards, wall prints, blog post images and more.
Something miraculous happens the first time you hold a canvas print of your work, or see it on your wall. You realize that those pixels have become an object that influences the mood of a room, or a gift that lights up the face of a friend.
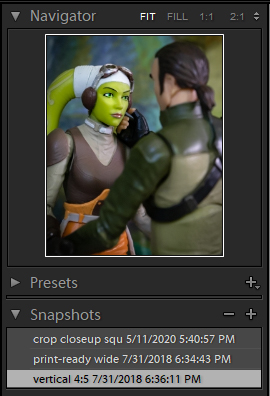
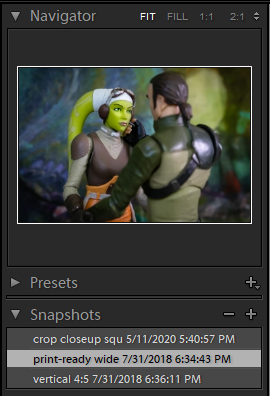
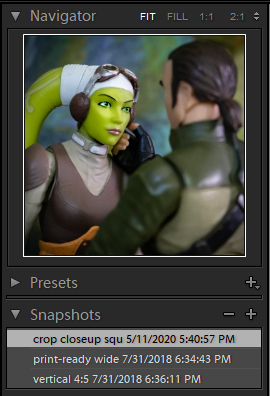
Basically, without having to save three separate work files, I can make a single image successful in three different shapes and sizes:
Closely related to this feature is the ability to export from Lightroom with a variety of preset watermarks (or lack thereof) and resolutions. If I need a print-quality file, I have a high-res Export preset ready to go. When adding a watermark, sometimes the traditional bottom right spot I use is too busy or has a bright spot that makes the watermark hard to read. So I have presets for watermarks in all corners or even sideways on the left or right.
I run multiple Instagram accounts for my different interests, so it’s also handy to be able to select the right watermark for the right account straight out of Lightroom—or to use the same photo on two different accounts by exporting it twice.
While this may seem a small thing, to me this feature opens up a whole world of possibilities for how I use my photos. And it makes it easy. Otherwise, they might just sit on my hard drive and never find a home beyond a quick post to Instagram. But this way, I can go back and grab photos and print them as gifts or use them as greeting cards, have them printed onto merchandise, like coffee mugs, or made into keychains. All from a single file.
Teddi (@teddi_toyworld)
It’s amazing to see the variety of responses above. It just goes to show how everyone approaches toy photography differently. Was there one thing that had a big impact on your photography? If so, please sound off in the comments.


Great ideas and tips, guys! I’m glad to be a part of this one.
Thanks for always being a source of passionate toy photographer articles. Been feeling down about the world, and it’s good to be reminded there’s other people passionate about my same passions sometimes.