I tend to write a lot of posts about finding locations to take toy photographs. Including Lanzarote, Cyprus and Snowdonia. Sorry if I’m too repetitive with this. Along with far flung places I’ve visited I’ve also got favourite spots closer to home. Those places where you keep returning to, the ones where you know you’re going to get results.
But in this post it’s a different kind of location, and a different type of photography.
What to look for in a location
Usually my location scouting involves looking for places not influenced by humans. I think this comes from my usual subject matter being Star Wars. Wanting to find places that can fit into a galaxy far, far away can be challenging. Especially when there are lamp posts, or cars, or people.
Living in the UK there is not a lot of places that aren’t touched by humanity. Outside of our cities there is a lot of farmland, especially where I am from. So it can be tough (but rewarding) work to find spots to photograph. It’s probably why I climb mountains to find locations.
But what about figures that aren’t from a different galaxy?
I’ve been trying to broaden my horizons beyond just taking a lot of Star Wars photos recently. You know really niche subject matter, like MCU characters, Ninja Turtles or Batman. Shake it up a little.
I’ve had this S.H. Figuarts Bucky stood on my shelf for a little while now. And as Sebastian Stan is the doppelgänger of a young Mark Hamill, it seemed like a baby step out of a galaxy far, far away. And with other characters that exist in a real world setting there’s no need to avoid human influence.
Anything Lucasfilm can do…
Ironically for this post, when I picked up Bucky with the intent of taking some portrait type photos. I initially took the digital background approach. I know a lot of people use this method, and I’ve had some success with it in the past. I normally come up against one of two issues when I attempt to use it.
It’s not the case with these photos, but firstly is the lack of a middle ground on wider shots. I love to take photos of a figure in a landscape or location and when they are stood in front of a screen you can’t blend the foreground with the background easily. I guess it’s why they use a 3D generated world when filming things like The Mandalorian or The Batman on the Volume. I think it’s also key to remember that there are a lot of visual effects that are then added on top to remove the “seams”.
Secondly, and this is relevant to these next few photos. Is the lack of depth in the background. If you don’t want everything to be in focus, or you want to have some bokeh, this is really tough to do. I came to this conclusion with a photo I recently took of my in disguise Raphael out in a real location.
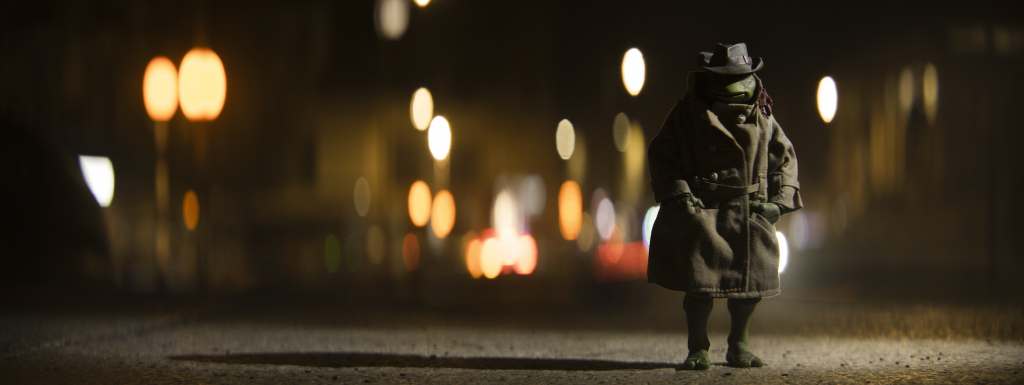
As you can see from the bokeh in the background and street lights all of the bokeh are different sizes and shapes relevant not only to their physical size but also to the distance they are from the camera. Because everything on a screen is the same distance from the camera this doesn’t quite come out the same. I’m sure there are ways around it, and I’m not giving up on a way of making it work in the future.

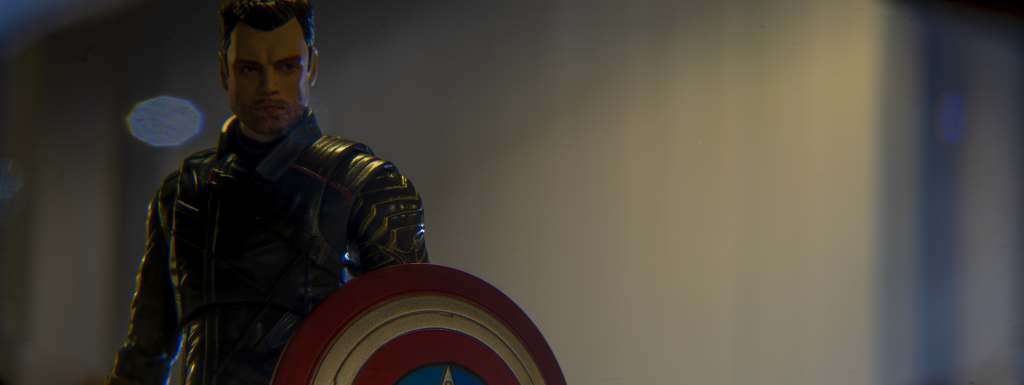
As you can see, the setup here was super simple. Backdrop on the screen and just natural light from the window to Bucky’s left. The shield gave a natural shadow across the lower half of the face. And with the right angle I was able to get the split between light and dark on his face without going all the way into Rembrandt lighting.
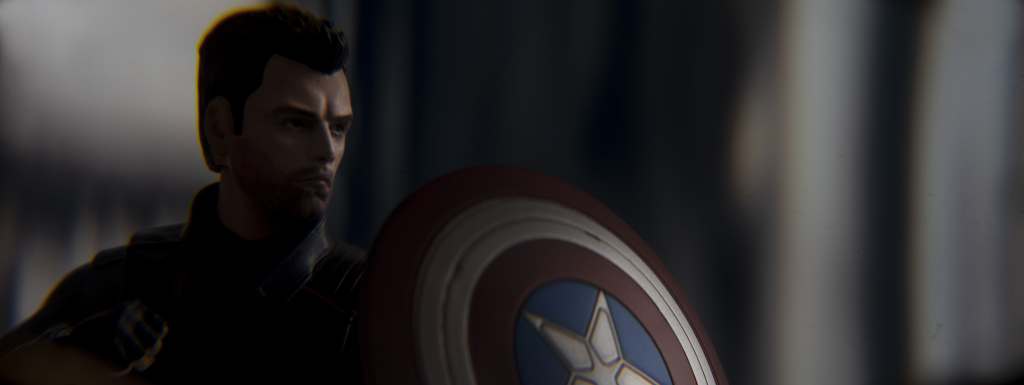
As you can see from these two photos the backgrounds do come across a little flat and detached. Now I know they are not the most dramatic or exciting of images to use in the first place, but hopefully you can see what I’m talking about.
On a side note I’m really happy with how the reverse light and shadow worked when it came to Bucky’s face. By this I mean where one side of his face is lit, the background is in shadow. and vis-versa where his face is in shadow the background is lighter. It means you can retain an outline of the character and still have strong contrast on your subject. Side note over.
So what kind of location suits the Winter Soldier?
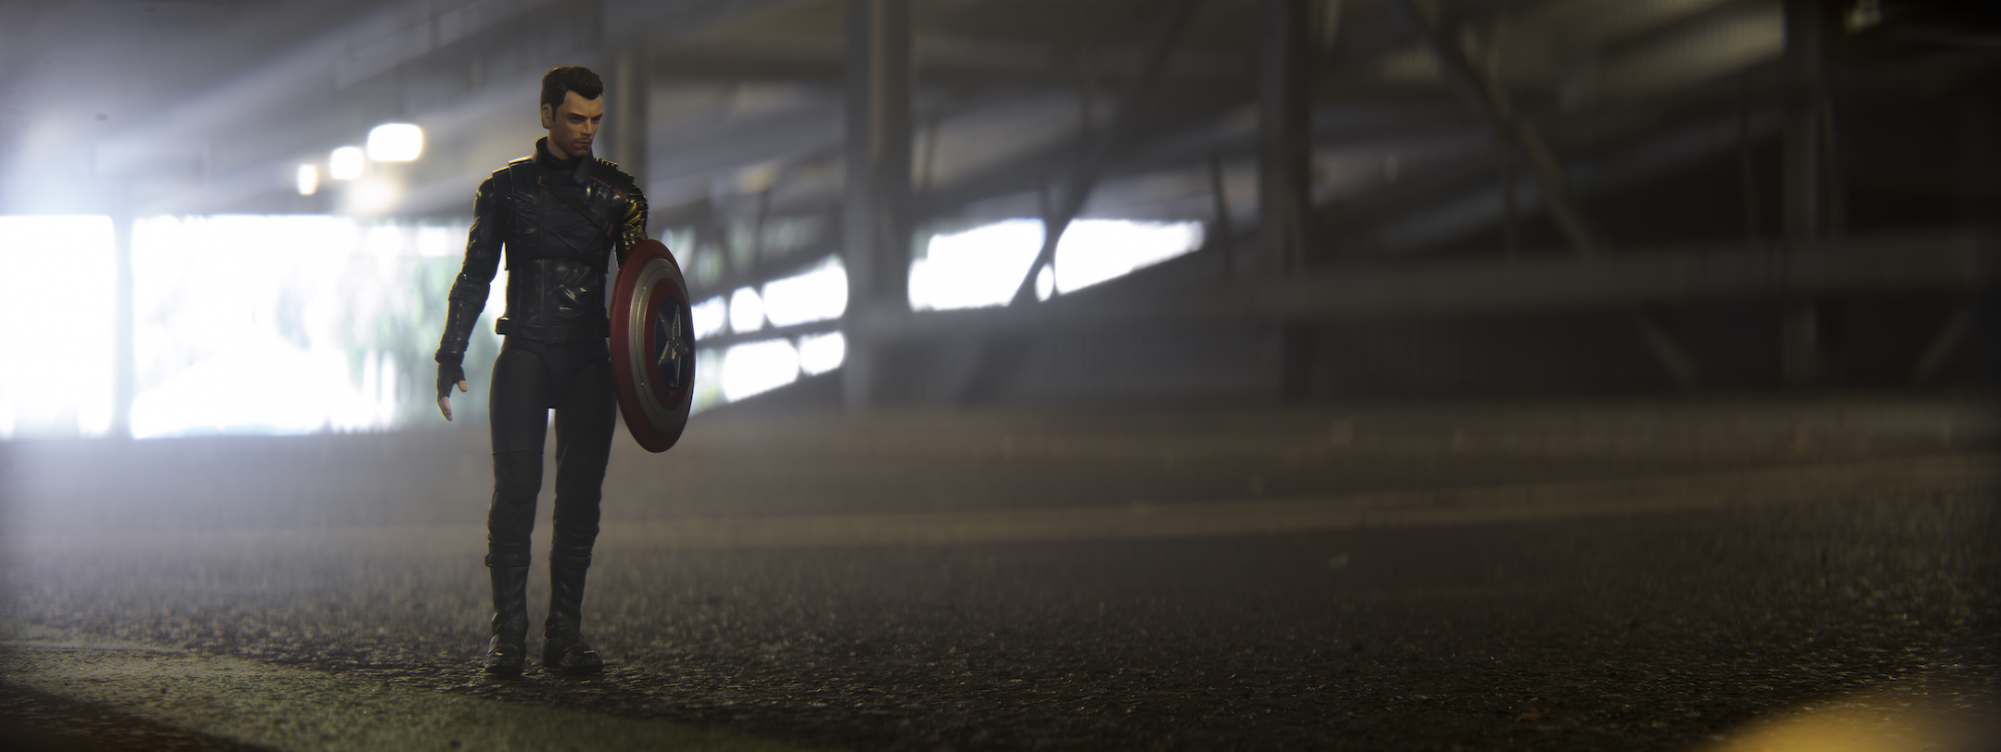
I don’t know if I am remembering it correctly, but I have a strong recollection that most of The Falcon and the Winter Soldier actually took place in disused warehouses. I don’t have many of those around where I live. But working in a hospital one thing I’ve got with an industrial feel, is lots and lots of car parks. They are literally everywhere. So after work the other week, being the cool guy I am, I hung around in the evening in the basement car park. It was fine, only some of my colleagues saw me.
As you can see when I found my location I immediately got to work, and forgot about my plan to take portrait shots. I just can’t help myself with taking ultra wide figure photos.


Back to the portraiture
So from the get go, I have to be clear my intention with taking these photos was not to have hugely detailed backgrounds. I was still aiming, as with the original digi-backdrops to have fairly shallow depths of field to isolate the figure. It might seem counter intuitive but hopefully with the shots below you’ll see what I was aiming for.
You’re part of my efforts to make amends
With this photo I wanted to use the pillar behind to create a bit of depth to the background. The darkness of the underground car park falls off to the left. While the vertical lines of the pillar appear to the right of Bucky due to the angle of the camera. I repeated the trick from before of having the light side of his face sit against the dark background, with the reverse on the other side.
As you can see the lighting, as with most of my photos it was all very basic. I had one light shining on the pillar to reflect and lighten it in the photo. I also had another light, not quite as bright, shining on Bucky to bring his front out of shadow. In real life his jacket is quite a bright blue, but in the camera it darkens down quite quickly and needs lightening. Finally the light on his face, cutting in from the left, catching his hairline and just reaching the features in the middle of his face. Again it doesn’t go full Rembrandt, but the highlight on his brow, nose and lips really help to define his face. I also really like the highlight on his cheekbone.
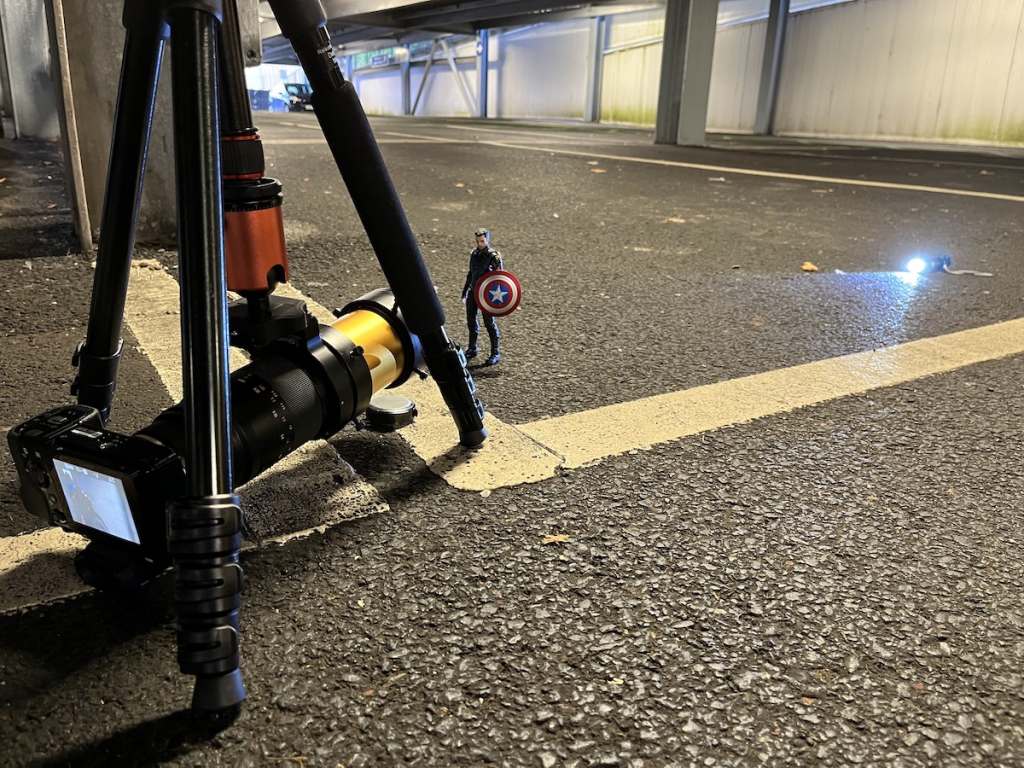
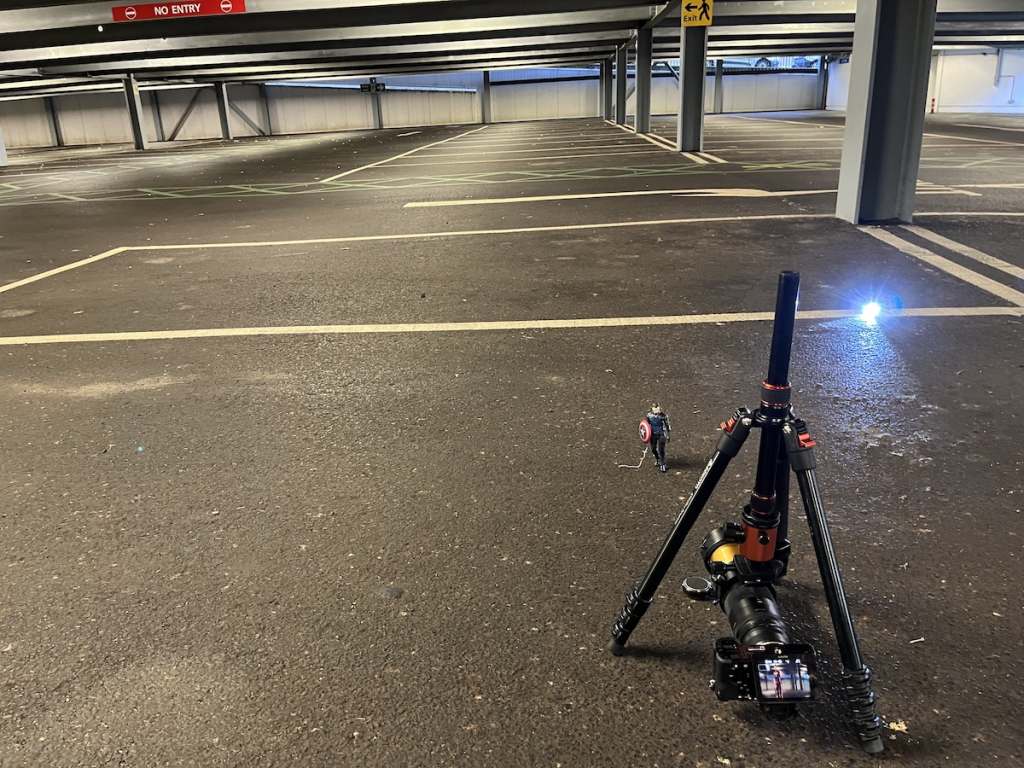
In the behind the scenes shot below you can also see I’ve flipped my tripod to get the camera as close to the ground as possible. I’ve always found it important to mimic larger subjects, you know when photographers take pictures of real people. By which I mean the camera needs to be level with the eye line of the figure. This stops the figure looking like a toy and sells the scale illusion better.

You’re doing the staring thing again
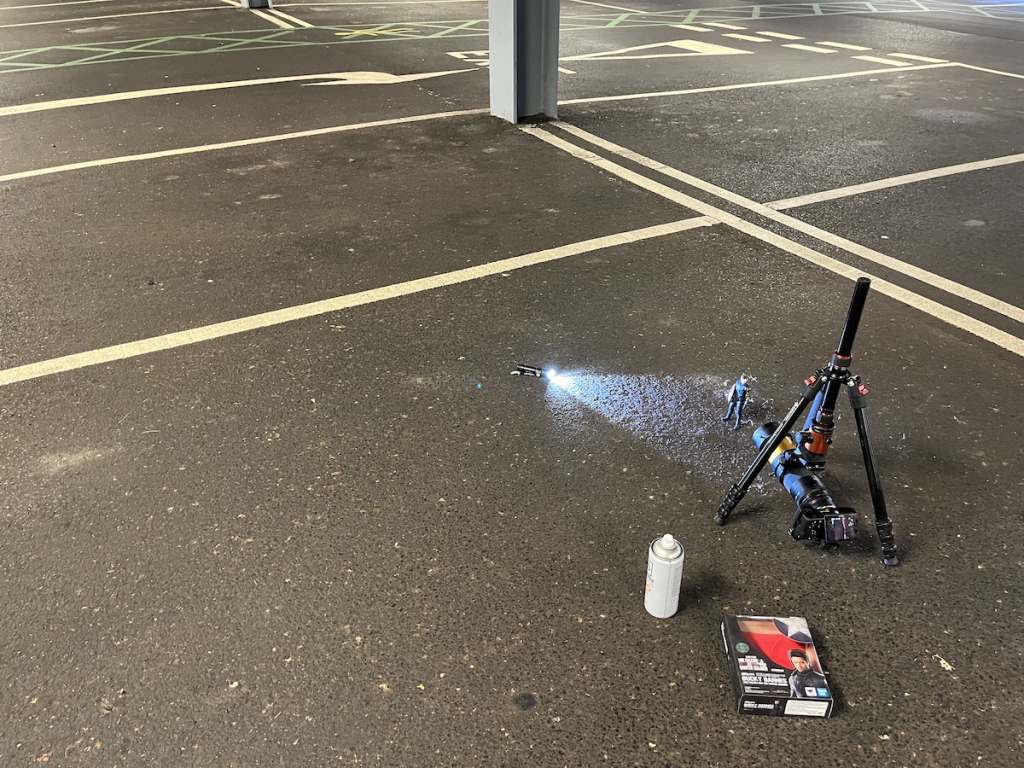
I took this shot because the various blue and yellow caught my eye. You can see it in the behind the scenes below. Where the daylight is coming through the structure of the car park to shine a cool light. And in comparison the artificial light of the car park itself is warmer and yellower in tone.
With the position of Bucky having him face away from the closest light sources he’s almost cast in silhouette. Because of the other surrounding lights he’s not fully in darkness and his features are still showing.
There was a lot of naturally occurring edge lighting to Bucky, but this was mostly the warmer light. I used one of my torches to spotlight him and give some cooler edge lights as well. Especially on the right side of his face as we see him. It’s a little thing, but I think this really helps balance the image with the warm and cool contrasting and complimenting one another again and again across the photo.
These is also enough definition in the background to create a feeling of the location he’s in. It isn’t specific but there is enough to anchor Bucky in reality.
What’s going on in that big cyborg brain of yours?
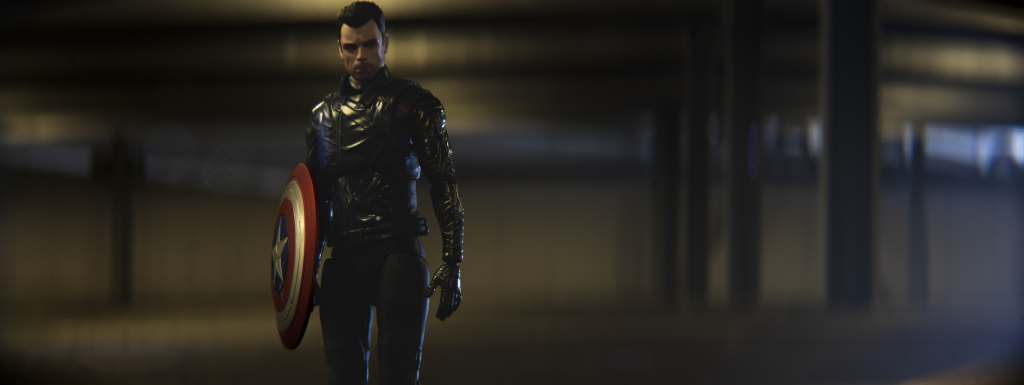
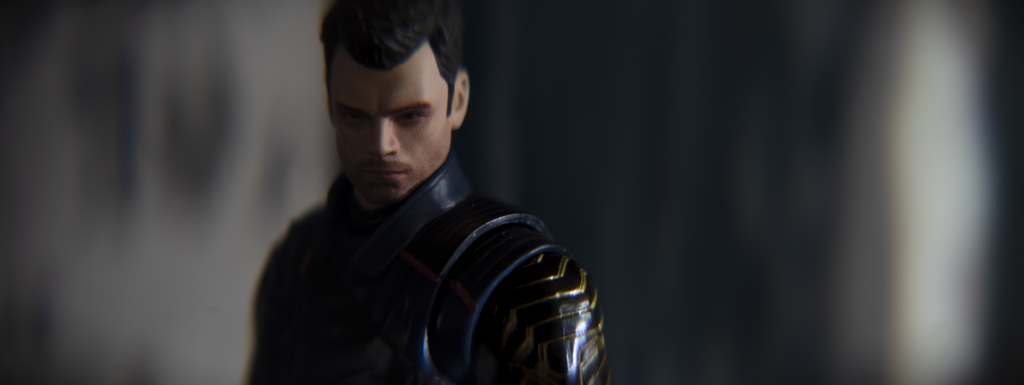
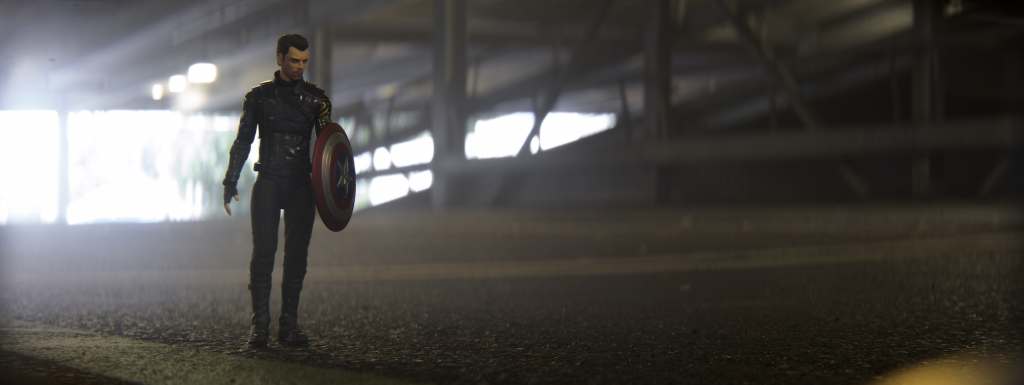
For this photo I turned around in the car park, shooting into the wider, open space. I wanted to go a little wider but still keep the portrait feel. I copied similar lighting techniques as before, combining the lighting of the location and using spot lights to give Bucky some of the cooler edge lighting that was not happening from the lighting in the car park.
This photo is all about the posing for me. Firstly I turned the shield to quite a tight angle, you can still see the star. But I wanted Bucky’s shape to repeat all the vertical pillars of the background. He needed to cut through the photo just like they did. Secondly I really like the head cocked to the side ever so slightly. It reminded me of the pose from Captain America when Iron Man arrives at the Hydra bunker in Civil War. It’s kind of inquisitive and questioning. And I like the tension it brings with Bucky looking into the camera.
I did have to wire Bucky up to get him to stand in a walking pose. I just had to clone it out with PhotoShop after. I like to give a bit of motion in most of my photos. It can give a sense of narrative, the figure’s either going somewhere or coming from something. In this case, and with the tilt of the head it all adds up for Bucky walking towards the camera and questioning whoever has our viewpoint. It makes the camera a character in the story the photo is telling.

Didn’t take much for him to fall back into form
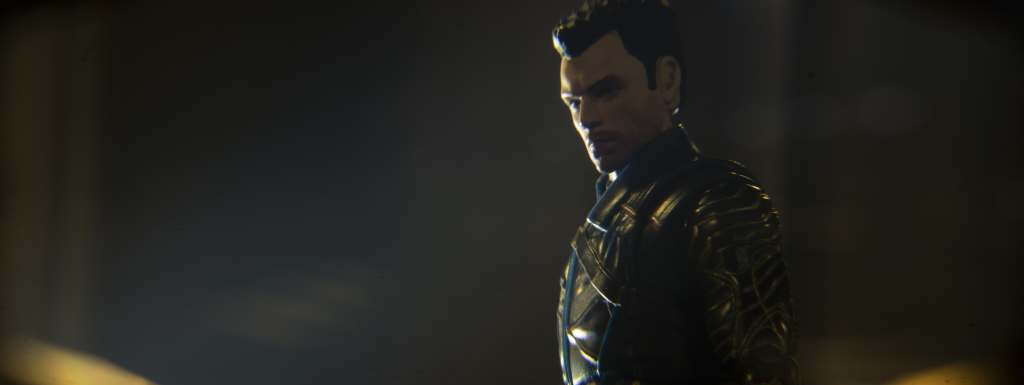
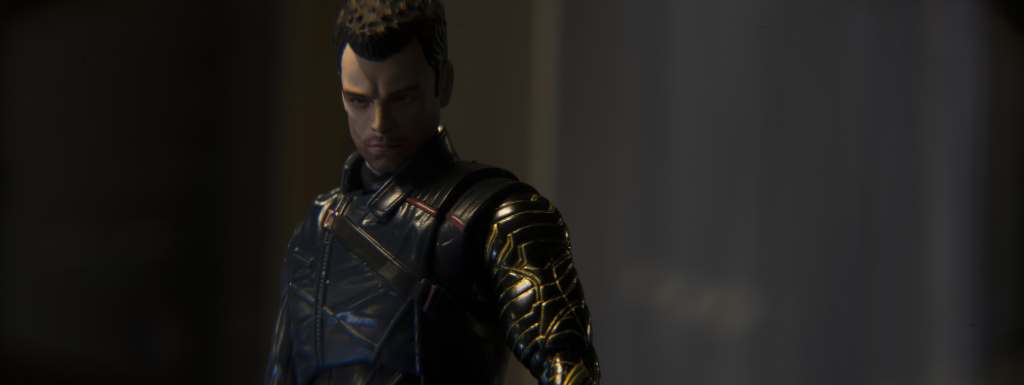
I wanted to go really strong with the edge light on this one. Bucky is turned so far away that very little of the light on his face can be seen. I actually picked the angle due to the face printing on the figure. With S.H. Figuarts figures you usually have multiple head or face sculpts. However sometimes they cut something of a corner and will give you two identical sculpts but with one having a bit of side eye. With this figure that is the case. Two identical faces, just one where he looks to the side.
After picking the pose it was about where to put the light. As with a lot of these Bucky photos I have split the face with the lighting. I think it plays into his character’s split persona. Portraying someone with a conflicting backstory. Obviously it is easy to project that with everything we know from the MCU already it must be said.
One thing with 6 inch or 1/12 figures I find is that the paint jobs on the human faces can be a little soft in the detail. I guess that comes with something being the size of a finger tip. What is normally very good though, especially with the import figures is always the sculpt itself. And usually I find some dramatic lighting is always good to bring that out in a photo. I think it’s why I’ve been so focused on the lighting of Bucky’s cheekbones, nose and forehead with in this series of photos. By highlighting these it defines the likeness of Sebastian Stan, where in flatter light it looks nothing like him.
When it comes to the background, I think this one is the least present in the photo, but it is still there. You can still see the pillars fading into the background. And importantly they are just a touch off alignment, an ever so slight dutch angle. With the lighting and the facial expression there is a sinisterness to the image. We know Bucky has something of a shady past and all the elements add up and lean into this.
Did any of this work?
Looking back at the photos I took for this post, I’m not sure the results made the point about having more depth with a real background in the clearest fashion. Their moody nature probably didn’t help with that.
Along with the third on location photo, with the wider composition, I actually think the photo of Raphael best shows the benefit of taking photos on location. With both of these you can see the softness of focus and the resulting bokeh changing as the elements of the scene get further from the camera. When it comes to a digital background I have just not found a way to achieve this. This may be because of my anamorphic lens and the oval bokeh making this more prominent. I’m not 100% sure, it just comes out being flatter. I need to go back to looking at some of the new shows and movies using the volume in their production and see if there is something different I can do. It’s not something I’m giving up on just yet. But I’ll be doing a lot of on location portraits going forward too.
On the other point I made right at the beginning. It’s not just the exciting locations that work out when it comes to toy photography. Sometimes the least obvious ones can bear fruit too. Maybe I’ll spend more time glamorous car parks in the future.

![AI is ruining toy photography [a personal viewpoint]](https://toyphotographers.com/wp-content/uploads/2026/03/Together-As-One-Ultra-Magnus-revealed-scaled-500x383.jpg)


Really neat to see your experimentation, Tom! I especially like how the backlighting from the flashlight outlines the figure against the darker background.
Thanks Teddi. It was very much experimenting once I was in the location. And when taking toy photos, always carry a flashlight or six