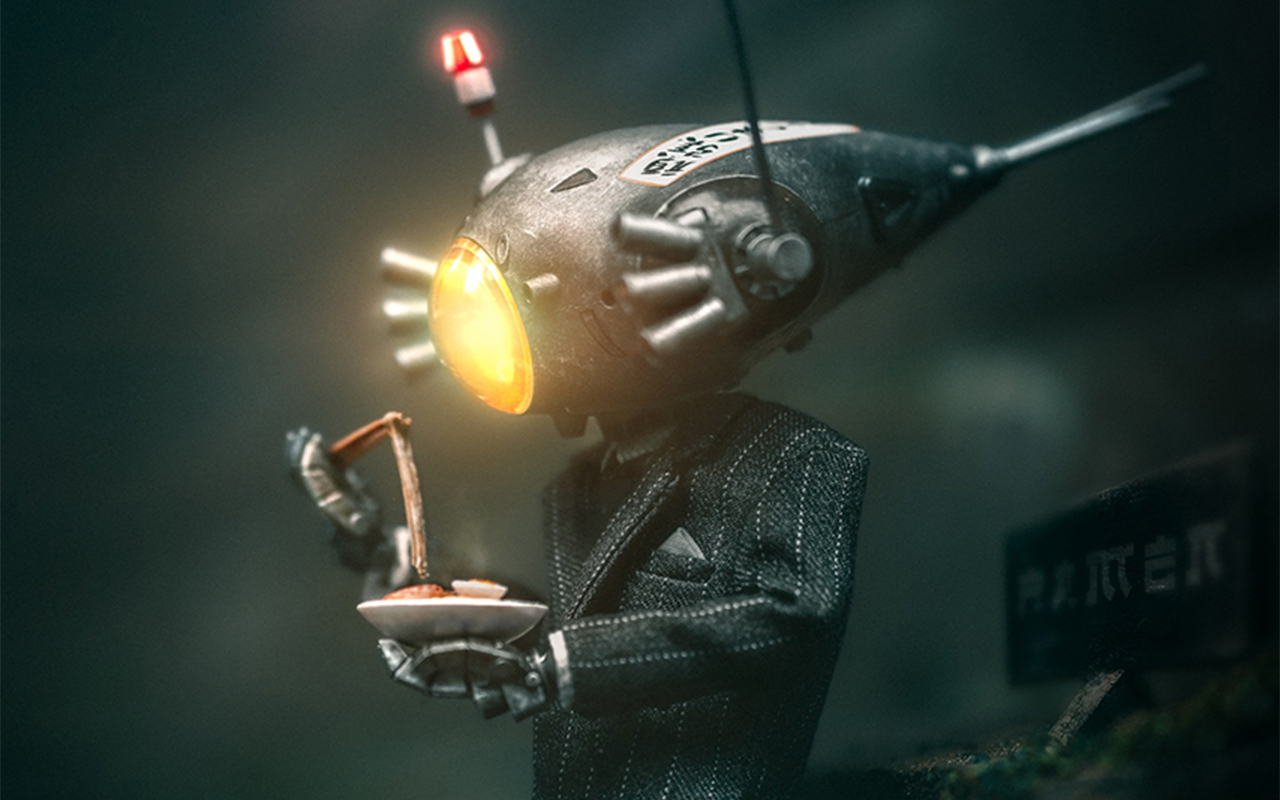
Sometimes it doesn’t take a lot of time to create an image. Often, 15 minutes and one action figure can be enough to take an idea into reality. Let me give you an example by breaking down my latest image.
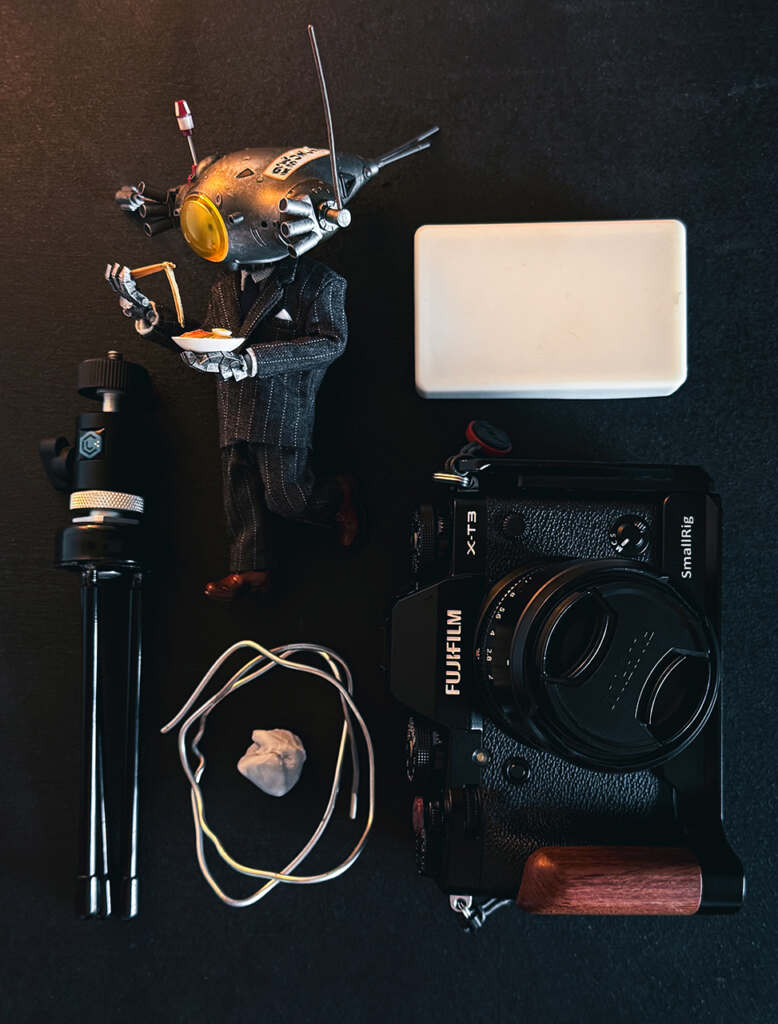
I’m a photographer who can be overwhelmed easily, so keeping my load out minimal is a high priority for me. To create the photo I have in mind I kept my packlist to only the essentials.
I always have an idea for a pose in mind which I then break it down into two categories: my primary idea and then secondary opportunities.
Primary shots are photos that I really want to achieve; they can be more than one and are the focus of a shoot. Secondary shots are the ones I’m having fun messing about with, in the moment, whilst exploring the location and winding down.
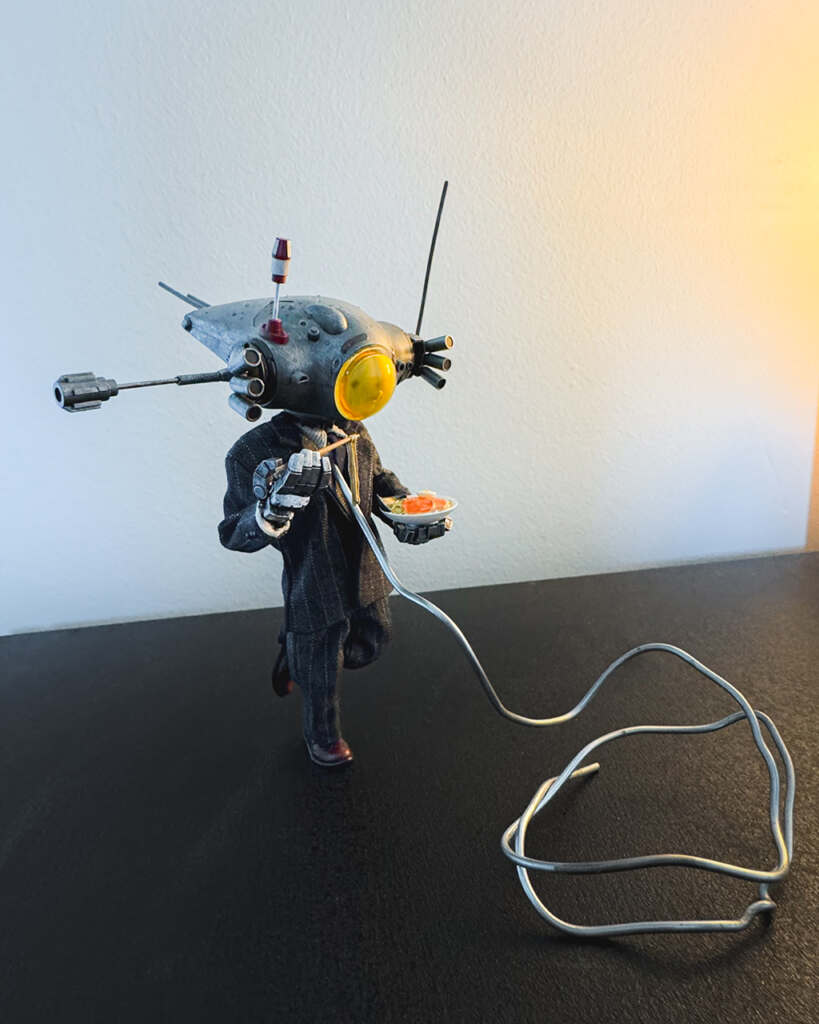
To help the primary shots success rate I always pre pose my figures before I head out. I try to see how stable they are at balancing and to see if I need to use a wire or some other aid. There is nothing worse than trying to pose on location, and getting frustrated because I can’t get the figure to balance right!
In this image, I used blu tack/sticky putty to hold the ramen bowl and chopsticks in place and as you can see in image ‘A’ I also needed to use wire. Then on location I need to find a suitable spot that compliments the pose. Once I have matched my figure to the location I’m good to go!
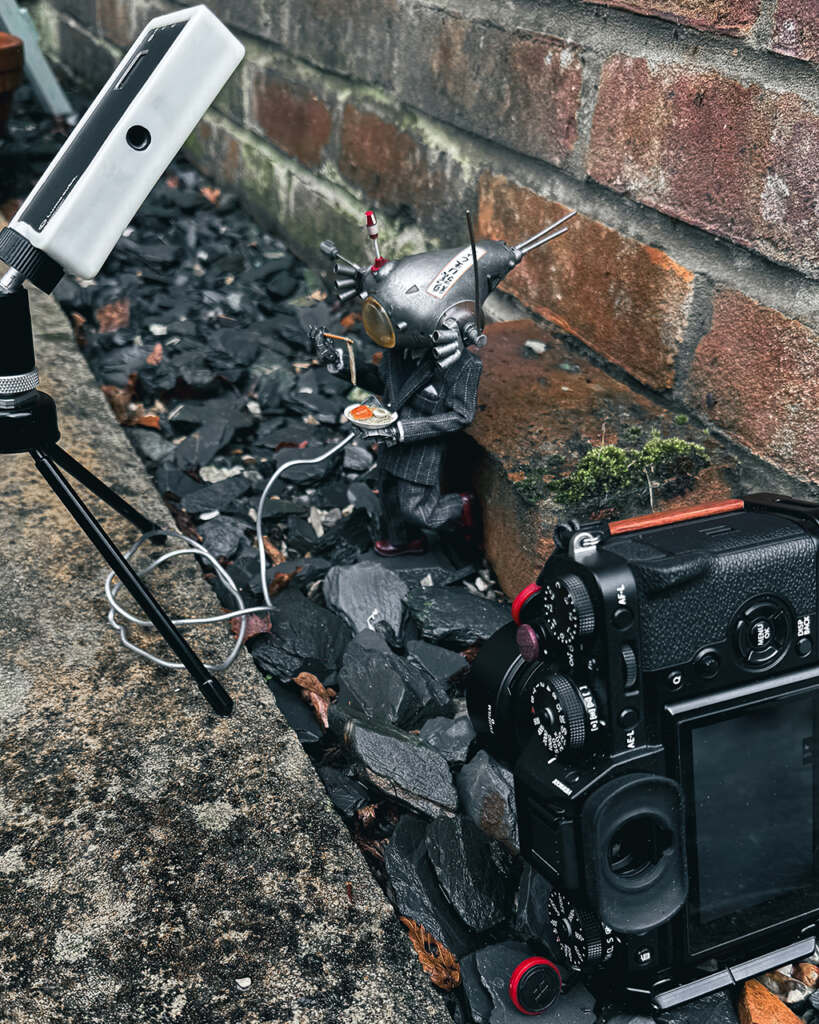
I wanted to use this wall to support my figure but due to his rather large head I needed to set him off a little so I used a brick for this as you can see in image ‘B’. Pre posing my figure allowed me to dip in, set it up and capture my image nice and quick. Perfect for my busy schedule!
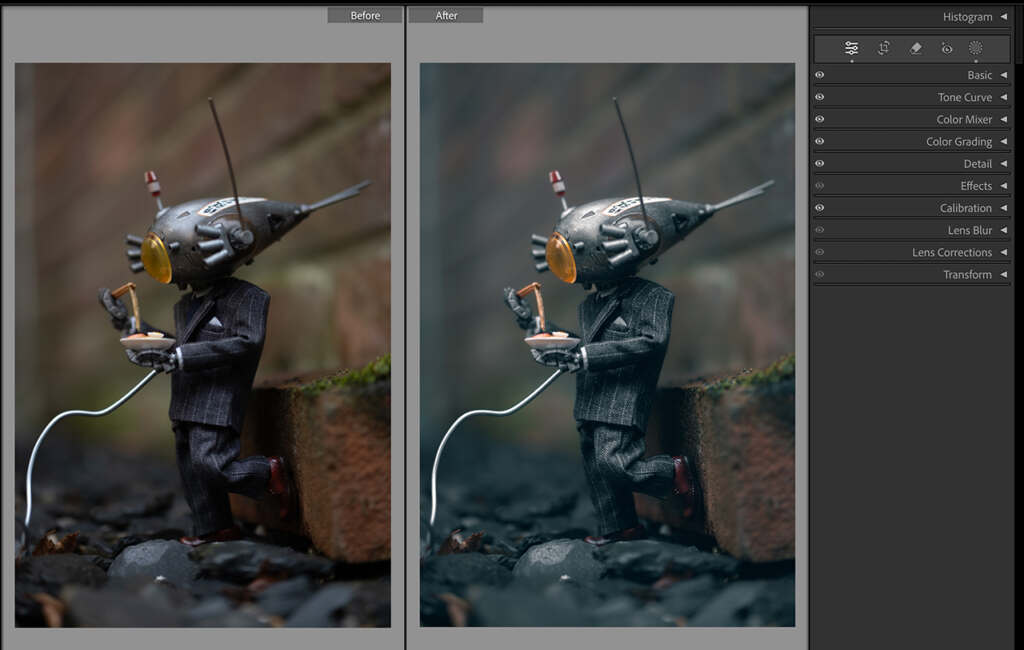
Once I’m happy I’ve taken enough photos and captured an angle I like, it’s time to import it into Lightroom and give my photo a little sprinkle of life. I’ll work my way through the editing panel making adjustments to my image that I’m proud to share.
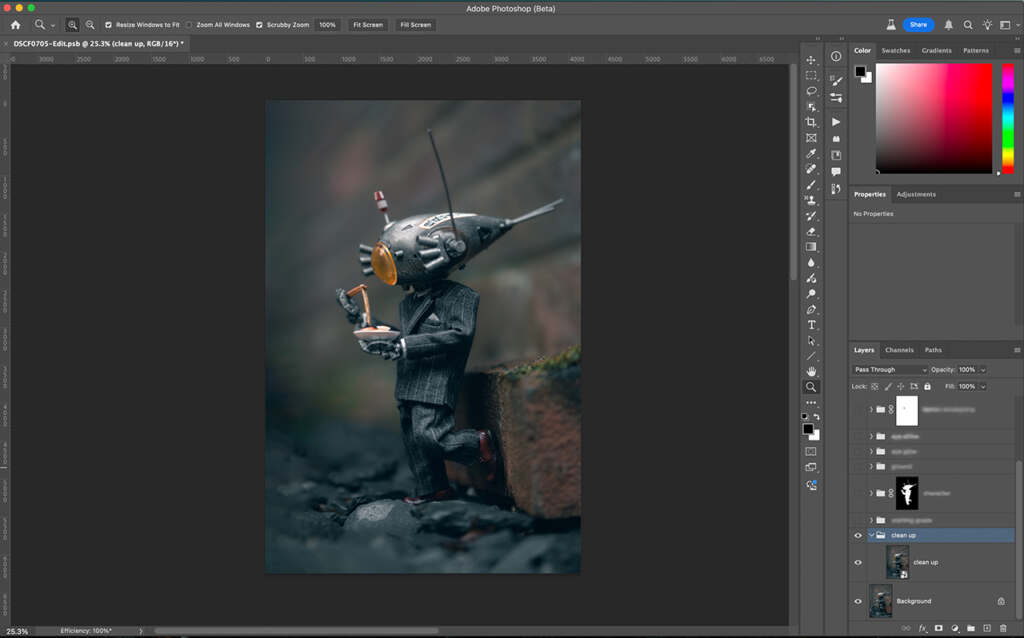
After I’m happy I then send it over to photoshop to clean up the image and remove the wire and the things I don’t want in the scene, such as debris and distractions. While you can do this in Lightroom, I personally prefer using Photoshop as I find to have a lot more control here.
There you have it…a quick 15 minute shoot and a brief rundown start to finish.
Final thoughts
A full time job can leave very little time to get out and just submerge myself in big ideas, and longform photo ops. That doesn’t mean I don’t enjoy getting out to create something though. I’ve found that with an idea and with a little preparation I can make something happen in very little time!
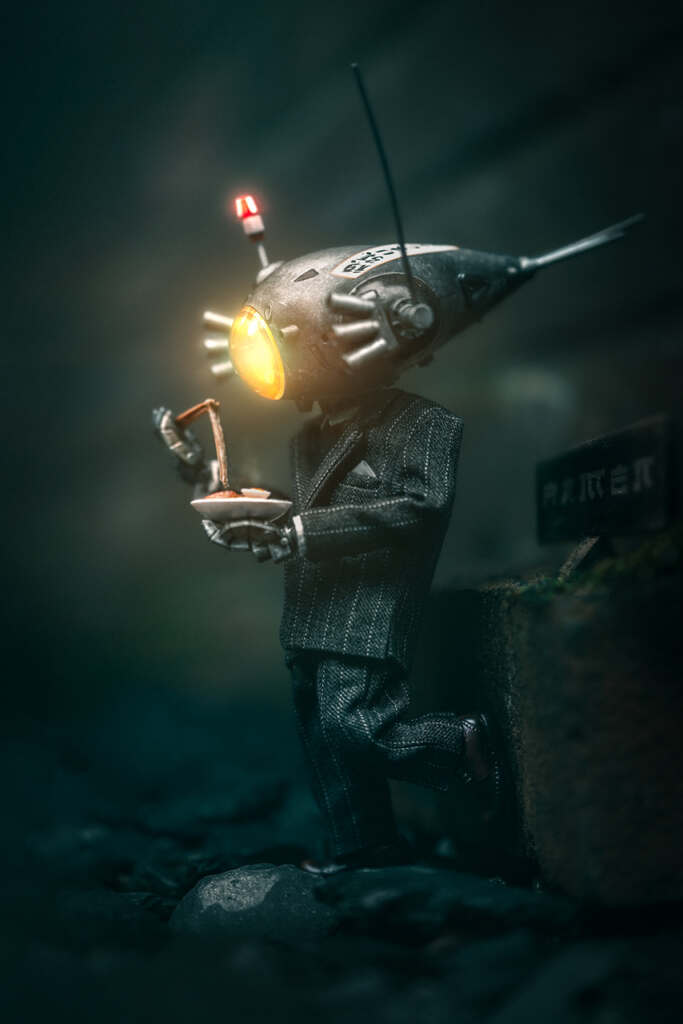
This final shot from start to finish took me about an hour… I know, I know, the title said 15 minutes, it did take me 15 minutes for the most part, from the pre pose, the shoot, and the edit to a point that I am happy with! I like exploring ideas and seeing where it takes me. It’s through this process that I find I learn and develop new skills, such as making the light on his head glow.
While my final image emerged after another 45 mins of post production, if time really is a struggle I am able to break the process up into two steps if I need to. I know I’m not the only one short on time to create so I hope that by showing you how simple ideas can be realized quickly, I’ve inspired and motivated you to go out and photograph something no matter what your time constraints are!
Bonus – Make it glow!
There are hundreds of methods available, but one I always find myself using is the following:
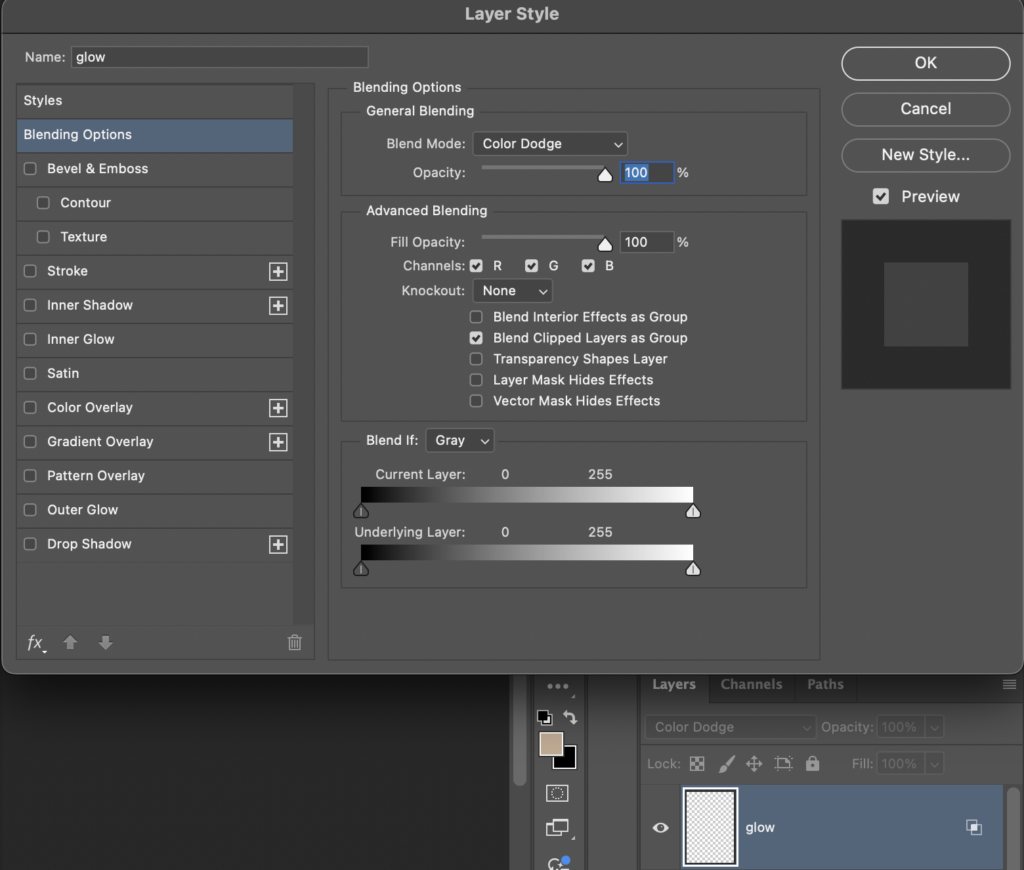
begin by opening Photoshop. Then create a new layer and rename it ‘Glow’. After this change the blend mode of the layer to ‘color dodge’. I then double click the layer, to open the layer style window. Here you will see many options, but I am only interested in the one under ‘Advanced Blending’ that says ‘Transparency Shapes Layer’ making sure this is NOT selected, then click ‘ok’.
Now it’s time to select the brush tool. I select a soft round brush with a size appropriate to the source of light with 100% opacity and lower the flow to around 6% making sure white is selected. Now start painting where there is light. I prefer using many brush sizes starting with an oversize brush adding a little haze, then narrowing the size down and applying the effect further towards the center. The most important thing is to have fun, play and explore what’s happening in the scene. You can always dial back the opacity and/or fill if you find it too harsh so don’t panic, failing that being on a non destructive layer you can always delete it and start again!
Remember less is more and you can always add more color dodge layers with different colours and repeat the steps to increase the intensity.
~Andy
You can find more of Andy’s work on Instagram at @clarkenwellsdk. Please check out his work and give him a follow.


Very helpful breakdown of how you work out “getting the shot”. Thank you!
Well done, and great reminder that a little creativity doesn’t need to take a lot of time!
Thank you, Andy! There are some very useful tips.