Practical effects are a fun part of toy photography. Let me back up… toy photography in general is fun (otherwise why the heck would we do it?), but adding practical effects really gets my fun-o-meter spiking. One of the most common of these effects is moving sand and dirt around to create a sense of motion in the photo.
There are several ways to move dirt around, and I have used a bunch of them over the years. One is to simply pick up some dirt and throw it (my kids often get pressed into service for this one). Another is using a can of compressed air to blow the dirt around.
Both of these options have downsides. For one, both are hard to travel with, especially by plane (packing compressed air seems to violate the FAA rules on flying with compressed gasses, near as I can tell, and kids can violate my patience quota). Throwing dirt and taking a photo at the same time requires a lot of coordination. Kids require care and feeding. Lots of problems!
Pushing sand
As I write this I am on a much-needed family vacation (COVID is a harsh mistress, y’all) at the beach, which leads to a lot of shots using sand, and pushing sand around. I have another solution that can be used instead of the suggestions above:
The BAAM! BAAMHP Drain Cleaner.
The BAAMHP is simply an air pump with a trigger. It is meant to clean out drains, but what fun is using products for their intended purpose? The salient abuse of intended design is this: It can also be used to push dirt and sand around on command.
The way it works is simple. You pump it a few times to load it with air pressure—the more pumps, the faster the air comes out—then you pull the trigger to release it. If you release the air at the same time your camera snaps, photo magic can happen.
I like magic.
Setting up the shot
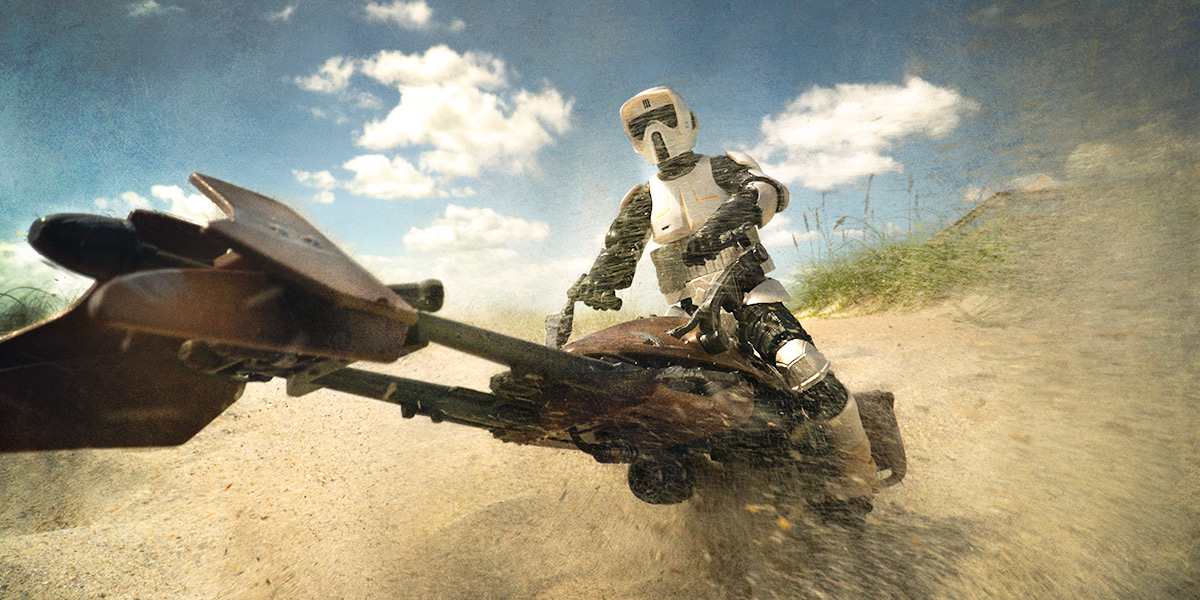
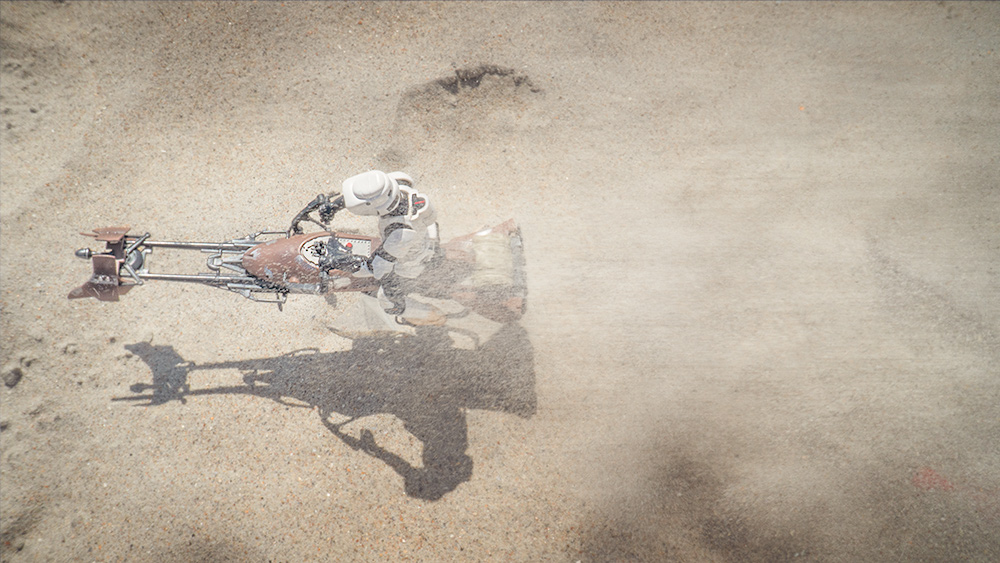
I had an idea for a shot where a speeder bike from Star Wars would be zipping along the beach, kicking up sand as it went. The framing would be from high above.
To get that shot, I set things up like this:
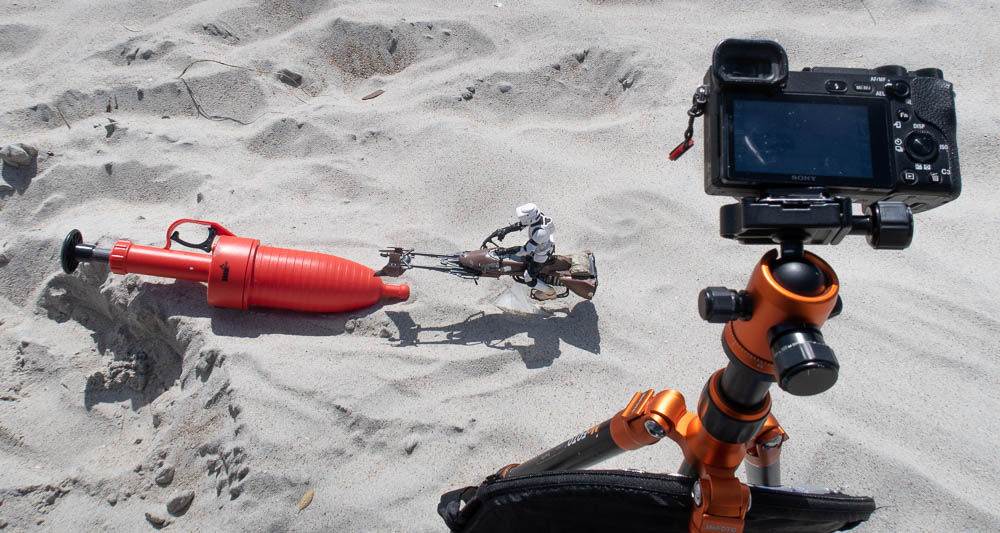
I placed the bike on some fresh sand, untouched by feet of man or beast. I then positioned the camera on a tripod over the figure, manually focused it, and set the shutter to burst mode. This way I didn’t have to worry about exposure or timing. When it was time to move sand, I could just hold down the shutter and get 11 frames per second of whatever happened next.
I like to capture the entire event in multiple frames, not just the one shot. This way I don’t have to worry about super-human reflexes to hit the shutter trigger at the same as the BAAM! trigger. It takes a lot of the guesswork away.
It is also helpful to have a remote trigger for the camera, to both reduce camera shake, and to give you a bit more range. Unless you have an assistant (mine were in the beach house doing remote school), you need to trigger both things at the same time, and a remote trigger gives your arms an extra foot or two of range, which can be beneficial.
My remote was at home, and I was not, so I was doing this all literally within arm’s reach.
Action!
With the camera ready to go, we can concentrate on triggering the BAAM! and watching sand move around the frame. To help things, I often pile a bit of extra material (in this case sand, but in other cases leaf litter or whatever ground material makes sense for the scene). This gives the blowing air more stuff to move around.
Then I trigger the camera, and then trigger the BAAM!. It looks like this:
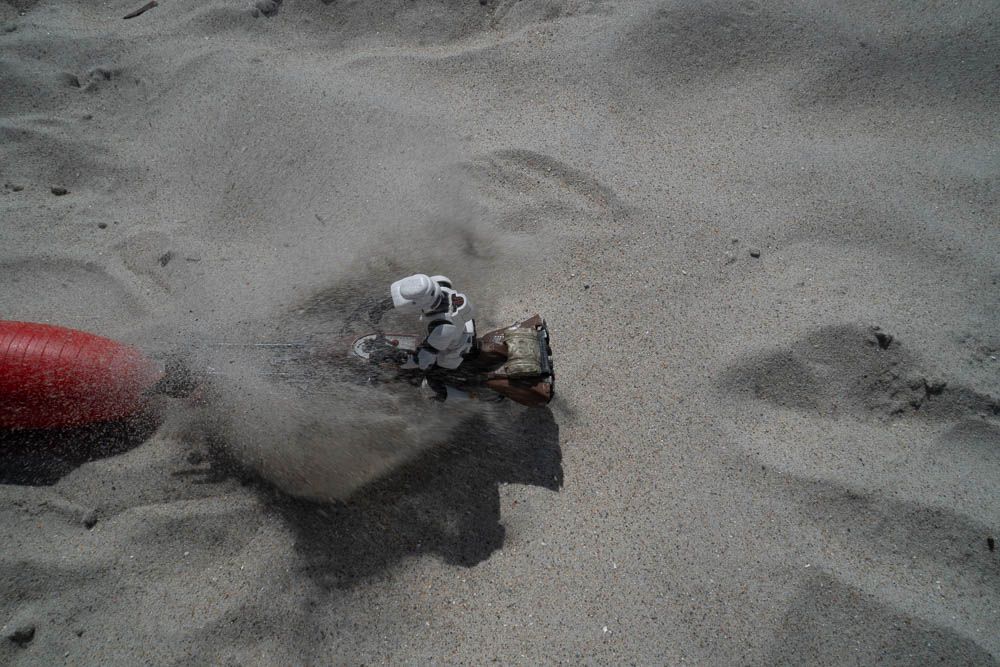
It turns out the sand is heavier than I wanted, so it didn’t flow in the air as I expected. I really wanted to blow the sand, but capture it as it went behind the bike, to give the impression of the bike kicking up sand (with its anti-gravity repulsers, or however speeder bikes work). Unfortunately, the sand was too heavy, so I reversed the BAAM! and pushed sand from behind.
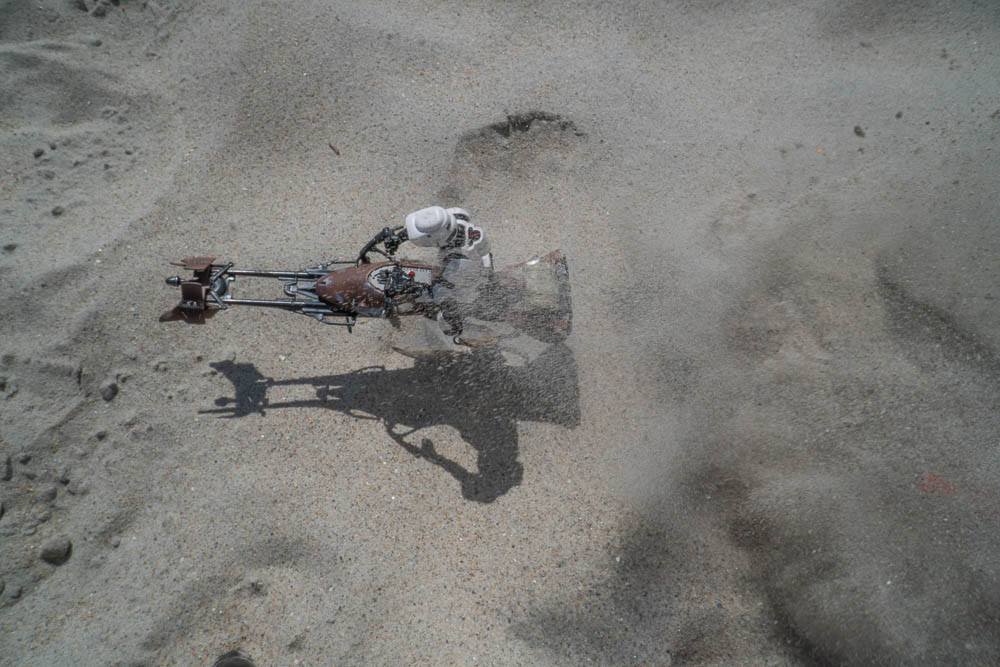
This resulted in a more satisfying look.
How the stuff you want to blow around reacts to the puff of air is going to change dramatically, so there is a bit of trial and error involved to get the perfect shot.
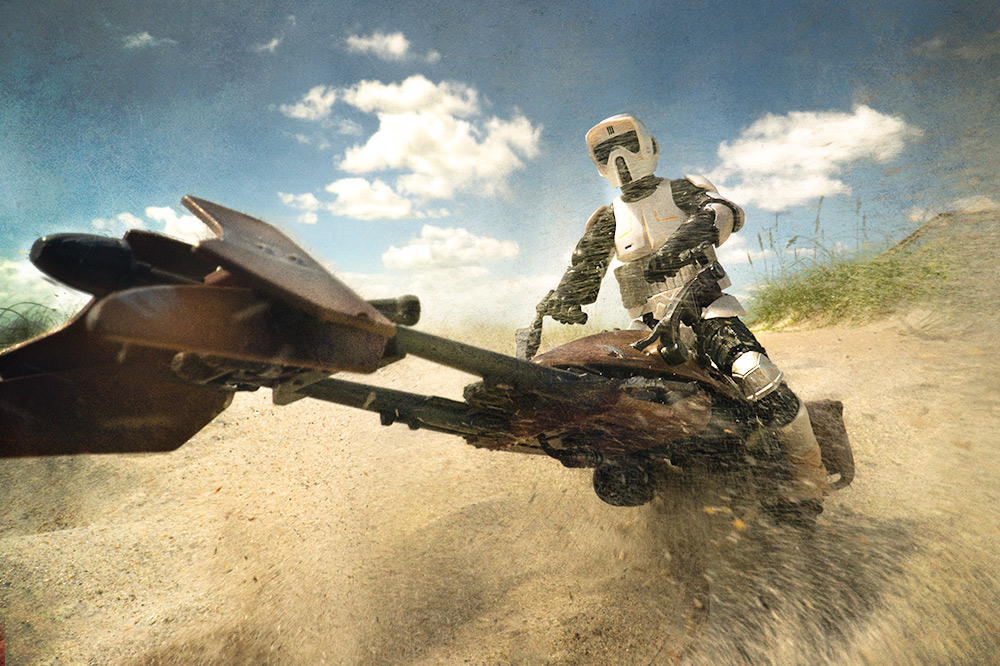
I gave this a few runs to ensure I had everything I needed, by repeating the process over and over, moving the BAAM! around slightly, and crossing my fingers. There is always a bit of luck involved with these things, and they require an extra dose of patience. However I got a few frames that I was able to combine into the shot I had originally envisioned.
Changing perspective
Sand movement doesn’t just have to be from above. I also had a shot with the camera at ground height and the speeder bike flying over it. This was the setup:
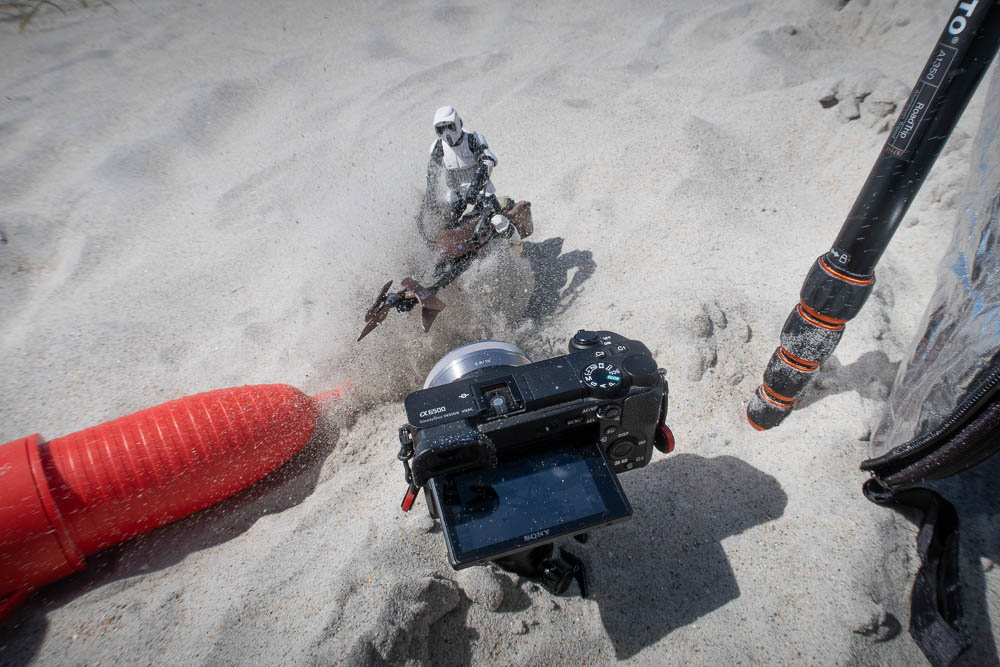
The setup is pretty much identical, except I moved the camera to a Platypod so it sits low to the ground. Otherwise everything was the same and, once again, I just aimed the BAAM! and fired the shutter to capture the shot.
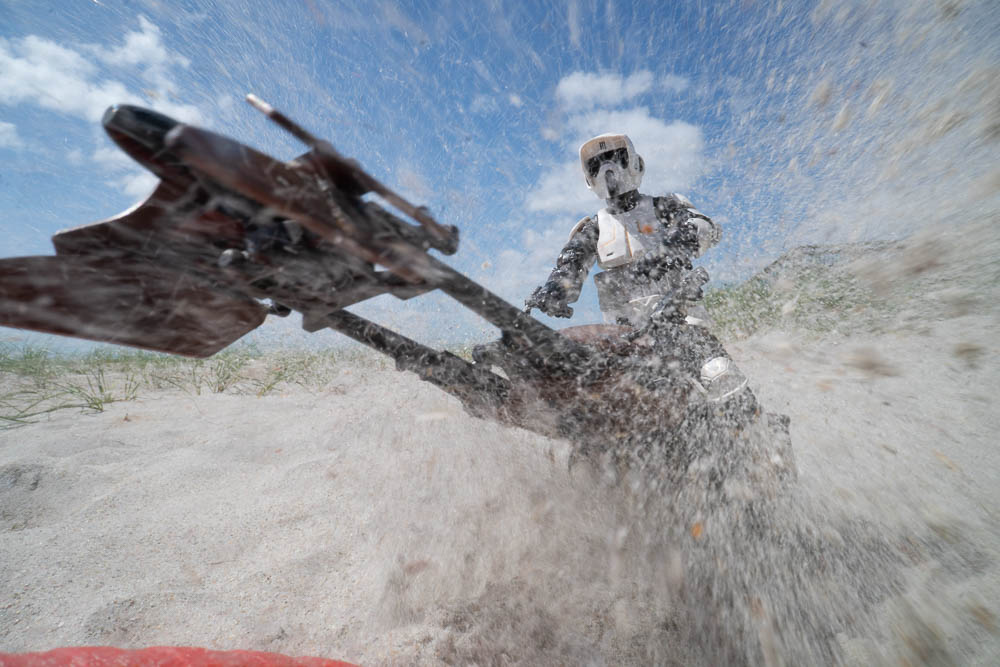
A bit of trial and error later, and I got this shot in the can.
Final thoughts
The BAAM! doesn’t have to be limited to sand. It works with dirt, leaf litter, powder, snow or anything else that comprises small-ish particles. Heck, it could also be used to push water around (but I didn’t have any, except for the big angry pool to my left that some call the Atlantic).
Practical effects are a fun way to add some movement to your toy photos, and whether you use a BAAM!, compressed air or your bare hands to throw stuff around, I highly recommend you give it a try for your next photo.
[dave]
Want more toy photography goodness? Subscribe to our weekly email round up so that you never miss a post. You can also listen to episodes of the podcast! You can follow my work at @therealstudiodave


I don’t like sand. It’s coarse, and rough, and irritating, and it gets everywhere 🙂
I kinda agree with you, but it is necessary sometimes to get the right shot!
It’s actually just a terrible Star Wars quote, but sand does scare me when it comes to camera gear. You are a braver man than I.
Oh. I recognize it now. You disguised it by saying it like someone who doesn’t have negative acting talent 🙂
Excellent work. I am a faithful supporter of Spain. There are not many people here who dedicate themselves to this type of photography. I’m trying to learn my best to post my first photo in social media and try not look ridiculous :). Thank you all for your work and for sharing your experiences! Alex San Martiín
Thanks Alejandro! Good luck with your first social media post! I’m sure you will do great!
How do you not get sand in the camera? Is there some sort of cover on it?
No cover. I just brush the sand off with a soft brush when I am done. Cameras are a) replaceable, and b) can take a bit of grit if they are at all weatherized.