I’ve seen fellow toy photographers on Instagram posting their BTS (behind the scenes) shots, with their indoor lighting setups. I had a couple of lights I could use and figured, “That doesn’t look too hard.”
Boy, was I wrong.
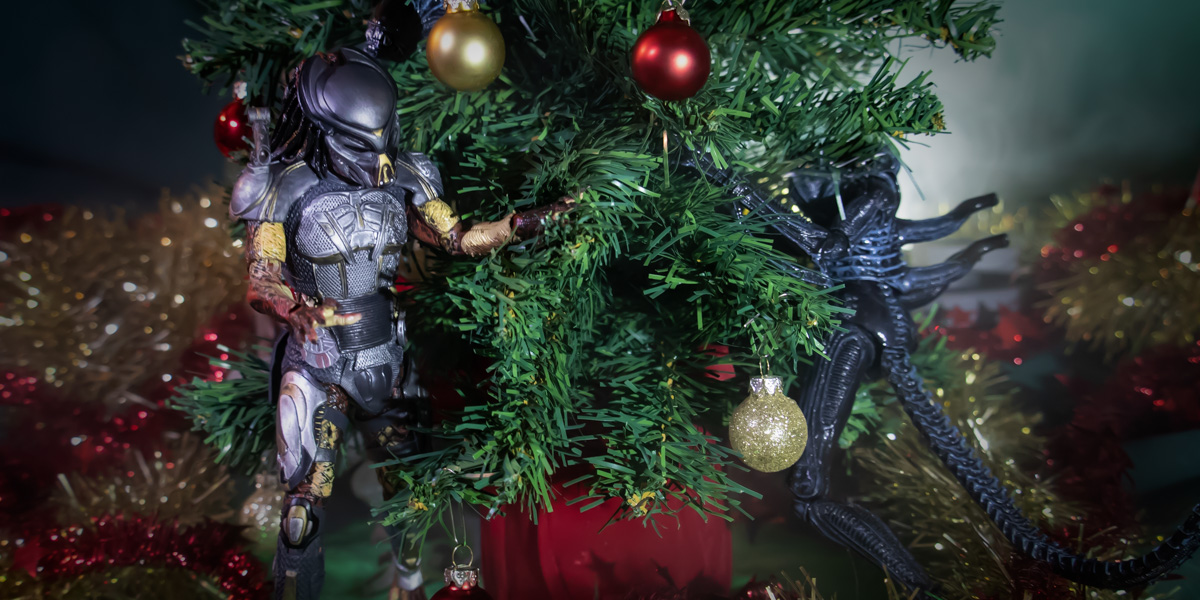
I wanted to quickly set up and take some pictures that I could use as Christmas cards. The only thing that went “quickly” was the discovery that there were more factors than I expected. Christmas decorations by nature are visually busy, and that was probably my first mistake. But let’s set that aside and focus on the indoor lighting aspect of things.

First, everything was too dark.
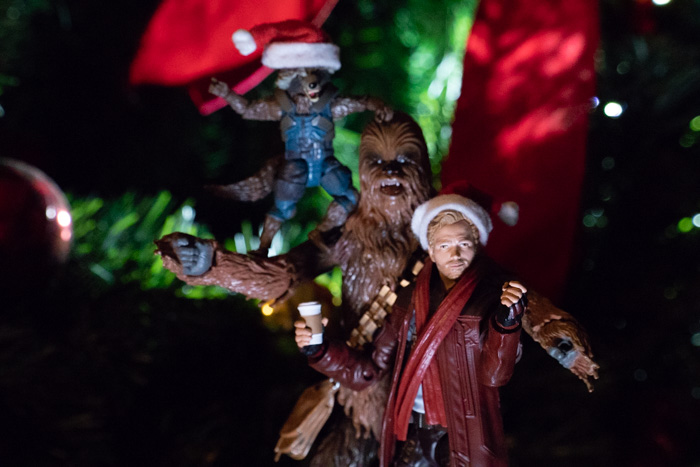
Then Star-Lord’s face was too bright.
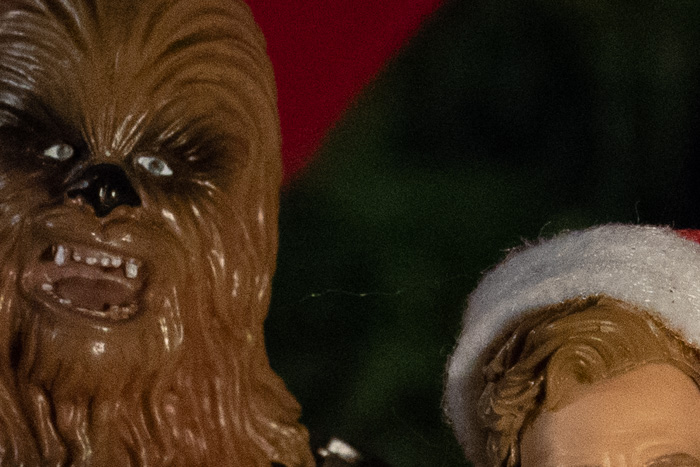
Ugh. Look at that grainy texture! Not what I was going for.
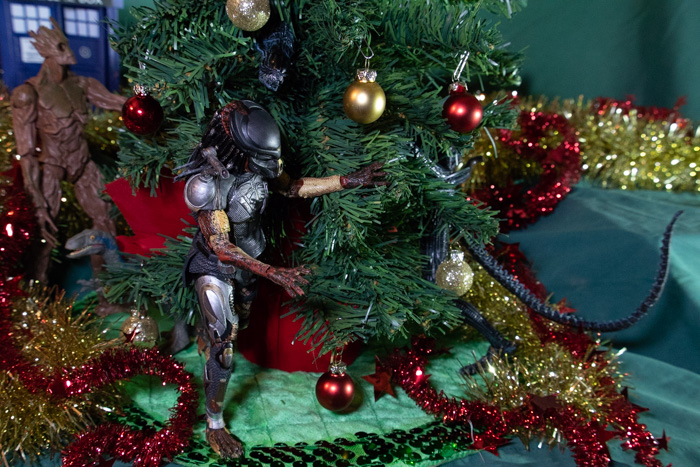
And this setup (besides being WAY too busy) was just flat.
I’m Not Giving Up on Indoor Lighting
Maybe it’s not “too hard”, but my expectation that I could just set up backdrop and throw down a couple of small lights and the photos would be great was a mistake. Maybe it is easy, but I’m pretty sure I’m missing some basic information that will require some experimenting to discover.
OR I COULD JUST ASK MY FRIENDS.
I see great indoor photos from so many of you, and even if you think you aren’t doing anything special, I’d really love to hear more about your indoor lighting setup. What kind of camera do you have? What settings do you use? (Aperture priority? F-stop? Macro lens?) How many light sources? How much difference does diffusion make? Is it important to have the area around the figures protected from ambient window or indoor lamp light, or how do you leverage that?
We all learn what works and what doesn’t and then it becomes instinct or habit. I want to draw that data out of your brains! What habits do you have? Maybe you know better than to put a figure with a bright face (Star-Lord) together with a figure with a dark face (Chewbacca), because you know that’s a recipe for frustration. Or maybe you know a trick that makes it work. Maybe you always put your figures XX inches from the background, put your camera XX feet away from the scene and then zoom in to achieve the proper amount of background blur.
I’m not generally one to listen to podcasts (sorry!), so I haven’t listened to it, but I know the Toy Photographers podcast addressed lighting with Shelly, Brett and Sunny Ang (@zekezachzoom) back in September. Anna (@fourbrickstall) also did a great post about lighting as it relates to LEGO minifigures, which is very helpful.
Please, Please Share What You Know! This Lighting N00b (and others like me) Need You!
I realize that what works for you may not work for everyone, because we all have different tools and environments. What works for a phone camera is often different from what works for a Canon 80D with a macro filter on it (that’s what I’m using for these shots). But if you have a chance, please drop a comment and share a tip or two about what works for you.
Maybe it will help someone else!


My indoor shots have all been taken with a little set. A single 3 by 3 (foot) lightbox is then held over the whole thing. It gives very even and clean light.
That sounds cool! What kind of lightbox? I’ve seen some on Amazon that are for product photography (usually smaller, like 12″-16″ square), and they are “portable photo studio”. Is it that sort of thing? Does it have a built-in light?
It’s actually a thing my uncle made. It has wood sides with a light inside and a semi-translucent white cover.
Cool! Home-baked lightbox, love it!
What type of lights did you use for these shots? Also what camera settings did you use?
For me there are two things – one, diffuse the light by using a diffusing panel (special material) or some tissue paper. The larger the surface of the panel/tissue, the softer the light. Also the closer you are to the toys the softer the light.
You did pick a very hard subject there. I would suggest starting simpler. Pick one toy, and get a plain background. Get one light, preferably a bright one (looks like your lights are not strong enough here). Then play with the distance from light to subject, and the angles of the lights. Start with one light. There is a saying “If you think you need two lights, use one light. If you think you need 3 lights, use one light”.
Either way, starting with one light makes it easier to see what that one light is doing, so when you add more lights (which, truth me told, I do a lot) you have a better idea of what each one is doing.
I try to get my lights so I can take the shot between 1/60 and 1/400, depending on how sharp I need movement -for a static shot like this and a camera on a tripod, 1/60 is more than enough.
The noise is likely your ISO is too high, or your exposure is too long, and you don’t have long exposure noise reduction turned on. The correct ISO depends entirely on your camera, so you’ll have to experiment. Note that sharpening, or the clarity slider in Lightroom can also add noise to an image.
You can use long exposure to overcome a dimmer light, but there are some caveats. One the ambient light from the background will become stronger. Second, motion is an issue. If I need to do long exposure (> 1/60) I ensure my camera is locked down on a tripod. I also turn off motion blur reduction. Motion blue reduction works great for handheld, but the camera is always trying to stabilize the lens, so it actually introduces motion blur if the camera is steady.
As far as ambient vs artificial light, it really depends on the situation. One trick is that to cut down glare is to make the ratio of ambient vs artificial light more even.
Sometimes its hard to get everything exposed correctly. Having a larger light surface (using the tissue method, or investing in an actual soft box) can help. Using white paper, or other reflectors to bounce light can also help (those lightboxes are really just a 360 degree reflector)
Lots to learn! fun journey – congrats on starting down that road. If you have more questions, feel free to ask.
So many great tips, Dave, thank you! Honestly, I don’t remember what camera settings I was using, I tried a bunch of combinations. I think I’m in Aperture priority mode most of the time, and just messing with the F-stop numbers (if I’m even using those terms correctly) and the exposure dial.
My lights are (mostly ghetto) odds and ends. Two battery-operated mini worklights with fold-out stands that we got for $15 each at Home Depot. One or two rechargeable VidPro LED-230 photography lights. Various flashlights and clip-on lights at different angles as rim light or to spotlight a dark face. (Not all these were in action for the shots I took for this post, but those are usually what I have on hand at the moment.) We have some diffuser/reflectors but I keep forgetting to pull them out and use them.
Again, thanks for all the tips — I’m taking them all to heart and will experiment with them! I especially like the idea of starting more simply and taking the time to get to know my camera in the indoor setting. I’m so much more familiar with making it work outdoors, and it was a real stumbling block to discover that most of that didn’t work once I took the photo shoot inside. Like learning my camera all over again.
Oh, while I think about it – that macro filter? Don’t use it. You don’t need it for 6″ figures, and its likely to distort the light going into the lens.
I’ll keep that in mind and try some shots without it. I started using it because when I first started using this camera, I had a heck of a time getting it to focus on the figs unless I was really far away and zooming in. As someone who also photographs LEGO, it was annoying to have to set things up and then move so far away to take the shot.
I support Zee and Dave’s comments regarding indirect light. Either through diffusion of the light source or reflection. If you can drag the backgound closer to a window with indirect daylight (overcast days are great) that is also a great light source (see Dave’s comment on ambient light).
With the flat light problem, try moving your light source more to the side. That way shadows give your subjects a 3D look. You can always bounce a bit of light back into the shadows with a reflector to maintain detail in them.
If you work with subjects with contrast you can generally bring up the shadows in post processing. Be careful how you make the original exposure as you can bring up colour noise with the shadows. Try bracketing one stop either side of the camera’s exposure and have a play in PP. Also, do not ‘overcook’ any HDR software filters if you use them. I find a less-is-more approach to save the image from looking fake.
Good luck.
Great ideas, Tony, thank you! I especially want to remember the tip about reflecting a little light back into the shadows that are created by a light to the side. That sounds like it would work really well.
Hi Teddi, good questions you’re asking and great tips and suggestions given above by our friends. I might just give my observations on the images above and share what I’ve experimented with what works for me.
I don’t know what your lighting setup was for this shoot but I’m guessing the light source was mainly coming from the front of the figures and not diffused which can give a harsher and flatter look. The suggestion about diffusing the light source and placing it to the side works nicely in given definition to the face, allowing the shadows around the features to be visible. Once happy with the exposure, you can also experiment moving the light source (still at the side) slightly forwards or backwards. (Personally, I like having the cheekbone on the unlit part of the face visible.) I would highly recommend reading books or watching YouTube videos on portraiture lighting as different lighting angles give different moods for your desired image. Aperture: Rocket looks out of focus to me and increasing your aperture number will help keep him sharp.
What works for me as follows:
Lights: Xiao Mi LED bulb (colour changing wifi control,) LitraTorch (adjustable brightness and colour filters) and natural window light. (Honestly though, my brain handles one light source and bounce cards best.) Oh! And I switch off all other lights in the room if I want to eliminate unwanted ambient light.
Random cardboard pieces: to shield/direct light.
Diffuser: tissue paper, plastic bag, bubble wrap or tracing paper. Occasionally a “proper” diffuser.
Circular polarising filter: I like these as they help to reduce the bright highlights on plastic, making them more realistic.
Canon 80D: I use this camera as well and for indoor shoots, I almost always use a tripod. I use the “Live View” function so I can see on the fly how different lighting/bounce cards positions affect the image. I use manual focus (usually on the eyes) and keep my ISO at 100 (unless I require faster shutter speeds.) Drive is set at 2 seconds to reduce camera shake.
Gee that was a long comment and I hope it helps. Looking forward to reading others comments. More than happy to chat with you Teddi about the 80D which I love!
So glad you chimed in, Janan! I was really hoping you would, as I have eyed your BTS shots lately with curiosity. I noticed how you used cardboard to shield and let in light and thought that’s a great way to do it simply and effectively without spending a lot of money.
I’ve watched a lot of YouTube videos about photography, but for some reason the examples they give and the theory doesn’t always stick in my head in a way that I can pull it out when I’m actually in the moment. I should probably mark one particular technique in my mind and then try it specifically, rather than watching and nodding and then forgetting the details later. Ha!
Yeah, I often struggle the desire to have several characters in focus (who are at slightly different distances from the camera) and the desire to have the background blurred out more. I love the effect of the background being indistinct and soft, but sometimes I don’t find the right combination of distances, especially when working indoors. If the characters had been a lot further away from the Christmas decorations, that would have helped a lot, I’m sure!
Thanks for taking the time for a longer comment, as I really appreciate the details. And I’m thrilled to hear you use the same camera, so I may send a question or two your way via IG direct message sometime. Great info!
Lots of great info folks! I love toy photographers because they are so willing to share bts. You never really see that for landscape or other types of photography.
When I started shouting indoors it was also a big learning curve. I have found the best thing to do is shoot in a dark room. Controlling the light sources is the most important aspect. At first I used a lamp made for raising chicks purchased at my local ranch store. Then taped a piece of white printer paper over the top. This worked very well as a diffused lightsource. I have since moved on to some Litra products including the Torch and the LitraPro. They are excellent tools and very useful and compact which is perfect for lighting mini scenes.
I shoot on both the Olympus OMD EM5 and the Canon EOS M3. When I shoot indoors I use the lowest ISO possible (lessens grain). I also always utilize a tripod. I shoot full manual mode and generally have the aperture wide open. The closer you can get to the subject the better the background blur. If you want details in the background then shoot from a bit further away. I like my crazy bokeh so I tend to add Christmas lights or other reflective things (glitter paper and such) in the background. That way every reflection turns into a bokeh ball.
Not sure if I’ve added any good info that hasn’t been covered but the you’ve already found out the best way to learn indoor photography – start doing it!
Definitely appreciate the additional thoughts you added, Joe! I’ll have to play with my camera settings to see which brings the better background blur — being closer or zooming in from further away. Up til now, I thought it worked better with zooming in from afar but maybe I’ve gotten it backwards! I admire the bokeh you bring to your shots so much, and would love to learn how to do that (assuming my camera is capable; I don’t even know enough to know what makes bokeh and what doesn’t). Great idea with taping the white paper over a light to diffuse it, too!