
As any minifig photographer knows, lighting these highly reflective four-brick-tall toys dramatically can be a chore.
Unlike an action figure, a minifig’s head is just a cylinder: there are no facial features to sculpt out with light and shadow to bestow mood. Their bodies are humanoid but largely cubic, making for planes of blown highlights if the light isn’t angled just right. And the scale of a minifig pretty much rules out working with anything but a large light source… because everything is a large light source relative to its size.
These physical characteristics of the minifig, as well as its material and glossy surface, make creative lighting a huge challenge for me as a minifig photographer.
So when I stumbled upon an old post about the cinematography of The LEGO Movie written by its lighting supervisor, I tuned out the world, curled up in bed with my tablet, and consumed it with vigor. Even though the movie itself is completely CG, its visual goal was photorealism so there were valuable lighting lessons to be gleaned from the movie as a photographer:
“We want it to look as though it’s all been made in someone’s basement – someone with a lot of time on their hands – and then lit and photographed by an absolutely top-notch miniatures photographer.”
(That “someone” being Avanaut, of course! True story.)
Lighting Principles of The LEGO Movie
Craig Walsh, the lighting supervisor on TLM, laid out eight Lighting Principles, of which here is just a snippet:
- Thou shalt not suffer a character to be frontally lit without a very good reason. This rule is designed to maximize the shaping of the characters via rim lighting. Of course, there are inevitably times when characters will end up frontally lit, especially in very dynamic shots or where lighting continuity is critical, but in general we would choose beautiful lighting over strict continuity – it’s more important to create and maintain a mood than to be too literal.
- Maintain separation and ensure a good, clear read of the most important characters in a shot. This can be achieved via silhouette (for example staging against atmospherics, or by use of contrast), by colour or by judicious use of Depth of Field.
Craig’s list (boom tish) also includes allowing overexposure, watching the black point, and artificially enhancing light to shape and model rectilinear or trapezoidal objects as other lighting principles.
Rim Lighting
Looking at how TLM used rim lighting in these screenshots really inspired me to have a crack at implementing their first lighting principle in my next minifig photo shoot.

Rim light and DoF to separate the character in the top hat from the background
Rim light and DoF to separate robot from the background
As a portrait photographer, I know rim lighting can be tricky even with real people in a studio, so getting a rim light on such a small object without a lot of light spilling onto the rest of the scene would really be a technical challenge for me. It’s totally different from backlighting, where the subject is simply placed in front of a light source, allowing for the light to wrap around them from behind. With rim lighting, the objective is to carve out an outline of the subject to separate them from the background.
-
- A selfie clip-on light at its dimmest setting
-
- Gaffer tape to limit the beam and contain light spill
Maintaining Separation
The second lighting principle is the easier of the two and something that I think most minifig photographers already do, at least in terms of employing DoF or color to separate the subject from the rest of the scene.
To a much lesser extent, I use atmospherics in my minifig photography because adding atmosphere can be very messy. The idea of throwing baking soda, dust, water or whatnot around the room fills me with anxiety. You might say I have atmos-fear. (I’m sorry, I had to.) But for this project, my OCD buckled to my desire to experiment and so a mess was made.
Contrast is another technique I seldom make use of so that was something I wanted to incorporate into this project as well.
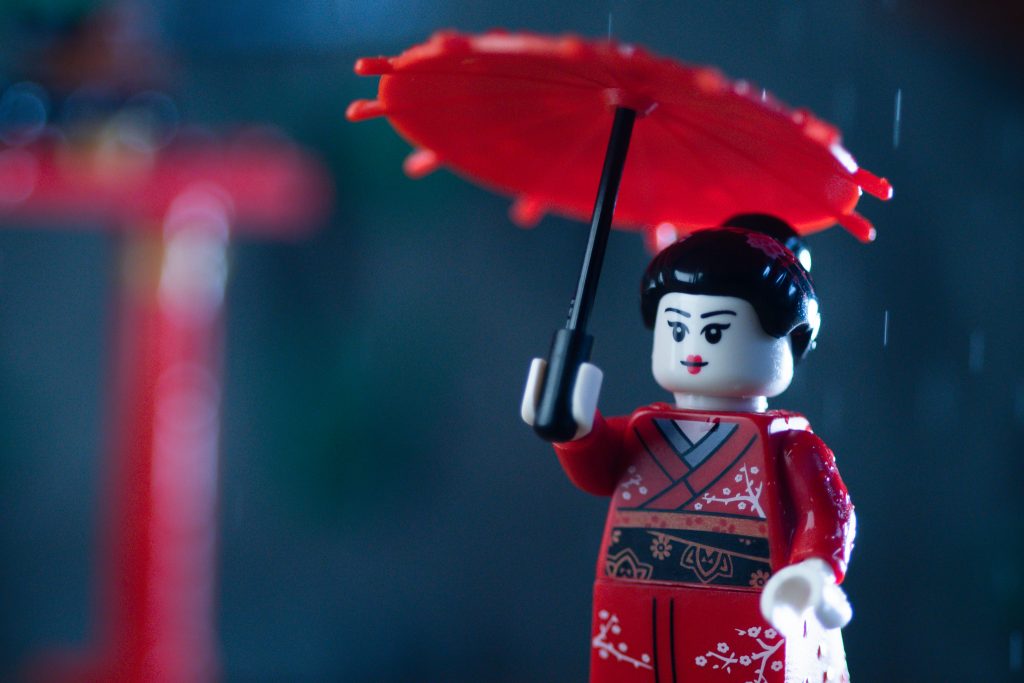
Maiko in the Rain
The recipe for this shoot called for rim lighting, staging against atmospherics and use of contrast.
Atmospherics meant fog or rain for this shot, but after several failed attempts at localizing the spray from Atmosphere Aerosol on such a tight set in a previous shoot, I ditched that idea and went with rain for this scene.
Fog and dust created in Photoshop because it was too hard to contain Atmosphere Aerosol spray
For the minifig, I used the Kimono Girl from Series 4 just as I had done with the previous shoot. I had decided on using her for this TLM lighting principles project because a) she was new to me, and b) I had some third party accessories that were perfect for her. Kimono Girl is dressed as an apprentice geisha, a maiko, so that’s what I am calling her.
For the scenery, I used a brick-built mountain — a remnant of an underwater shoot I had done some months ago — and took a torii (a red Japanese gate) from one of my son’s Ninjago sets in his room.
Building up the Photo
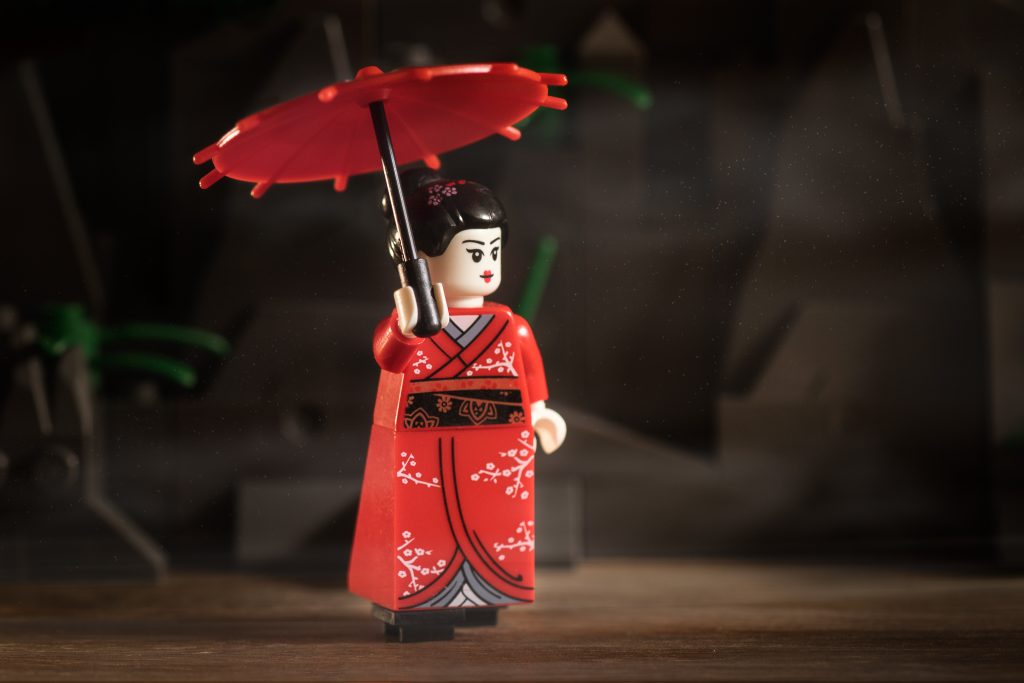
Here’s the initial shot of her without any artificial light sources, just ambient light from the large windows a few meters away:

Maiko with just ambient light as a starting point
There’s a nice color contrast with the red kimono, her white face and the bluish mountain behind her which provides some separation. The shallow DoF also does that job nicely.
This test photo also revealed some of the challenges I would have to address in the subsequent shots, such as the distracting reflections of the umbrella shaft and other objects in her face.
But first, I wanted to see if I could even get a rim light. I decided to use one of those selfie lights that clip onto a phone instead of a flash this time. I thought I might be able to control it better since my flash is quite powerful at its lowest setting and would need to be gelled significantly to get it down a few stops.
I used gaffer tape on the selfie light to tighten the beam and control the spill:

Gaffer tape to tighten beam on my $18 light
It took quite a bit of trial and error positioning the selfie light and adjusting its brightness just to get a rim light and oftentimes, I’d run into the problem of getting highlights on planes as well. For example, Maiko’s dress is really hot on the side in this photo:
Side of dress slope with distracting highlights
Minute adjustments to Maiko’s and the selfie light’s positions finally resulted in a decent rim light with no planar highlights, so the next thing to tackle was lighting Maiko’s face.
The issue with Maiko’s face, apart from the reflections on it, was that it was more of a dull shade of gray; unacceptable, since the white makeup is one of the most striking characteristics of a geisha.
I added a dimmed LED lamp and positioned it camera left to provide some soft fill light. Rotating Maiko a touch towards that light not only replaced the reflection of the objects in her face with a reflection of the LED lamp, but it also gave a nice rim light to the umbrella shaft. However, because of Maiko’s new position relative to that light, it’s considered frontal lighting, but I have a very good reason for it (as per Lighting Principle #1)!

Maiko turned towards light gave her face a lovely satin sheen and the umbrella shaft a rim light too
Lastly, I played around with shutter speeds and ISO settings to get the right kind of rainfall from my spray bottle. The final photo was shot at 1/3200, ISO 1000 at f2.8.
Post Production
In addition to my usual basic adjustments to photos in Lightroom, I changed the white balance of this photo to make it cooler because rain or night shots always call for bluer tones. I was also more aggressive with noise reduction since I shot at a much higher ISO and shutter speed than I am comfortable with.

Maiko in the rain
Conclusion
Using the lighting principles of a photorealistic CG movie in a photo shoot was a lot more challenging using an actual camera and real lights, mostly because CG doesn’t really have to obey the laws of physics or follow logic. That’s pretty much a given and also the 7th Lighting Principle, “enhanced photorealism”:
We wanted a convincing simulation of photorealism, but we used every trick in the book to treat that as a point of departure rather than a limitation. We departed from strict physically correct DOF when required, used special lights that only affected certain objects or characters in a way that could not be done with real world lighting, […] or to work with other data such as normals or depth, for example to reduce the exposure of distracting areas of a set.
I’m sure there are readers of this blog who are purists, but I’m not one of them so I really enjoyed this read and process. Regardless of your own workflow, it’s worth a read just for the intention of the lighting team to get things as photorealistic as possible and for the artistic reasons for departing from it at times.
For me, rim lighting certainly was the biggest hurdle to clear. I’ve written a more detailed BTS on my blog if you want to read about the process I went through — including some missteps (regrets, I’ve had a few)– and view a before-and-after slider of the white balance adjustment.
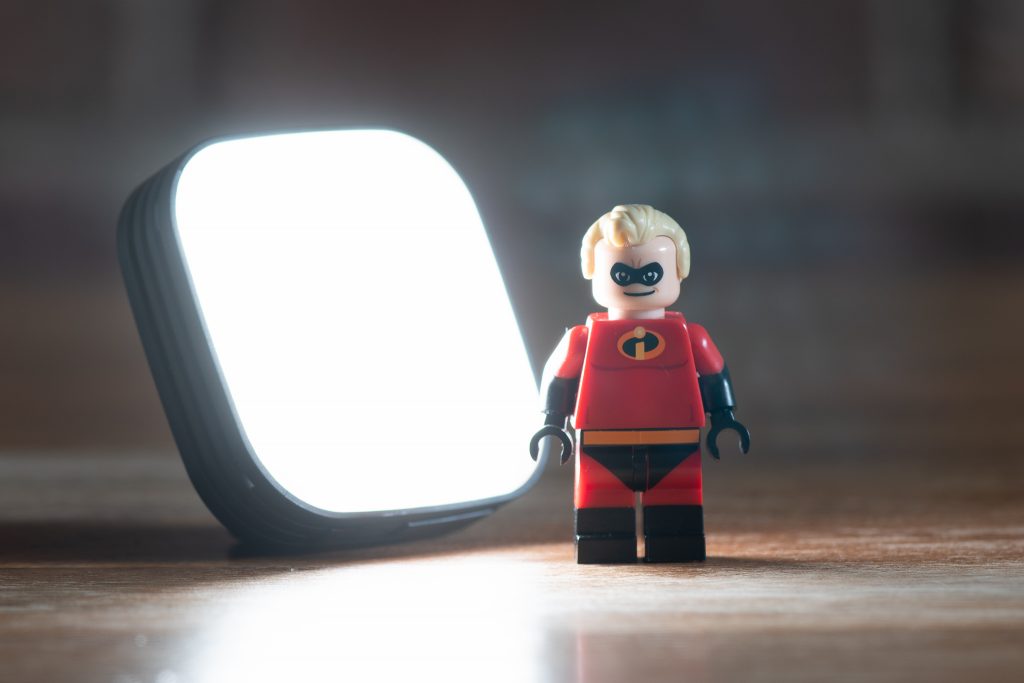
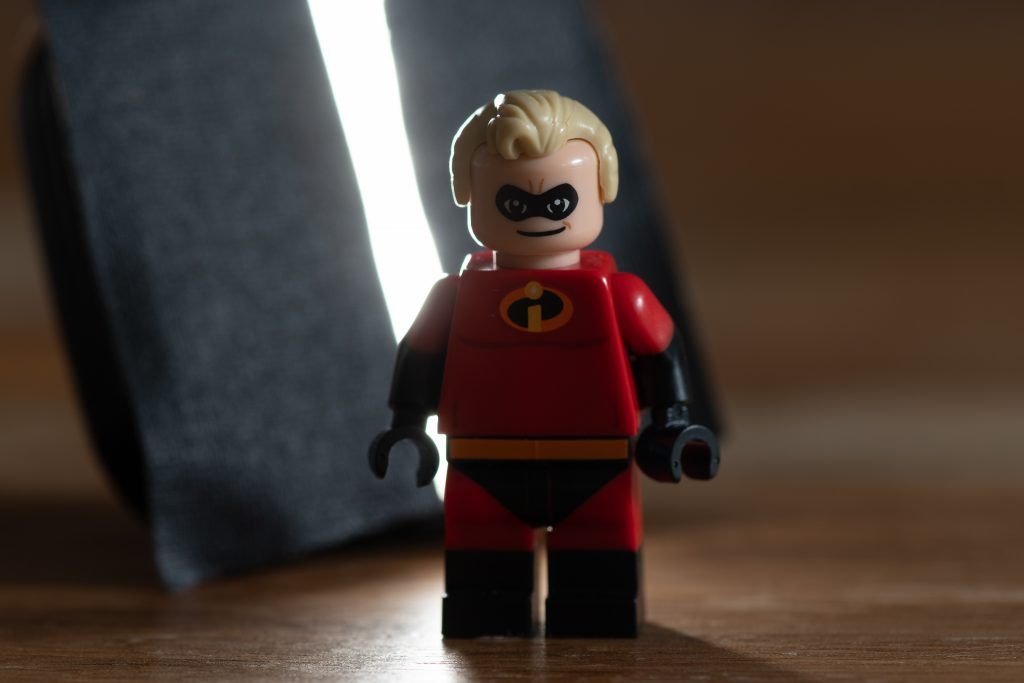
I’ll definitely try to use rim lighting a little bit more in future work since I really like the punch it adds. In fact, here’s a photo I did a few days later, using that movie still of the Wild West robot as my inspiration:

Rim lighting, natural window light, focus stacking, and a radial gradient
Rim lighting may not have as large an impact as the other techniques for separating a subject from its background, but I think it adds a wonderful detail to the photo and merits the extra effort.


I couldn’t wait to read this post and, now that I have, I cannot wait to try out this type of lighting. I feel I have used this technique before, but I have never really thought about its implication on Minifigures. I look forward to spending more time on it. Thanks for sharing this information.
Let me know how it goes! I’ve also tried rim lighting with a small flash, but instead of using gaffer tape, I just put two boxes very close together in front of the flash to create the slice of light.
Like Tony, I’ve never thought of rim lighting LEGO. I have now, and I’m excited!
Thanks for the super informative post Anna!
So many techniques to try on these little guys! I’d love to see what you come up with.
Thanks a lot Anna,
great Post and I‘ll read your Blog too!!! I had no idea of rim lightning… now I have. THANK YOU!
Astrid
Thanks! I’m familiar with it from my work in portraits but I haven’t really seen this kind of lighting done so much on LEGO, at least on my feed. I hope to see more of it since it really elevates the photo.
Great post. I honestly feel like a newbie when it comes to lighting and struggle to set up anything that really works for me. This has given me some constructive tools to start with. Thank you !!!
Thanks! Minifigs can be challenging to shoot in anything other than flat light. They’re so reflective.
Keep at it. Make small adjustments rather than big ones. You’ll get there!