The benefits of zoom on a lens are obvious. Zoom in to get your subject nice and close in frame, or zoom out and get a nice wide view of the entire scene. A handy tool for sure. However, one aspect of the camera zoom, technically called focal length, can affect the perceived distance between the foreground and the background—a phenomenon called lens compression.
Lens compression means that the farther one zooms in, the scene gets compressed from front to back. In other words, for the same scene, if you have a wide focal length (aka you’re zoomed out), the distance front-to-back of the scene will appear larger than if you use a narrow focal length (or zoom in).
This concept took me a long time to fully understand, and may be best understood with a demonstration.
Queue the lens compression demonstration!
I set up a little experiment to demonstrate what lens compression looks like. I started with the following setup:
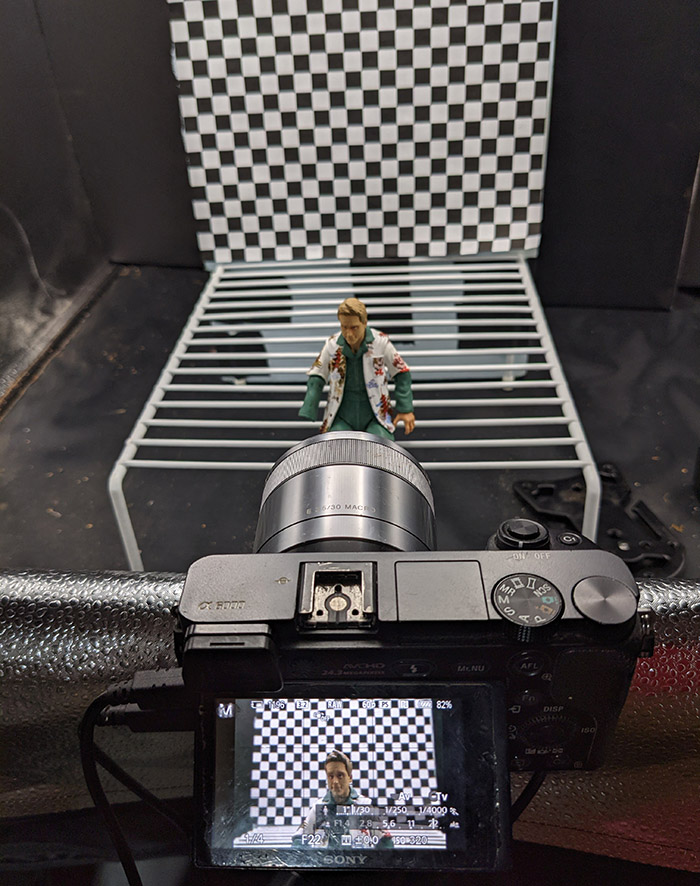
I started by printing out a piece of standard 8 1/2 by 11 inch paper with a 1/2 inch black and white grid on it. In front of that I put an 8 inch rack, and placed an action figure, in this case Wash from Firefly, on the front end. This will allow me to ensure that the distance from the figure to the background remains the same. I then turned on the Rule of Thirds grid on my camera. To conduct the test, I will swap lenses on my camera. I will then compose each shot so Wash’s head fits exactly into the middle Rule of Thirds box. This way I can be confident that the subject is the same size in the frame as I move the camera back and forth to accommodate the different focal lengths. Then we can compare the various backgrounds.
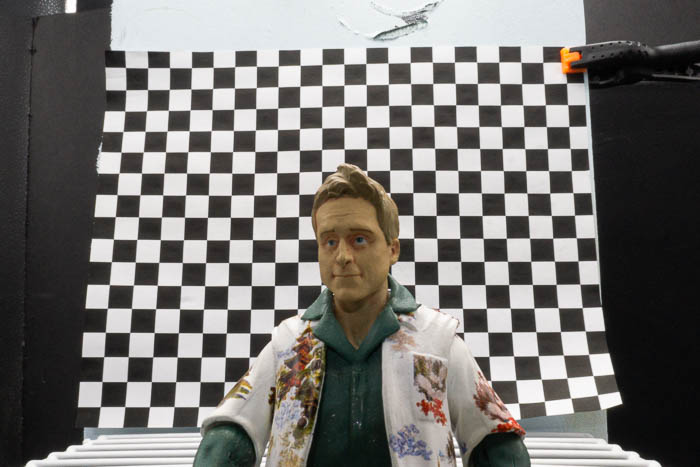
So these are the results. First a 16mm wide shot:
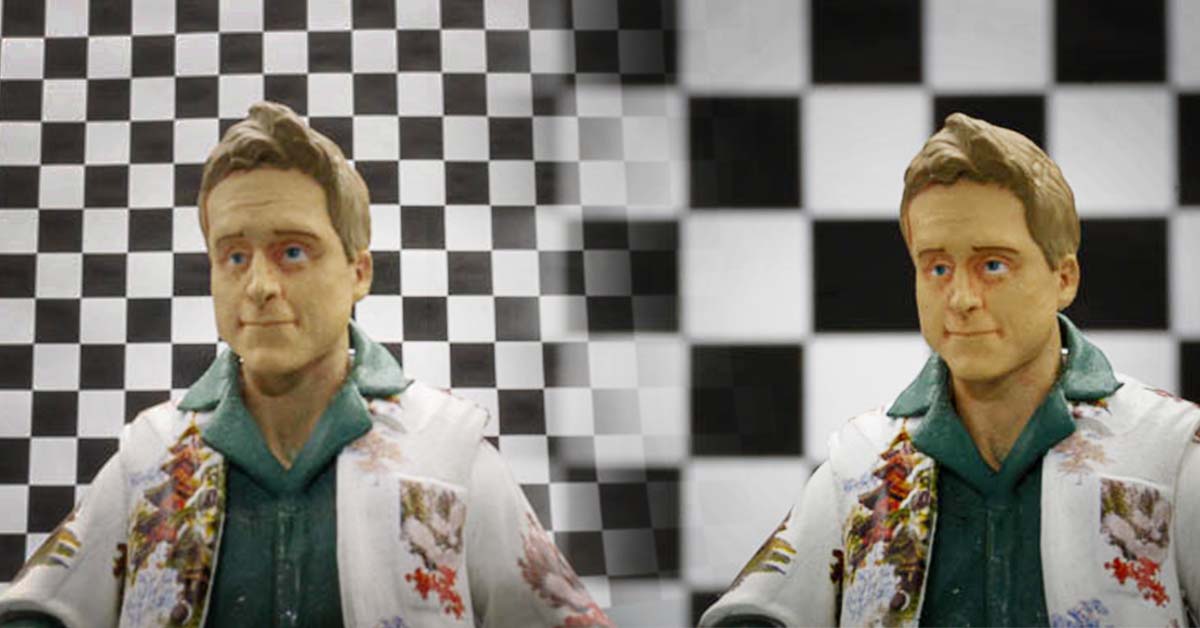
Then a 35mm lens:
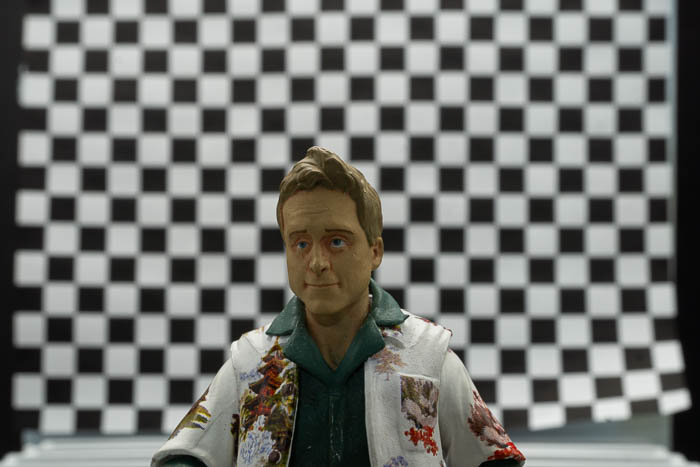
And finally a 300mm zoom lens:
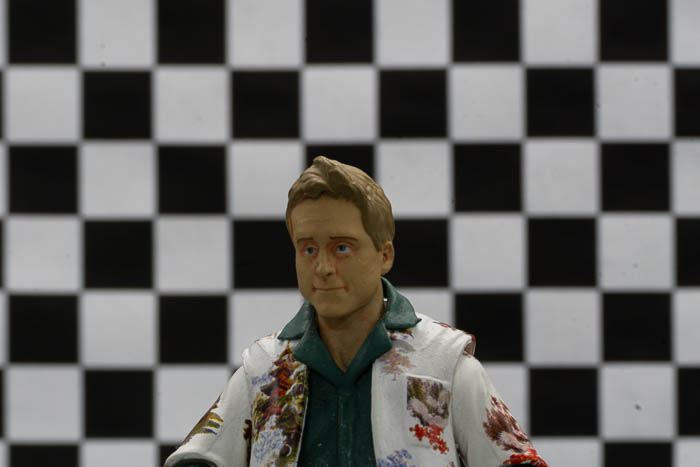
As you’d expect, despite the size of the subject remaining (roughly) the same, as the focal length increases the amount of background that gets captured is a lot less. However if you look a little closer, the background of the 300mm shot appears to be closer to Wash than it does in the other shots. That closer appearance is due to lens compression.
So now that we know what it is, let’s put it to use by looking at some examples in action.
Lens compression in action
Let’s compare a couple of shots with a similar goal, but using lens compression in different ways to accomplish the same goal. In this case, the goal was to make an object in the background feel like it was the same scale as the action figures placed in front of it.
Note: if this sounds like forced perspective, then you are correct. Lens compression is an important part of how forced perspective works.
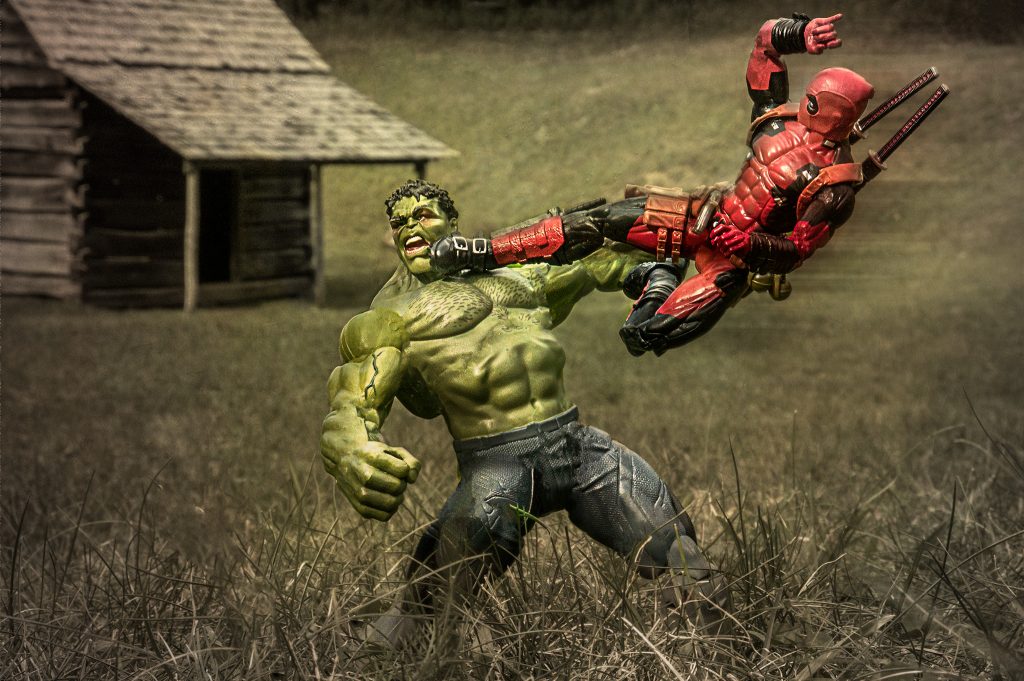
This first example has Deadpool fighting Hulk in front of a cabin. This is what the cabin looked like from where the figures were set up:
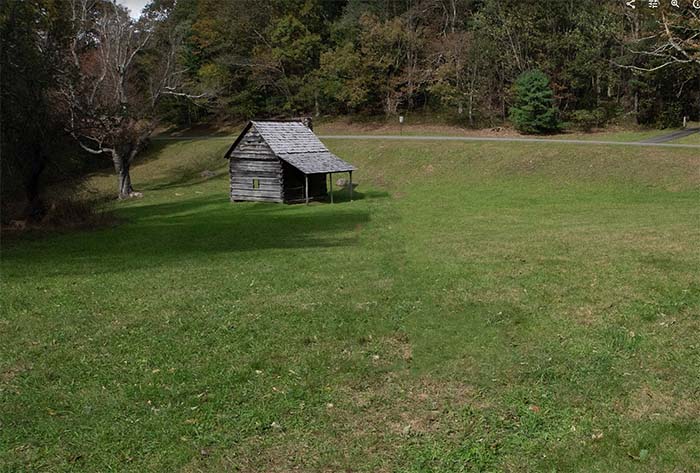
The cabin was about 150 feet away. Since the cabin was so far away, a wide focal length would keep it small in the frame. However, I wanted to get it bigger in the frame. So when I set up the figures, I positioned myself a fair ways back and zoomed in.

This allowed the power of lens compression to embiggen the cabin in the frame, bringing it closer to the action, and making it the correct size compared to the figures.
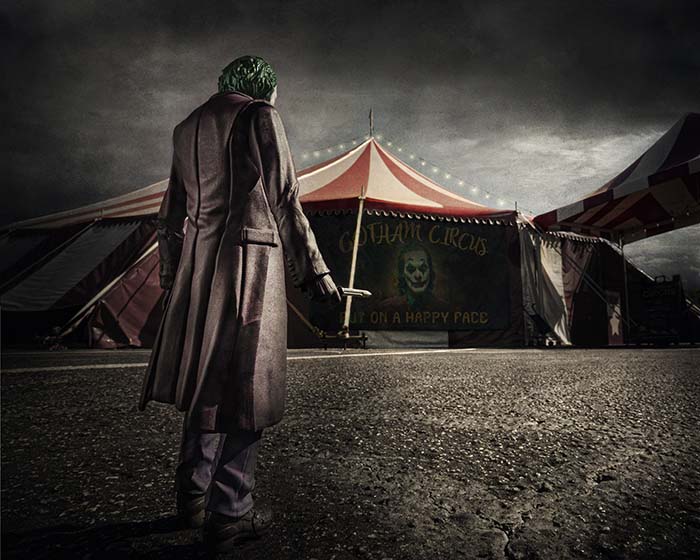
Contrast this to the next image of the Joker in front of a circus tent. I don’t have any behind-the-scenes images, so let me describe the scene. This was in a parking lot, and I was attending an awesome circus with the family. I happen to know the clown (Hey, Kirk!) so I arrived early to hang out with him. I placed Joker, a 6-inch figure, on the ground about 30 feet from the tent. The tent is about 100 feet wide, and 25-30 feet at the peak. I wanted to have Joker big in frame, with the circus tent far in the background, with lots of that cloudy sky, giving that menacing feel.
I typically shoot my figures with a 35mm or 50mm lens, but if I had used those lenses, the tent would not have fit entirely in frame. I’d certainly lose the sky. So I went with a super-wide lens, a 12mm, and moved really close to the Joker figure. This allowed me to decompress the shot, pushing the tent back in the frame. Now the tent fits completely in the frame, and that cloudy sky is fully visible, contributing to the menacing feel of the scene.
One last example is this shot of Eric Draven, aka The Crow, behind a skull at sunset on the beach.
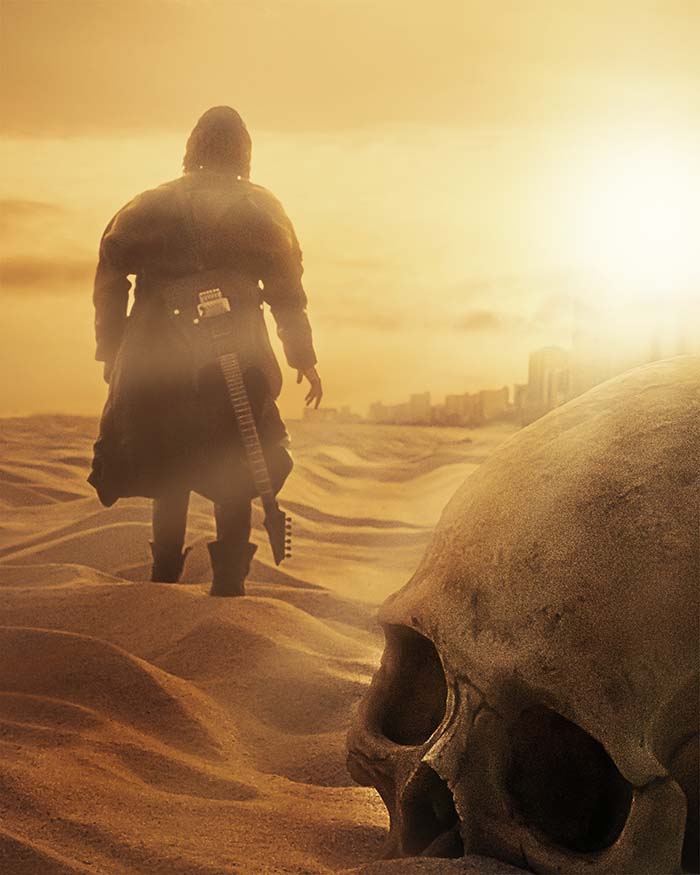
When I took this shot I really wanted the skull to be dominant in the foreground, and the effect of Eric standing behind it looking off into the sunset. The skull is actually a full-scale replica (aka human-sized), and Eric is 12 inch figure. If I used my regular focal length lenses (35mm and 50mm) I would not have been able to get the effect I wanted. I could have used those wider focal lengths, and placed the skull closer to Eric, but I would have sacrificed the distance between Eric and the skull. I would have also introduced a lot more of the background, and reduced the size of the buildings in the background, possibly to the point of them not being truly visible anymore. They would appear as noise, and not actual buildings. This would have reduced the impact of the composition.
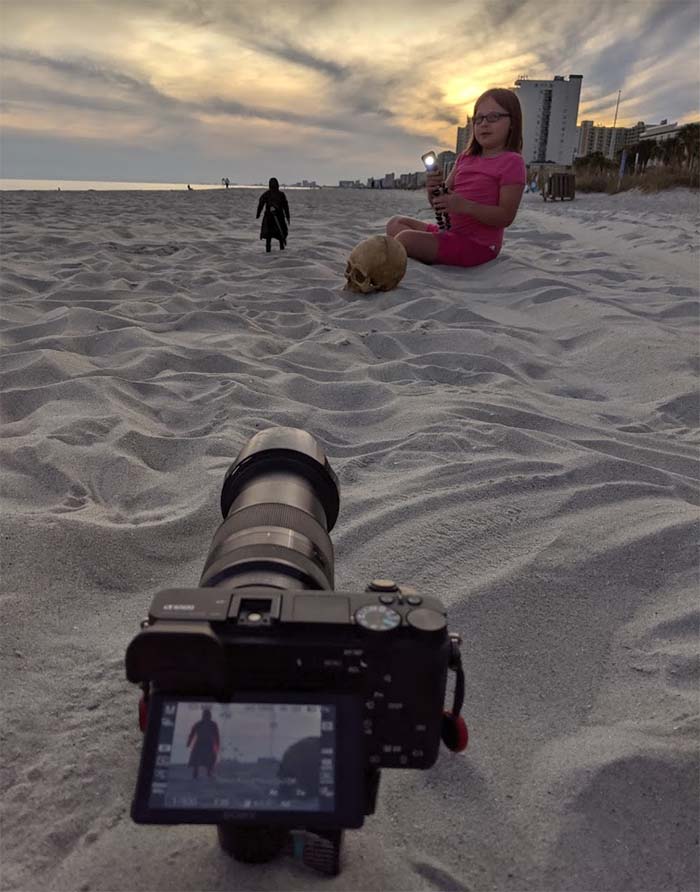
As you can see from the behind-the-scenes pic, there aren’t a lot of interesting things in the background. Having a wider background would reduce the importance of Eric. However, by putting some distance between the skull and Eric, and then using the narrowest focal length I could (200mm), I was able to get the right distance between the skull and Eric, while bringing the buildings closer, making them part of the story instead of background noise. As a bonus, I was able to keep my lovely assistant (aka my daughter) out of frame as she helped put some light on Eric. I also eliminated some of the other beachgoers in the background. The beachgoers would be easy to remove in post, but my daughters knees would not.
In conclusion
So thats lens compression in a nutshell. Taking advantage of how zooming in compresses the image can be a useful technique to create more impactful photos, as well as overcome some scale issues that are a constant struggle with toy photography. It’s a technique you may have used subconsciously already, but hopefully now that you know what lens compression is, it can become a deliberate design choice for your own images. After all, knowing is half the battle.
[dave]


Very cool explanation! I think I might give the forced perspective thing a tray again!
That was a great tutorial. Thank a lot to explaining. I will have to give this a go in “the field”. Thanks for another invaluable post.
This was very helpful! Now if I can just remember it to put it in action!!! ? Thanks for the well explained tutorial!
Love the visual examples. I use this a lot, but didn’t know what the technical effect was called. Thanks for a great article, Dave. Makes me want to get out and use this technique again!
Thanks for this comparison, Dave. Love the tutorial!