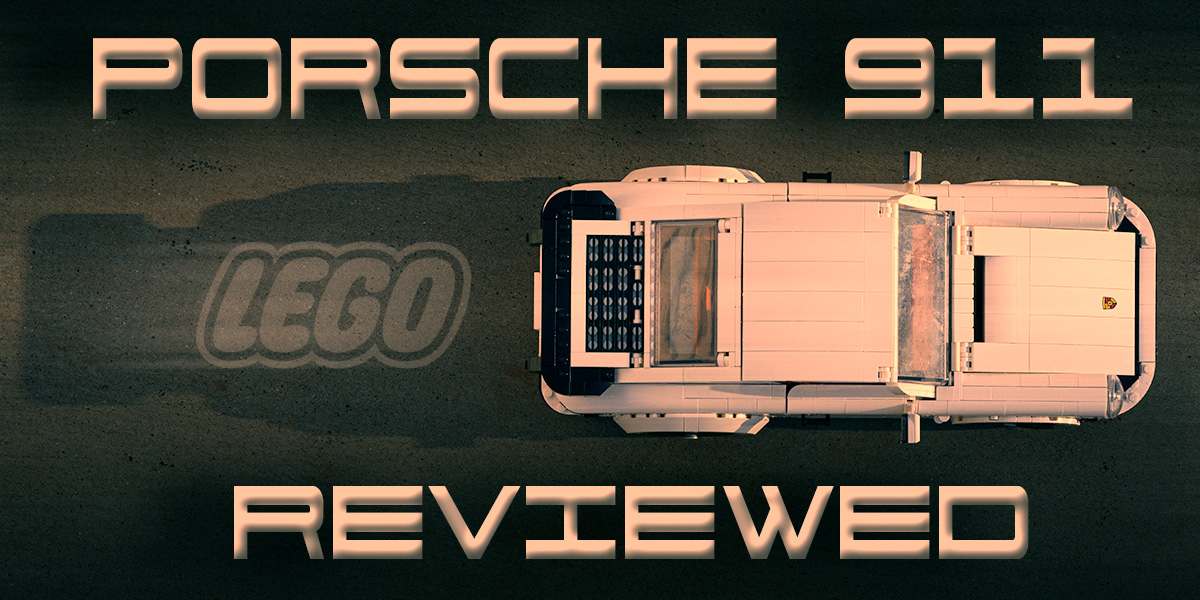
When it comes to models, sports cars are classic. I mean, who doesn’t love a reminder of the freedom of the open road, with the seat pushed back, the radio cranked and wind flowing through your hair as you move along at ludicrous speeds in vehicles that are way more powerful than will ever be needed. LEGO models are no exception. That’s why I jumped at the chance to review their latest in the Creator Expert series: the Creator Expert Porsche 911.
Like with all my reviews, I will look at how accurate the model is to the original car, and how it works for toy photography. Basically, how it looks on the shelf, and how it looks in front of the lens.
Disclaimer: LEGO was gracious enough to offer ToyPhotographers.com a preview set for this review, but I am entirely at liberty to comment as I wish. Like a healthy, fibre-rich cereal, no sugar coating is required. With that out of the way, let’s take this sucker for a test drive.
Porsche 911: the details
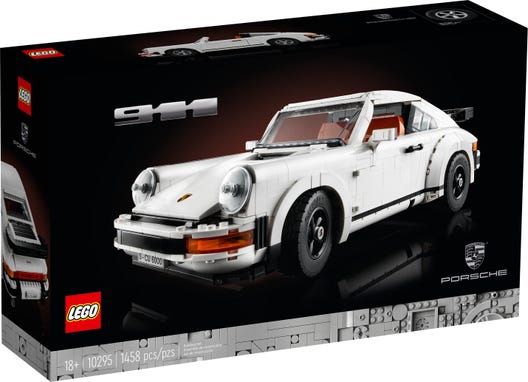
When built, the car measures 13.5 inches long, 4 inches tall, and 6 inches wide. The box comes with a respectable 1,458 pieces, however you don’t actually use all of them. The set includes parts to build either the Turbo (solid roof) or the Targa (convertible, or cabriolet) version. About 3/4 of the way through the build, you are given a choice of which style of Porsche you want to end up with. Unfortunately, you cannot easily switch between the two versions. Switching requires you to disassemble about a 1/4 of the build to reconfigure it. Each design’s unused parts end up being left in the bag. However they did design it so the leftover parts are in their own bag, so you’re not left with a pile of bricks.
For various reasons I decided to go with the Turbo version. Confession time: I am not really a car guy. If it wasn’t for Top Gear (UK), I wouldn’t be able to tell the difference between a Maserati, Aston Martin or a non-red Ferrari. But the Porsche 911 is an iconic car, and they haven’t changed the body type since well before I was born, so it’s a sports car even I can appreciate. Once I read in the instructions that the Turbo had more power than the Targa, I channeled by inner Jeremy Clarkson and went with “MOAR POWER!”
Plus it’s the one my kids picked when I asked which I should build.
Model features
From what I understand, Porsches are pretty simple cars, and this model is no exception, though it does have some fun details and hidden gems.
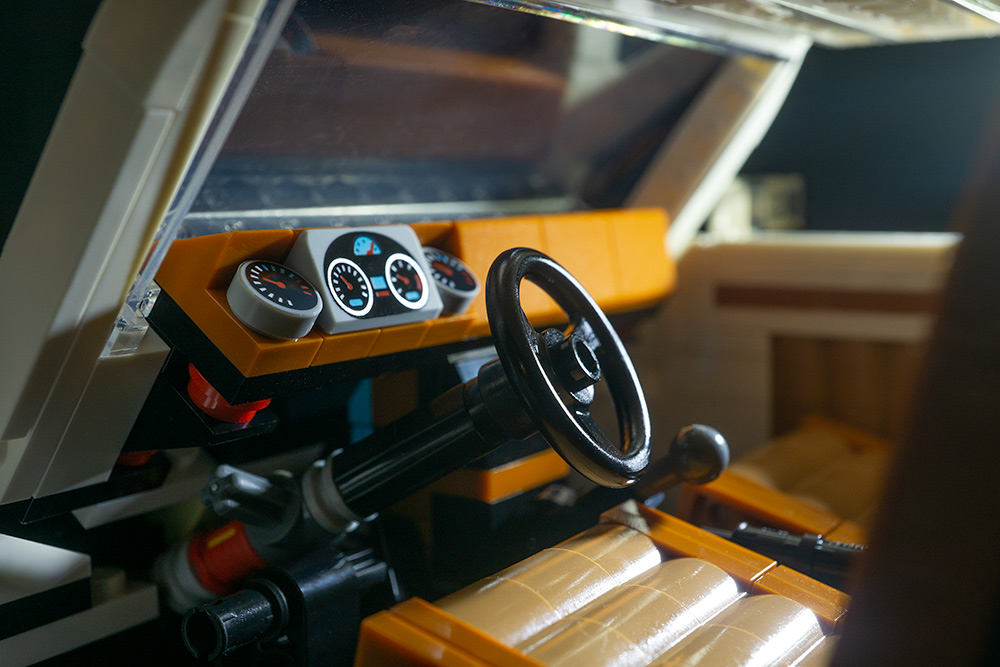
Both side doors open, revealing the interior, which looks like leather, and the dials are a nice touch. The car has both a stick shift and an emergency brake lever, and the steering wheel turns the front tires. It even includes pedals on the floor.
All in all, it’s a nice interior. (I would point out it lacks both a radio and cup holders, but I am going to let that slide for now.)
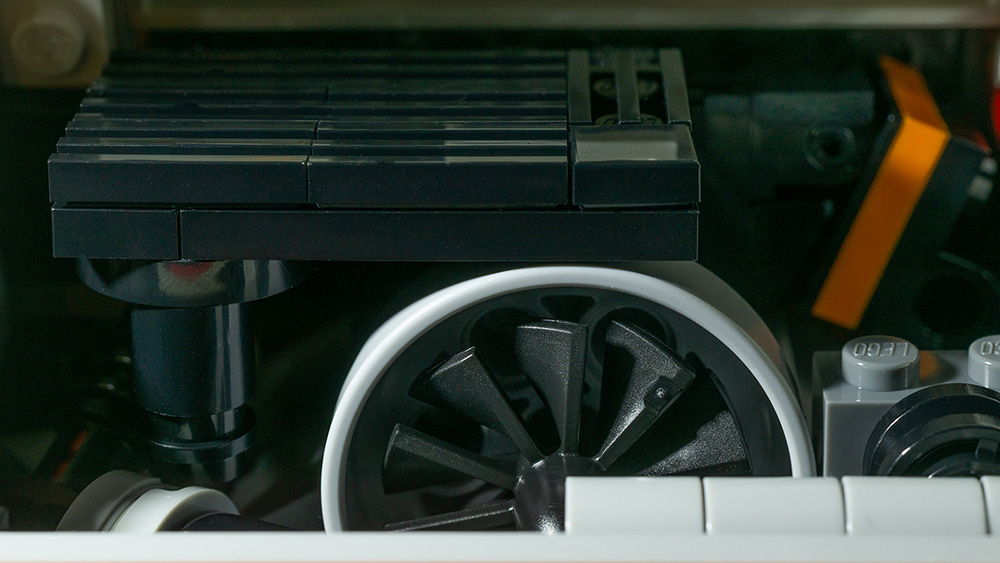
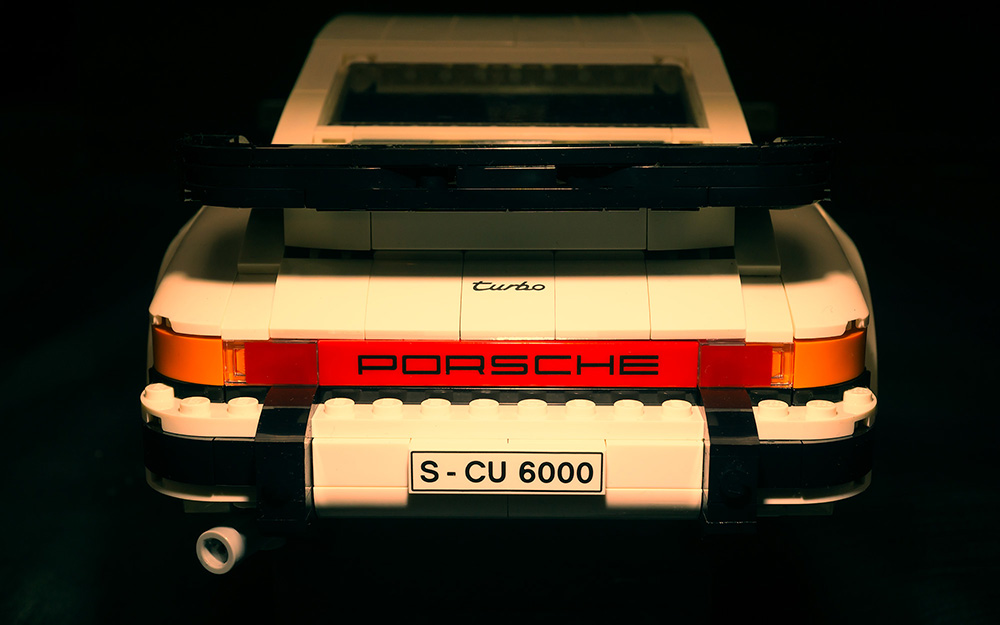
Porsche 911s are infamous for having the engine way in the back, and the model accurately portrays this. You see a fairly detailed engine if you open the trunk lid—technically a hood on this car, since it contains the engine. The actual trunk used for luggage is in front under the hood, which is really a trunk lid. (It is best not to overthink this aspect of the car. Needless to say its accurate to real life, which is equally confusing.)
Under the trunk/hood is empty space (no spare tire on this bad boy), but it has an embossed Porsche logo, which looks pretty dang good.
The back of the car has a spoiler, exhaust and the Porsche name. This kit also allows you to choose from several license plates. I chose this one (below) because it matches the aesthetics of the car more.
Build quality
Overall, I am really pleased with the build quality. The car looks exactly like the iconic Porsche 911. It is, however, not without some flaws, which mainly show up when one treats this car like a toy photographer does, and not as it’s intended—to look good on a shelf. Which it does. This car looks fabulous on a shelf. No complaints there.
Among the downsides of this car, some of the parts are not well attached. The roof is especially flimsy, and only attached to the windshield by two claws, so it comes apart easily when being moved around. The windshield is attached via a couple of angled pieces. It’s a clever bit of LEGO engineering, but it does lead to it coming loose with minor handling. Normally this is not a problem, but as a toy photographer I want to take this out into the real world, and that’s when these issues manifest.
A couple of the skirt pieces on the back wheel wells also came loose when I was carrying the car into the field for a photo shoot. Fortunately, the parts break off in larger chunks, so if you knock something loose it’s easier to find on the ground. Plan on having to reset some bricks when you get to your photo location. If you look closely at my photos in the next section, you can see where I wasn’t diligent in resetting those bricks.
The only other complaint I have is that the side panels are made out of many small bricks, so you get unsightly random lines. This is, of course, the nature of LEGO, and really not a huge problem, but I found they catch the light and become noticeable on camera. I would have liked if more care was made to add symmetry to these lines, and if they maybe used some larger pieces instead of repeating many small pieces over and over. But I am also deep into nitpicking territory, and it’s LEGO, so not unexpected or avoidable. Just be aware, especially when using lights, that reflections tend to catch in the brick seams, and the resulting pattern is not overly photogenic.
Photographing the Porsche
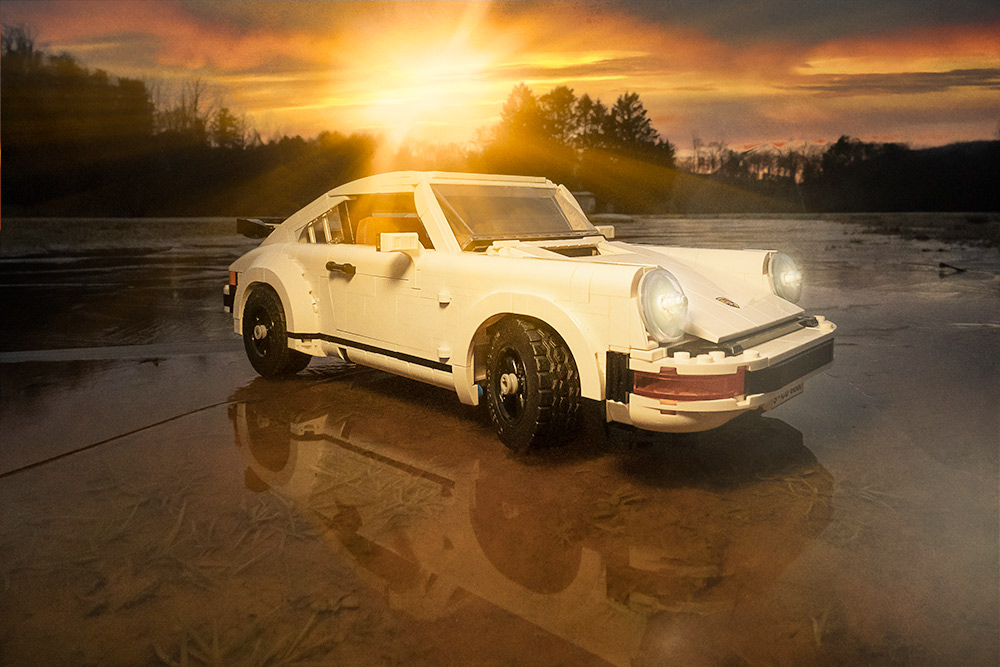
Despite my issues with some of the poorly attached parts, once the car is set up on location, it looks really good in front of a lens. It is really a nice car to photograph.
I did have some issues getting photos for this review, but it had nothing to do with the LEGO, and all to do with Mother Nature. I live in North America, and for the previous couple weeks the weather has been down right horrible—record cold and a lot of wind and rain. Not the thing you want when taking LEGO car photos. As I write this, the storms are expected to last at least another week. Luckily, I caught a very small break in the weather, and I had an hour of daylight—yep, exactly one hour—to get some shots.
If this first shot looks like it was taken on ice, that’s because it was. I went to a local sports field on a frosty morning to get my shots. The spot between first and second base was flooded and frozen over. Not enough to hold me, but it held the car just fine.
Unfortunately, I managed to grab just a couple shots of the car. Like I mentioned, I only had an hour break in the storms, which conveniently arrived at sunrise. I took several more shots on this patch of ice, but in my rush I didn’t check focus between setups so they were blurry (insert sad face).
When I was scouting this location previously, I found another location where I wanted to shoot this car. The second location, a walking path, provided a “driving on a road” look, with some Atmosphere Aerosol tossed in for the fog effect. Literally 30 seconds after I took this shot, the clouds rolled back in and I lost the sun and my photography opportunities.

It is back to dancing with Old Man Winter for me, but I think I was able to prove my point: This car looks great in front of the camera.
Final thoughts
All in all, the build engineers at LEGO did a great job with this car. It looks great on camera, and looks equally good on a shelf. It’s a win/win. The model does have some parts that come off easily when transported, but that’s par for the course with LEGO, and nothing an experienced toy photographer can’t handle.
In short, if you are looking for a LEGO car to shoot, picking up the Creator Expert Porsche 911 is not a bad way to go.
[dave]
Want more toy photography goodness? Subscribe to our weekly email round up so that you never miss a post. You can also listen to episodes of the podcast! You can follow my work at @therealstudiodave.


So interesting to read about this car. I’m not a car person at all and yet you kept me rapt and reading through all the details. The photos are excellent.
Thanks Christina!
I would love to see a Lego version of a Porsche flat six.