This post is just a quick how-to about using a reflector to improve lighting for your toys. It can turn a drab image into something more interesting by bouncing around the existing light onto your toys in different ways.
What is a reflector?
A reflector is anything that will reflect light by taking in light (often the sun, but it could also be street lights or other artificial lights) and redirecting it at a different angle. They literally bounce light.
Reflectors can be anything that has this light bounce property. They can be as simple as a white piece of paper or tin foil, or as complex as a store-bought reflector made for this exact purpose.
You can also use things in your environment to reflect light. For example, you could place your toy in front of a white wall to bounce some sunlight back at your subject. This allows you to put highlights on the dark-side of the figure and fill in shadows.
Many photographers I know keep a few white 3 x 5 cards in their bag to act as reflectors. I personally keep a store-bought 5-in-1 reflector for this purpose, which is what I will discuss here, but anything that reflects light will do.
The nice thing about reflectors is that they bounce the same light back, so the colour balance is maintained. Using artificial lights can often lead to a white light on one side, and the yellow light from the sun on the other, creating an unnatural effect. If you bounce the same light around, the light colour (or temperature) will always be the same.
Positioning the reflector
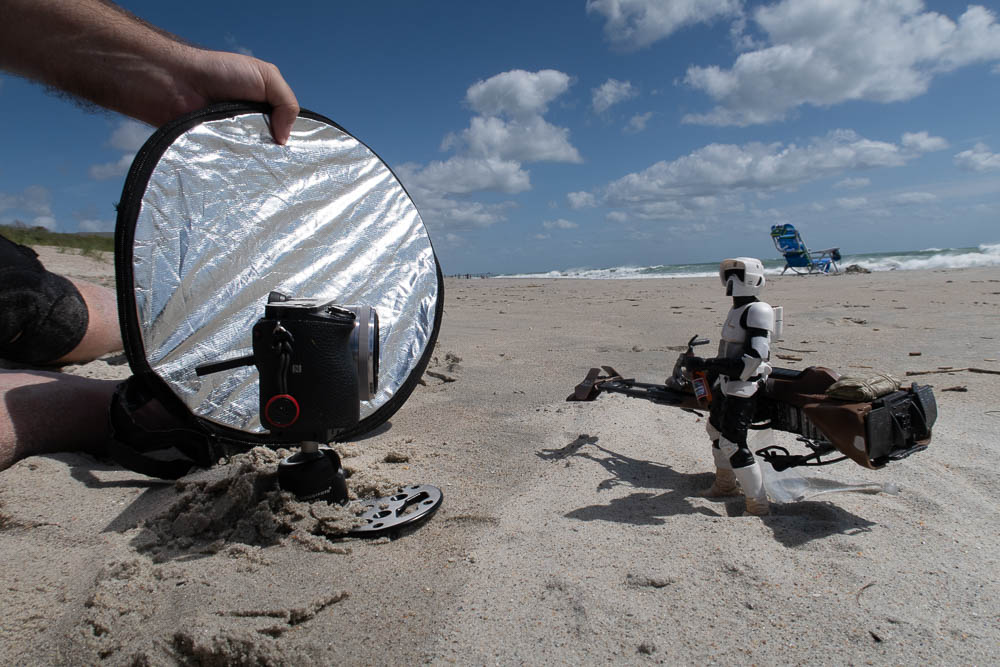
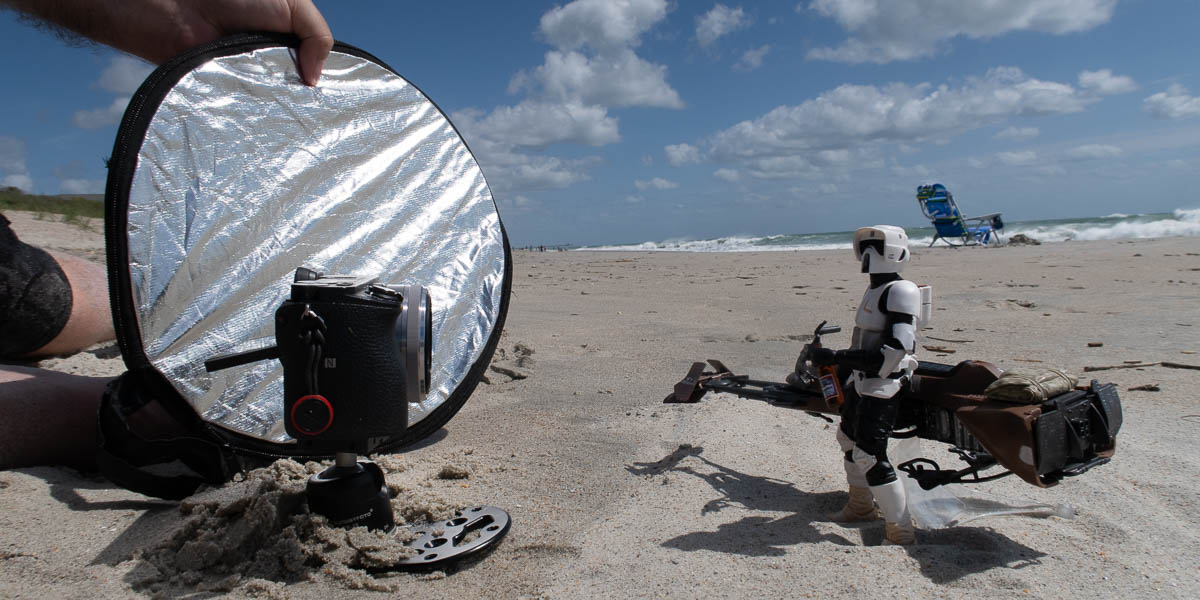
Positioning the reflector is the important part. The reflector needs to go on the opposite side from the light source. For example, in the shot above, the sun was high in the sky to the right of the frame, so the reflector is placed on the opposite side of the action figure from the sun, on the left side of the frame.
The reflector doesn’t need to be held straight up and down. With reflectors, angles are the most important thing to get them to work correctly. You can move the top or bottom in and out to change the angle between the reflector and the sun until you get the right about of light bounce for your scene.
Reflector in action
This is an example of using the reflector. There is no reflector on the left image, but a reflector is used on the right one.

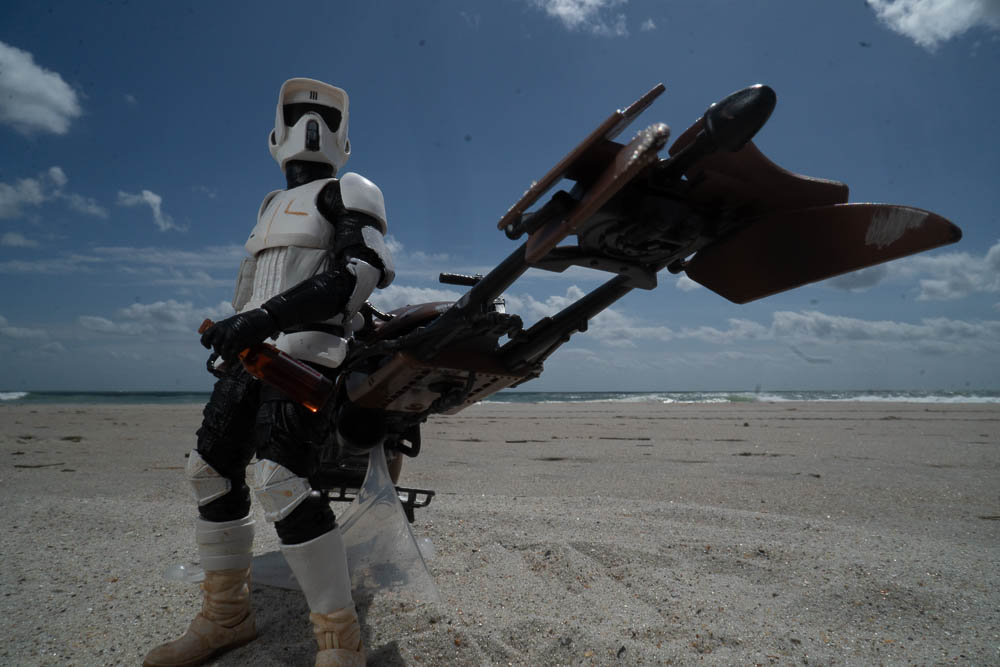
It is a subtle difference, but the trooper in the left image doesn’t stand out very much. In the right image, the trooper has more light on him and he stands out from the bike. This draws the eye into the trooper. Light attracts attention and makes a more interesting photo.
5-in-1 reflector
As I mentioned, I keep a 5-in-1 reflector in my camera bag for all my reflecting needs. These reflectors come in all sizes, from 5 inches to more than 6 feet. Since I shoot toys, I keep a 12-inch reflector, which costs $13 USD on Amazon. It folds down to 5 inches, which fits in any camera bag, and it’s light as a feather.
The reflector has five options for reflecting: A white side to bounce a normal amount of light. A silver side, which reflects more light. A gold side, which reflects light but makes it more yellow, useful for that golden-hour sunset look. A black side to remove light from a scene. And finally a scrim, which is put between the light source and the image to diffuse the light.
If you are curious, my final image looks like this:
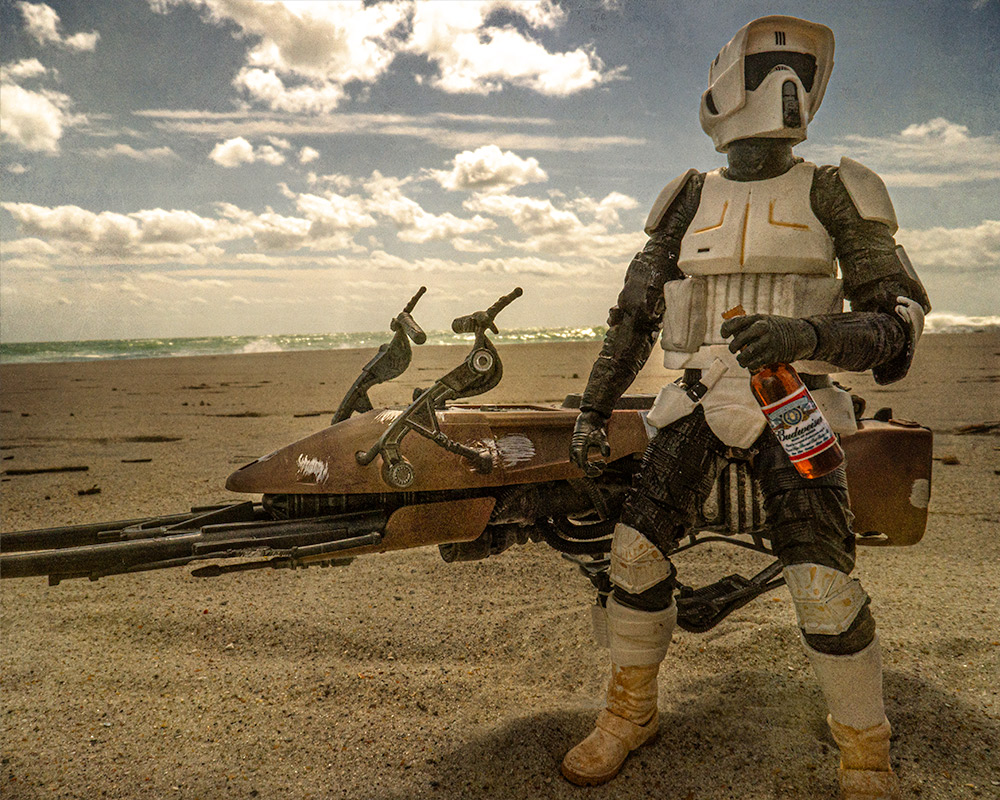
That is reflectors in a nutshell. They are a quick, cheap way to bounce light into your scene to make it more interesting. Almost any white-ish surface can be used as a reflector (in a pinch I have used receipts and business cards).
They are a useful tool to keep in your photography bag of tricks.
[dave]
Want more toy photography goodness? Subscribe to our weekly email round up so that you never miss a post. You can also listen to episodes of the podcast! You can follow my work at @therealstudiodave


I knew by the title it was a post by you Dave. So I guess you now have a writing style that people recognize. How cool is that!
Keep up the great articles!
I believe thats known as being “notorious”