
Over the last three years, I have been slowly creating a LEGO city based around the Ninjago City (70620) and Ninjago Docks (70657) sets. It’s the first large scale MOC that I’ve ever attempted and it took me a long time to get to a point where I’m happy with it—multiple restarts occurred over the three years!
But now I’m happy to call my city “finished” and show it off to the world. I needed to work out how to best photograph it: I wanted to show off the ‘whole’ as well as the details.
Photographing large city MOCs or whole cities is a different challenge than shooting minifigures or small scenes. I needed another approach and to break out different kit.
Space
First and most obviously, I needed more space than usual for the photo shoot. I had originally built the city in my garage (a space for a single, small/compact car, made even smaller by my bike, lawnmower, dryer, etc.) but recently moved it to a larger room in the house.
Even though I still did not have enough space to get a good shot of the whole city. I had to move the city to the other end of the room where I could turn it side-on to the camera, to get the best aspect for the picture.
Learning point one: Consider where you are going to be able to photograph the MOC, and either build it there or make it modular. This will also help if you ever take your MOC to a LEGO show for display!
If your city takes up a whole room, then moving it to another even larger room may not be a consideration. But maybe you can section it up and photograph it by blocks or neighbourhoods.
Backdrop
The next thing I required was a large backdrop in order to separate the MOC from the shelves, desk, printer, wardrobe and other distractions in the room. I wanted a plain bright backdrop to help the city’s colours pop out.
I used a backdrop frame normally used by portrait photographers, consisting of metal stands holding a metal bar between them. You can find these on Amazon or photographic supply sites.
From this, I hung a wide roll of white paper, which again is sold for portrait photography. Other things you could use include plain curtains, a bed-sheet, or just a white/neutral painted wall.
My city is wide enough that I had to double up the paper and tape/staple it together. I also had to create side and front ‘skirts’ to hide the desk and other things I was using to support everything.
You could also choose to cut the subject out in Photoshop and use a virtual background.
Learning point two: Spend time getting the backdrop right and looking through your camera from the angles you might want to shoot—I found the backdrop didn’t extend far enough to the sides or above, when I went to shoot from low angles later. Also, if you have enough space, try to push the backdrop as far back from the rear of the MOC/city as you can, to create fewer shadows.
Lighting
Lighting a whole city evenly requires a very different set up to what you might use for a single minifig or small scene. A Lume Cube or two is not going to work here.
I used a combination of light sources, which were not ideal but were all I had. On the left I positioned a large portrait lamp with a diffuser, raised high on its stand, bathing the left of the scene in even white light. On the right I had a remote flash unit on a stand with a large diffuser covering it—also something you might use for portrait photography.
The light from the flash was much more powerful than the lamp, which led to uneven lighting that I had to compensate for in post processing.
If you don’t have these kinds of light-sources available, then you can use powerful desk lamps, the room’s lighting or ambient light from a window, but these will require a longer shutter-speed.
Learning point three: If possible, use consistent light sources, not a mixture as it will make the pictures easier to process. I didn’t spend quite enough time fiddling with exposure settings to get a good balance between my different sources in-camera—I could have dialed flash power down while also extending the shutter speed to balance the two sides of the picture.
Camera kit and settings
I use a macro lens for my minifigure photos, but that would give a far too narrow field of view for shooting my city. So I used a wide-angle lens (a Nikkor 28-300mm lens) with a narrow aperture setting of f/14 to ensure that the majority of the city, from front to back, was in focus.
A smaller f-stop with my lighting set up meant that a longer shutter speed was required: This picture was shot using 1/4 second, ISO 400, f/14.
You’ll definitely want to use a tripod for this work—I wanted the camera angle high and at a slight angle to the city, and actually ended up with two legs of the tripod on the floor and the third on a bed!
I used a remote shutter release as well, since my set up was less than stable and I wanted to remove any chance of camera-shake. Another option would have been to use a timed shutter release.
The key to this kind of shoot though is the wide-angle lens. If you use a phone for shooting then by default you should have enough width to capture a large MOC easily. Some phones have a dedicated wide-angle mode as well, handy if you have limited space to get back from the subject.
DSLR users will need a dedicated lens for the purpose. As a general rule, the larger the starting focal-length number on your lens, the further away you will have to stand from it to get it all in one shot.
Learning point 4: Don’t rush the set up of the shoot like I did (I was racing against time as the room was required for guests staying at the weekend) and try a few different combinations of ISO, f-stop and shutter speed. Really, the f-stop needs to be narrow to get the whole city in focus, but perhaps I could have decreased the shutter speed even more to let more light in and reduce my work in post-processing.
Composition
For many MOCers the most important consideration for photographing their creation is that it provides evidence of the build, and that most of the detail is shown. However, this can be done in more artistic ways using a few simple guidelines.
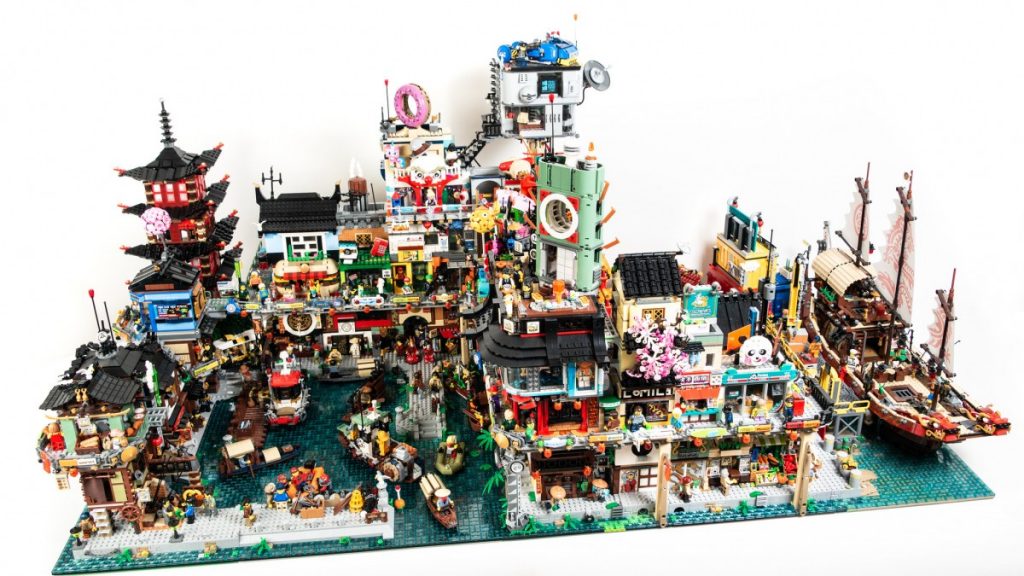
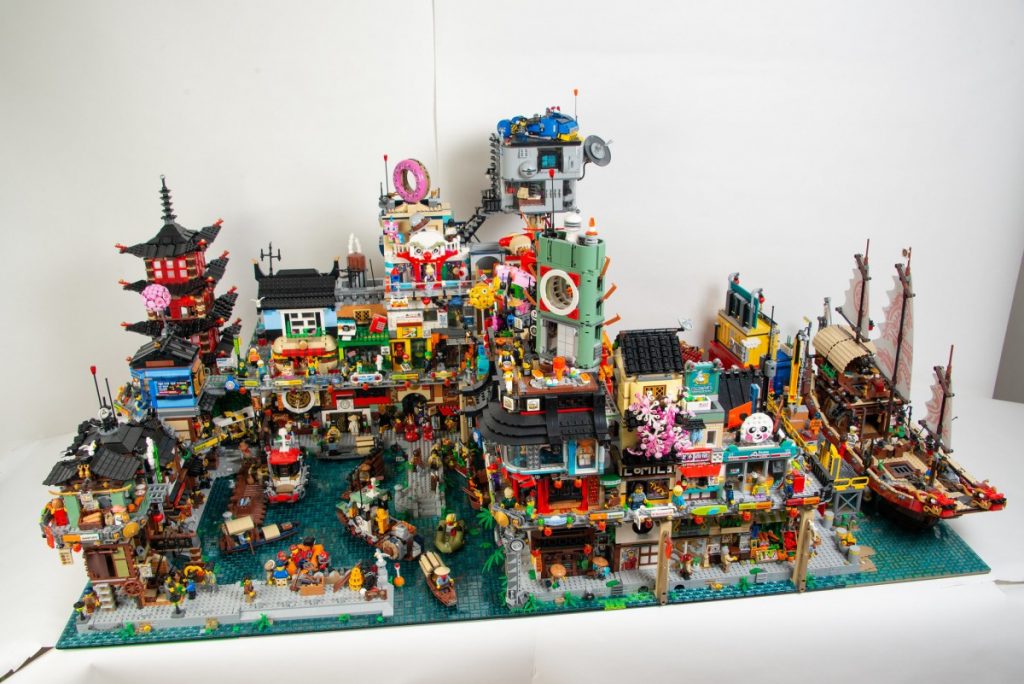
I try to avoid too many horizontal lines in the shots as they aren’t very dynamic—I shot the two ‘full city’ shots (see above) from an angle to give a sense of movement, like we’re flying over the city, and to allow the viewers’ eyes to flow around the scene more naturally.
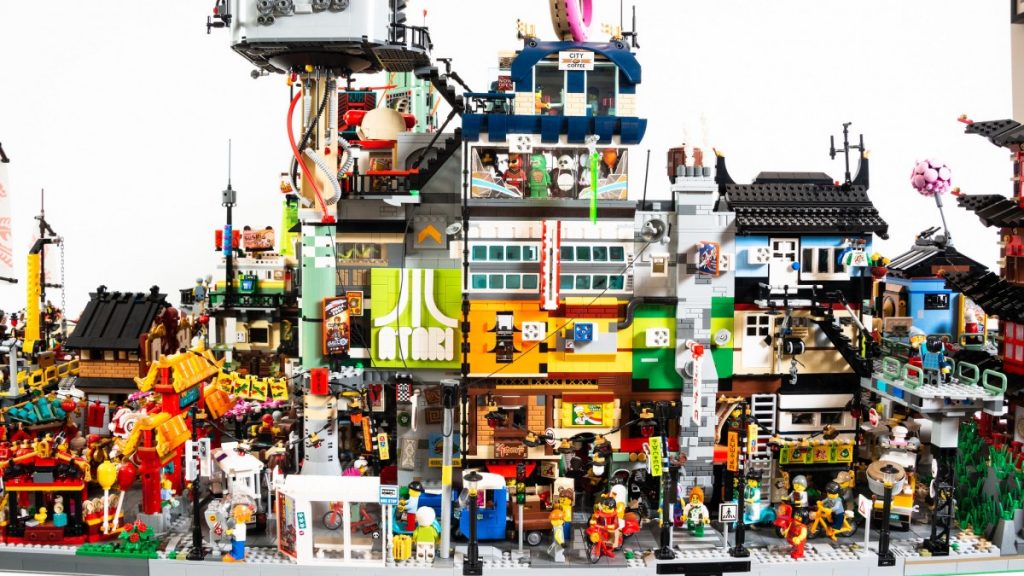
In the scene below I did allow horizontal lines, but I did this purposefully to create a ‘frame filling’ shot to emphasise scale and the detail-filled city.
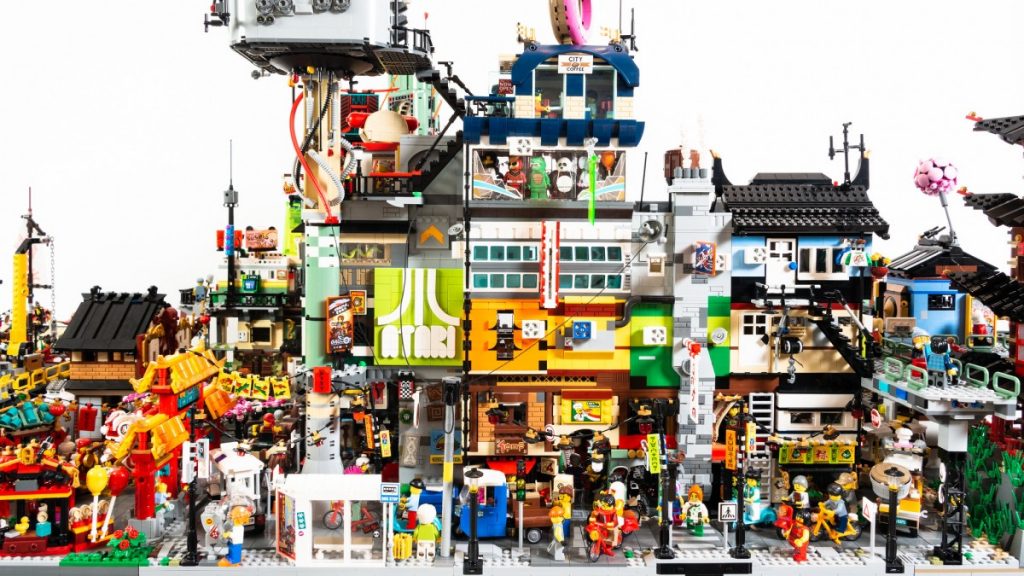
Horizontal lines with a wide angle lens present other problems we’ll look at in the next section.
Other compositional suggestions for a city scene include looking for ‘leading lines’ to create flow, guide the narrative of the scene and create perspective. Here are a couple of examples of what I mean:
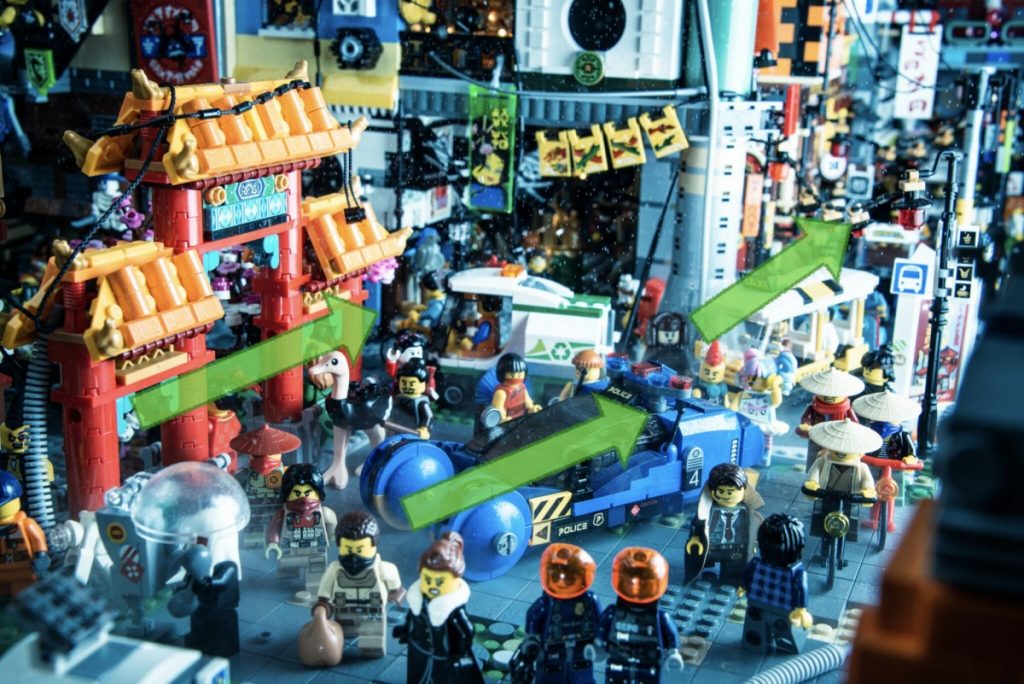
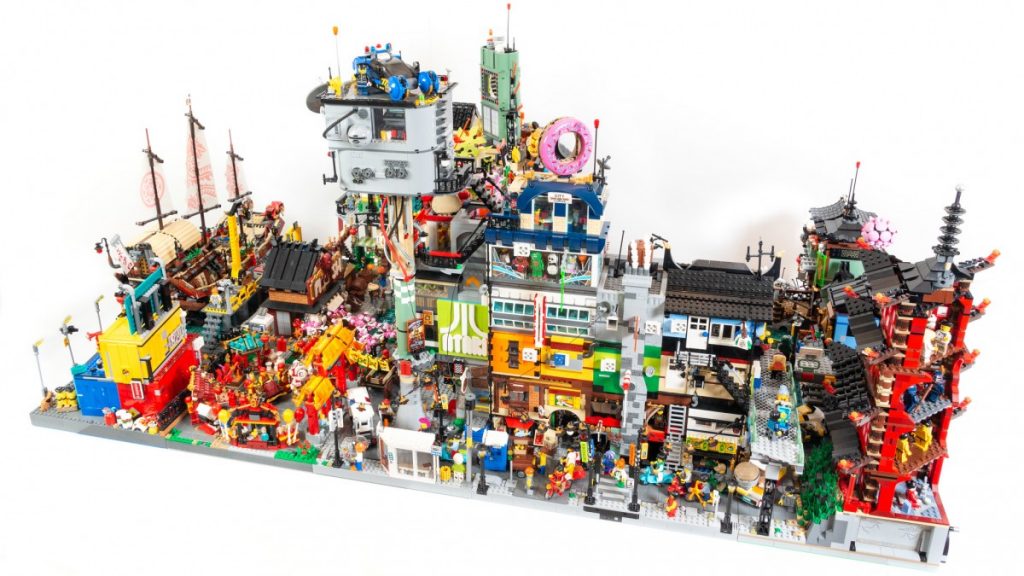
In this shot the angle of the China-Town gate leads the eye to the centre of the shot, which shows off the main subject, the spinner. The angle of the spinner carries the eye on to the rear right of the shot, to show off how far back the city extends, creating a bustling feel of a city with life beyond the boundaries of the frame.

This shot uses the breakwater and the upper level walkway to lead the viewer through the composition.
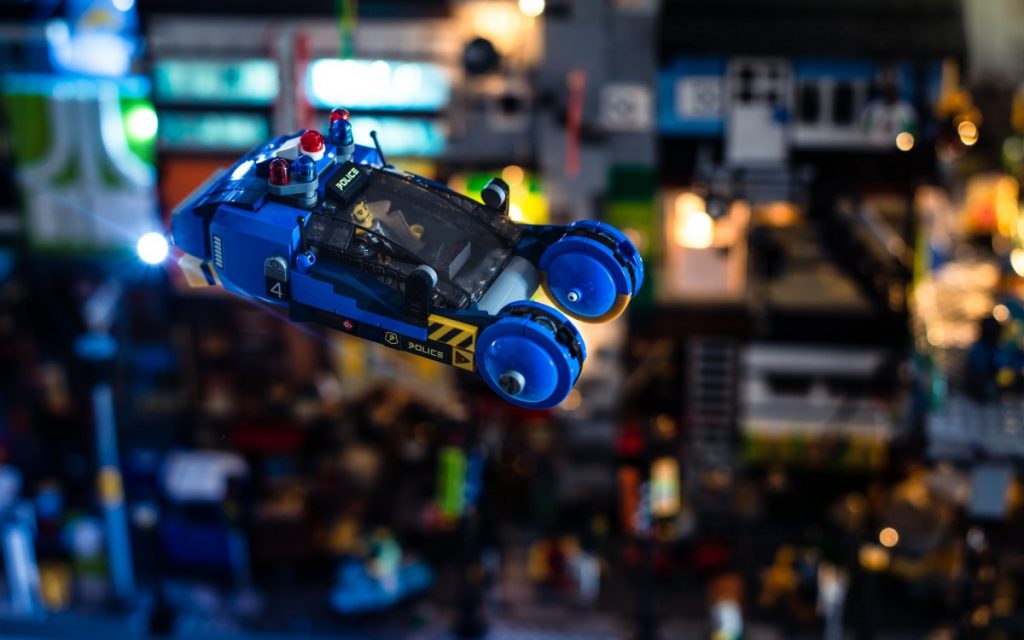
Other possibilities include focussing on mini-stories taking place in your city, or using the city as a backdrop for photos of other smaller subjects:
Learning point 5: As a photographer I regret not thinking ahead more to enable my city to be more easily photographed! I don’t have a whole lot of easy vistas or left-to-right lead-ins. Also, the main area I wanted to use as a backdrop for other shots was too narrow to act as a stage for the scenes I had in mind!
Post-processing
As alluded to in the rest of the blog, I had a few things to fix in post-processing: the lighting, some backdrop issues and problems caused by the wide-angle lens itself.
Firstly I had to balance out the differences in lighting across the city caused by mixing flash with a continuous light source. In Adobe Lightroom I used a mixture of the ‘exposure’ slider, ‘shadows’ slider and a ‘graduated filter.’
To address the backdrop, I had to fix three problems—the fact that my white paper looked grey, the seams where the paper was joined by tape, and the gaps where it didn’t extend far enough. I used the ‘exposure’ slider again, along with the ‘whites’ slider to push the grey backdrop further back to white. Then I took the shots into Photoshop to use the clone tool to remove any remaining seam lines and gaps.
The wide-angle lens I used introduced another problem—barrel-distortion. This is especially noticeable at the edges of photos taken with a wide-angle lens— straight lines appear curved and shapes can get skewed. I was lucky in that Lightroom includes settings to automatically compensate for some distortion caused by certain lenses:
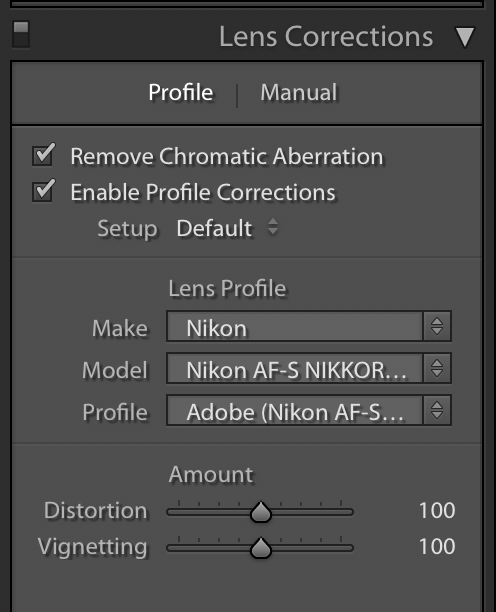
The ‘profile correction’ tick box detected my lens type and automatically compensated for the barrel distortion
Note the curved appearance of the road and the visibility of the backdrop gap at top-right before I applied the fix
If you use Lightroom but your lens is not recognised in its library, or if you use a different editing tool, then you’ll have to play around with the manual sliders for distortion to try straightening the curves.
Summary
Photographing a large MOC or LEGO city is a challenge, but can yield great rewards as everyone acclaims how wonderful you have been! It makes the years of toiling away in a lonely, dusty, spider-filled garage worth it to show off the creation!
You can follow more of Keith’s work on Instagram and Flickr.


Way to go Keith! Your city is a neverending source of inspiration, especially for cyberpunk stories!
Thanks Marco! I aim to make it more cohesive and sci-fi over the next 3 years or so 😀
An interesting read Keith, thanks. I am never going to build anything that big (you are crazy ?) but it was fun to read about the challenges you encountered. Also I do love your city. Now you just need to.make it bigger ??
The lego cities are very complex! I feel like the lighting for the buildings would take a ton of work, considering the legos have so many different colors. You really shined a lot of light onto this subject!