
”Embrace light. Admire it. Love it. But above all, know light. Know it for all you are worth, and you will know the key to photography.” (George Eastman)
In parts 1 and 2 of this series I covered the design and building of a lighting stage and its associated lighting rigs and lights. These are designed to replicate stage lighting on a smaller scale for the toy photographer. The intention is to light a figure, or a series of figures to help tell the story in an image. However, the lights are also well suited for portraits of our favourite muses and the messages you may wish them to impart. This final post in the series will concentrate on using the lighting rigs and lights to add mood and drama to toy portraits to support these messages.
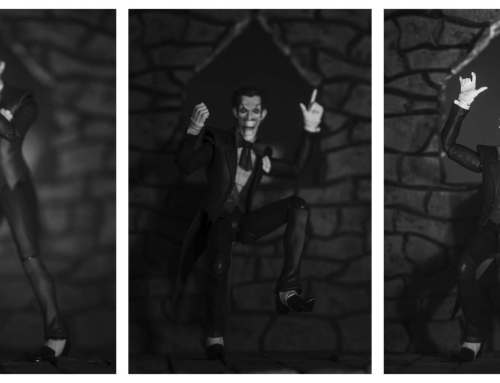
I have always been interested in what I call ‘Hollywood’ style portraiture. Those wonderful old monochrome images of movie stars that would promote their signature looks. I was given a book, published in 1948, that gave me an insight into how some of these poses and the supporting lighting were used for effect. I have been waiting for the right time to try some of these techniques out and the lighting stage has given me that opportunity. Please note that I have chosen to keep the photographs in colour to maintain the relevance to mainstream toy photography.
My Muse
I wanted to move away from my traditional toys, Lego Minigfigures and 3.75”/6” figures, to get a better understanding of how lights work with facial features and hair. For my muse I settled on a Hasbro Forces of Destiny 11” Rey doll. She is the closest, reasonably priced figure that I can get that has stranded hair, facial features (prominent nose, brow, lips) and articulation. The only change/addition I made was to add Mod Podge to the flat, printed eyes to allow catchlights to be seen in them. There are printed catchlights as well, but you can see the difference between the two types in the images. My particular model also had a very floppy head which I held in place with adhesive putty at the rear of the neck/head.
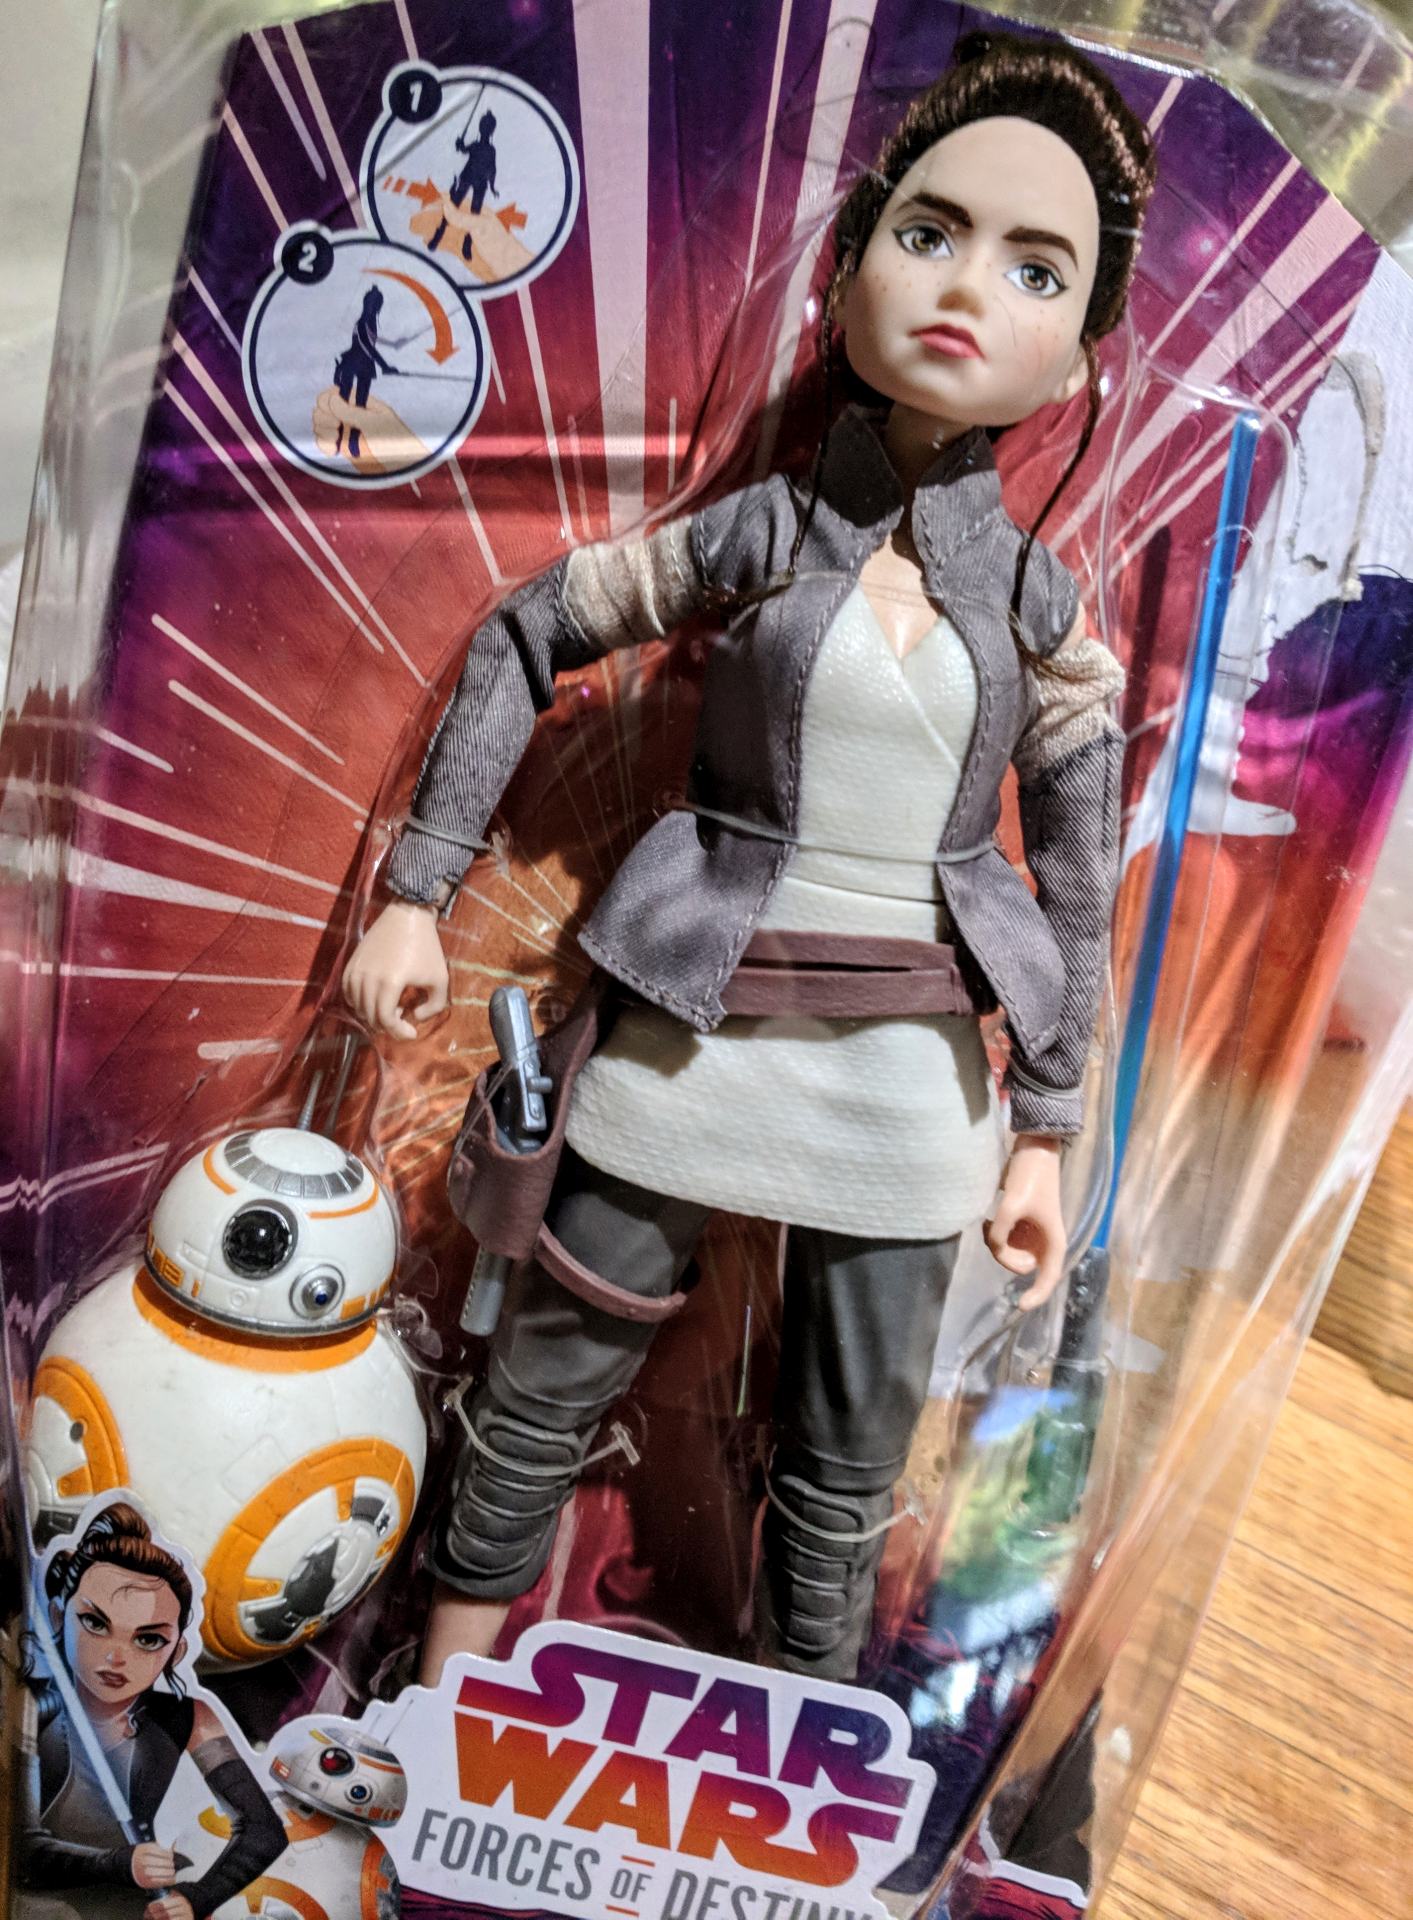
Hasbro Forces of Destiny Rey and BB8 Adventure
The Lighting
Please refer to part 2 for the lights used in this post. I used all of the lights made from USB LED Cards and custom accessories such as a diffuser, beauty dish, and barn doors. However, I encourage you to experiment with any lighting that you may have on hand. This post is merely offered to inspire you to play with lighting to maximise the effect of the messages you are trying to deliver in your images.
The Portraits
Here I will outline six different poses and/or lighting setups that I found effective and fun to use. Hopefully this will give you a starting point for experimenting with your muses and lighting equipment. I have given these poses personal names. They may have official/technical photographic terms, but I’m afraid I cannot help you out with these. I have included, not to scale, lighting setups to help you with positions and levels of lights. Experimentation will be the key to getting the images that work for you.
You will find full resolution copies of each portrait (minus the setups in the corner) for further perusal at: https://www.flickr.com/photos/tonytulloch/albums/72157702579964502/with/31856120137/
All images are SOOC (Straight Out Of Camera) JPEGs and have not been altered in post processing.
Portrait 1 is an ambient light reference shot. This was from a window about 4 metres (13”) away to the front right. Portraits 2-6 are the same setups as portrait 7 (below) but have different main lights as described in part 2. All images were taken with the same Zuiko 50mm lens (portraits 1-7 at f/2.0 and portraits 8-12 at f/5.6) on a Micro Four Thirds sensor, and a black backdrop. The camera and lights/strengths were the same distance/power for portraits 1-7, but were varied for portraits 8-12.
Rey portrait 7 – the classic ¾ pose with backlight and softbox portrait
The muse is on an angle from the camera (only the head in this shot) and is looking towards the main light at the photographer’s right. The spotlight at rear left provides lighting for the hair to allow separation from the background. The softbox provides a soft diffused light that allows for detail in the shadows, which are formed by the main light being just a little to the right of the muse’s face. This works well for delicate/cute subjects and poses that require a softer emotional look, such as pensiveness, daydreaming, whimsy, etc.
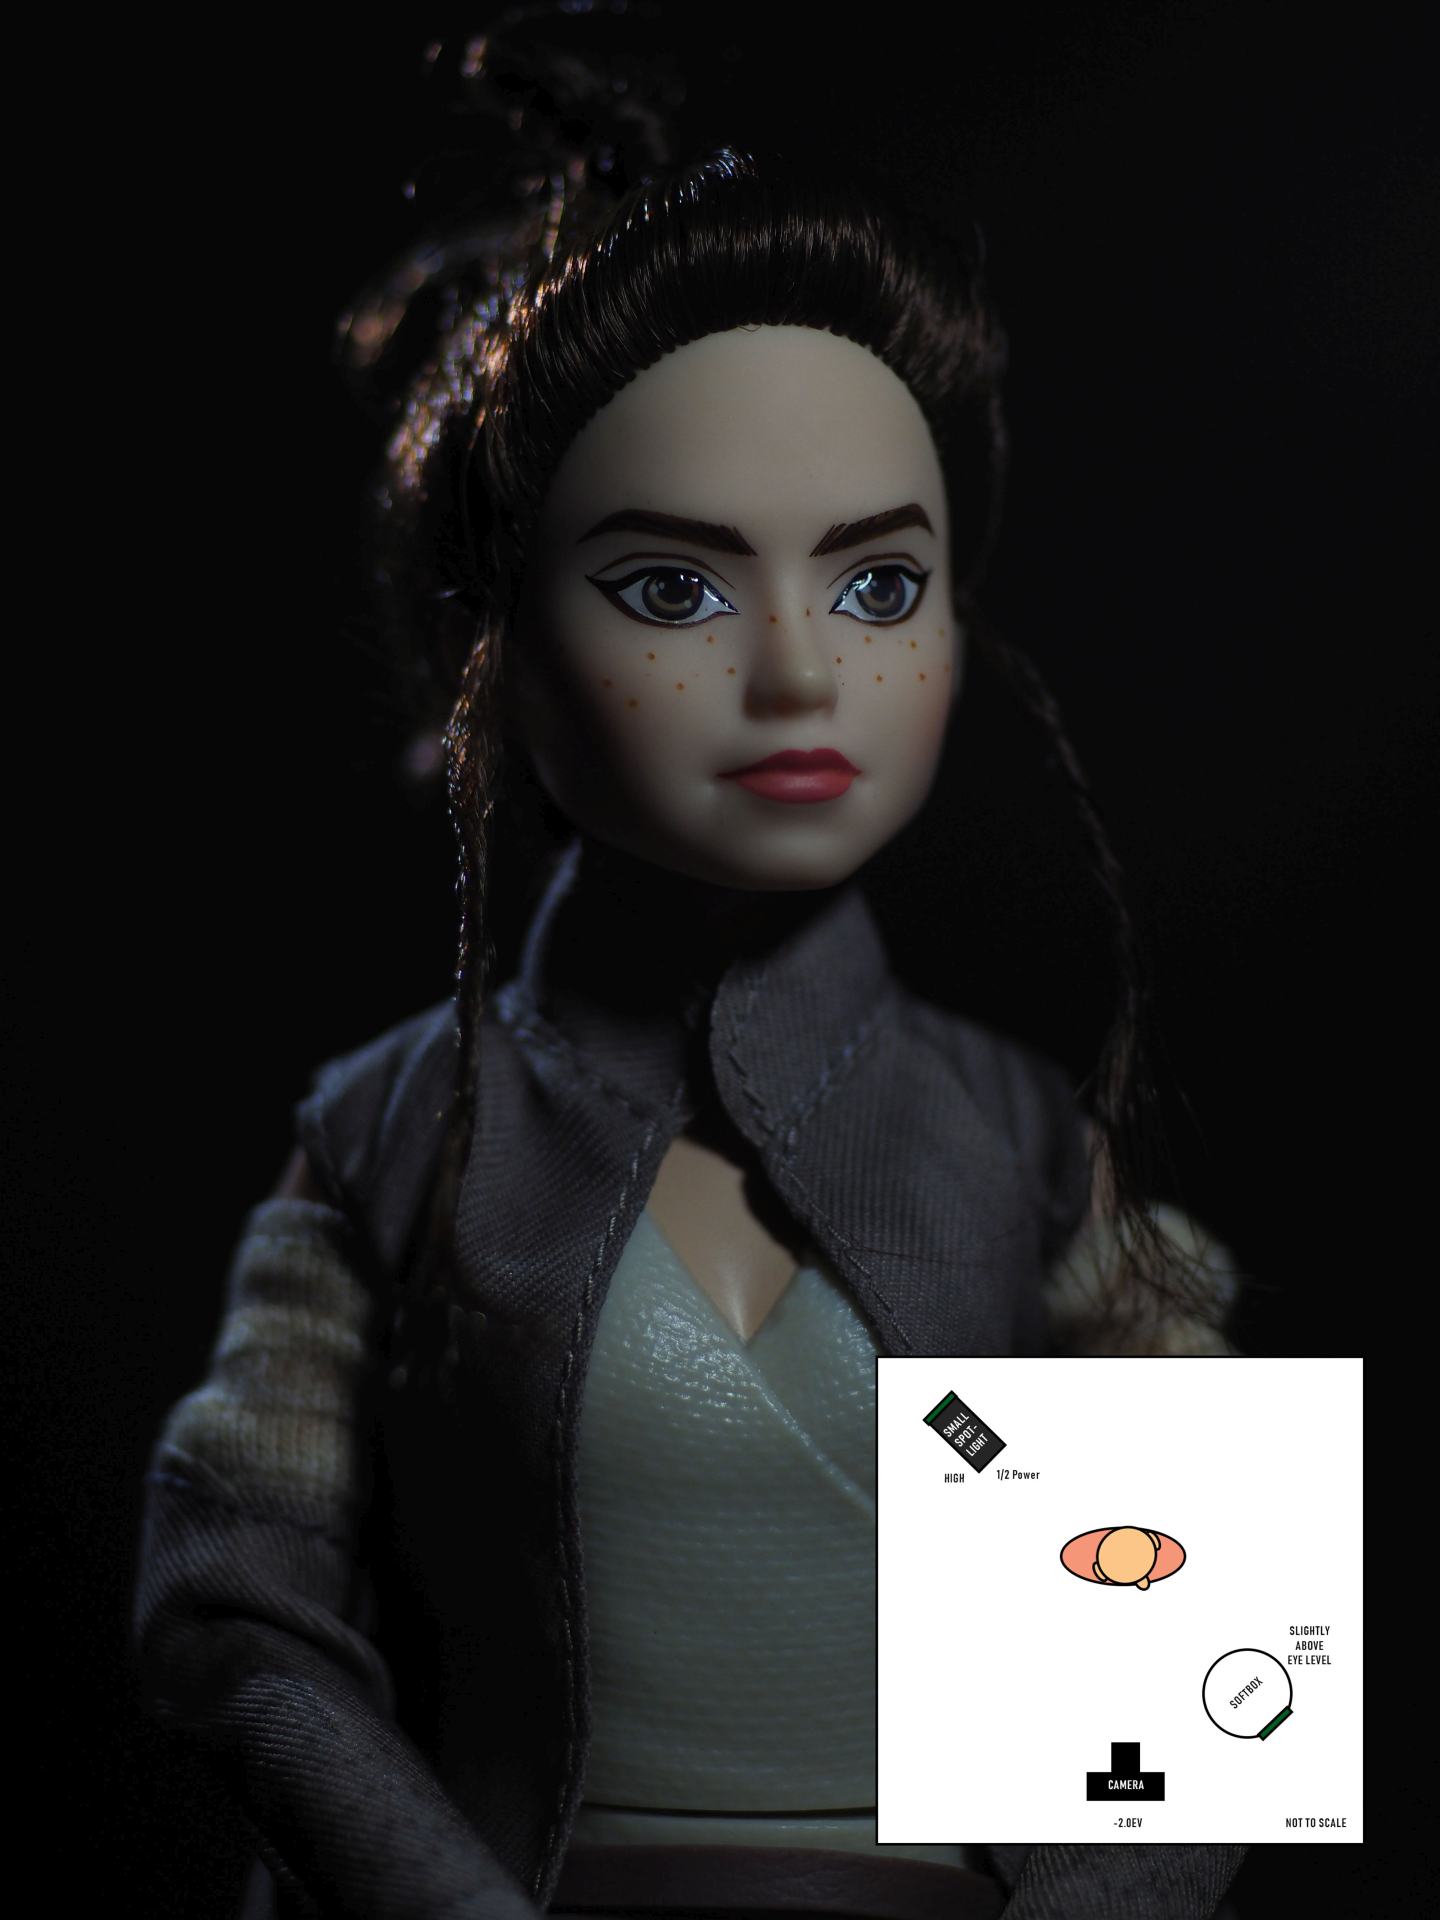
Rey portrait 7 – Zuiko (OM mount) 50mm f/2.0 at f2.0; half rim light, left rear; softbox, right front.
Rey portrait 8 – an upbeat ¾ pose with backlight and beauty dish
The muse now looks away to the distance, maybe somewhere into the future or past, and almost directly into the main light. The main light is placed slightly to the left to allow for short shadows to give a full look to the face. The beauty dish still offers softer light, but the shadows are deeper and have less detail than the softbox. The backlight is offset to show a subtle distinction between the head/body and the background, rather than lighting the muse from the rear like a rim light does. It also gives a full roundness to the head. The pose and lighting combination allow for a more alert mood than portrait 7 and can help to signify reverence, love, and hope.
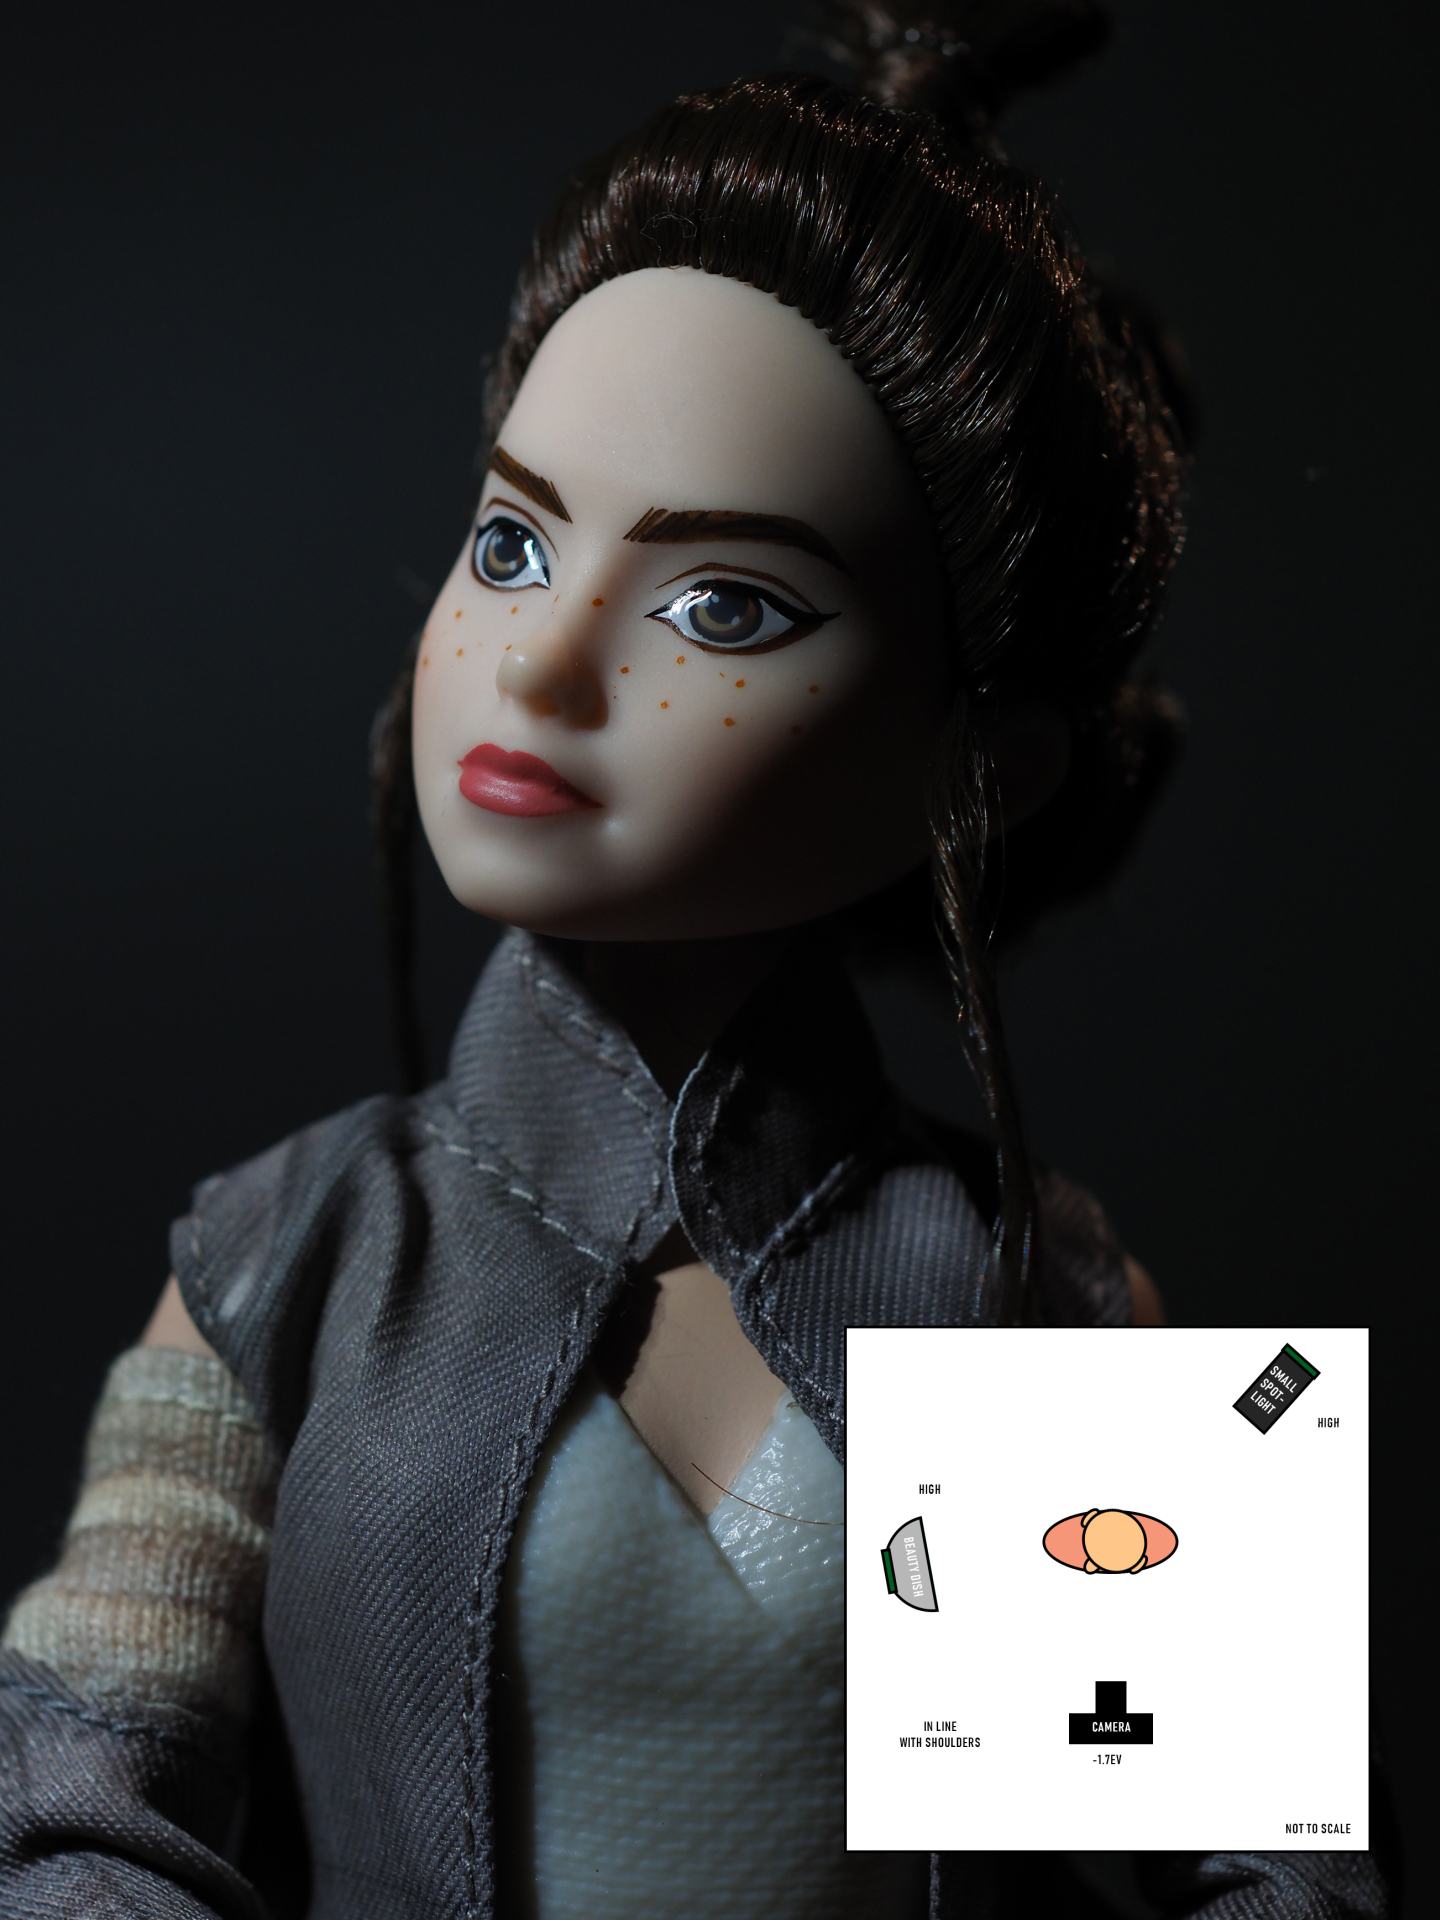
Rey portrait 8 – Zuiko (OM mount) 50mm f/2.0 at f5.6; spotlight, high right rear; beauty dish, high left front.
Rey portrait 9 – downbeat off centre pose with two spotlights and a reflector
The muse seems aware of the camera, but is otherwise preoccupied. The front spotlight, normally harsh at this distance, is tempered by the rear spotlight being bounced off a reflector to the photographer’s right. This allows the shadows to retain more detail in the subject, but keeps them dark at the rear. The rear spotlight spills some light on the hair, allowing partial separation from the background. With the head down and no eye contact with the camera, this allows for a moody feeling that, depending on the facial expression, can convey sadness, melancholy, broodiness, or anger.
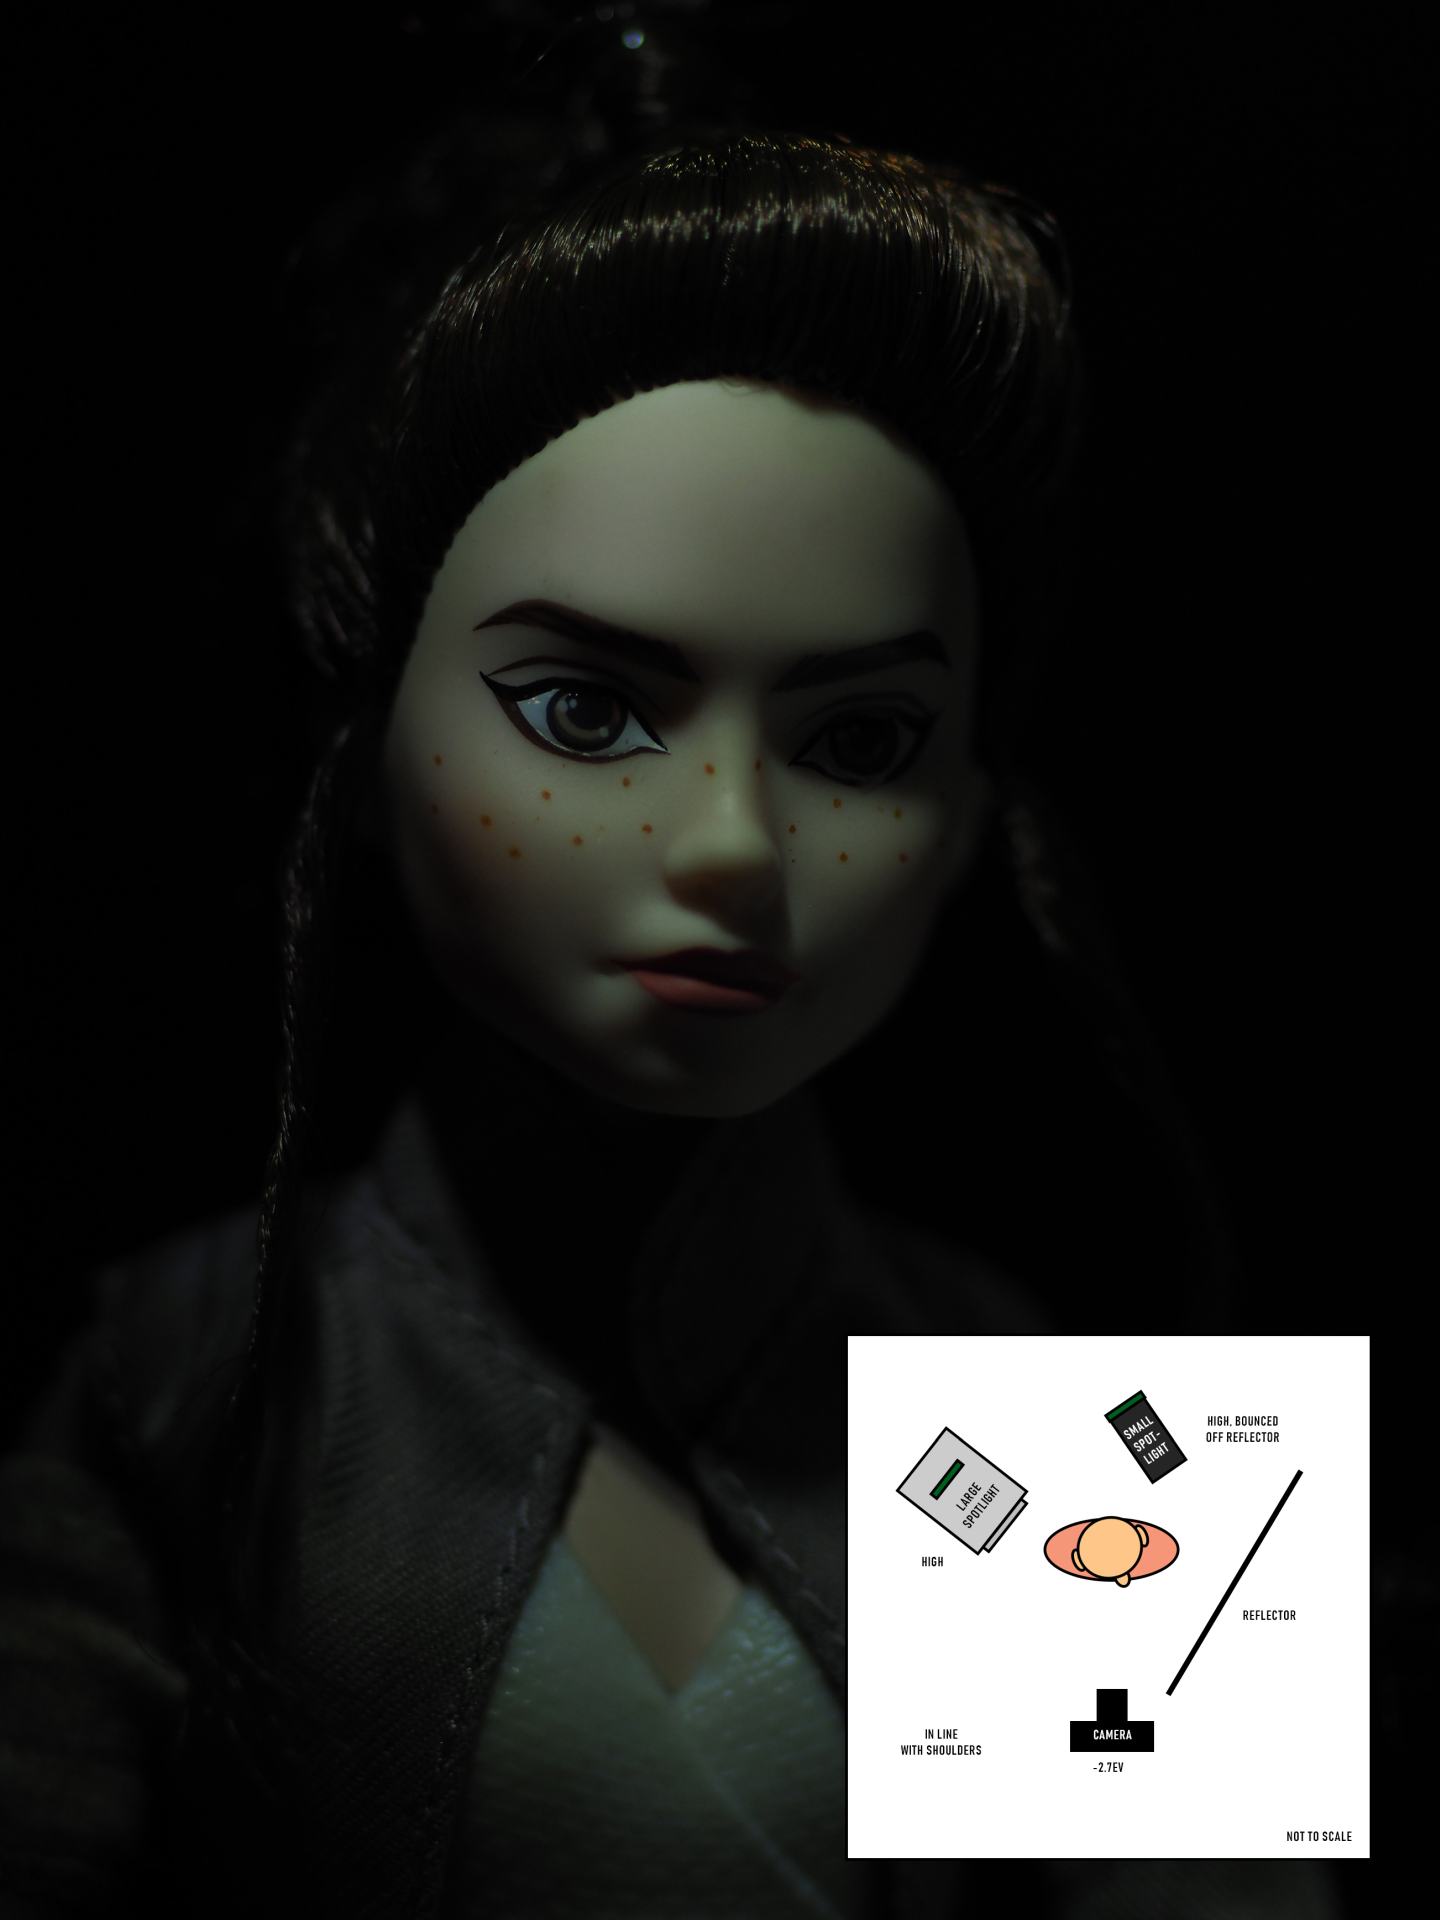
Rey portrait 9 – Zuiko (OM mount) 50mm f/2.0 at f5.6; spotlight, high right rear, bounced off reflector; spotlight, high left front.
Rey portrait 10 – front on pose with side spotlight and diffused background light
The muse is fully aware of the camera/viewer, but is choosing to look through them to something beyond. This is heightened by half of the face in full shadow from the spotlight and, with only one eye visible, tends to disarm the viewer. The harsh light of the spotlight maintains this feeling. On reflection, I feel I should have replaced the softbox with a harsh rim light at the rear right of the camera, as I feel the softbox is fighting the spotlight to set the mood. Harsh light can support a message of anger, action, hatred, or unbalanced/manic tendencies.
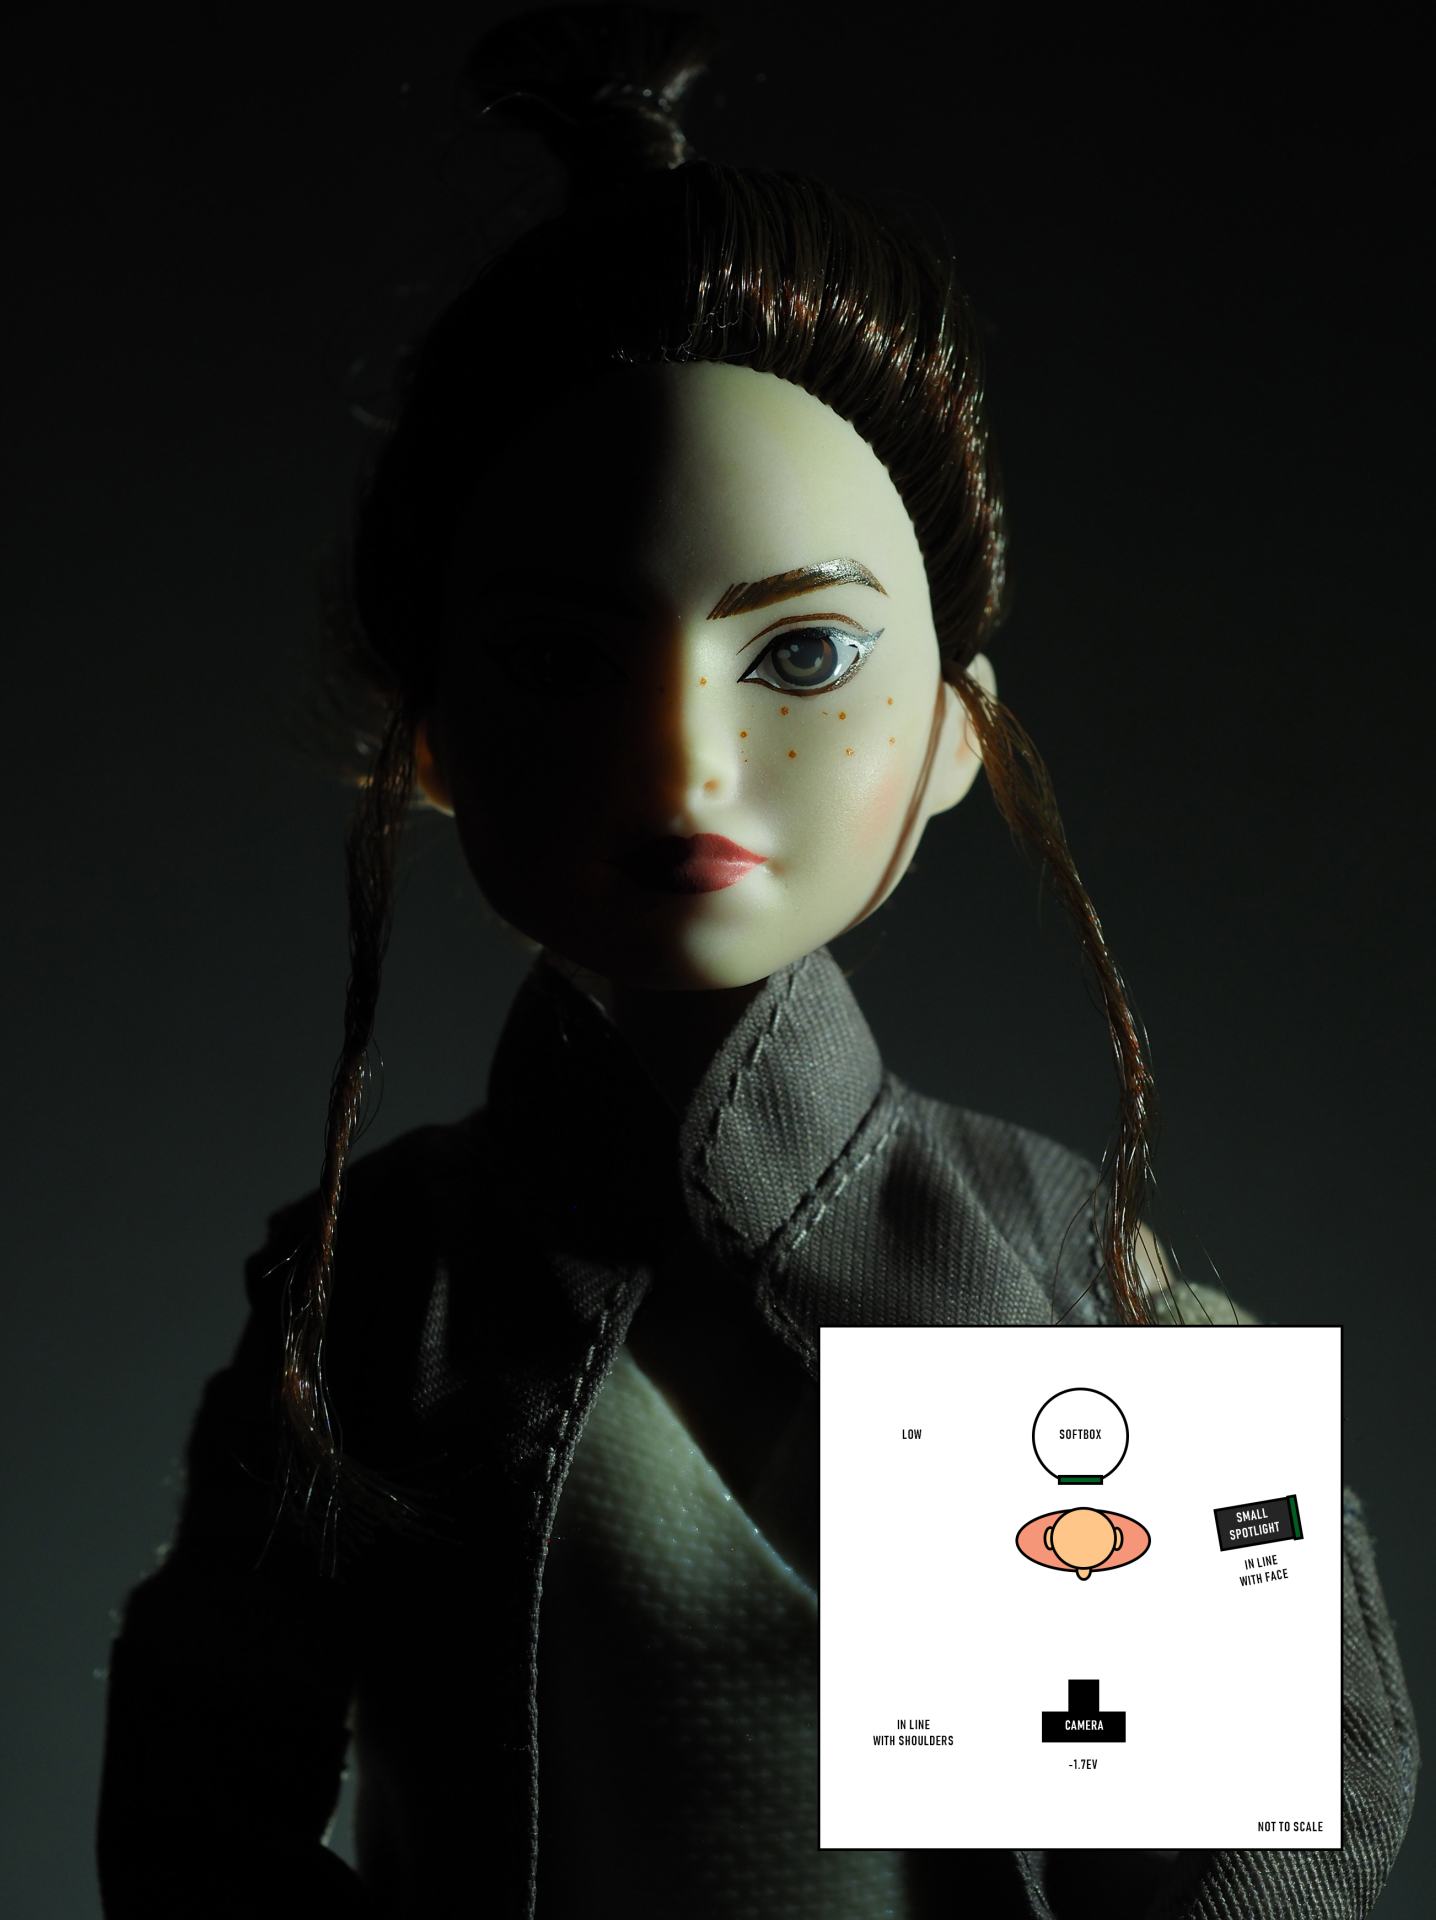
Rey portrait 10 – Zuiko (OM mount) 50mm f/2.0 at f5.6; softbox, low centre rear; spotlight, side right.
Rey portrait 11 – front on pose with barn doors and diffused background light
The muse is attentive and shows intelligence. The flatness of the light is countered by the offset position to the right of the subject’s face. There is a feeling of confidence or superiority in the subject due to the facial expression and position of the main light. The barn doors produce a light harsher than a beauty dish, but softer than a spotlight. One of the benefits of barn doors is that you have control over where the light falls without having to adjust the distance to the subject. This pose and lighting can show frankness, questioning, patience, or understanding.
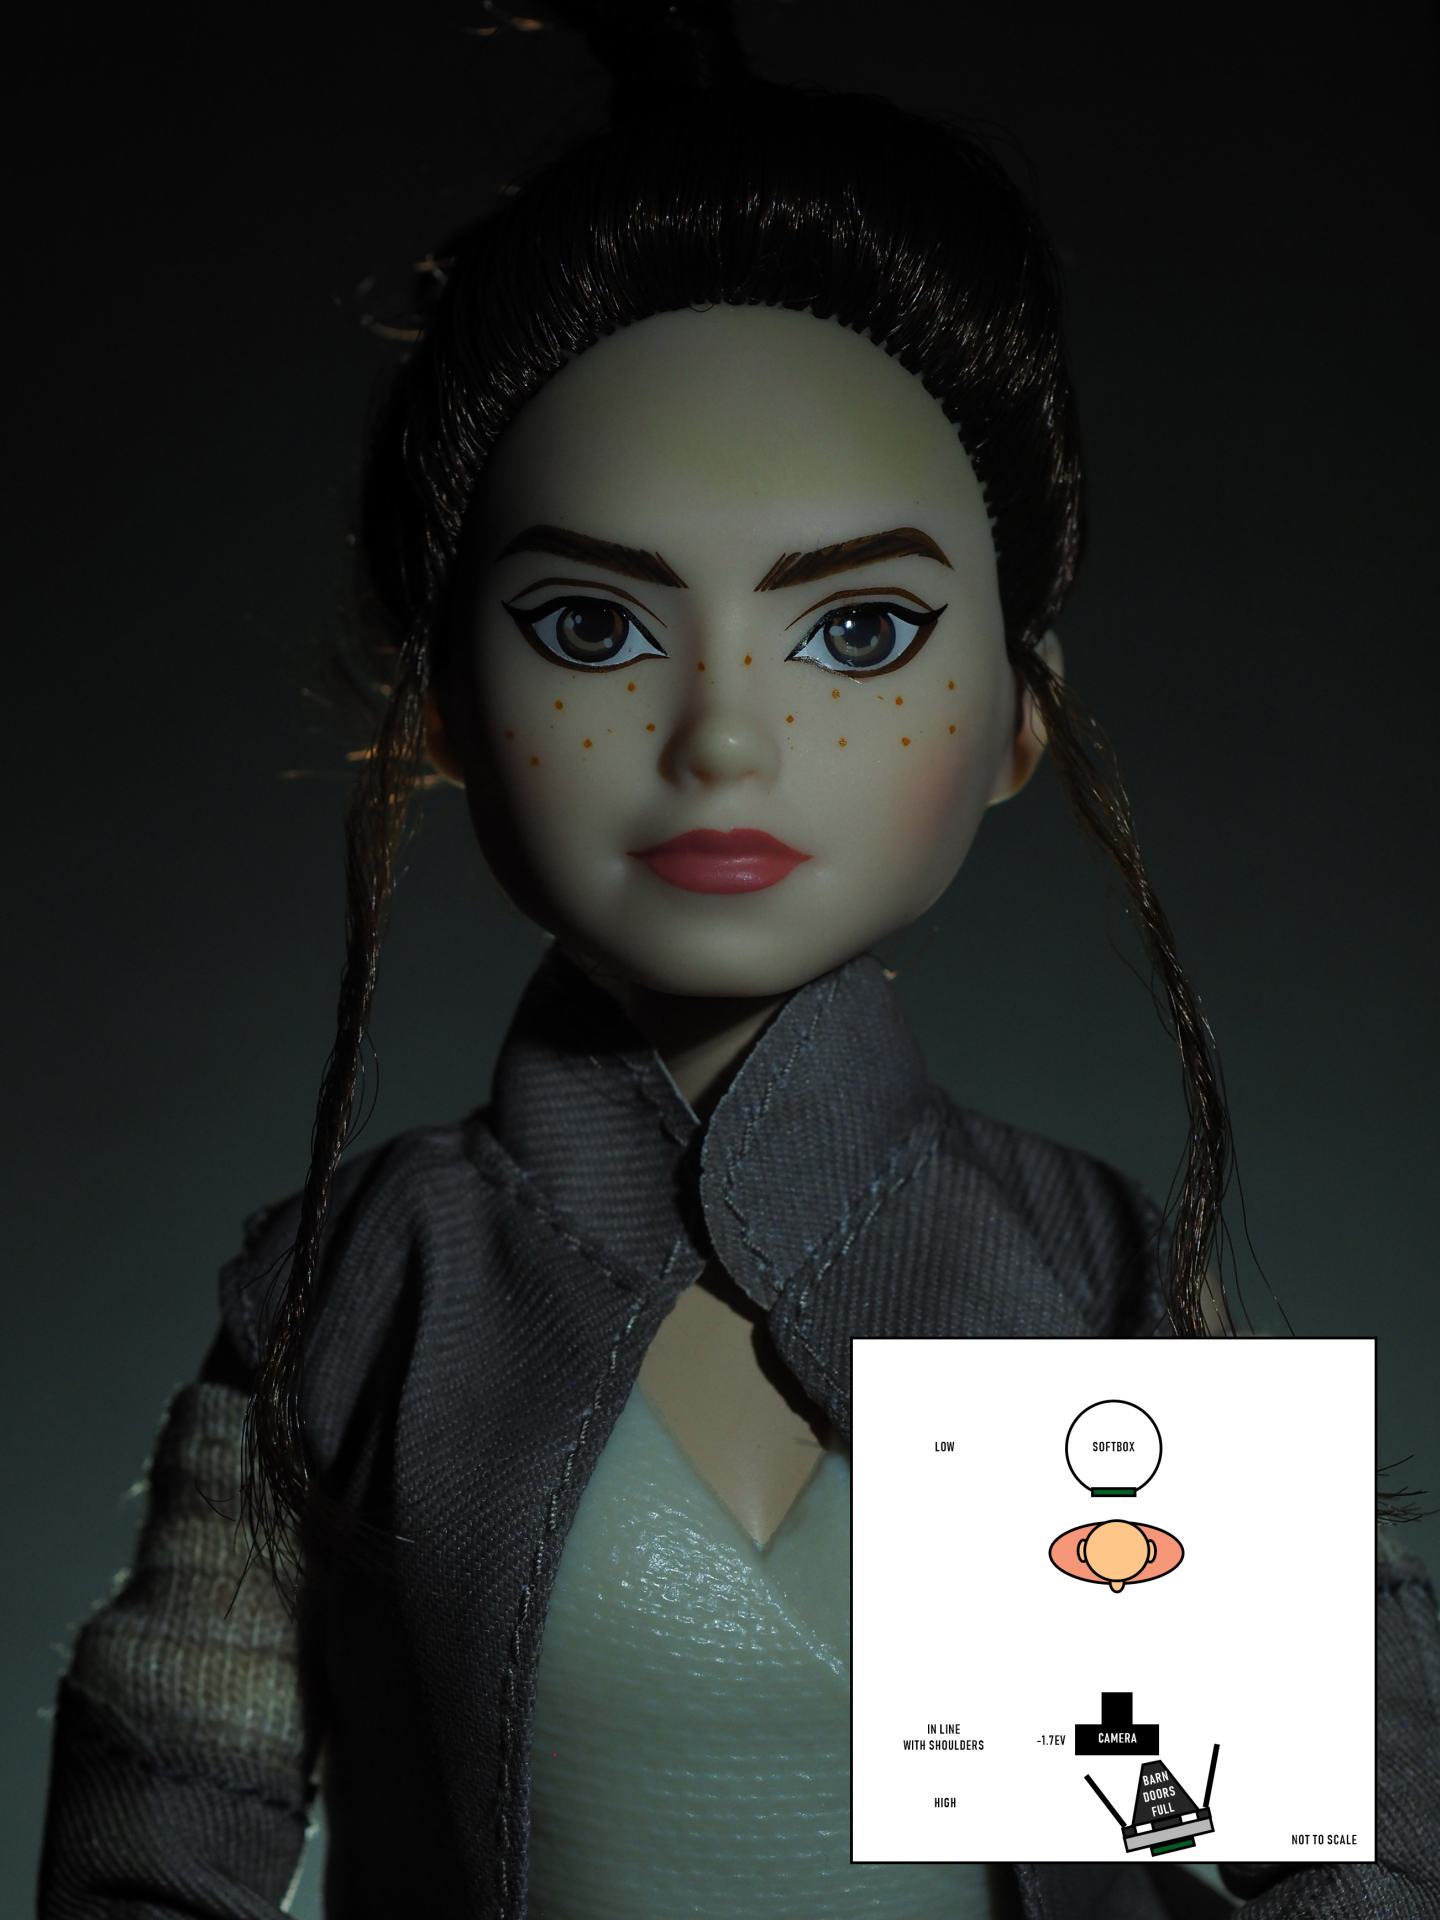
Rey portrait 11 – Zuiko (OM mount) 50mm f/2.0 at f5.6; softbox, low centre rear; barn doors, centre front.
Rey portrait 12 – front on pose with beauty dish and diffused background light
The muse seems to be waiting for something, or is maybe slightly amused, by an implied action or comment from the viewer. Eye contact is strong and the tilt of the head indicates a lightness of mood; this can also be used to make the viewer uncomfortable, or bemused. The background diffusion provides plenty of light to brighten a dark background and separate this from the subject. The beauty dish, as its name suggests, gives pleasant lighting for softer subjects; allowing for full features and lighter shadows. This combination can show mirth, inquisitiveness, or questioning.
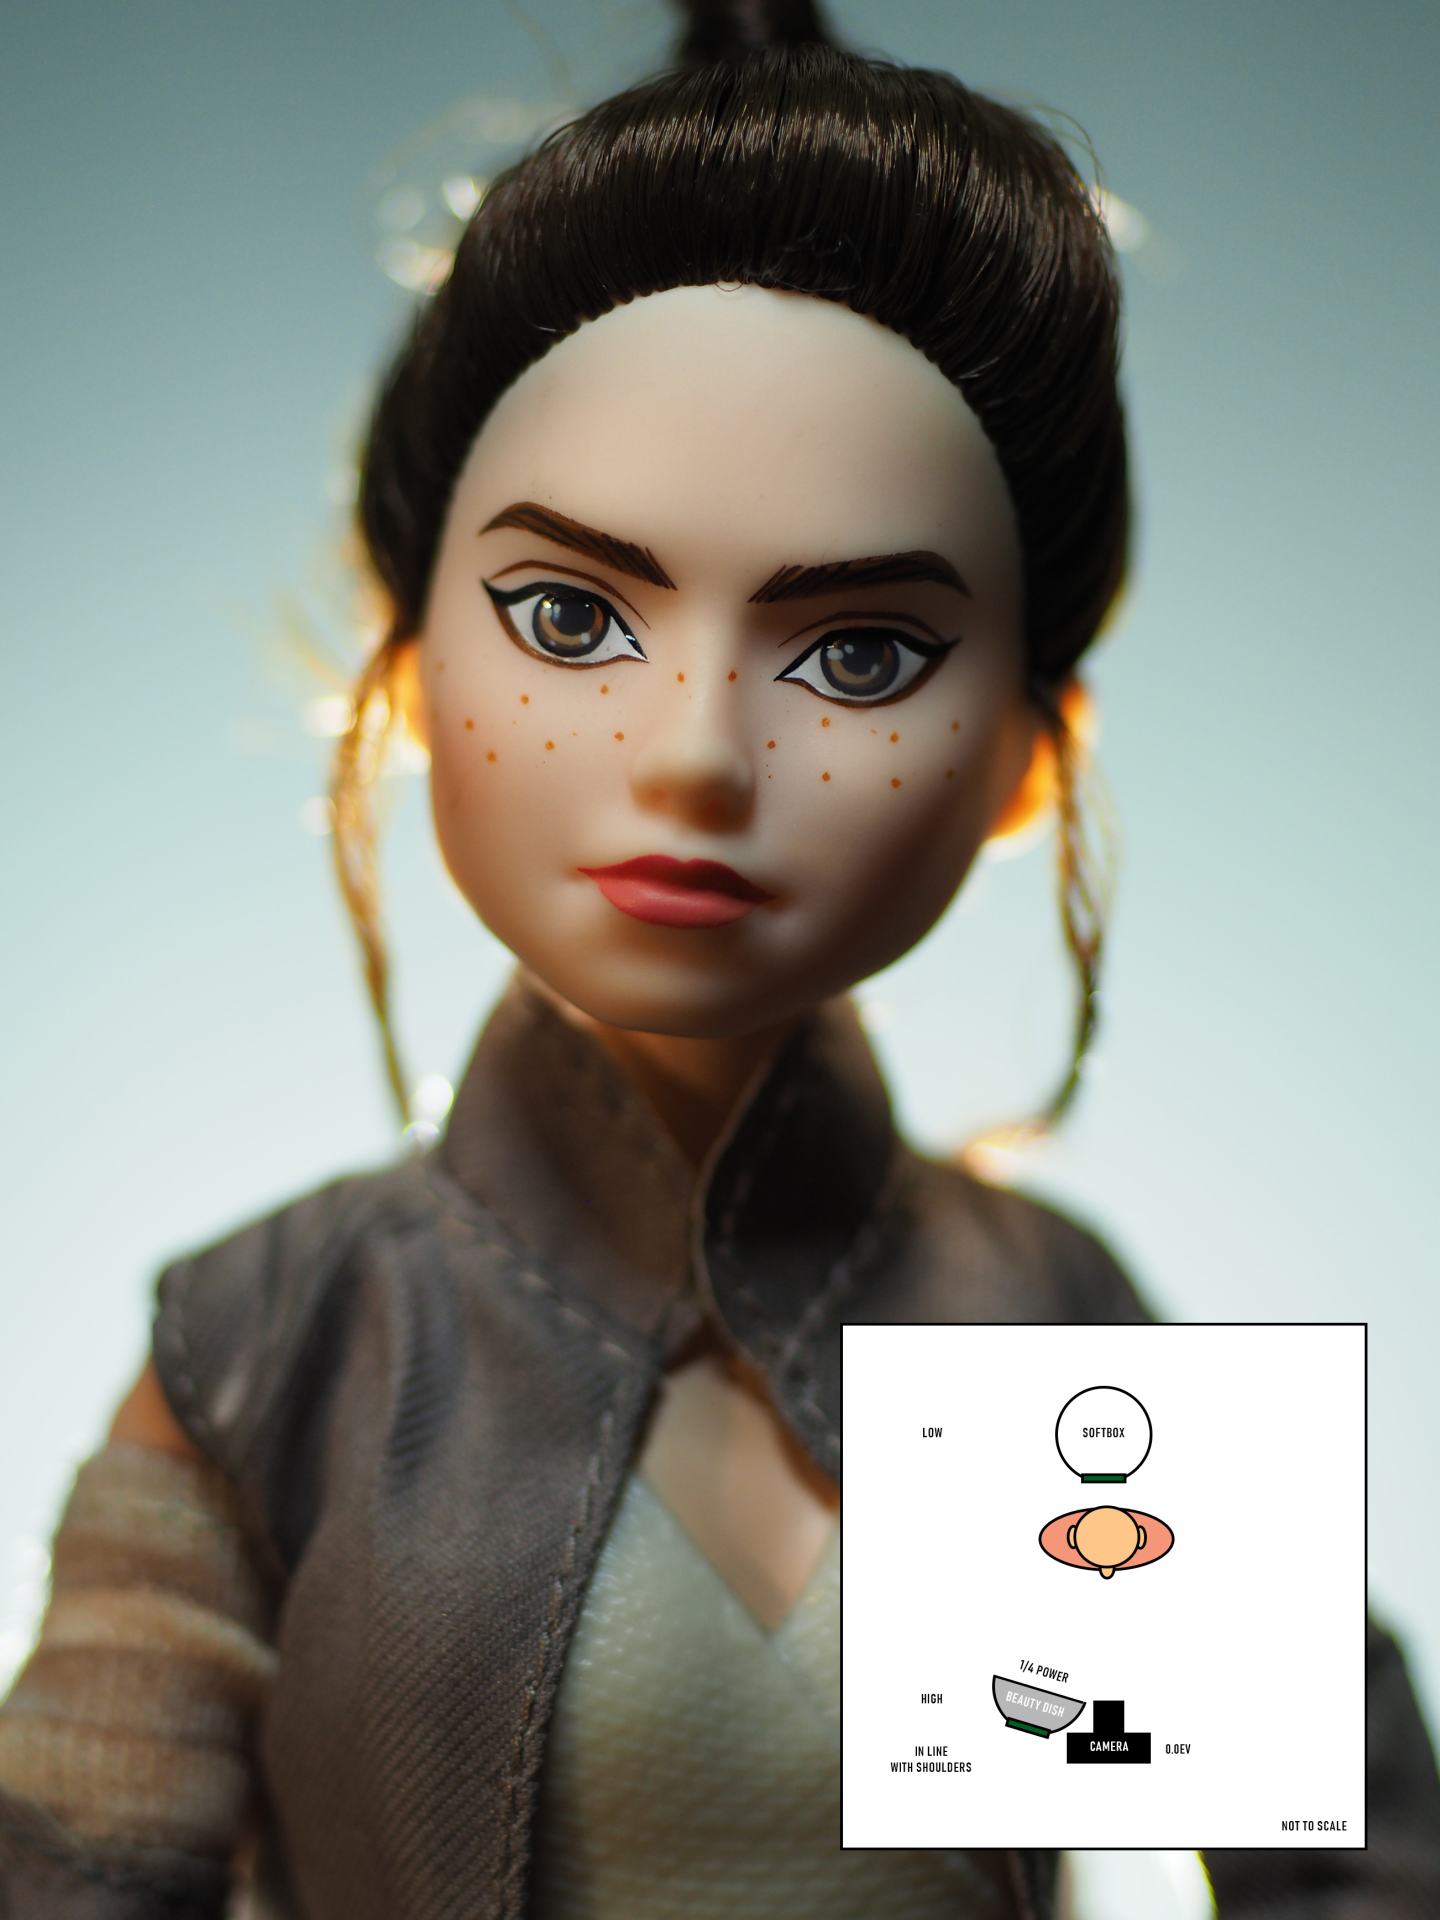
Rey portrait 12 – Zuiko (OM mount) 50mm f/2.0 at f5.6; softbox, low centre rear; quarter strength beauty dish, high centre front.
The Take-outs
Distance, power (remembering that these lights can be dimmed) and exposure compensation can all play a big part in the setting of the mood of your images, and should be included in the experimentation process.
If possible, set your camera to a white balance setting that suits your scene, even if shooting RAW. That way you can see what you are getting before you get to post processing. I forgot and left my camera on Auto White Balance (AWB) and as I shoot JPEGs I found that the colour balance didn’t match what I was looking for in some cases. Post processing JPEGs for colour balance can be tiresome.
Try to block out ambient light where possible. This will help you achieve more consistent results.
Summing Up
This whole lighting stage journey has been fun and I have gained an immense amount of satisfaction in the outcome of what I set out to do. I managed to replicate stage lighting for a mere fraction of what professional lighting costs and found a practical, if not perfect, solution for someone with basic crafting skills.
I hope this inspires you to play with light to help you get the images that you deserve.
My inspirations were from the Wallace & Gromit and Friends exhibition at ACMI and Lighting for Portraiture: Technique and Application, Walter Nurnberg, 1948, The Focal Press, London.
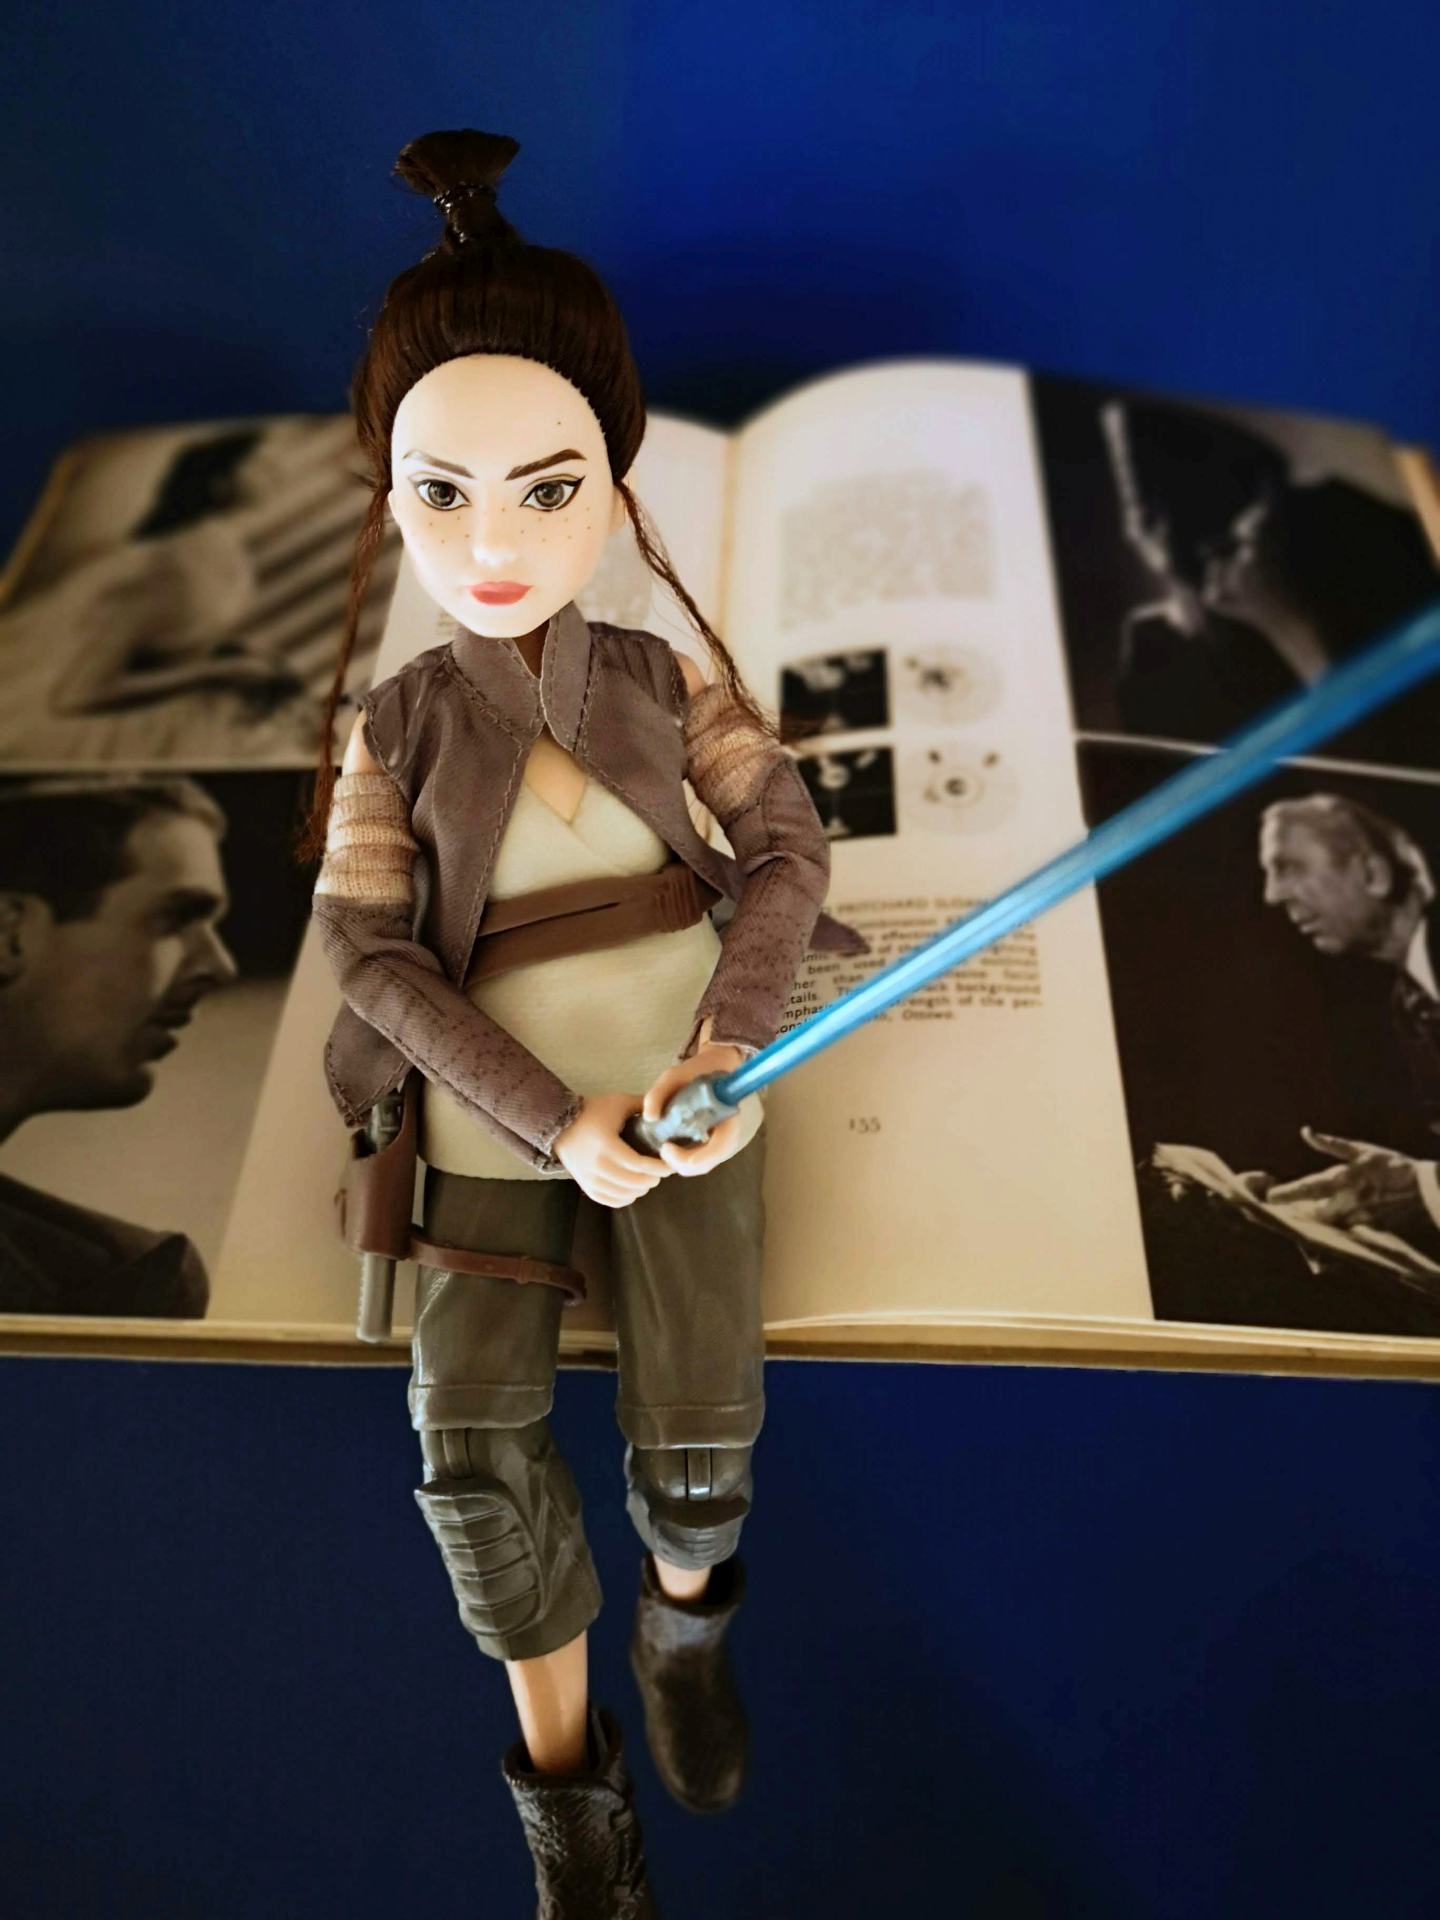
Rey and Walter Nurnberg (Lighting for Portraiture)


A shout out to Krash’s Kustoms for the introduction to the wonders of Mod Podge. Thanks mate.
Wow Tony, this is really professional! I love the portrait 12, the backlight is awesome!
Thanks Marco. The opportunity to change the brightness of the background makes a big difference.