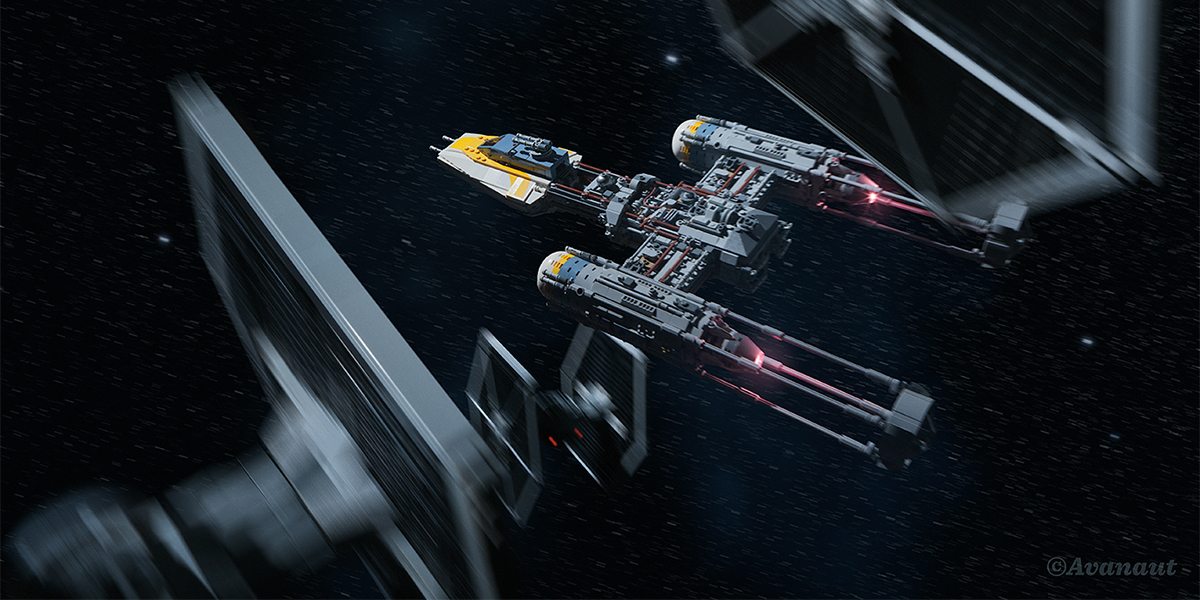
”What a piece of junk!” is a Luke Skywaker quote from Star Wars (1977). He said this upon seeing Han Solo’s spaceship the Millennium Falcon for the first time. It perfectly captures the lived-in look of the galaxy far, far away; nothing is off the shelf new and shiny. There is another ship in that galaxy that fits this the quote just as well; the Y-wing star fighter. The robust looking Y-wing is the unsung workhorse hero in the rebel fleet fighting the evil Empire. It is a heavy bomber fighter sometimes compared to the real life airplane Fairchild Republic A-10 Thunderbolt II, a.k.a. ”Warthog” because of its ugliness and relentless efficiency. The Y-wing has been my favorite fictional warbird for decades.
In 2009, when I stumbled on toy photography with my newly purchased digital camera, the first LEGO UCS Y-wing 10134 was already five years old and retired. When I found out it had even existed, the price had soared out of my reach so I was never able to purchased one. When this opportunity to review the new version of the UCS Y-wing for toyphotographers.com came up, I didn’t hesitate, I wanted to see what the top of the line LEGO Y-wing was like today.
The Box
The LEGO UCS 75181 Y-wing comes in a box which has a second box inside, namely a special UCS box. Some of the 1 to 13 numbered parts bags were inside the UCS box, some were randomly loose next to it. The instruction booklet is thick, 220 pages, and contains interviews from the makers of this set plus some Y-wing reference material from Lucasfilm. I like how they do these things for the UCS sets. Showing the faces and names behind the models adds a lot to how to look at them; they’re not just any products, there are living and breathing people behind them. This is a clever move from LEGO, adding the human aspect to the product works well. If you wish to take this to the extreme, I’d imagine you could collect models according to the designers, in this case Jordan David Scott. His previous work at LEGO include the UCS Snowspeeder and models for the Hobbit and the LEGO Movie, just to name a few.
The Minifigures
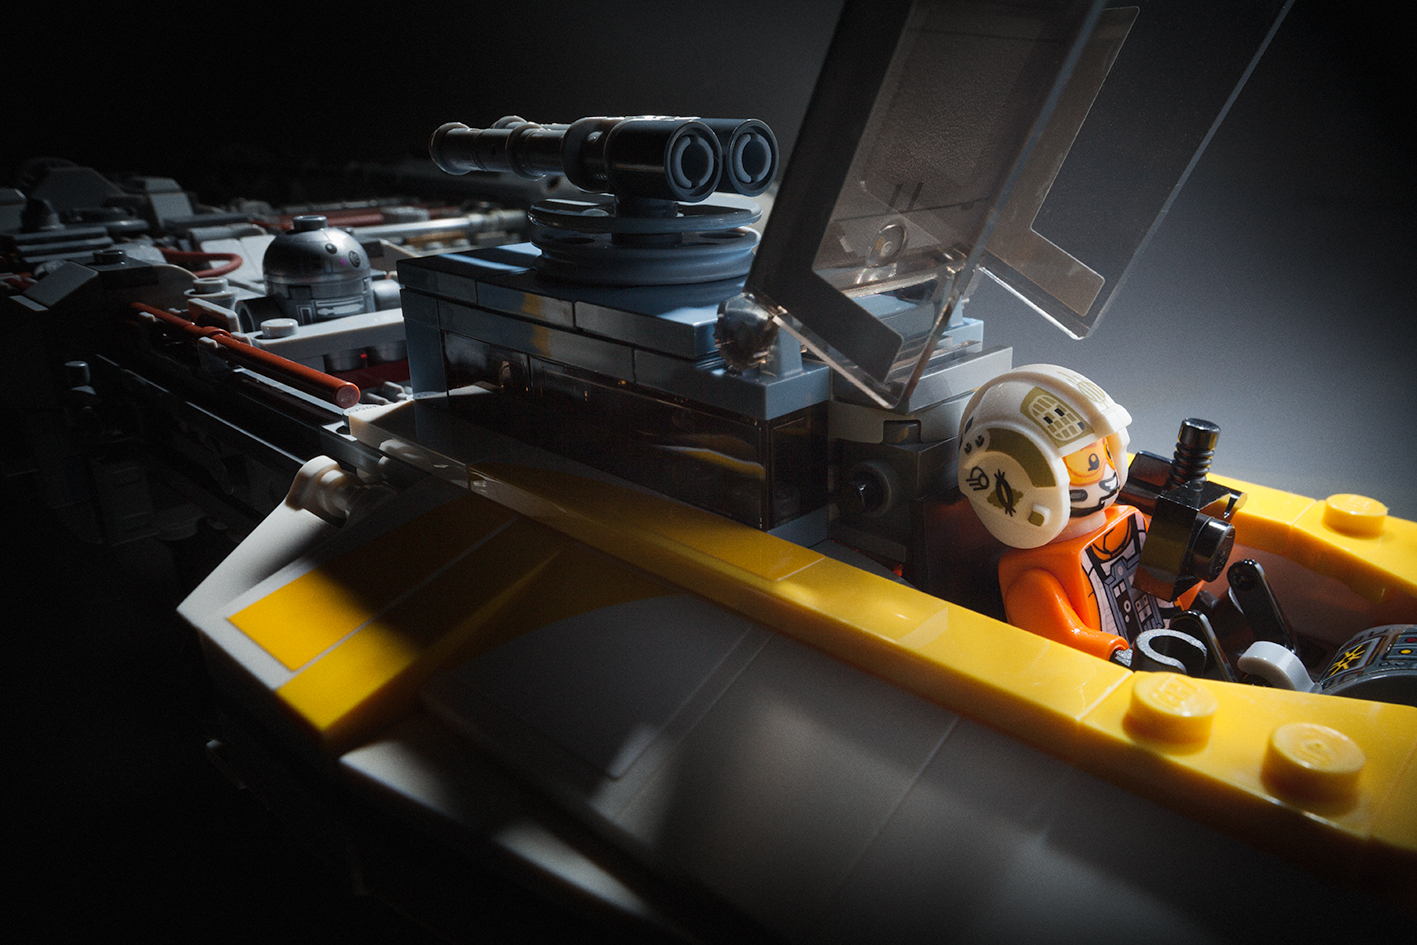
This UCS model is based on a battle of Yavin era Y-wing, a period on the Star Wars timeline when the Y-wing was considered to be at the end of its service life, a piece of junk, if you will. It comes with a minifigure of ”Gold Leader” Jon ”Dutch” Vander and a silver/grey R2-BHD astromech droid. The model itself isn’t necessarily the Gold Leader, as explained in the instruction booklet, but many details along with the Dutch Vander minifigure point firmly in that direction.

The grey/silver astromech droid can be seen on some 1976 or 1977 behind-the-scenes photographs of the Gold Leader model, but in the movie something similar can only be seen in one shot very briefly, and that’s not necessarily even the Gold Leader in that shot. I’m not 100% sure of this, I don’t know the movie that well. Apparently they forgot to put the droids on when filming the scenes, so most of the Y-wing shots are without the droids. Regardless, R2-BHD is named Dutch Vander’s astromech on starwarswikia and we’re fine with that. The interesting thing is that R2-BHD was supposedly on the Gold Leader in the battle of Scarif as well, this means that this LEGO model would pass as a Rogue One: A Star Wars Story model too.
Greebling
For me, putting the model together was a peculiar experience. I had just finished building a studio scale model of the Y-wing from a resin kit, a filming model replica which I upgraded with model kit parts from the same mid-1970’s vintage model kits they used for creating the originals back in 1976. Putting the LEGO version together with these details still fresh in my memory brought many enjoyable moments identifying the sources of some individual parts. For example, the use of the droid torso on the wings and on the hull to represent the 1/9th scale Kettenkrad track pad is ingenious! There are a lot of little details here and there where you can see how designer Jordan David Scott has looked at the reference and then translated that to LEGO. The small hump aft of the round wheel on top of the hull beautifully captures the contours of the real thing, a piece of the hull piping is remarkably well recreated using a brown whip, and the ”handlebars” in the butt were just pure brilliance.
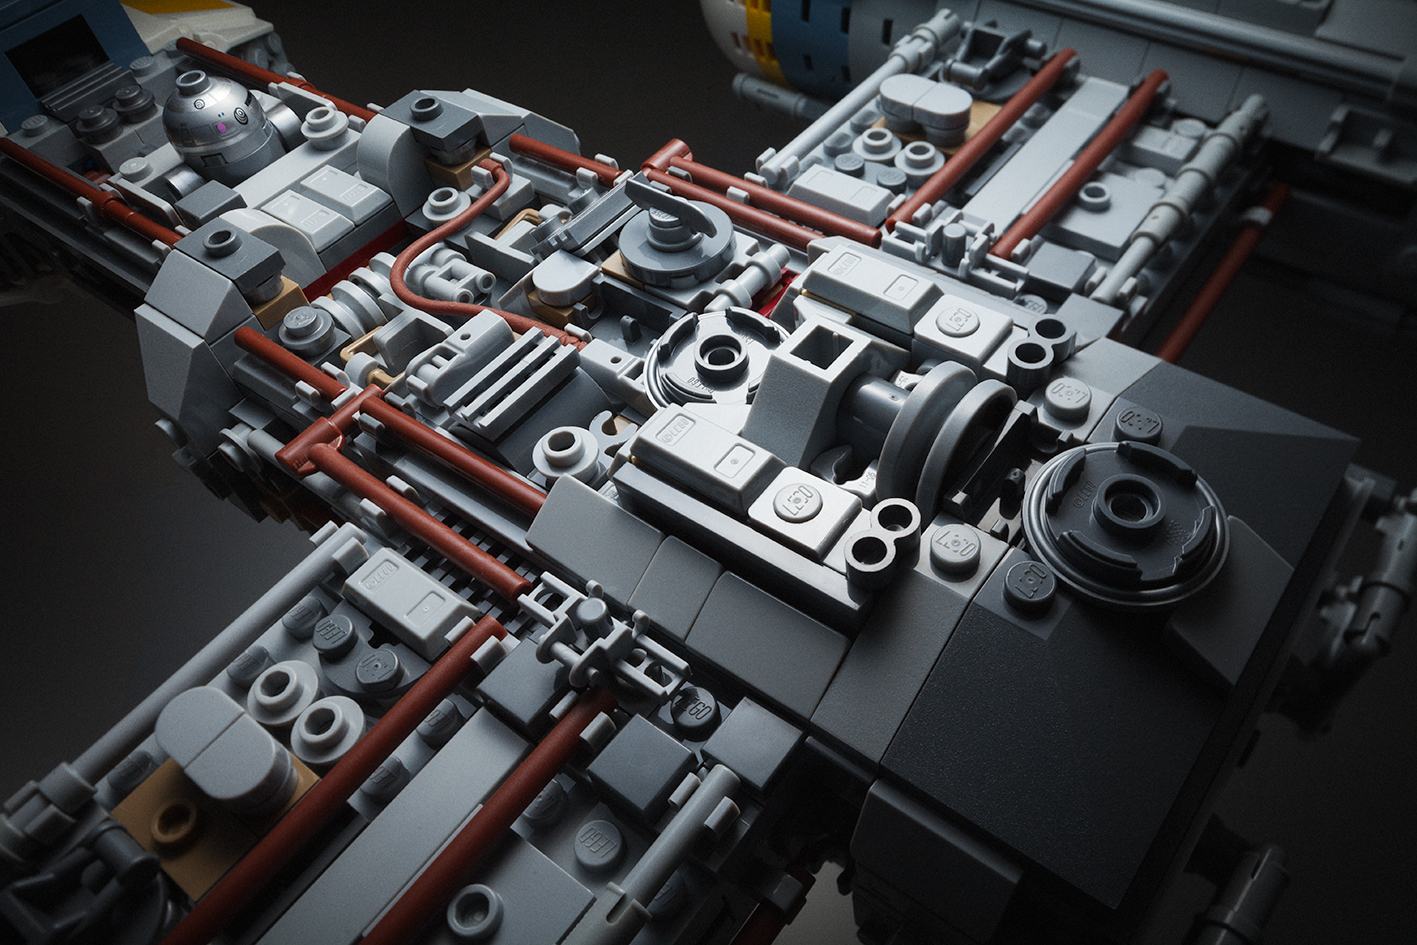
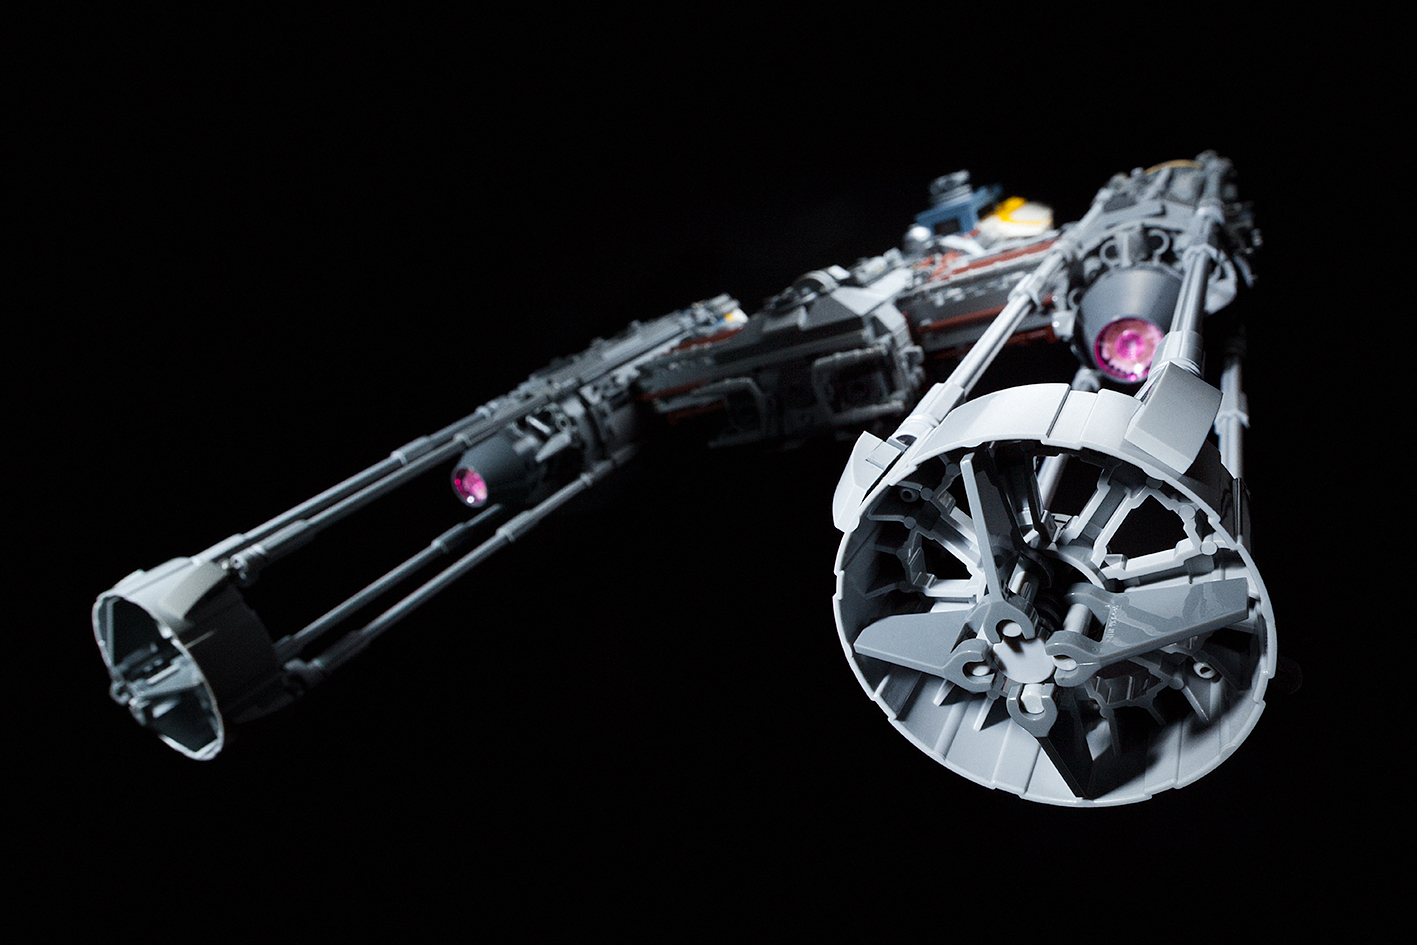
In the instruction booklet Jordan David Scott says it’s important for him to design models that can be observed from all angles – bottom and top. And indeed, on the bottom of this Y-wing you can see various details similar to the filming model, these include a technical detail such as the hole left open for a mounting rod. Incidentally, because of the weight distribution and the nature of the UCS mount, this is not the ideal location to mount this particular model from, hence another mounting point is located a little more towards the front. The black mount itself is adjustable, much like with the Snowspeeder last year, but this one feels more balanced. Its great to have the model tilted a little while on display in a cupboard or a display case. This allows the bottom to be seen better and offers a great view of the top details, which in this case is well warranted. You can also mount the model on the stand sideways so that the model tilts not on the axis like the photo below, but so that instead on the engines, the nose points slightly upwards or downwards.
Playability
There are a few play features in the model even though this isn’t primarily a toy; it is UCS, Ultimate Collector Series model after all. The cockpit obviously opens and closes and you can slip the pilot in and position the targeting computer monitor to attack position. But what’s actually quite nice, is how the roof gun rotates by spinning a wheel on the hull behind the cockpit. It’s a subtle detail, but I liked it a lot.
The Design
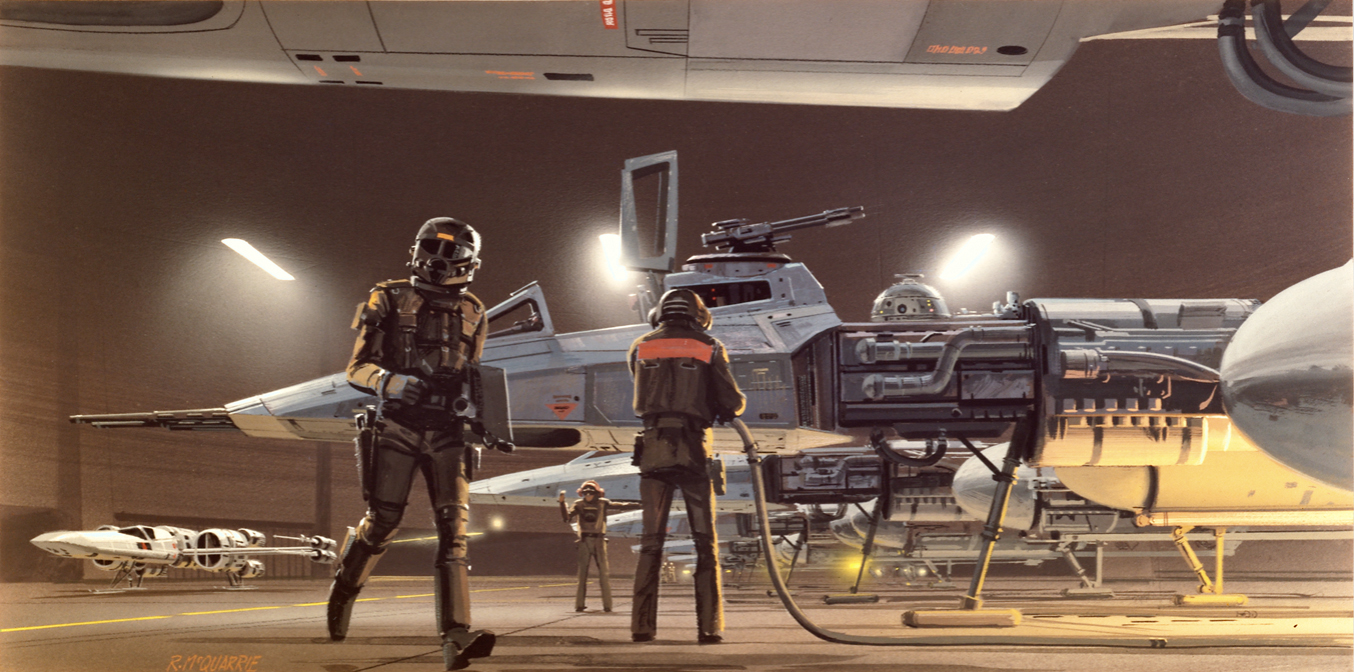
Landing gear on the Y-wing has always been somewhat unspecific. You don’t see any trace of them on the filming miniatures, yet the full size prop had them. For good reasons, the front gear is not located under the pilot on the head of this model. There’s very little room for it to be positioned their if this was a working model. The landing gear has been moved backwards to the hull behind the cockpit. This is not that far from what could be a realistic location, because this is the location of the nose gear in some of Ralph McQuarrie’s Y-wing concept paintings. I take this to be a ”homage under the circumstances”. There is also landing gear on the engines, all of which are retractable.
I was surprised to see the designer employing SNOT (studs not on top) techniques on this model. The bottom of the head is upside down entirely, which I suppose is not an uncommon technique in LEGO sets these days. The engines use rotating wheels to align all the elements just right, which is simple and very effective. But the one connection that I found rather exotic was how the elements on the steering vanes were attached, especially the flag trapezoids inside them. The rods connecting the trapezoids are clipped on with a halfway connection to make sure the rod remains long enough to secure the attachment to the vane element. It made me feel pretty adventurous inside, maybe even naughty, when putting this together.
The Devil is in the Detail
Looking at the cover art on the box I get the impression the person who put it together for the photoshoot did not necessarily know what the Y-wing looks like exactly. First of all, the two yellow stickers on the nose of the Y-wing model are wide apart from each other and a white gap forms in between them. There should be no gap there at all and to my eye this sticks out like a sore thumb. I placed the stickers as close to the edges of their respective bricks as I possibly could to minimise the gap. It actually worked quite well and the distinctive gold squadron marking looks considerably better this way. This isn’t against the instructions, just different from what the box art shows.
There are a few stickers with this set; three inside the cockpit and a grand total of ten on the fuselage around it. The latter is a little too much. I found two or four of the stickers unnecessary, especially the ones on the nose. Those yellow stickers, the ones with the gap, they could simply be yellow bricks.
The other problem with the box art are the doodads that surround the engine nacelles. The two pistonlike items on each of the four thingies at the end of the engine struts are way too far apart from each other. I guess this is due to just snapping them on to the t-bars for the photoshoot without thinking about it too much. But as they are on the box, they look wrong. There is an easy solution to this, however; simply push the pistons tightly together. They look much better snug like that. Looking at the instructions, this seems to be the purpose all along, but they can be even tighter than instructed for proper look.
The round engine nacelles are a very important design detail on the Y-wing and it’s a problem with all the LEGO UCS sized Y-wing MOCs I’ve seen out there. I guess there just isn’t a perfect LEGO part for this. The clean LEGO cylinder hemispheres are 4×4 in size and thus too small, the ones used in this build make a 6×6 semi-hemisphere, which is perfect in diameter, but the overall shape should be more like half an egg, even a round semi-hemisphere would do, but as it is now it’s a little flat on top. Then there are the four studs on top of it all. It may look like it hurts the clean shape, but I’d like to look at it as a reference to one of the filming models which had four little triangles painted on the nacelles. It’s a good match. At the end of the day, the studs and the slight flatness of the nacelles are a small price to pay for having an engine that is pretty close to being the right size, and on this model, they do the job well. If LEGO produces a clean 6×6 cylinder hemisphere someday, preferably just a little like a half of an egg, I will swap those onto my Y-wing without thinking twice.
Conclusion
Overall, there isn’t much to complain about with this model. Sure, the wings could be a little thinner and maybe just a little bit off the centre line to the engines, the head also feels a bit bulbous, but these are minor issues considering the model looks fabulous and otherwise captures the essence of the Y-wing exceptionally well. It feels right. If you take the time and compare the details on this model to the filming models, I’m sure you’ll find it very interesting and enjoyable.

For those who like to modify stock LEGO kits this is a perfect base to tinker with. With the large volume of details, the possibilities are endless. For example, you can change the color of the pipings. Or you can find different colors for the engines. You can make all the changes you want to recreate the exact Y-wing you like the best. The only downside is that you can’t make the Red Jammer, the first Y-wing made. You’d need red stickers instead of the yellow ones to accomplish that. But who knows, maybe someone will produce aftermarket stickers just for this.
Vesa Lehtimäki (aka Avanaut)


What a wonderful review Vesa. Thank you for giving us such an in-depth look at the beloved Y-Wing.
The Y-Wing was the first ship I got as a kid. Remember the Kenner die-cast one with the big silver button on top that dropped a bomb when pressed? Yeah, that one. Like you, ever since then, the Y-Wing has been my favourite ship too. And this set looks like it pays a wonderful homage to my favourite Star Wars bird.
Thanks for agreeing to review it for us mate. I thoroughly enjoyed reading it and, of course, loved your wonderful photos.
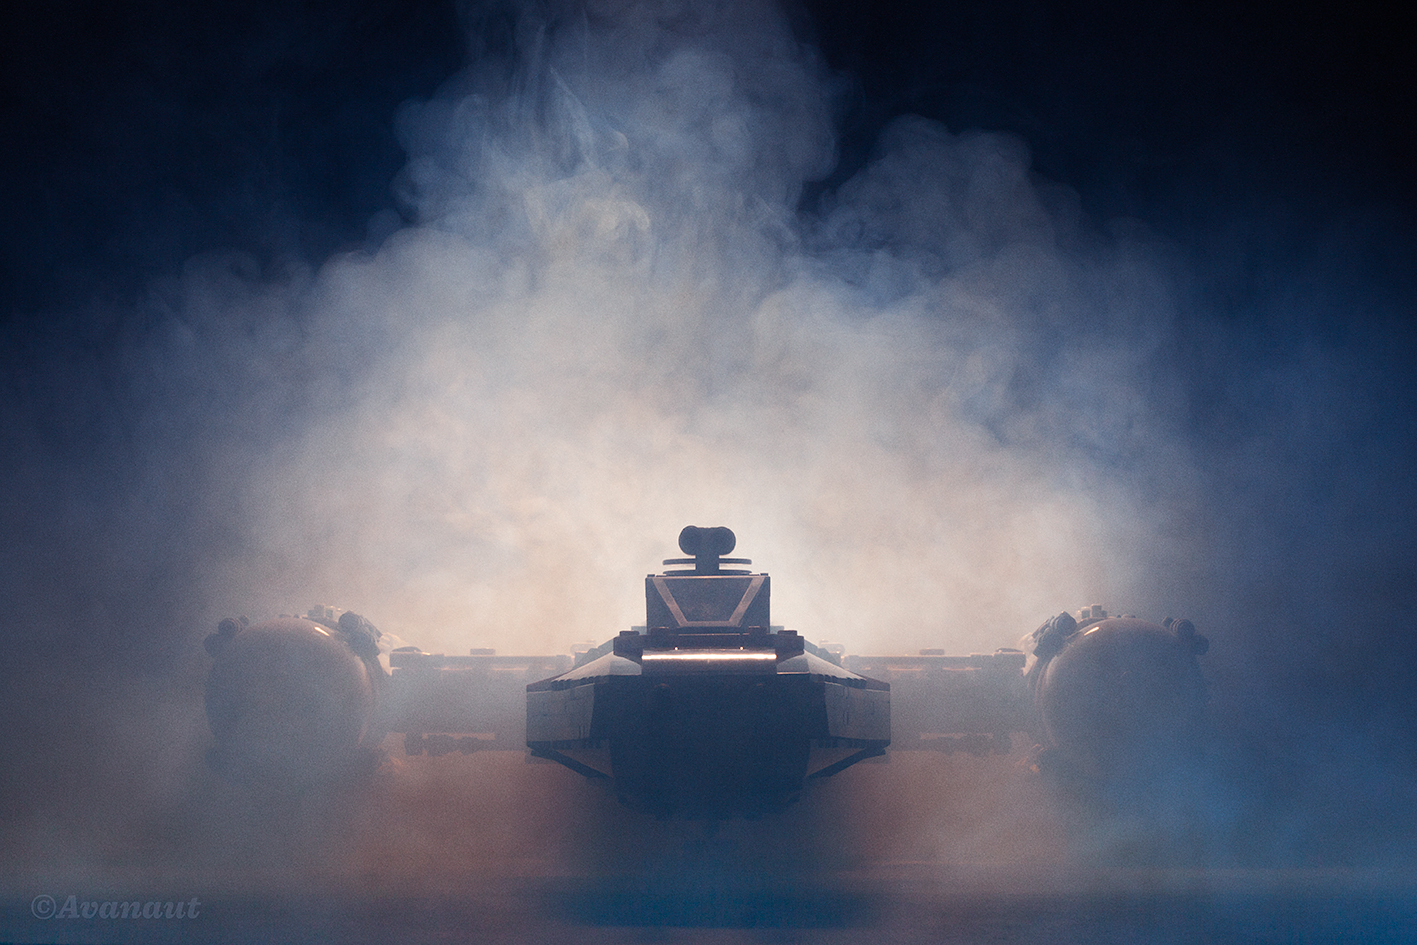
GREAT review, Vesa! I absolutely love the photos you took. That fog shot perfectly captures how epic this set is!
I’ve always been a big fan of the Y-Wing design, and wish that they received a bit more screen time in the films.
I love the Y-Wing ship. Think it was one of the most underrated and underused ships in the original movies. I’m not a fan of the UCS kits but when you see them used like you have in these photos, they become a lot more appealing. Absolutely brilliant and inspired. Oh, and a good review, thanks ?