This post is a two-for-one extravaganza. First is a behind-the-scenes exploration about how I captured the shot of the Hulk figure from Thor Ragnarok I created in my last post: Building A Hulk. The second is to describe a new way of generating action figure scaled smoke for my shots. Both are covered in this post.
Note: I am not sure if I am the first to use the process I am about to describe. I have asked many people how to create practical smoke effects and no one brought it up. It is a unique idea in my sphere of people. So I am taking pride in breaking new ground in this area (tho I suspect the first comment will burst my bubble).
This is the image that I am talking about:
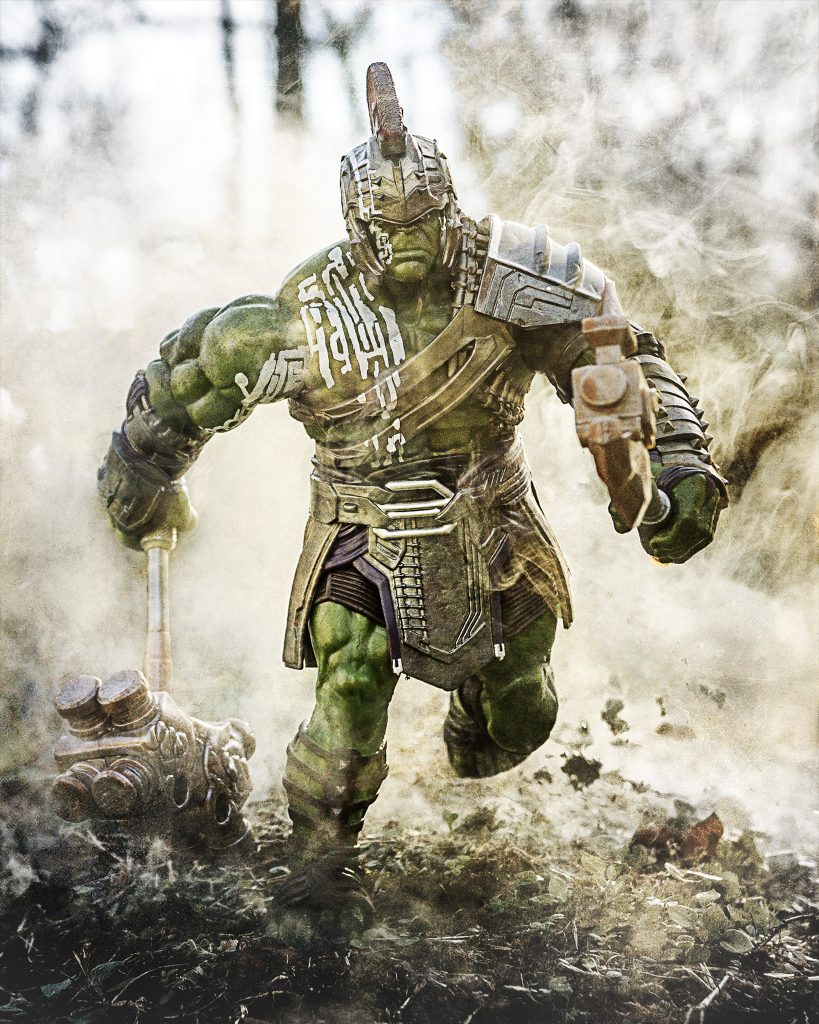
Hulk running in search of things to smash.
Special Effects vs Visual Effects
When it comes to toy photography there are some effects that are much easier to add in post production. These are known as visual effects, or effects done in computer. Others are much easier to capture in camera. These are special effects, or effects done in real life on set. Smoke effects fall firmly into the later camp. While they can be created in Photoshop, its hard to beat the realism of real smoke captured on set.
Ever since I started my photographic journey I have been looking for ways to make toy scaled smoke to add atmosphere to my images. I have not found a satisfactory way of reliably creating smoke that works for me. The most common solution I’ve seen is lighting a cigarette, or using one of those newfangled vape things, and blowing smoke into the scene. This doesn’t work for me because I don’t smoke, and don’t want to start, even a little.
Other solutions like smoke machines or smoke bombs are too large in scale. They are designed for human scale, or larger (like concert stages), so are impractical. There is a product called a Wizard Stick that produces enough smoke for a LEGO minifig sized image, but not near enough for a 6″ action figure.
The same story has been for every other solution. They were either scaled too small, to large, caused lung cancer, or created a mist effect, but not a smoke effect. It was a very frustrating search. I was getting discouraged and resigned to do my sub par smoke effects in Photoshop.
That was, until one day, I went to work and played with the bees.
Not kidding.
Bees: Producers of Sweet Honey and Sweet Ideas
So long story short, the food staff at my work place does a lot of sustainable food programs. They have a community garden, they keep chickens, and they have bee hives for honey. They also have programs where us desk-bound software engineers can get outside, help with the programs, and learn a few things along the way.
I signed up to be a beekeeper.
Part of beekeeping is looking into the hive (which are in wooden boxes) and seeing how the bees are doing heath-wise. To pacify the stinging cloud of murder bees than result from cracking into a hive, a bee smoker is used. It works on bees as it masks the chemicals that they use to sound the alarm to other bees that trouble is afoot. To me it was an epiphany.
I realized that the bee smoker would be the perfect solution to my action figure scale smoke effect problem. The rest of this post serves as proof that I was right.
Safety Disclaimer
Bee smokers involve fire, and heat. Do not use without adult supervision. If you are an adult, good luck to you.
Smoke’em If You Got’em
Bee smokers are cheap and easy to come by. This is mine, and it cost less than $20 on Amazon.
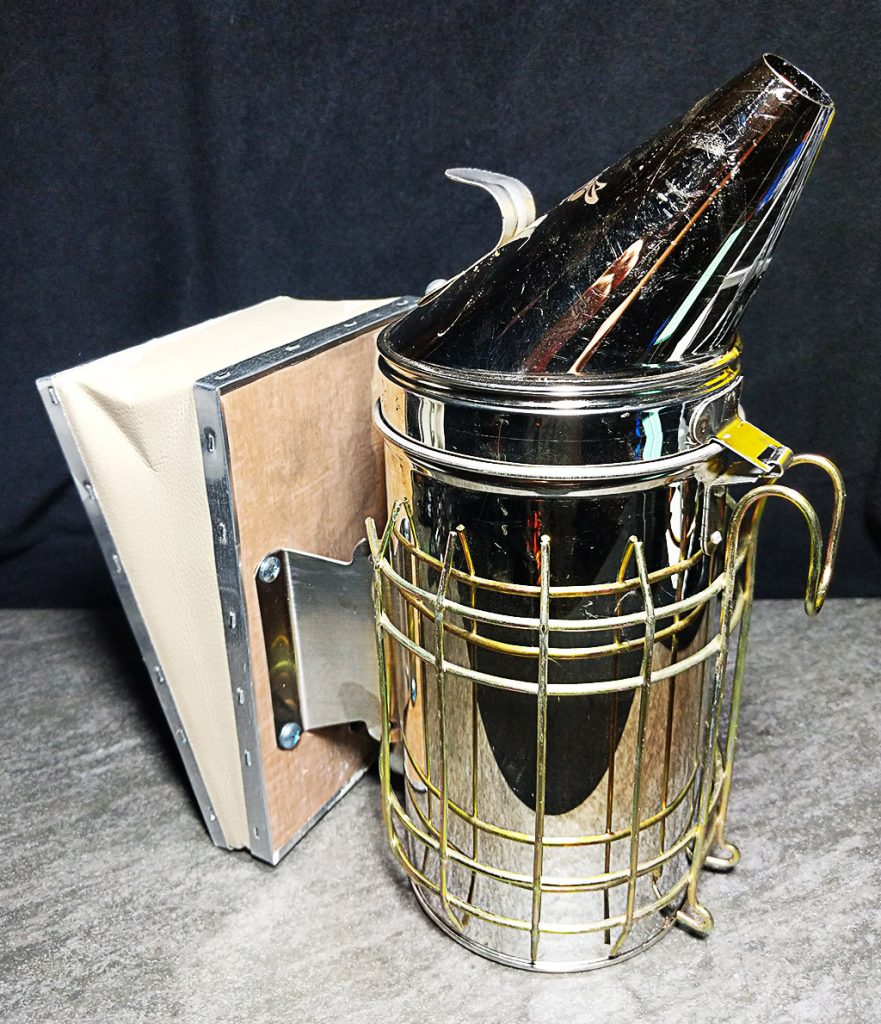
My bee smoker
It doesn’t really matter which one you get, they all work basically the same. There are also pellets than can be purchased as fuel, but I found them useless, so I’d skip those and same some money.
How they work is pretty simple. Fill the main chamber with organic material – paper, leaves, cotton fabric etc. and set them on fire. When the lid is closed, the only oxygen source is a small vent at the bottom, which is just enough for the material to smolder, but not create flames. If you’ve ever been around a camp fire you’ll recognize this as a perfect smoke generator.
The bellows on the side are used to pump more air into the chamber to fan the coals, and to push the smoke out thru the spout. It is designed to pump smoke into a hive, but if you pump it into a camera frame, you get a perfect toy scaled controllable smoke machine.
Behind The Scenes
So the first thing I did was set up Hulk out in my back yard. I placed him in front of an old stump to act as a nice background (tho due to the smoke this turned out not to matter as the stump is not visible in the final shot.
Then I set up the smoker. For fuel I used dryer lint as a starter, and some fabric castoffs from my wife’s quilting efforts. If you don’t have a quilting wife handy, cotton balls, or Doritos can be used as starter. Any old cotton t-shirt, jeans, or even leaves or pine needles can be used as fuel. Just tear any fabric into 2″-4″ chunks.
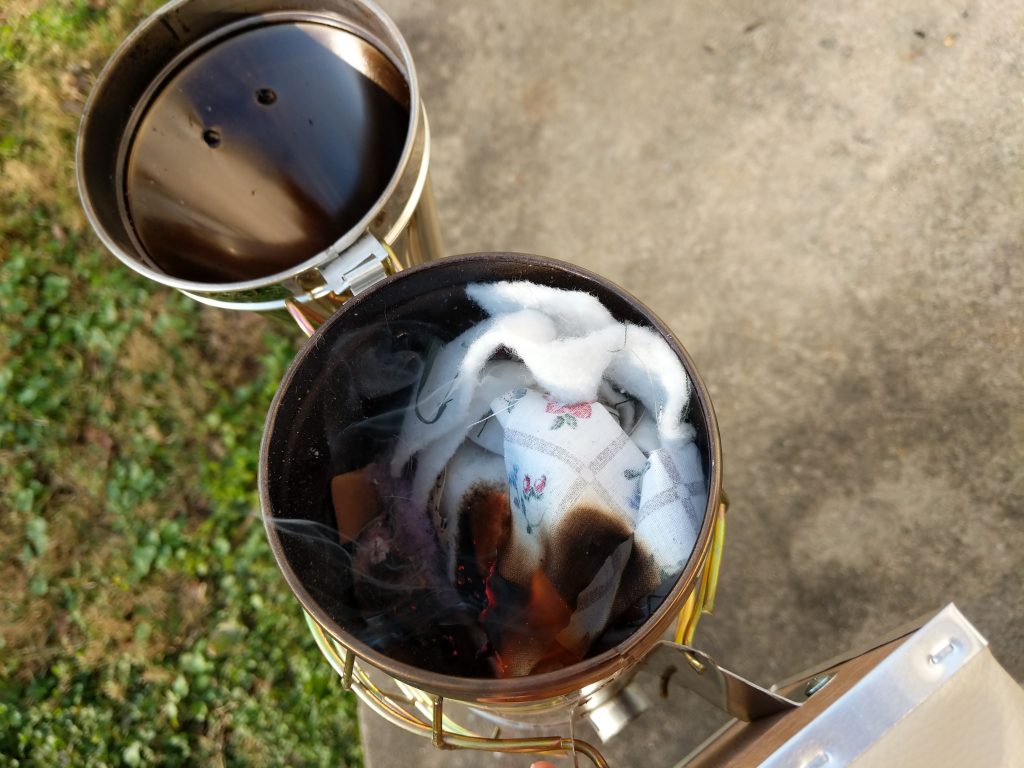
Lighting the fuel, which is dryer lint and discarded quilting fabric.
Light the fuel, close the lid, and pump the bellows a few times to ensure things are smoldering properly. You know its working by a large amount of smoke coming out the end. (and if you are me, cackling in delight at the possibilities a good smoker provides to my creative efforts).
Finally I set my camera on a Platypod Ultra, attached a remote trigger so I could reach the smoker and the shutter at the same time. Then I pushed the bellows to pump smoke into the scene with one hand while I triggered the shutter remote with the other.
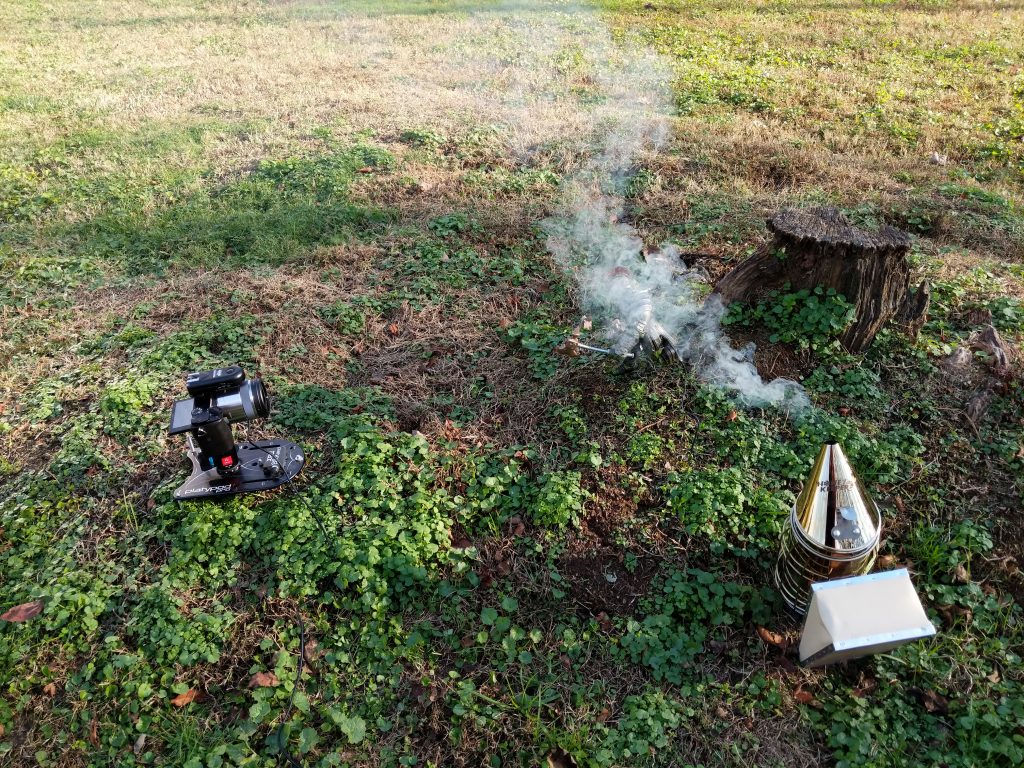
The setup with the camera on a Platypod, Hulk in front of a stump, and smoke from the bee smoker.
The rest is some basic Photoshop post-processing, and the image is complete.
Hulk running in search of things to smash.
Final Thoughts
So that is my solution for practical smoke effects for action figures. The smoker produces a heck of a lot of smoke, really more than I need. However I can put it exactly where I want it.
Another benefit is that it doesn’t require batteries, electricity, or special fuels. All you need is some cotton and a lighter, so it can be lugged to remote places and still be useful. It also has the benefit of pacifying any bees that are hanging out near your shoot.
So if you are looking for practical smoke effects, a bee smoker may just be the answer to your problems.
Thanks, bees!
[dave]
Want more toy photography goodness? Subscribe to our weekly email round up so that you never miss a post. You can also listen to episodes of the podcast!
Dave this is brilliant! And you’re right, I have not heard of anyone using this method before. I think it would overwhelm a LEGO minifigure, but for the larger 1:6 and 1:12, the scale looks awesome. Plus its easy to replicate and more environmentally friendly than some other methods. Nice work and thanks for sharing!
Thanks Shelly
You are correct that one would have to take care with a single minifig. However with a larger scene (say the Hogwarts Castle, or Star Wars ship, it would work well too.
Next time our friend comes out to check on his bees that are holidaying on our property, I’m busting out the toys! Thanks for the rad tip mate.
I look forward to seeing those photos, Brett!