Hi. My name is Alan, and I am a toy photographer.
Though I took occasional snapshots of toys as far back as 2008, I didn’t start focusing my camera on toys until the birth of my son in 2012. As any new parent will tell you, free time becomes a luxury when you have kids and I needed to adapt my creative channels to my new schedule. Taking photos of toys in my basement became the perfect outlet to fill the void.
As a lifelong toy collector, I’m surprised it took me as long as it did to turn my attention to photographing toys. I credit my brother-in-law for first putting the idea in my head when he posted photos he had taken of figures from his Kidrobot collection. His use of shallow depth of field and low angles brought his toys to life, and inspired me to start ‘playing’ with my own toys.

One of my first efforts in toy photography. I have a soft spot for Wall-e.
With the precious few minutes I could steal away during the week I happily shot simple photos of my toys using leftover Christmas lights and tin foil as backgrounds. They were fun shots to put together, and kept my camera gear from getting dusty. I happily shared these photos to Instagram and Flickr where they perished in obscurity.
In 2015, with the release of Star Wars: The Force Awakens, my toy photography went through a creative evolution. JJ Abrams made a return to practical effects in Episode VII, and it challenged me to try and squeeze as much in-camera magic as I could manage. I was never very proficient in Photoshop anyway, so this was a perfect avenue for me to explore.
I set out to emulate scenes and effects from The Force Awakens with my toys. LEGO became my go-to toy, as the bricks allowed me to build my own sets and I always had a soft spot for those delightful, LEGO minifigures.

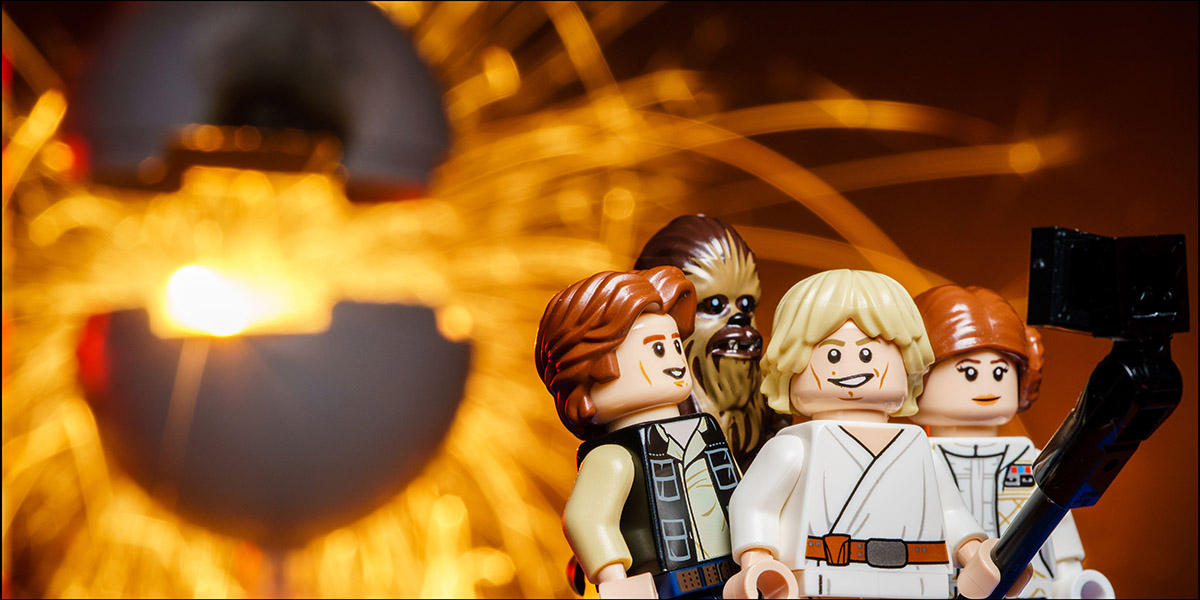
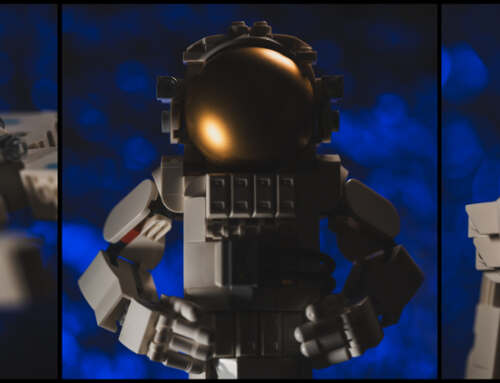
All effects were done in-camera using a technique called ‘Peppers Ghost’.
With my son now sleeping through the night, I was blessed with extra time for conceptualizing and putting together more elaborate shots and setups. I began experimenting with different lighting and materials, using anything I could scavenge from around the house such as LED flighlights, a steel utensil organizer and even a broken picture frame. Instead of quick ‘fire-and-forget’ shoots, I was now spending several evenings working on proof-of-concepts before even attempting a final shot.

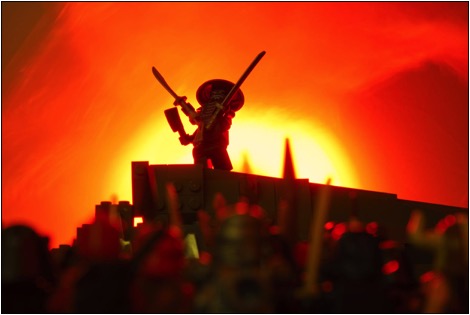
This was the most elaborate setup of all my shots. The background was created by shining a projector through a broken lens at a circular diffuser with black pieces of construction paper creating the shapes and textures. Photoshop was used was to remove the stands for the TIE fighters.
Coming up with practical effects became my addiction, and seeing the results come to life on my camera’s LCD screen was my high. There was an incredible feeling of accomplishment when a shot that often times I stood behind my camera doing my happy dance before rushing off to offload my images. No matter if the setup was simple or complicated, I was every bit as eager to share my final image as I was the techniques used to get me there.

The light orbs were created by poking holes in a piece of black construction paper and ‘popping’ my flash behind it. I triggered my flash twice, moving the paper between flashes to add depth to the orbs.
Though time is once again limited in my life, due to the arrival of my daughter, I still look to toy photography as my primary creative outlet. My toy collecting has evolved along with my photography. I am almost exclusively shooting LEGO, and first thing I consider when contemplating a new purchase is how well the figures or set is going to play with my camera.
I’m excited to be part of the Toy Photography community, and I look forward to sharing and learning from everyone who has discovered this new way to play.
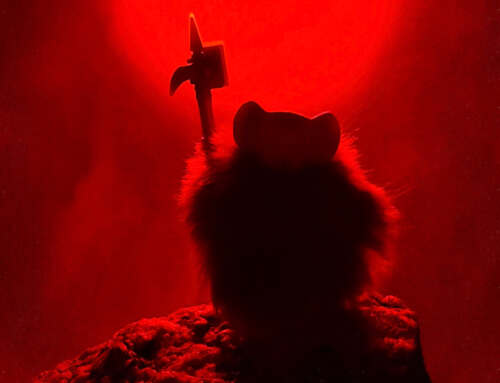
The sun was created by placing a color changing alarm clock behind translucent packing material.
You can follow Alan Rappaport on Instagram at @allanrappa.
Firstly, congratulations on your new baby daughter Alan! What a delightful read and your clever use of practical effects to create those realistic scenes are truly impressive!
Great post! Your practical effects are amazing! I’ll have to try some of those myself some day 🙂 I love all the photos too – especially the selfie of Luke, Leia and Han in front of the exploding Death Star 🙂
Lynn
Alan, this is an awesome post and your images are fabulous! I look forward to reading more of your insights about toy photography in 2019!
So great to learn a little bit about you and your process Alan! Thanks for sharing. Your work is incredible!
Your use of practical effects is inspiring, Alan! As a graphic designer, I admit that I would probably open Photoshop before I’d spend days perfecting a practical effect, but seeing the results you get and hearing the satisfaction it brought to know you’d _created_ that image in-camera… I can see the appeal.