
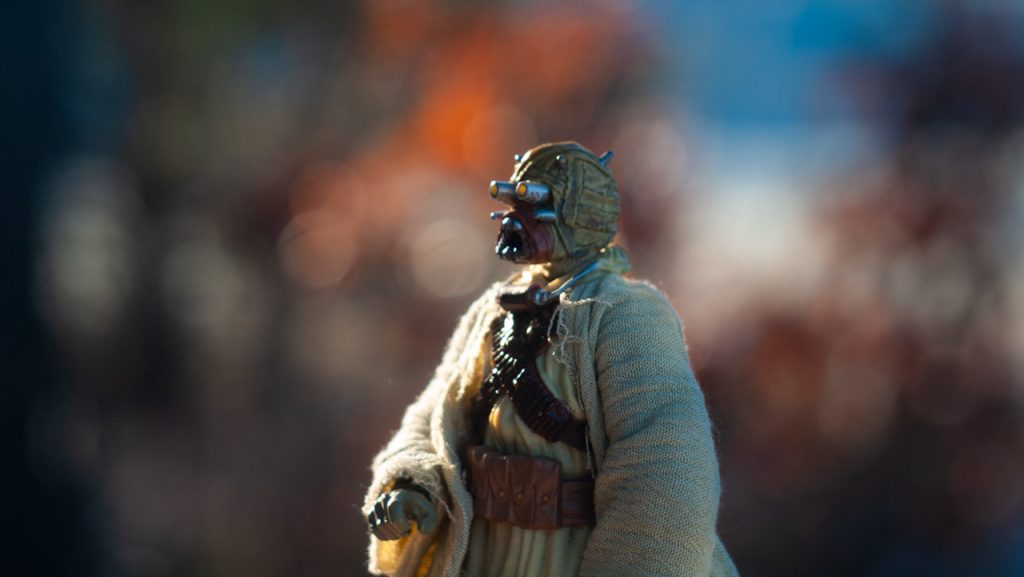
Bokeh. Just trying to pronounce the word can be intimidating. A couple of years ago I may have squinted sideways at anyone who went on about it. But I was curious about this mysterious and slightly snooty sounding word and what it meant, so I started paying attention to photos and reading some articles.
What I discovered is that most articles written about bokeh end up offering around 90 percent personal opinion about what good and bad bokeh looks like. Adding to this with my own subjective judgements about what is good and bad bokeh would a waste of our time, so I’ve tried to keep this as informative as possible without trying to influence you too much with “dos and don’ts.”
What is bokeh?
Bokeh is simply the way the blurry bits of your photo look. A technical definition is “the way a lens renders points of light.” I like to describe it as the texture of the blurry bits in a photo. I find this a little more descriptive than “the aesthetic quality of the blur,” which is the other common, and slightly vague, definition.
Take control of your blur
The first way to manipulate the texture of the blur in your image (hereafter referred to as “bokeh”), is to have stronger or weaker blur. As the blur becomes stronger, the details in the image blend together and the bokeh becomes softer and smoother. Conversely, less blur means sharper details and a rougher bokeh. Blur intensity is manipulated in a few different ways.
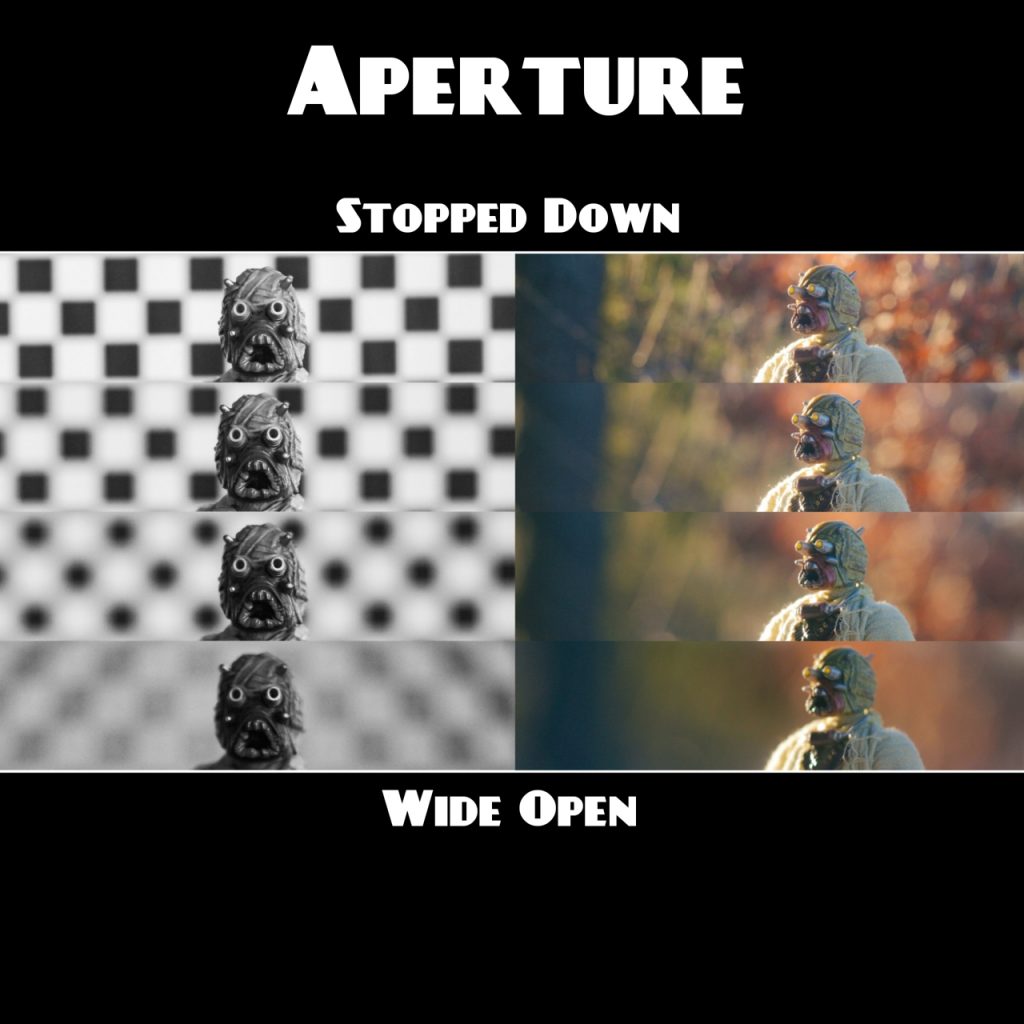
Aperture control
The intensity of blur can be controlled by adjusting the apperture on your lens (f-stop). The wider you can open the aperture blades on your lens the narrower your depth of field becomes (the range in which objects are in focus, aka DoF. Check out Dave’s DoF article about how it affects story telling, or Shelly’s Depth of Field Basics). The more objects in the image become out of focus the softer the bokeh becomes. This is why one tends to want lenses with the widest aperture possible when trying to create soft bokeh. Excessive blur can be toned down by increasing the f-stop. Shrinking the aperture increases the DoF, rendering more of the image in focus.
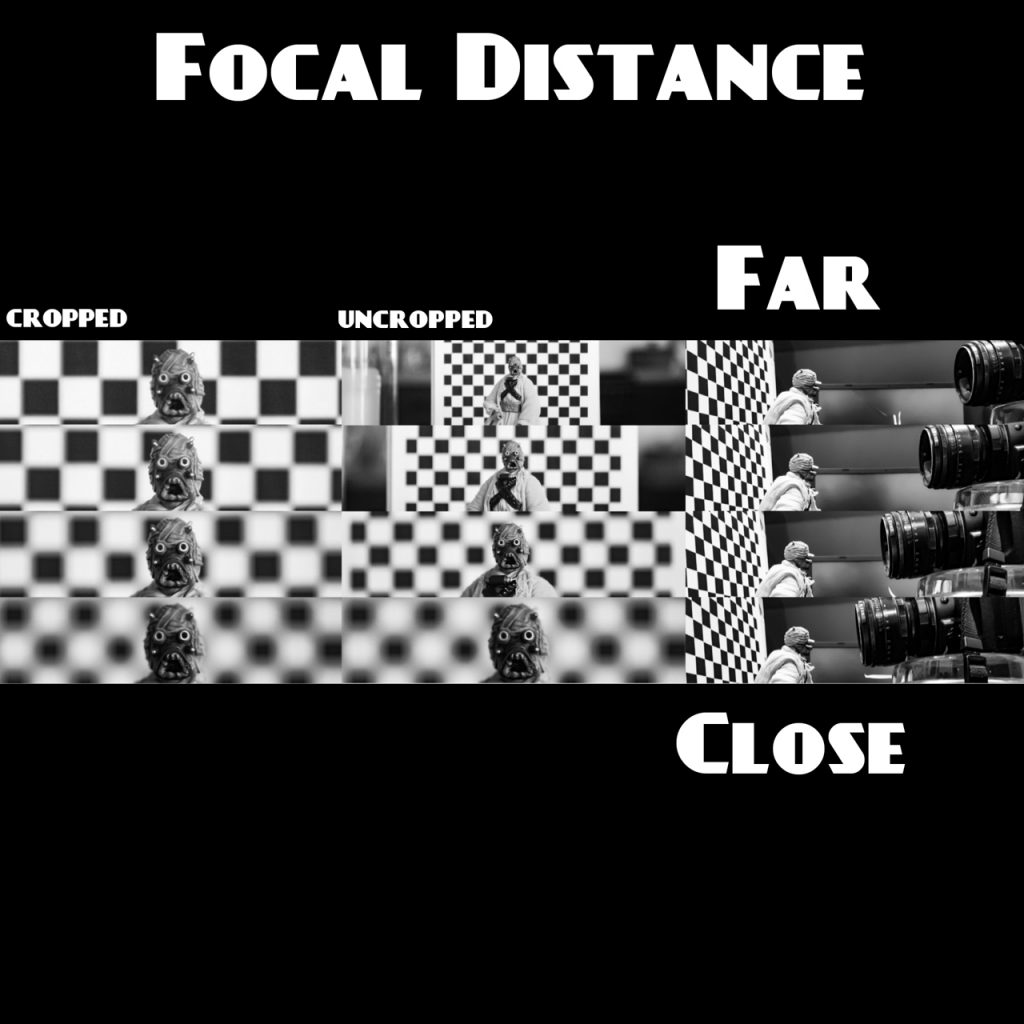
Focal distance
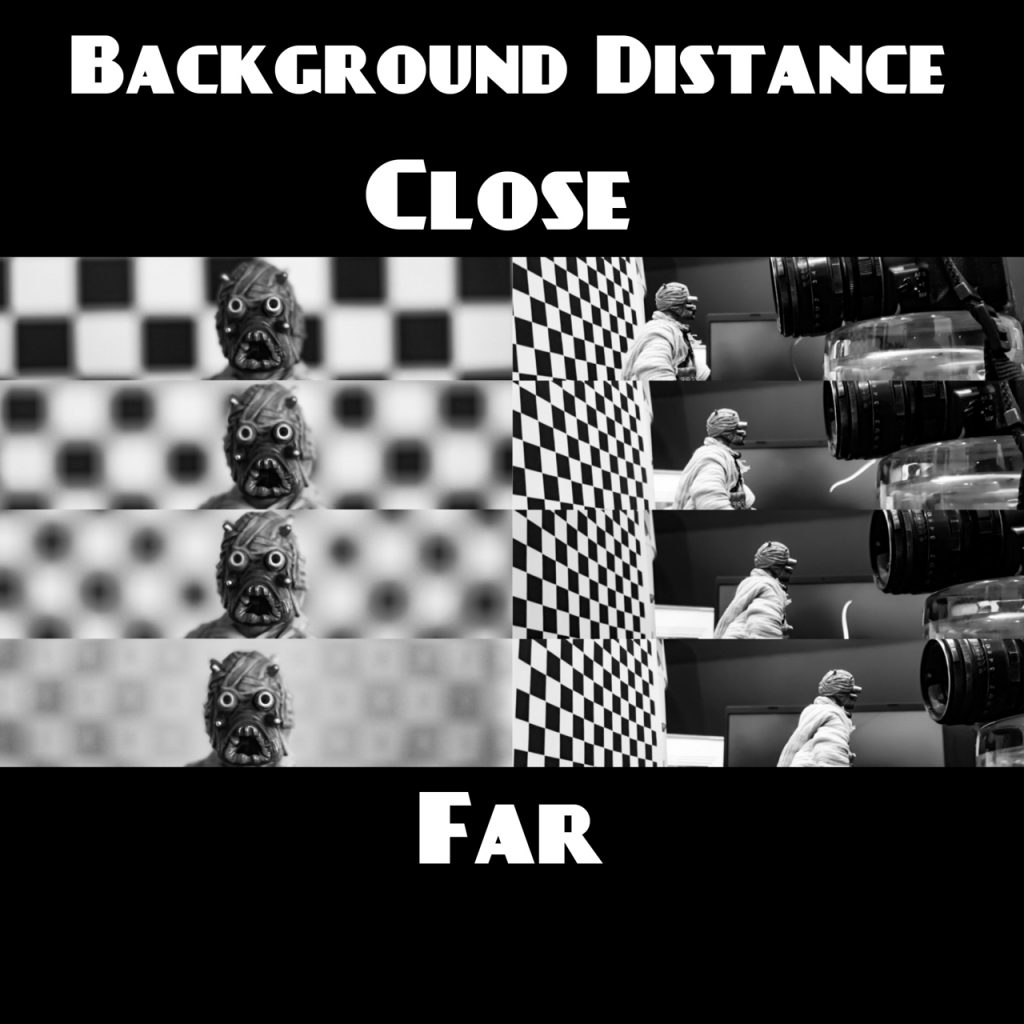
Blur level can be affected by the distance of your camera from your subject. The closer you physically get to the subject on which you are focusing, the narrower your DoF becomes and the blur in the background and foreground becomes stronger.
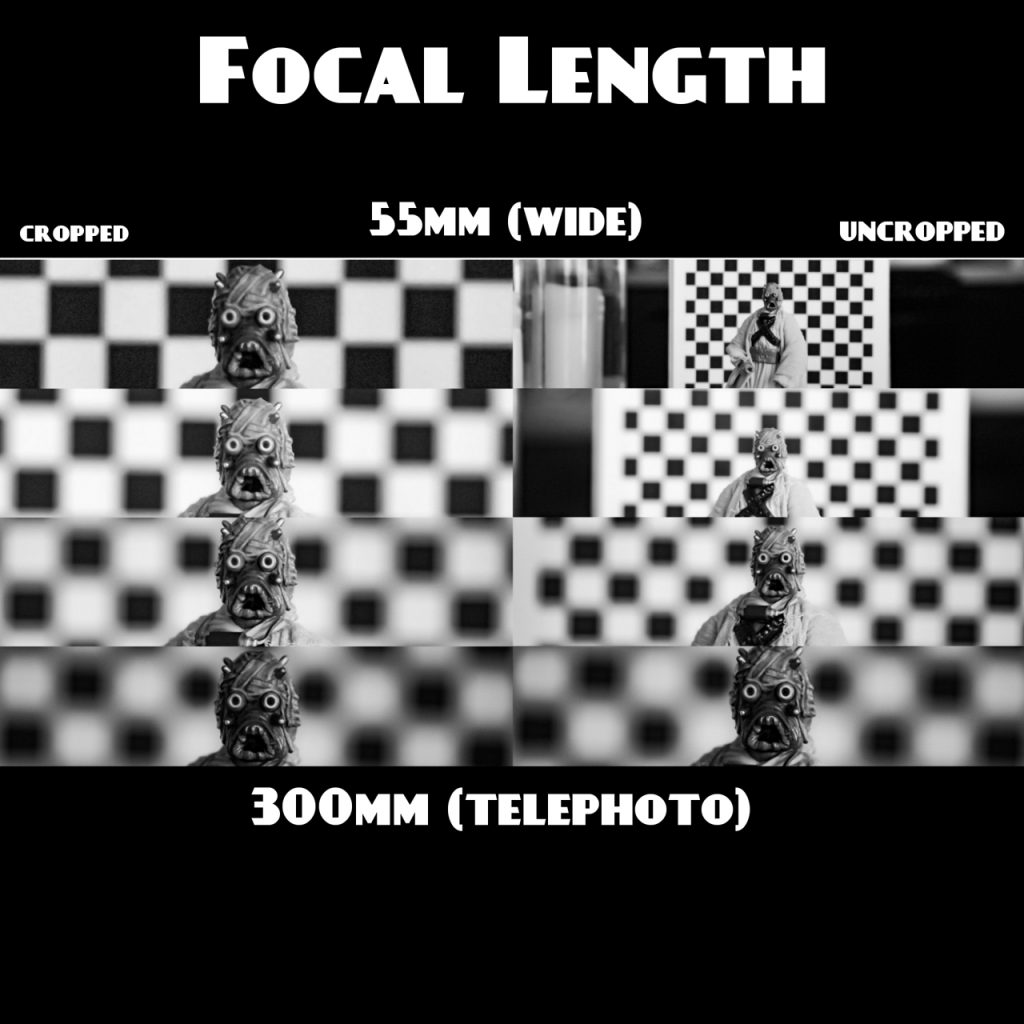
Focal length
Blur intensity changes with the focal length of your lens. The longer the focal length, the narrower your DoF typically is at any given distance from your subject. That means if you are 1m away from a toy and shooting with a 100mm lens, the background will look softer than shooting with a 50mm lens at the same distance, all other settings being equal.
Background separation
The fourth way to control the level of background blur is the distance of separation between your subject and the background or foreground elements. Greater separation creates stronger blur.
These four methods of controlling the intensity of blur in your photos are the foundation for controlling your bokeh.
What blur actually does
Why do we care about blur control? That first technical definition of bokeh is actually insightful: The way a lens renders points of light. Theoretically, the sharpest detail or point of light that can be rendered is the size of one pixel. When you add heavier blur, that point of light is spread out over a wider and wider area. As it expands it becomes circular (usually).
Imagine casting a stone into a still pond. Its ripples expand and you have a circle. Throw a second stone. The two circles expand into each other and the ripples interact, creating new waves and geometric patterns on the water. Throw a third stone in and the interaction becomes even more complex.
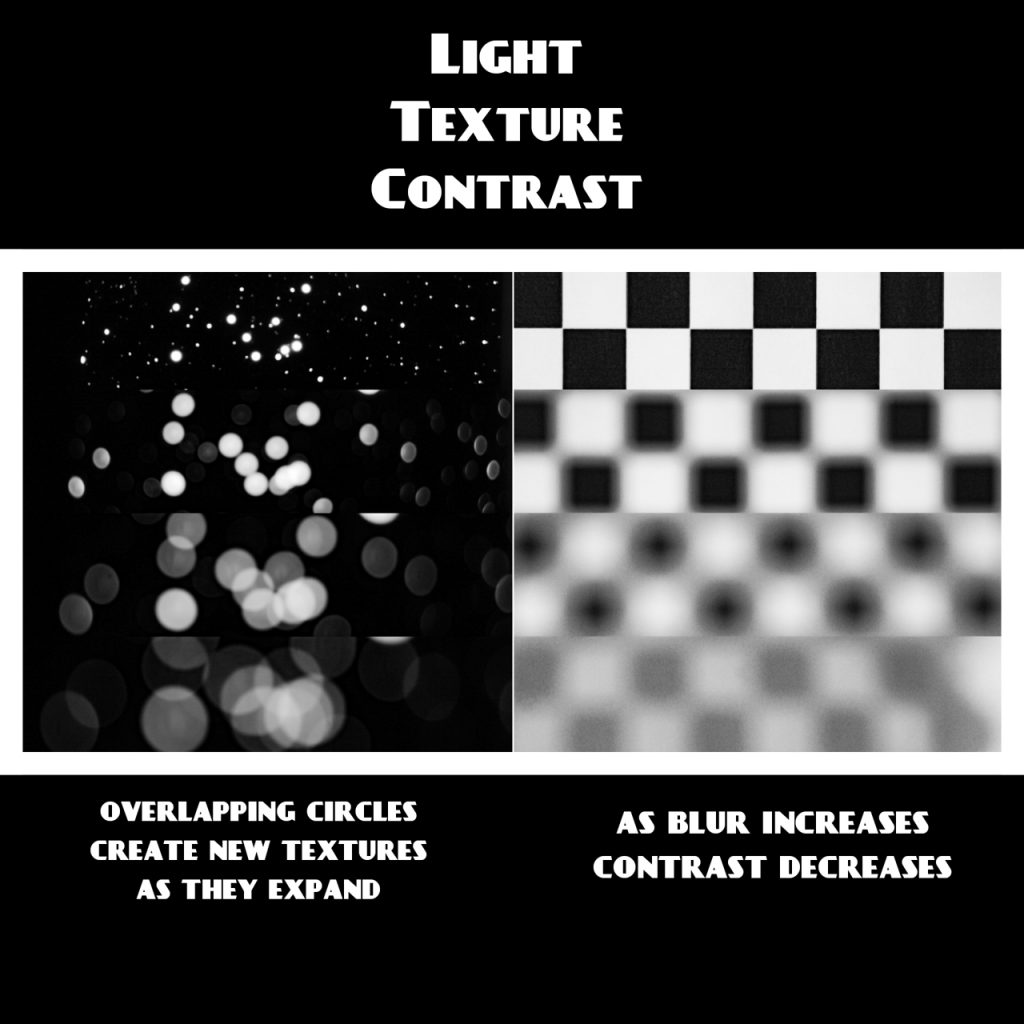
Points of light behave the same way. Blurred points of light expand as circles. They begin to overlap. The patterns that are formed by these overlapping circles create the bokeh (texture of blurred points). The pattern you end up with depends on the how many points of light you have, their position relative to each other, and the degree to which they overlap—this is ultimately in your control by choosing how strongly they are blurred using the aforementioned techniques.

Choosing your background
This leads us to the final ingredient: the light points themselves. The basic rule is that your bokeh can only have a smoother texture and a light contrast that is less than the existing background.
For instance, if your background is a smooth pea soup fog then adding blur will not affect the texture, it will blend grey points into equally grey points and you will have grey. On the other extreme, if you start with a black and white checkerboard, as you increase the blur, the white points will expand over the black areas and the texture and contrast will steadily decrease.

Coles notes (or CliffsNotes for American readers)
Remember the following points:
Think of bokeh as texture.
More blur = smoother/decreased contrast
Less blur = rougher/increased contrast
Blur intensity can be affected by changing:
- Aperture size – Wider = more blur
- Distance you are from your subject – Closer = more blur
- Focal length of your lens – Longer lens = more blur
- Separation of subject and background – Greater separation = more blur
Is there more?
In the next portion of this series we will discuss how the unique characteristics of different lenses affect bokeh. Stay tuned.
– Matthew Wyjad (@morriswhyadd on Instagram)


Really well details article on bokeh. Keep posting stunning article like this one.
Thanks Elina. I have at least two more articles that I plan to write specifically about bokeh.
A very well written article coupled with really good comparisons displayed clearly. I enjoyed reading it and look forward to the rest of the series Matthew.