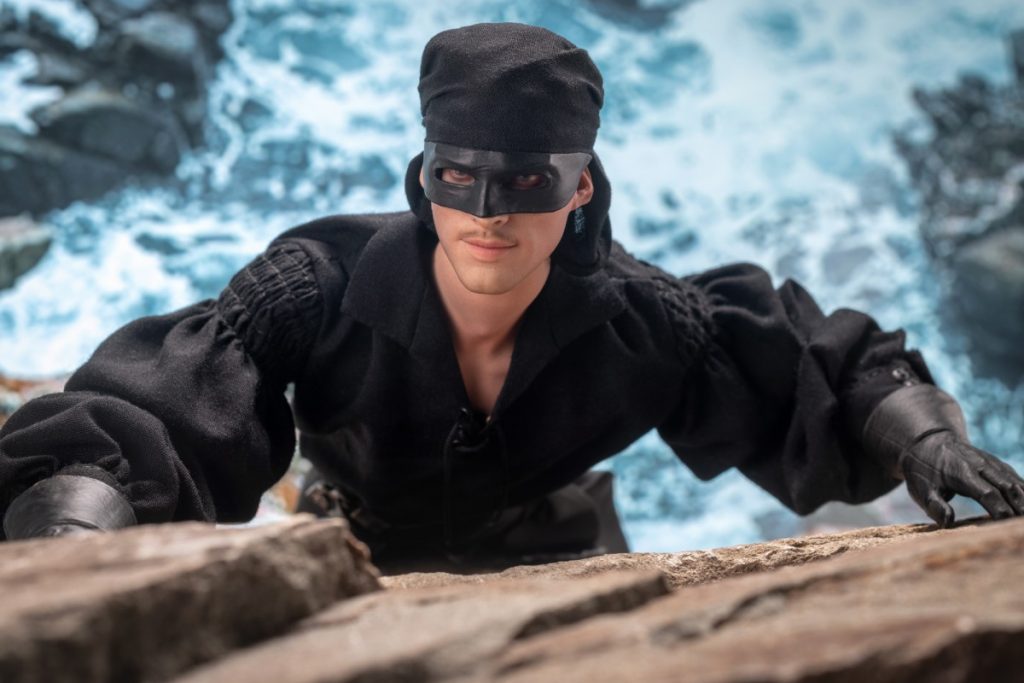
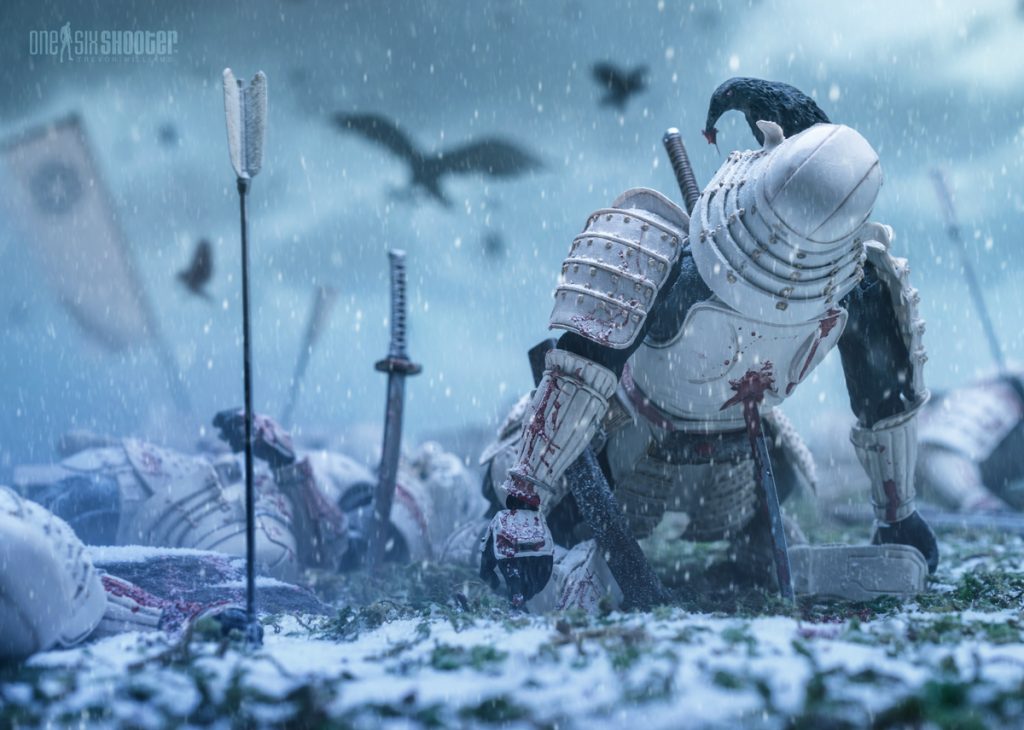
I often share behind the scenes images along with images I post on social media. People seem to like the glimpse behind the curtain, so to speak, to see the lighting positions, the effects, the sets, props, etc.
Several of my photos involve using physical sets—structures, plants, props, etc.—in conjunction with digital backdrops. Since I get a lot of questions on this technique, I thought I’d share some of my process.
The digital backdrop
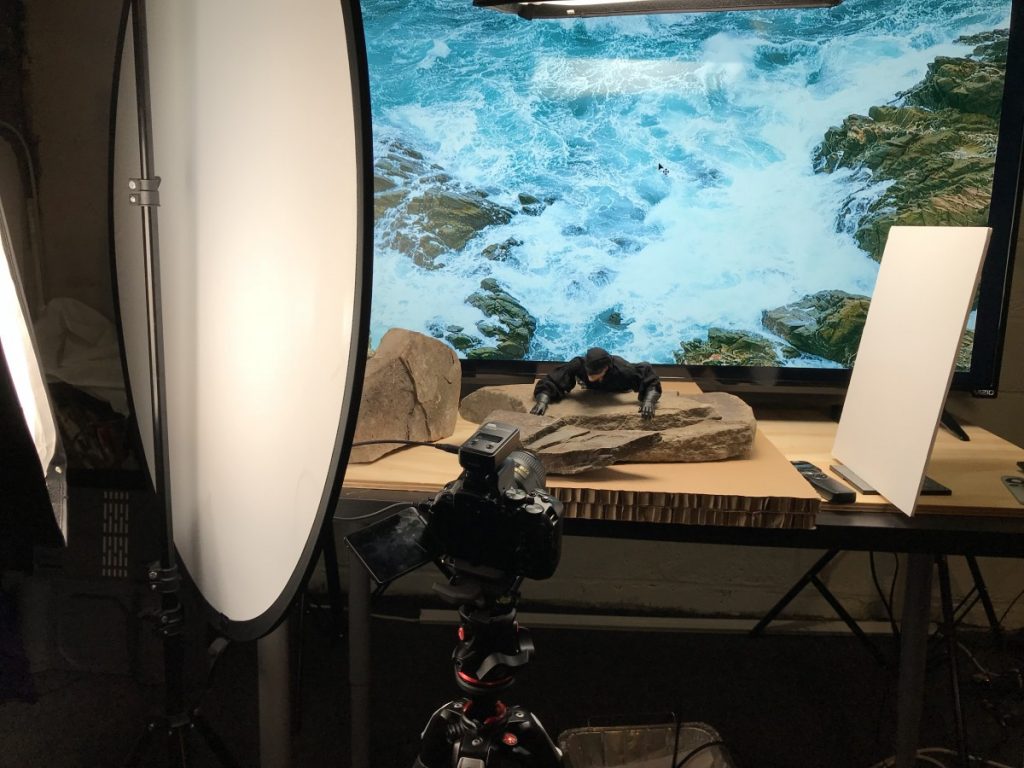
For my backdrops, I invested a while back in a 55” television. Nothing too expensive, but big enough to be able to use with even 12” figures if needed. But this can be done with any TV, computer monitor or even your laptop or iPad if it will fill enough of the frame you want to shoot. A higher resolution screen is going to be better for backgrounds that you’d like sharper – otherwise, the pixels will show unless you keep it slightly out of focus.
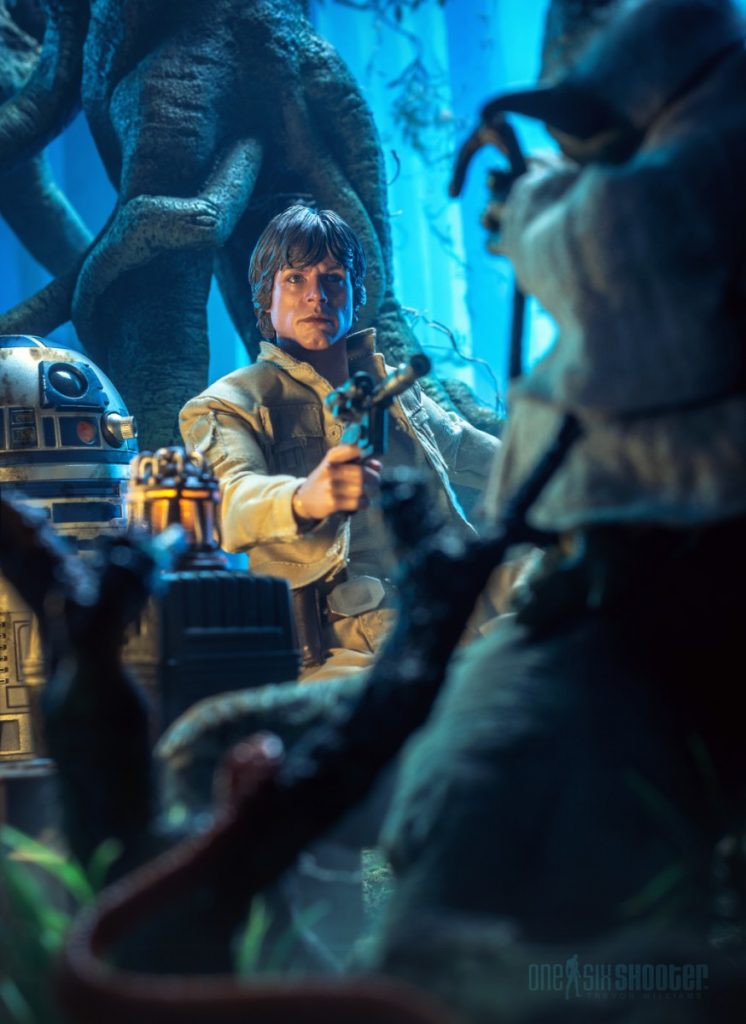
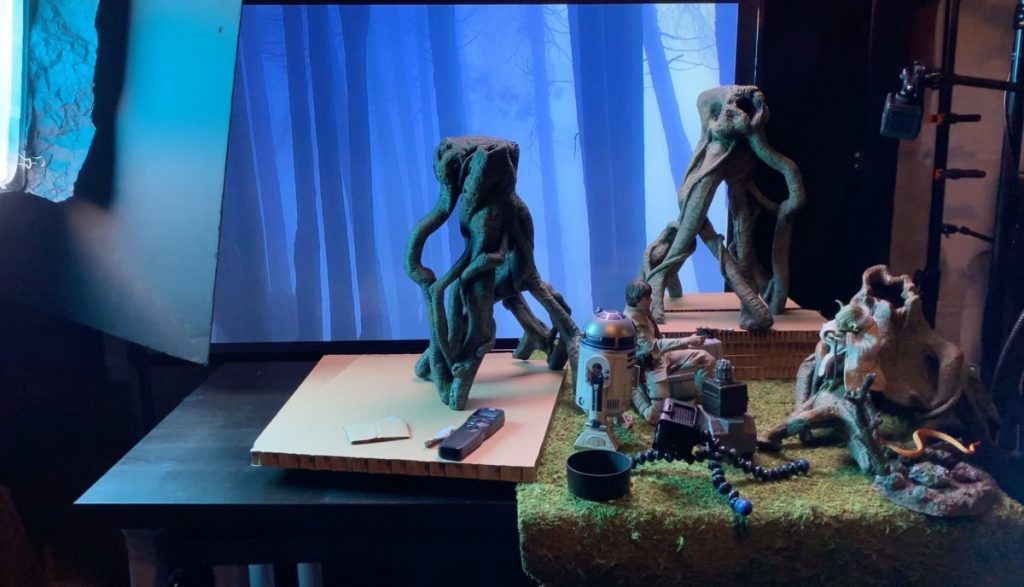
For this tutorial, I’m using a shot I did that recreates a scene from The Empire Strikes Back using the Hot Toys Bespin Luke Skywalker and Yoda, and Sideshow R2-D2.
The physical set
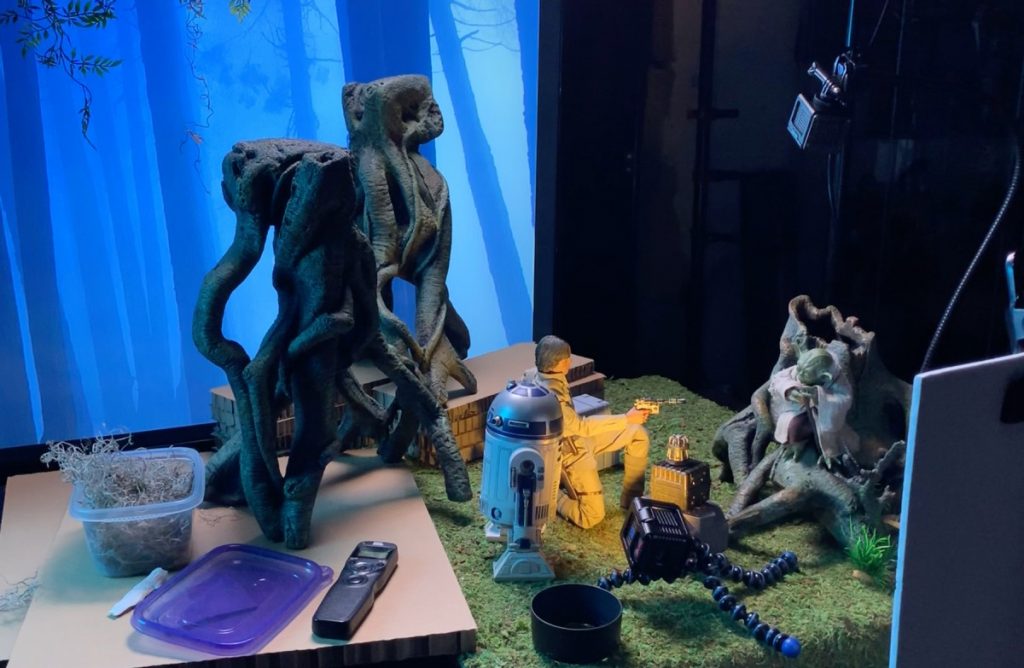
The level that I take the physical sets to depends greatly on how intent I am on the angle and framing I want for a shot. If I have a vague idea of what I want to do, I may build out the set a little more to allow for changing angles or composition of the figures. If I have a very precise vision for a shot, I will try to get away with as little setup as possible to get that shot.
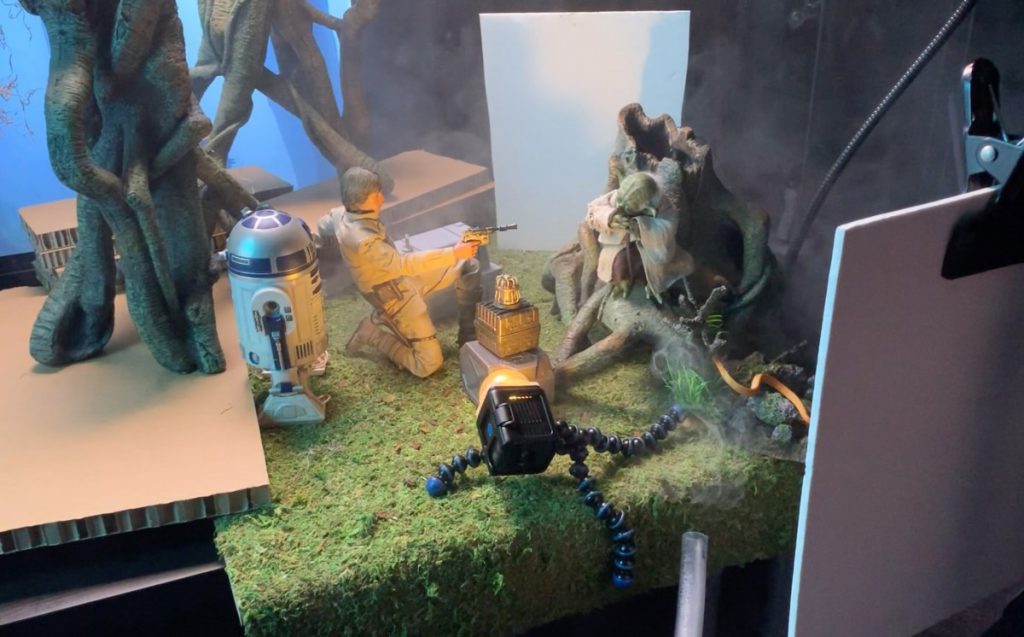
For this image, I was fairly certain of the point of view I wanted. I started by loosely setting up the figures and the key elements. In this case, Luke was the focal point and I wanted the shot to be framed by the tree and Yoda on the right. I wanted the key light to come from the portable lantern sitting on some crates, as seen in the movie. I have this prop, and while it does light up, it’s nowhere near the light I needed, so before I started nailing down composition, I placed a Lume Cube with a warm filter just behind the crates to recreate the lamplight.
The environment in the film had a very blue-green tone to it and I wanted to exaggerate that a little to make it feel more like a production painting. I started by adding a light blue gel to a softbox overhead. In place of a softbox, you could also use a regular desk lamp or overhead light here by propping up a piece of plexiglass on a couple of stacks of books overhead, then add tracing paper (to diffuse the light), and blue cellophane or photo gel.
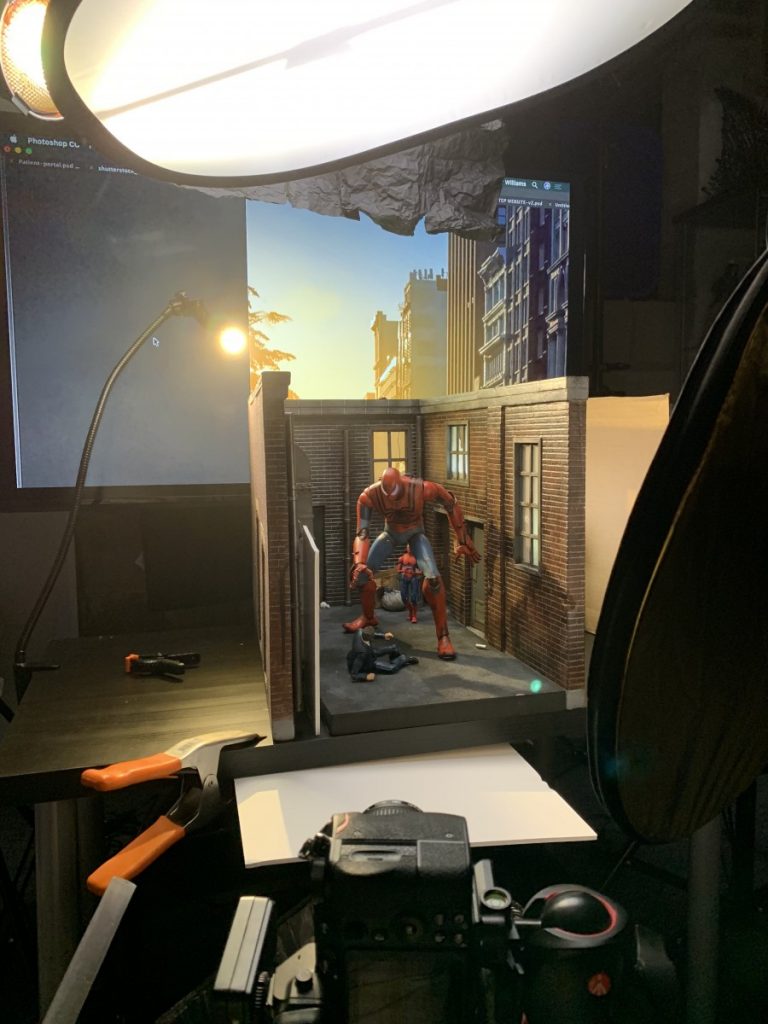
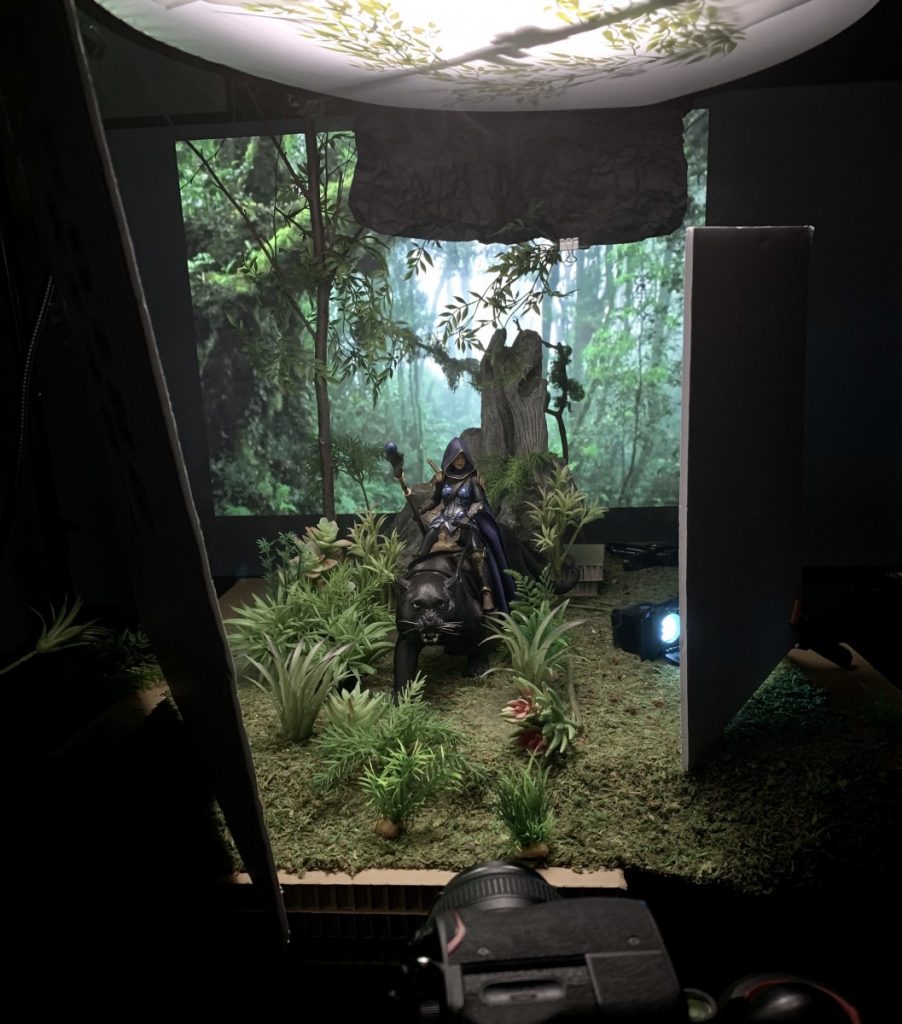
I’ll remove the camera from the tripod and move around the set to play with different angles. I’ll keep looking through the lens and moving set pieces and figures around until I’m happy with the balance and layout. Then I’ll set up the tripod. I have a collection of cardboard pieces I use to build up height for figures or set elements, like the trees here.
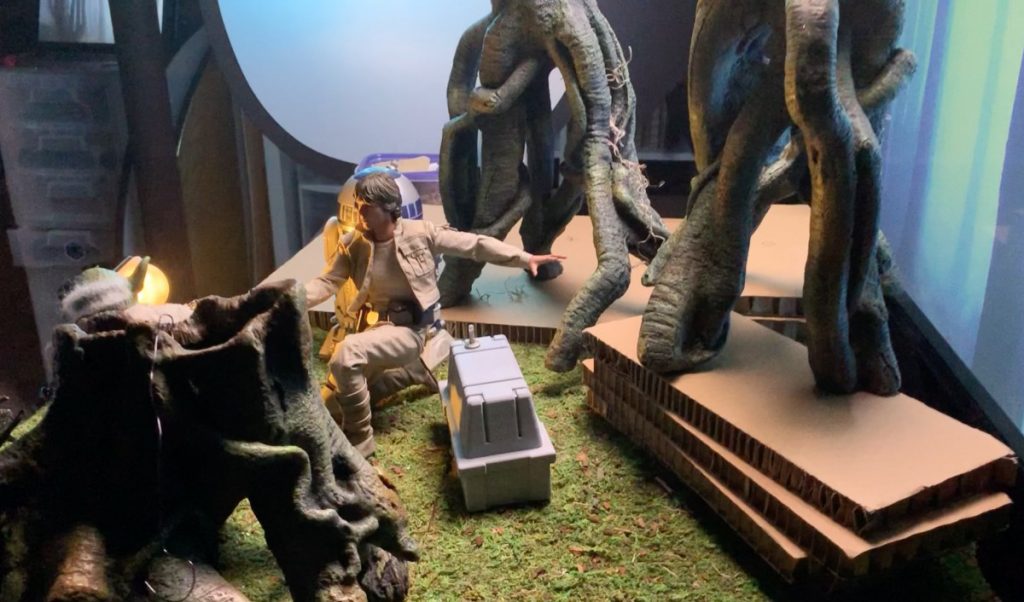
I set up these “trees” (a couple of fishtank tree props from a pet store) behind Luke and settled on the composition. In the final shot, this tree trunk balances the base of the tree (another fishtank prop) that Yoda sits on and pulls the eye diagonally through the image. To offset Luke from the background tree trunk and simulate some more bounced ambient light, I added a rim light by placing a softbox behind and to the right of them (seen in the next image below).
Merging the physical and digital
The digital backdrop itself—the misty trees—is a stock photo. I brought this into Photoshop and adjusted the colors and focus a bit to help it match the set and the scene. You always have to pay attention to the backdrop image to make sure you are matching the light’s direction in the image. Nothing breaks a shot like a mismatched background—if the light is coming from the left and low in the background image you don’t want to light your scene high and to the right. Or if it’s a sunset but your subjects are brightly lit from the front!
I project this image directly from Photoshop onto the screen via an old AppleTV I have hooked up, but you could easily just attach your laptop (or even a phone or tablet) directly to the screen, too. Make sure the bottom of the screen is below your set or at least cut off in your framing.
Lighting and digital backdrops
Two things you’ll contend with when using a digital backdrop: the light it generates and the reflective nature of the screen.
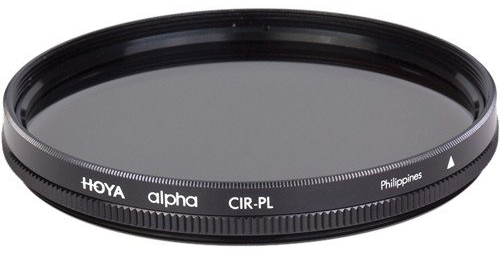
The first issue can be largely remedied by using a circular polarizing filter. These lens filters are typically used outdoors to cut down on glare or reduce the brightness of a sky without affecting the rest of the image. But here, they can be used to dial back the light coming from the digital background. You’ll lose some contrast and a little color the further you take it, but it almost always helps to some degree. One note: Using the polarizing filter, even in a neutral position, will force you to change your settings and increase exposure or ISO a little.
Secondly, when you’re using a digital backdrop, you have to ensure that none of your lights are reflecting off the screen surface, at least the parts that are visible in your composition. On the left side of the image above, you can see the “flags” I use to block the light from reflecting on the screen. Normally I use “photo foil”—matte black foil that can be formed around lights—which I tried (and you can see here), but I needed a little more coverage, so I used a large black card. The light is still directed at the scene but doesn’t create glare on the TV screen. When you’re using a digital backdrop, you always have to be looking for reflections—even your own reflection. (Tip: Wear black!)
Finishing touches
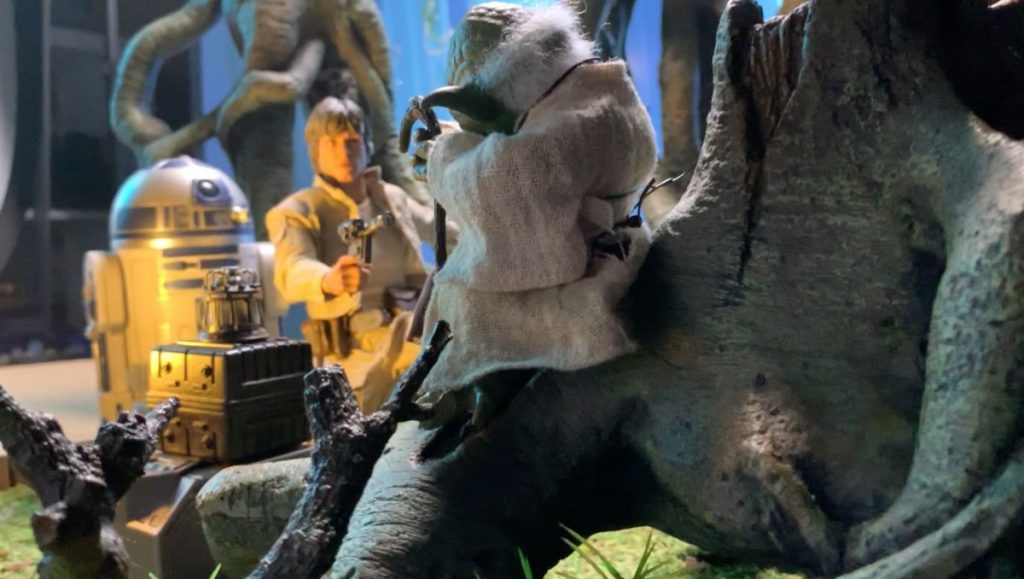
Finishing the setup and lighting, I used a couple of reflectors (just white cardstock) to brighten the Yoda/tree trunk area—but only enough to help define the character. I wanted this area to remain pretty low key to frame the main subject: Luke. Once everything is set up, my last ingredient, and something I use more often than not, is fog. I use a small fog machine to add atmosphere, concentrating it on the background and on the ground for a “swamp” feel.
Finally, I’ll take the images into Lightroom and Photoshop to make adjustments. This is where I’ll color grade and correct color discrepancies between the background and the physical set.
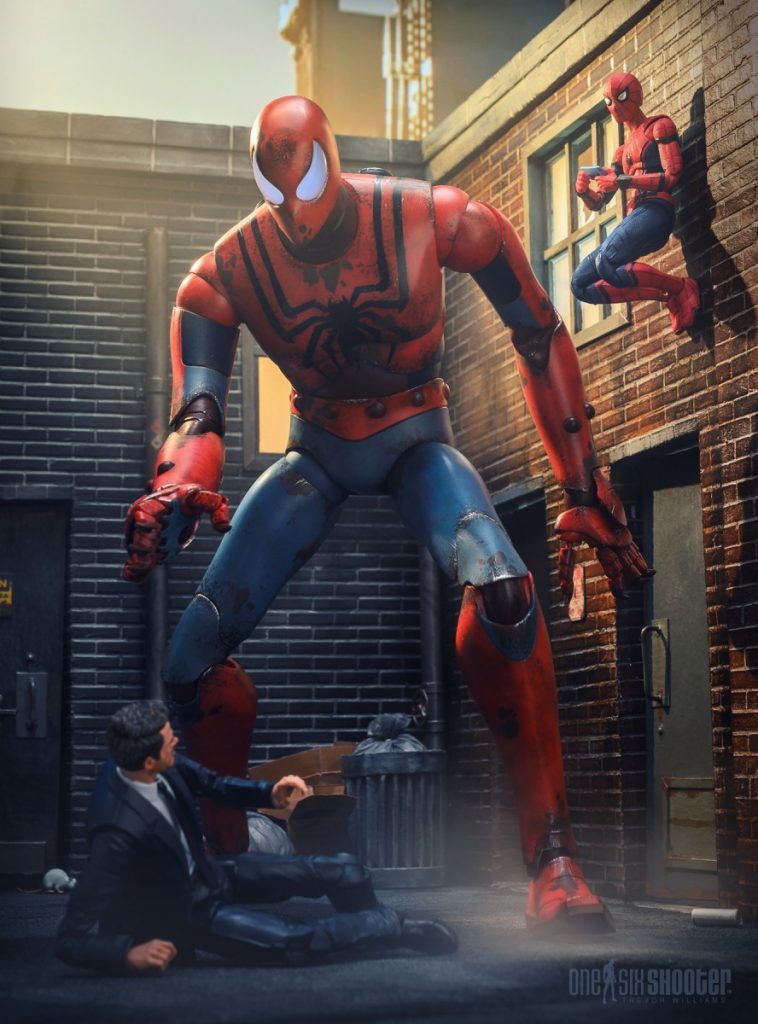
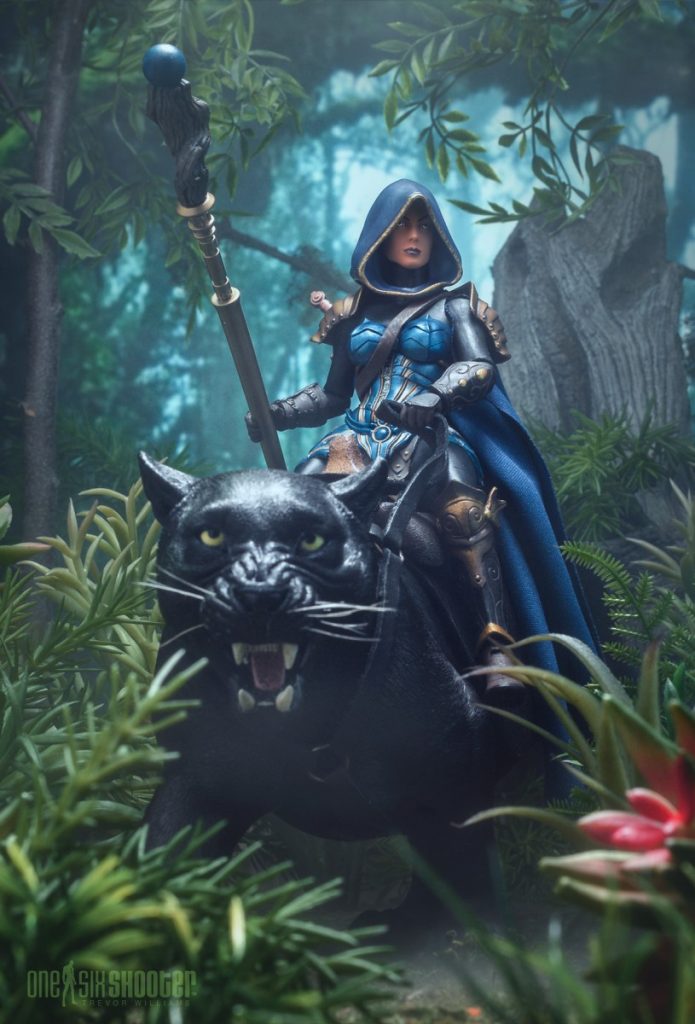
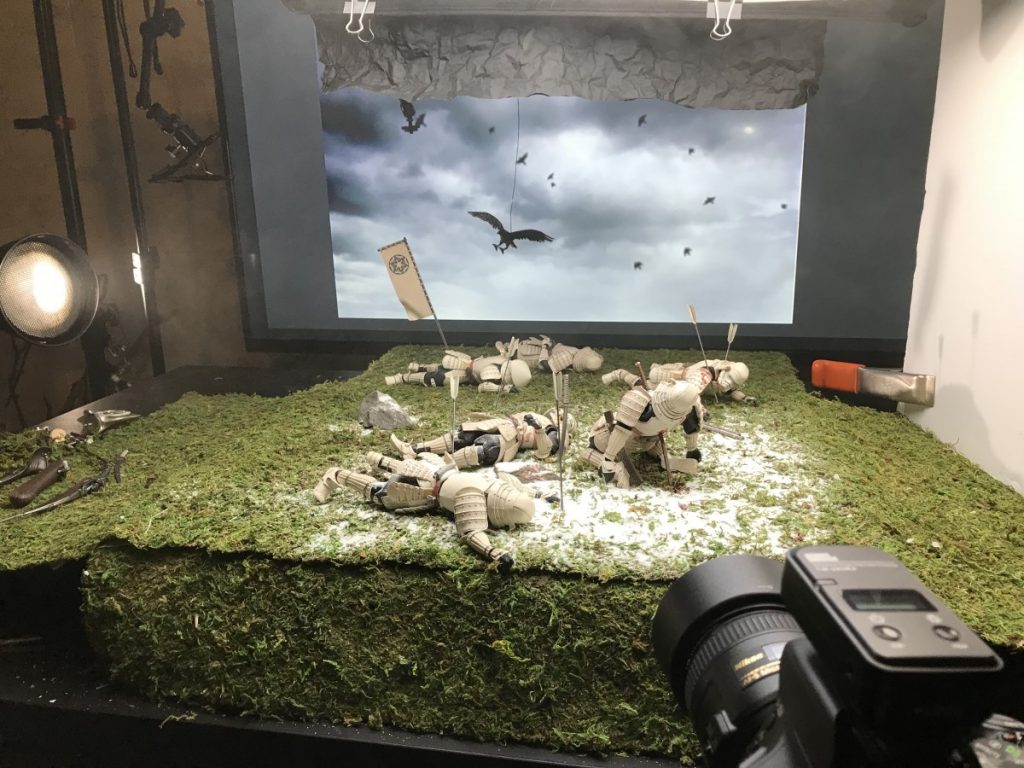
Using a digital background allows you to get some nice depth in your image and it’s a great alternative to having to find that perfect setting, and light, for the image you have in mind. I’ve put some other examples of shots I’ve used this for, and their setups, below.
That’s it! I hope this helps you or inspires you to try mixing physical and digital sets in your shots! Let me know if you have any questions and feel free to contact me with them or with your results!


Thanks for this post Trevor!
I use digital backdrops sometimes and now I see whatI was doing wrong.
I learned that I should put a little more physical props to make DOF more perceptible and to hide the fact that the background is flat 🙂
Thank You!
Yes! Three levels of depth helps sell a digital background really well. I try not to have it make up much more than 50% of the image generally (some exceptions). The more you can blend some props snd the background or very closely match the light sources, the better it will look.
This technique takes a page out of classic Hollywood matte paintings.
Interestingly enough, The Mandalorian now uses gigantic wrap-around LCD panels to project backgrounds for their sets. Whats old is new again 🙂
Yeah! Very much so, Dave! When I was shooting the Star Trek figures for QMx, using a simple digital gradient/sky, some rocks and bright-colored fish tank plants recreated the cheesy studio sets from the 60s/70s really well!
Great post. Have you had issues with a digital background while using a really fast shutter speed for action shots?
Excellent advice. Thank you.