As a newcomer to toy photography I have really enjoyed reading other people’s stories about how they came to be toy photographers. It’s helped me to think differently about the photos I put on my Instagram. It’s also helped me to start thinking about whether I should buy a camera or stick with using my iPhone.
I recently wrote about why I took up toy photography. In that post I mentioned how I’m curious about what it might take to transition from being a phone-only photographer to one of those adepts who chats casually about shutter speed and swaps out a lens without looking.
That curiosity was stoked while attending the recent Melbourne Toy Photographers Meetup. It was inspiring to see my fellow toy photographers wrangling their lenses, lights, tripods and reflectors as they set up poses and tried to capture the perfect shot.
At this stage I want to explore as much as I can about phone photography before deciding if camera photography is for me. Our Toy Photographers community is full of experienced photographers from many different backgrounds, so I thought I’d throw some questions their way.
Here’s what these generous folks had to say about making the most of your phone, and how to tell if it’s time to step into the world of the “actual camera.”

Am I limiting myself if I decide to stick with phone photography?
Alan Rappa (@alanrappa): Limiting yourself, no. Challenging yourself, absolutely. The best camera is the one you have with you. And I have no doubt you will be able to create striking images with your phone. The challenge will be how much flexibility your phone will offer as you push your photography further.
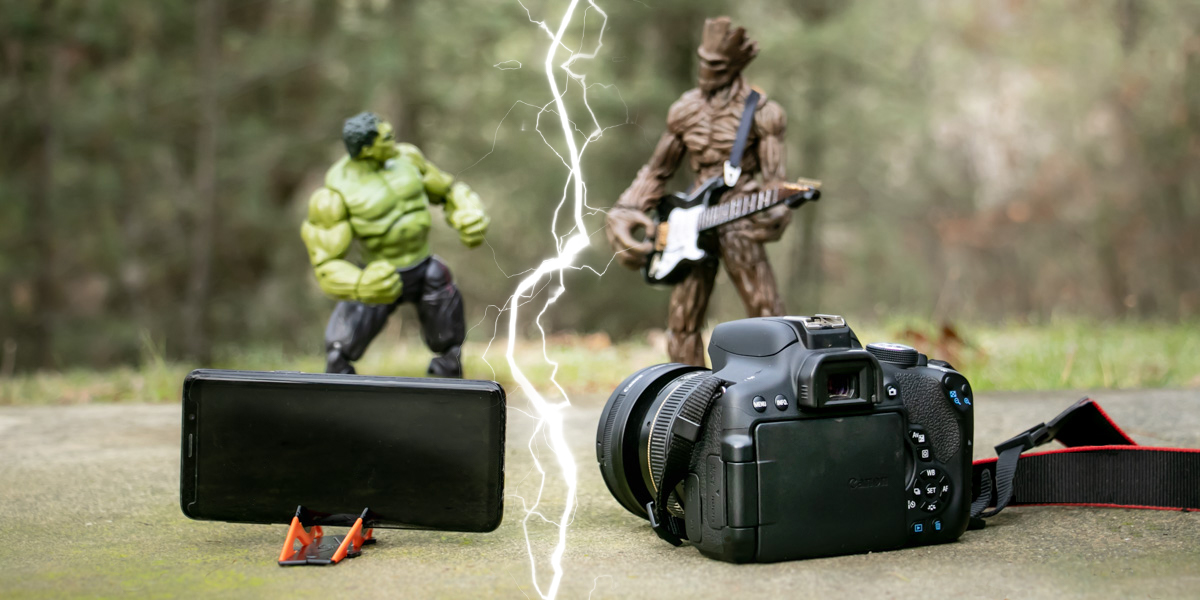
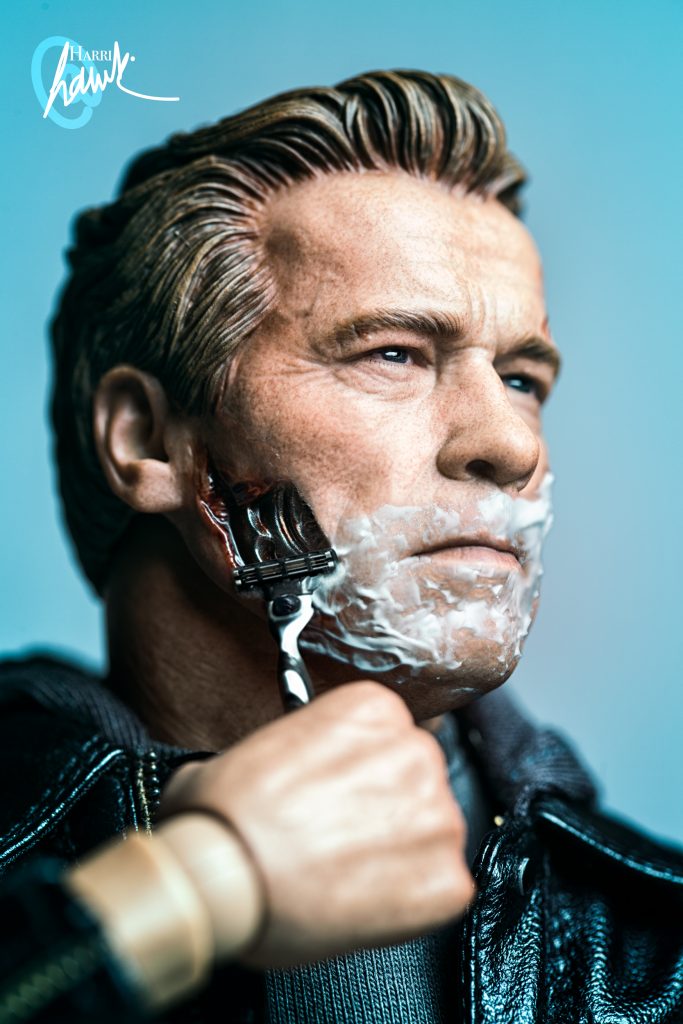
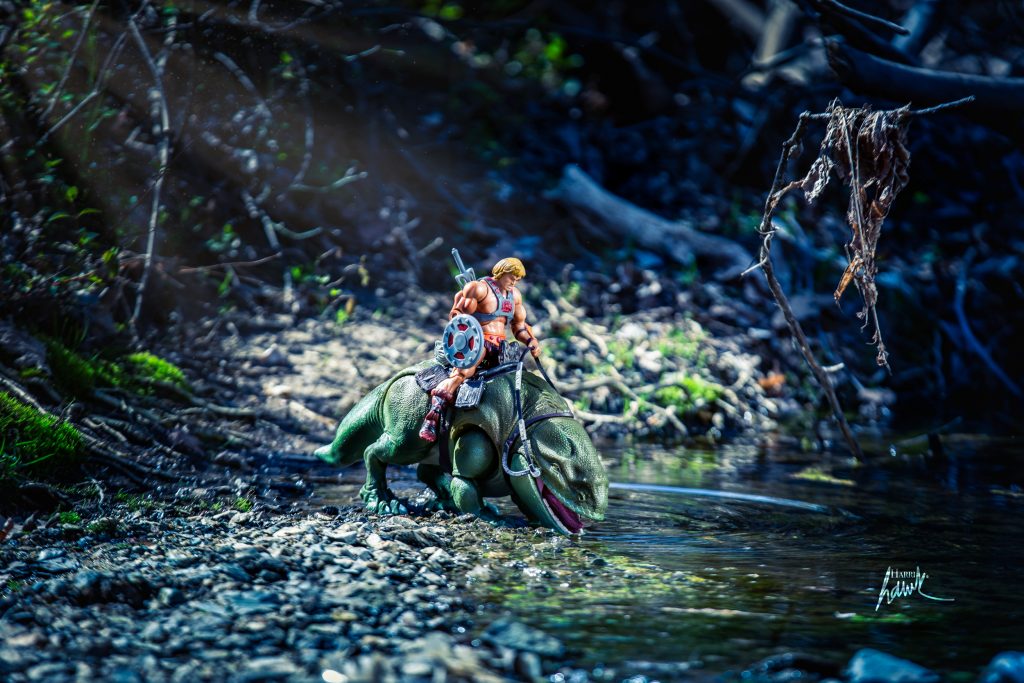
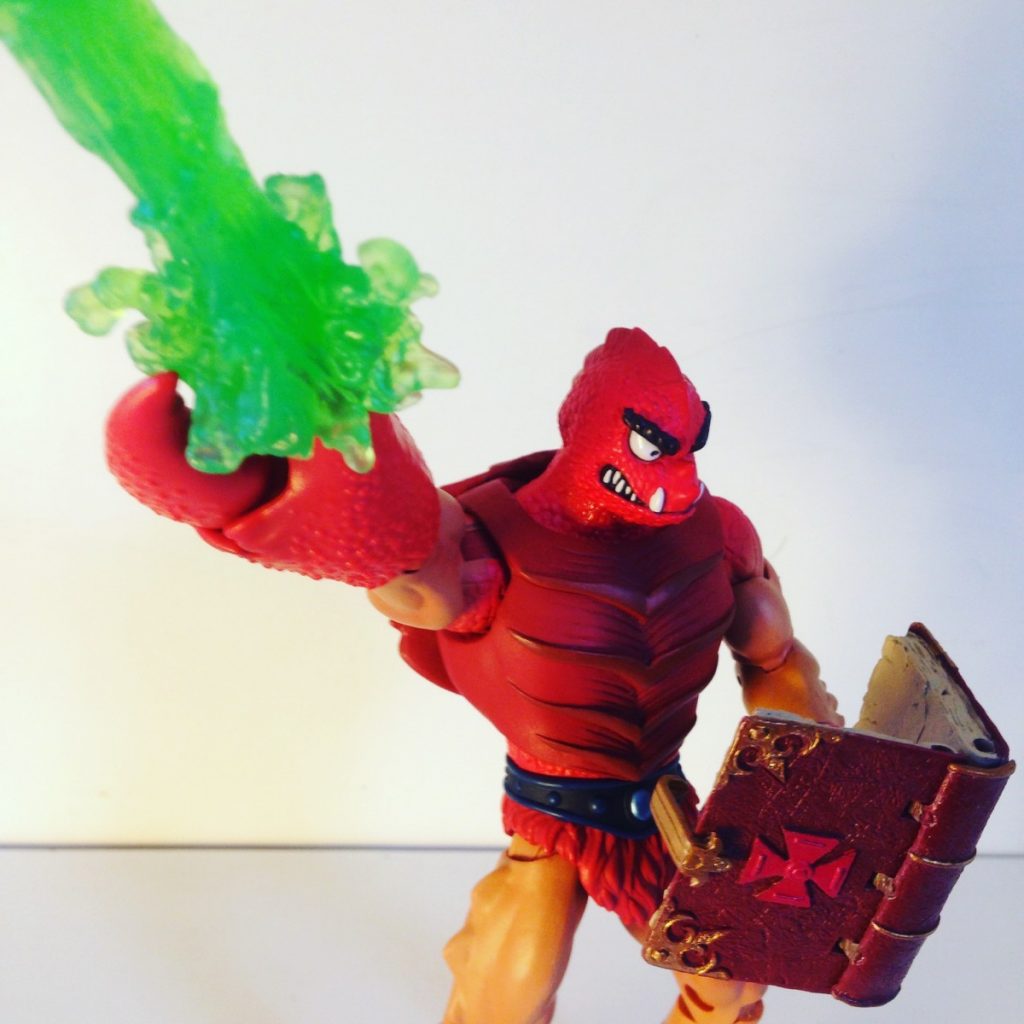
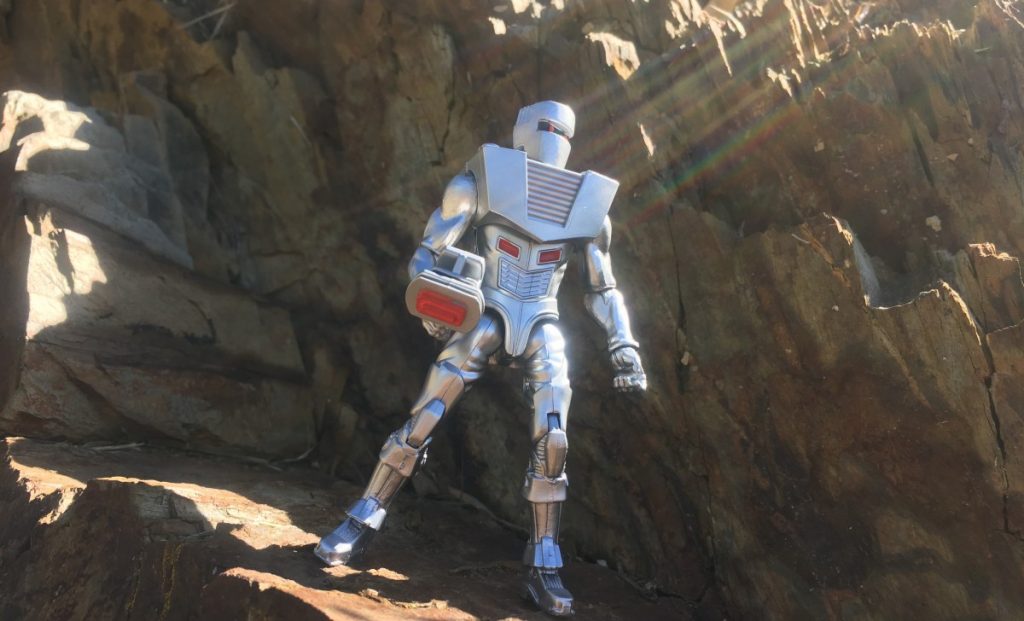
James Gibbs (@harri.hawk): I tend to agree with Alan. However, there are more possibilities with a camera. One of the main differences between the phone camera and a normal camera is having lenses. Now, there are ways to get great shots with smartphones, but if you want to use shallow depth of field, the bokeh effect or different focal lengths, lenses definitely add an extra dimension to your images. Below are two shots with different lenses. I don’t think you’d be able to get similar shots with a smartphone.
Dave DeBaeremaeker (@therealstudiodave): The way to figure it out is to ask yourself if there was a shot you wanted to get but couldn’t figure out how to accomplish with your phone. If the answer is yes, then you will likely find benefit in using a “real” camera.
Oliver Peterson (@oliversees): You can certainly make it work with a phone, especially as the technology improves. That said, my photography really took off when I decided to put down the phone and only shoot using a DSLR.
Phones do, however, have some great benefits in certain situations. They have limitless depth of field and they’re always in your pocket. In some ways, I felt less pressure and enjoyed a more casual attitude when I was only shooting with a phone. Even as a full-time DSLR photographer, I still like having the phone as one more option in my bag of tricks.
If I stick with my phone, how can I make the most of it in terms of technology and technique?
James Gibbs: The best thing about sticking with your phone is the availability of a much larger selection of editing apps at your fingertips for a fraction of the price of desktop software. These apps are designed to make mobile editing fun and easy, and are generally simple to navigate and use.
Dave: I would suggest downloading an app that gives you control over things like shutter speed, aperture and ISO. I have used Open Camera with some success.
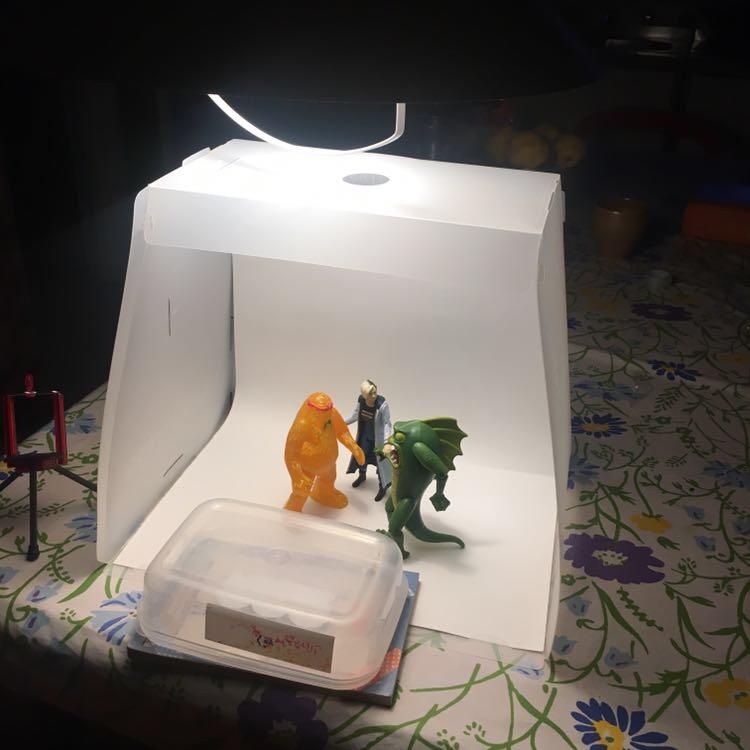
I would also invest in a tripod and lights. Phone cameras tend to be less awesome in low light, so having a good light source (Lume Cubes are excellent) can be the difference between a good shot and a missed opportunity. The rest is simply practice and experience.
Teddi Deppner (@mightysmallstories; @teddi_toyworld): I’ve used my phone camera for a long time. Through experimentation I’ve found what kinds of shots it does well. I like my phone better for LEGO minifigures than action figures. It’s easy to put the lens right down at the figure’s level and get up close. My top tips would be:
- Explore your camera settings and modes. Look for the option to tap for focus, and tap to shoot. The “floating shutter button” is a fantastic option, allowing me to put the on-screen button for taking the shot within easy reach for one-handed use.
- Edit your photos with a phone app. I use Snapseed. It has decent options for enhancing focus on the figure using lens blur, adjusting color, cropping, spot-healing—just about anything you’d do in Lightroom.
- Keep a light in your pocket or bag. It doesn’t have to be an expensive light. I’ve had good success with flashlights and small work lights purchased at Home Depot. The right amount of light makes a lot of difference in a phone camera’s ability to focus and get a crisp shot.
If I decide to get a camera, what’s a simple or affordable setup for a newbie?
Alan: “Simple” and “affordable” are subjective terms, so it depends on your budget, and how much time you want to spend reading through a manual.
What you want out of a camera is control of your aperture, shutter speed and ISO. Then you need to determine if you want something with a fixed lens or an interchangeable lens. This is the start of a whole new conversation about which lenses to get (great idea for another post!).
Establishing your budget is the best place to start. Once that’s sorted, it’s a matter of looking at what cameras fall within that range, and prioritizing the features that are most important to you.
James Gibbs: A good option is to look at the used section of sites like B&H, PROCAM or Adorama. They are well-established, reliable providers that are good at making sure used stock is in working order for a fair bit cheaper than a straight-out-the-box setup.
Remember—just because you decide to get a camera, doesn’t mean your pix will be better straight away. There is a learning curve you’ll need to follow to understand how to use your new equipment.
Dave: The thing about modern cameras is that these days they are all good, and for the most part, they all do the same things. What matters is that it works for you. My advice is to go to a camera store and pick up the various models, and see what feels right in your hand.
Stick to the interchangeable lens cameras to maximize your future options, but the kit lens that comes with the camera will likely suffice for a long period of learning. If you shoot LEGO, or other small figures, you may want to invest in a macro lens or two. If you shoot 6-inch figures or larger, pretty much any lens will suffice.
I use a Sony a6000 camera in my studio, so I can confidently recommend it. You can still get this camera with kits that include a couple of lenses and everything else you’ll need, for the price of a premium smartphone.
Teddi: I don’t know about “affordable,” but my husband and I went in 50/50 with our son @actionstuff to get the Canon EOS Rebel T6i, because a lot of action figure photographers in the community recommended it.
We had a Canon EF 50mm 1:1.4 lens already in the house (photographer family), and a 72mm close-up lens 500D for pseudo-macro shots. I also use a Canon 80D for my own non-phone-camera purposes, usually combined with the close-up lens.
Oliver: I would suggest not going too cheap if you can afford it, especially if you think you’re in this toy photography game for the long haul. You’ll end up wishing you had something better and more versatile. Buy something decent that can be easily upgraded over time. This will give you room to add more options if you decide to do so down the road.
What kind of intro courses are out there, for either phone or camera photography?
Alan: YouTube is a tremendous resource for building a strong photography foundation. I also recommend shooting as often as possible. The more time you spend with your phone/camera, the better you’ll learn your way around your gear. I would also be remiss if I didn’t recommend sites like toyphotographers.com for tips and tricks specific to shooting toys.
Dave: KelbyOne is my go-to tutorial site. A quick search on YouTube will also turn up a lot of good options. If you are a “learn in a classroom” kind of person, then most local community colleges are likely to have an Intro to Photography course for pretty cheap.
I find the best teacher is experience and a curious mind. Dig into your camera, whatever it is. Find settings, play with them, take test shots and see what your options are. If you need to learn a specific technique, Google that technique. Eventually you’ll have a full set of tools you can apply to any situation.
Oliver: The toy photography community is generally very open to helping each other out and sharing knowledge with people new to photography. You’d be surprised how many of the folks behind your favorite Instagram accounts are willing to answer questions and give suggestions. If you love a shot, don’t be afraid to send the photographer a message asking how they achieved it. Just be respectful and patient when you do.
Thank you so much to Alan, James, Dave, Oliver and Teddi for their invaluable insight and advice. What about you? What advice would YOU impart to someone either trying to get the most out of their phone, or planning to make the transition to camera toy photography?
Adam Ford is a toy photographer and poet from the tiny town of Chewton, in central-south-west Australia. You can read other posts by Adam here. You can also find more of his toy photos at @adamfigurephotography and more of his writing at theotheradamford.wordpress.com

Well Done Adam for a fantastic article and the Photographer’s, excellent and informative responses. When I started 2011/12? Toy photography was very underground and for the most part looked down upon from “Real Photographer’s) Look at it now! ????????
Well written with lots of good thoughts. Oddly I came into toy photography on the opposite direction. I started with my DSLR but over time have added my lovely Panasonic Lumix DC-ZS70 P&S which has one of the best close-up capabilities I’ve seen in a small package and then on to my phone as well. I started my toy adventures photographing vintage toys for Ebay and moved on from there. Nowadays I use them all depending on what I am shooting and where. Have fun with your journey and to paraphrase others: spend as much as you can afford to spend on your gear. It pays off in the end.