
I recently had the pleasure of hosting the Traveling Ultra Platypod, an innovative small form factor tripod. The idea is to put a Platypod in the hands of creatives and see what they can create with it. I took up the challenge and created a bunch of images. One of them, using Rorshach (from Watchmen), was one of the more complicated shots I’ve ever done on my own.
This is the behind-the-scenes for Rorshach in the Rain:
The concept for Rorshach in the Rain
I had been toying with the idea of having a dark figure in a raincoat walking through a dark and stormy night. It required a fair amount of complexity to accomplish. Because of this, I had never gotten around to taking it.
When the Platypod arrived, I realized that I actually had all of the pieces I needed to get the shot done. As a bonus I could do it in my backyard. Not only that, I had the incentive of a real-life storm coming into the area, so the right feeling was in the air.
I grabbed a bunch of my gear, along with the traveling Platypod, and lugged it out into my backyard to get the shot… hopefully before the storm hit.
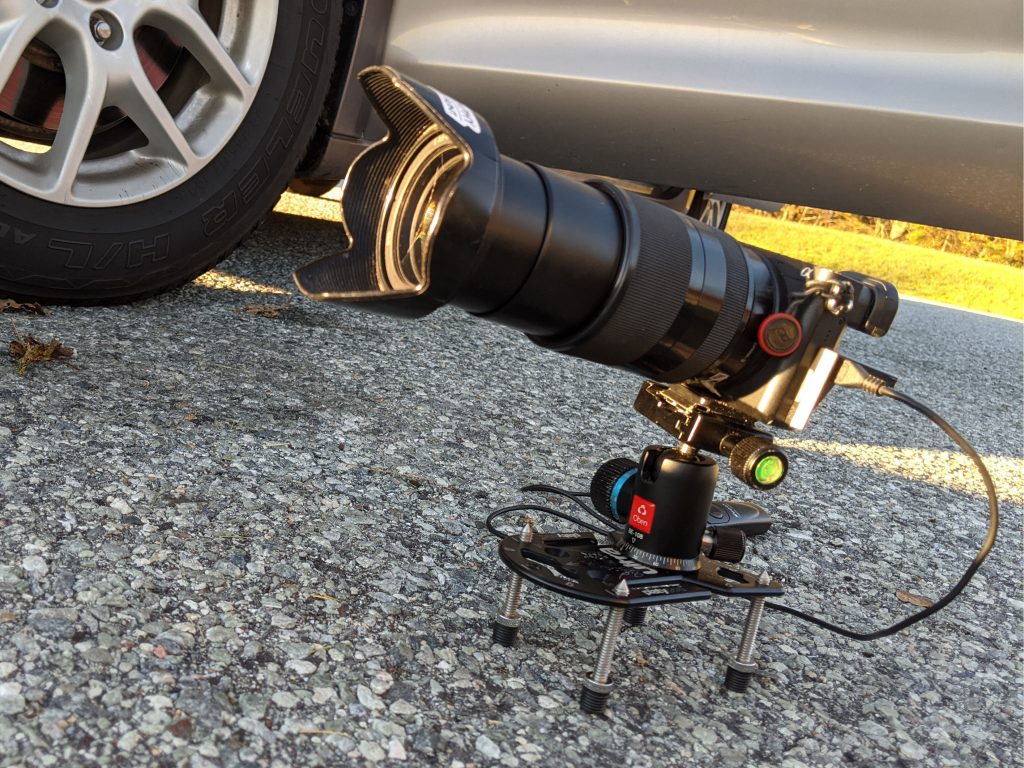
What is a Platypod?
A Platypod is, essentially, a machined aluminum plate that is large enough to support a large camera. Toss a ball head onto it, and you get a highly portable, compact support for any camera that fits easily into your pocket. It’s a very versatile tool, especially for us ground-hugging toy photographer types.
The setup
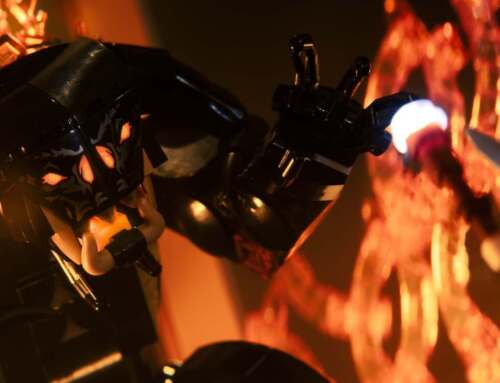
During the summer we had a 15-foot blow-up pool in the backyard for the kids to frolic in. Now there is just a 15-foot diameter flat ring of dirt in the middle of the lawn. It was the perfect setting for this shot. I set up the 12-inch Rorshach figure in the middle of the circle.
A Lume Cube mounted on a c-stand, directly above the figure, provided light. This was to simulate the look of a street lamp.
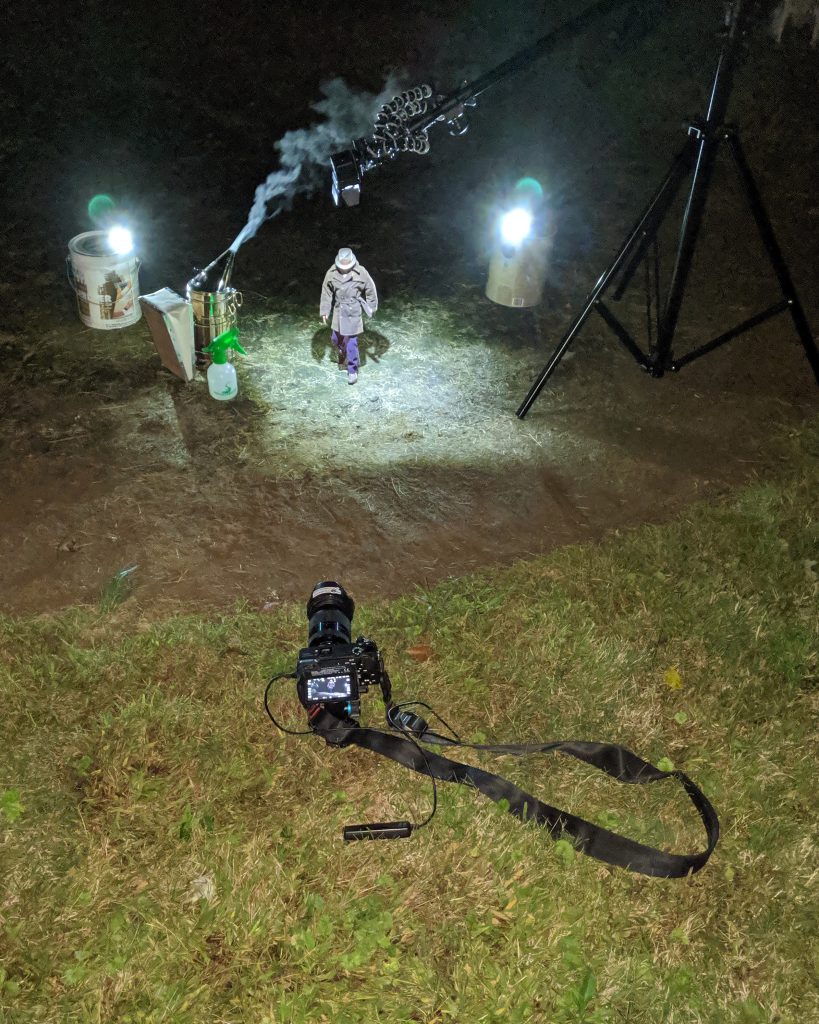
I added two Lume Cube Airs in the background to act as backlights for the mist effects. I put them on old paint cans (the cool thing about photography is the setup can look like crap as long as its out of the camera frame).
To create the misty atmosphere effects, I decided to give my bee-smoker technique a try. Smoke and mist look the same in low light. I used a water mister for the rain effect.
If you are keeping track, I had two practical effects to deal with, both requiring a free hand, as well as a camera to operate. Normally I’d grab a wife or kid to help me, but I was alone. To get around this limitation, I put my camera on a Platypod, then attached a remote trigger.
I was ready to go!
Making the shot
Taking the shot was hectic. Triggering multi-shot mode with the remote, I’d then throw it down, quickly pick up the smoker and the mister, and spray smoke and mist into the scene, hoping it would result in a combination that would work. When done, I put everything down and picked up the remote again to stop the shutter.
I tried this multiple times until I was almost sure I had something. I was going for one more attempt (never hurts to take more than you need – digital photos are free), when the wind suddenly picked up and a gust blew over the figure.
Mother nature decided I was done, so I packed everything up and headed indoors.
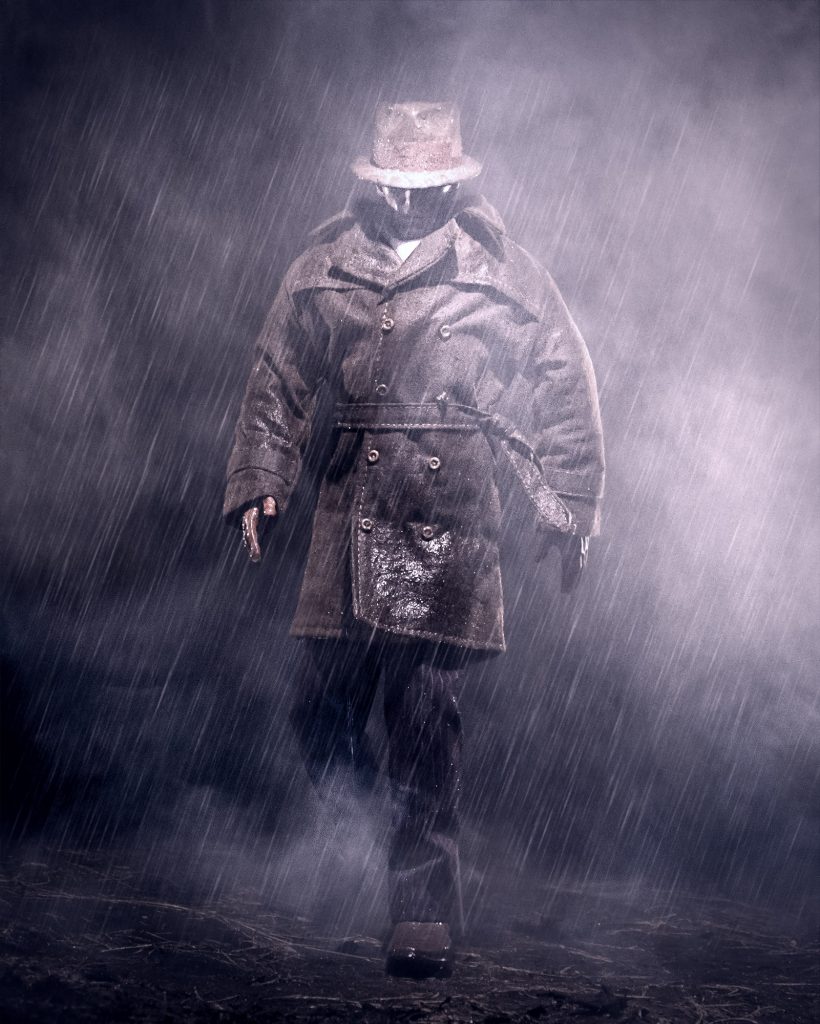
This is the shot I used:

As you can see, the shot works, but none of the rain came through. So I added some rain effects in Photoshop. I also added some colour grading and some texture overlays (as is my style), and came up with the final image.

Conclusion
This was a hectic but fun shoot. I got the exact results I wanted, and used some innovated technology to do it. All in all a very satisfying experience.
[dave]
Want more toy photography goodness? Subscribe to our weekly email round up so that you never miss a post. You can also listen to episodes of the podcast!


Beautiful work, well worth the effort. The Platypod looks like a great solution to get low where other tripods won’t easily go. Thanks for sharing your methods.
Thanks for your comments Tyroga!
I love sharing how I do things, and its nice to see the Platypod fit in so well to my workflow.
Beau travail, la photo de jouet n’est jamais simple c’est souvent un travail d’équilibriste et de débrouillardise.
Merci! 🙂
I really love your writing Dave!
I totally dig this line:
“It’s a very versatile tool, especially for us ground-hugging toy photographer types.”
Cheers!
heh, thanks Wade!