I was lucky enough to be sent the recent wave of Harry Potter sets by our friends at LEGO so I wanted to spend a post (or 2, or 3) looking at the sets from the toy photographers perspective. This week I’m going to look at the Great Hall set (set 75954), the centre piece of the wave (excluding that ginormous castle). As a Harry Potter fan, I couldn’t wait to build the Great Hall, to finally have some LEGO Hogwarts to build and photograph, especially after never getting my hands on the old castle.
I’ve done this review from a ‘how well does this set allow me to take the photos I want to take’ perspective, rather than a look at the build process or all the little details of the set. If you want to see a good review from a non-photography perspective, it’s worth checking out the Brothers Brick review, where you can see the build process, information on all the exciting new elements within this set and some great overview photos of the set. After writing and photographing this set for days, I still haven’t managed to work out how to take a decent complete picture of it! I might need to take it to Scotland to do that! This was the best I managed!
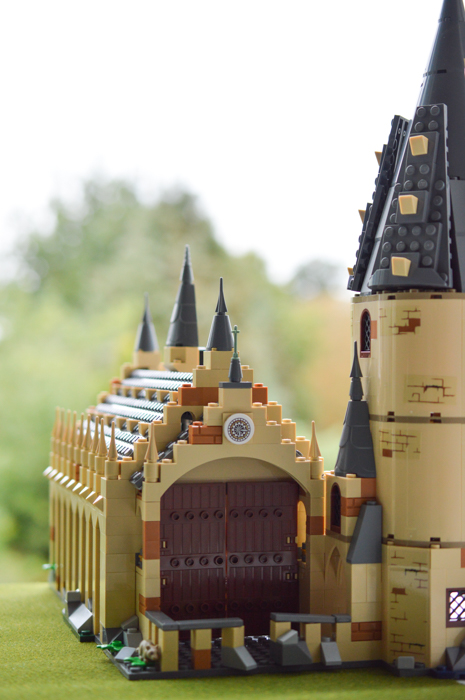
Hogwarts Great Hall, a tricky building to photograph whole!
I’ve broken this review down into three parts to make sure I give everything a fair look. I’ve considered the exterior of the set, the interior of the set, and then the minifigures. Let’s start with the exterior.
The Great Hall – exterior
Looking at it from afar, the Great Hall has been really nicely put together. The window elements really give a feel of the expanse of a hall and the grand feel of Hogwarts really comes across.
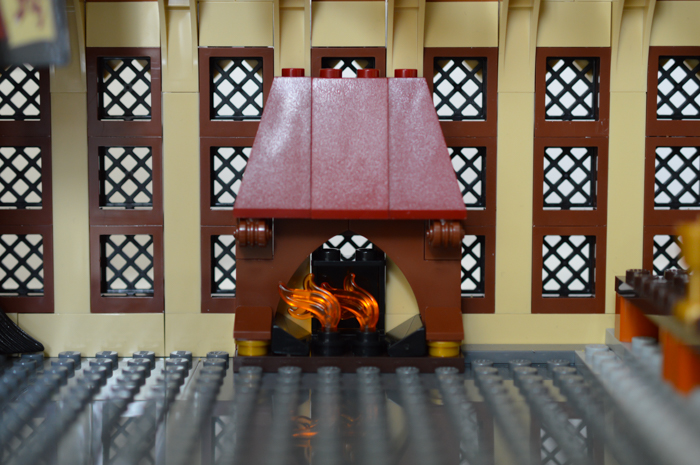
For the completed outside we get a beautiful portion of the castle, featuring a tower, and the front of the Great Hall. This looks great on display, and I really can’t fault it at the size and cost of the set. (I can however fault the sheer amount of stickers on this set. I have a personal hatred of stickers and getting them on straight was a nightmare!)
Importantly for the toy photographer, from this side the castle makes a great backdrop to many outdoor Harry Potter scenes for photography. It’s a really versatile and can be used as any part of Hogwarts exterior in a pinch! It’s got the right old building feel to it that means you can let your imagination go wild! Additionally, the stone is nice and neutral for backgrounds, letting figures really stand out.
I tried photographing it in a few different ways to see how it worked as a background for some different scenes.
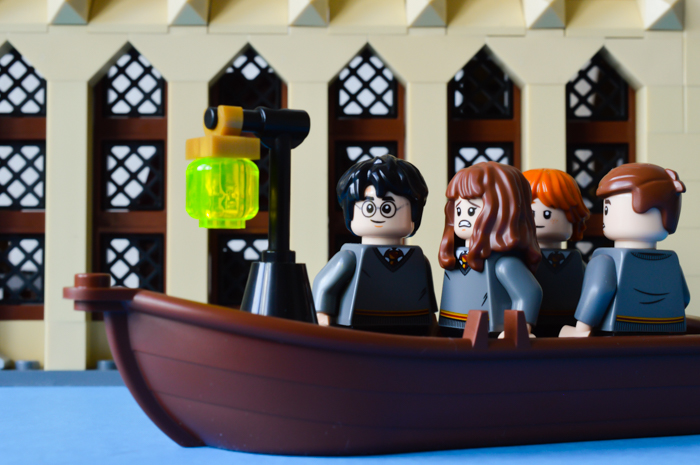
“And the fleet of little boats moved off all at once, gliding across the lake, which was smooth as glass.” – Harry Potter and the Philosopher’s Stone, page 83.
“He was going to be expelled, he just knew it.” – Harry Potter and Philosopher’s Stone, page 112.
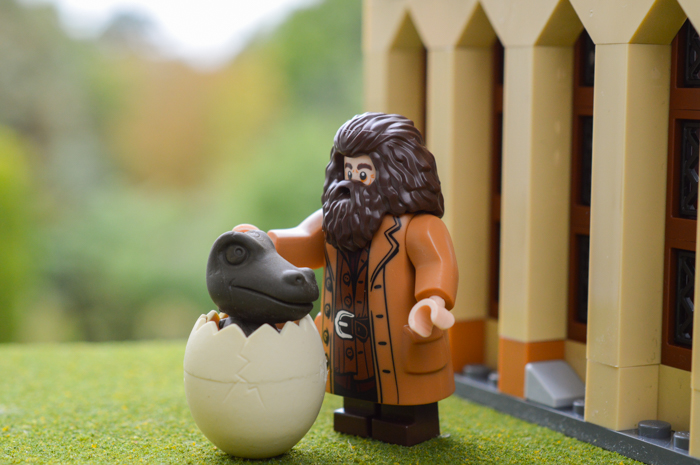
“Isn’t he beautiful? Hagrid murmured. He reached out his hand to stroke the dragon’s head. It snapped at his fingers, showing pointed fangs.” – Harry Potter and Philosopher’s Stone, page 172.
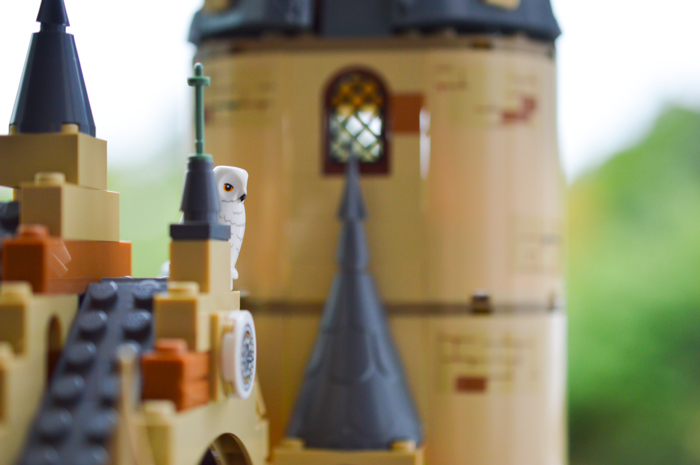
Hedwig enjoys watching the world from the Hogwarts roof!
“They flitted along corridor’s striped with bars of moonlight from the high windows. At every turn Harry expected to run into Filch or Mrs Norris, but they were lucky. – Harry Potter and Philosopher’s Stone, page 117.
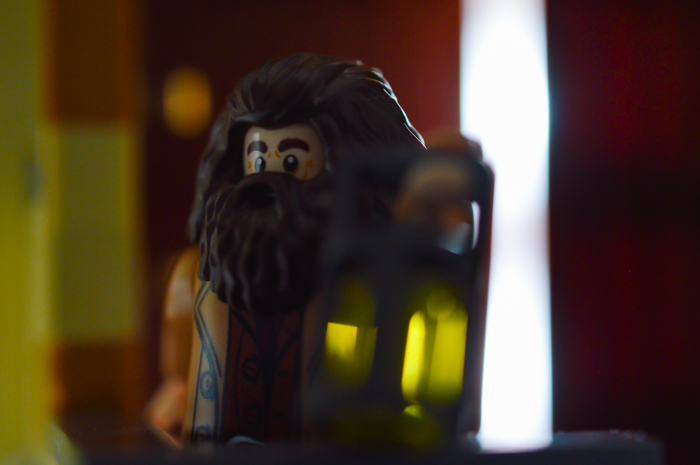
Hagrid watches over the grounds at night.
The Great Hall – interior
From the inside, it’s a bit of a different story. I respect what the set designers have done with the limited space, and as a play set for kids, it’s just what you would want. However for a photographer and a collector, it’s a bit cramped! The space only just fits the four tables and benches which makes scene set-ups tricky. More space would have been great as when trying to shoot scenes within the great hall, my (not particularly huge) hands constantly knocked over figures, candles and posters. One of the benefits of the open side though is that it’s really easy to take photos of the hall from the side without removing too many walls.
Here’s some of the scenes I ended up shooting inside the hall itself with the original table set up.
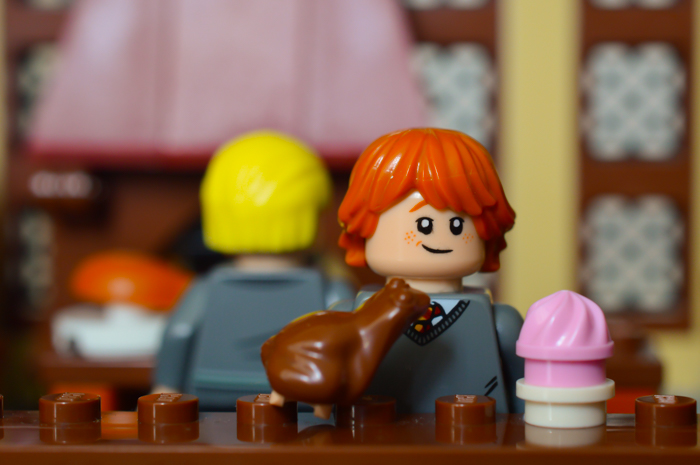
Who wouldn’t want a chocolate frog AND a cupcake?
“‘That does look good’ said the ghost in the ruff sadly…” – Harry Potter and Philosopher’s Stone, page 92.
For this following photo, I kept the original interior, but removed the windows at the head of the hall. Fair warning though, anyone who follows my Instagram stories will know that I had several disasters during this process, including dropping the entire castle, destroying the tower, and completely breaking the roof off. Needless to say, it needs a gentle set of hands to do the interior and exterior toy photographers decorating!
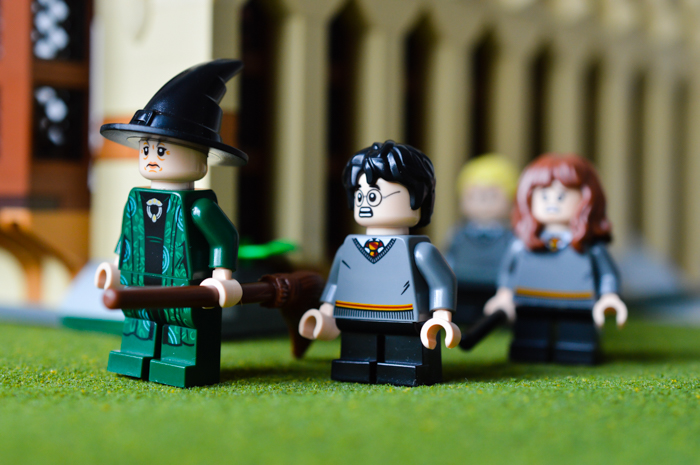
“Harder to shake off was the feeling that Harry had got from the teachers look – a feeling that he didn’t like Harry at all.” – Harry Potter and Philosopher’s Stone, page 94.
Set change
If you are happy to not keep things as they are in your sets, changing up parts of the interior allows for a bit more flexibility with your photos. You might like to get your friendly half-giant to lend a hand clearing out the hall!
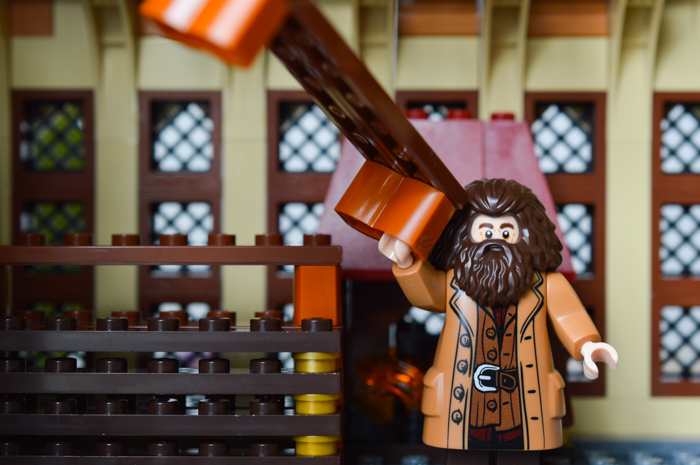
Hagrid shows off his usefulness and helps shift the tables and benches!
Removing most of the hall furniture allows scenes such as the Duelling Club to be set up!

“Malfoy raised his wand quickly and bellowed, ‘Serpensortia!’ – Harry Potter and the Chamber of Secrets, page 145.
Even if you don’t want to completely change things up, removing just some of the tables gives us a little more room to play with.
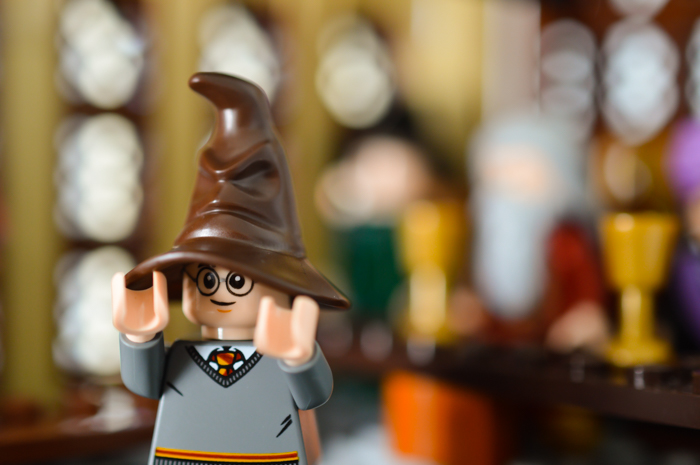
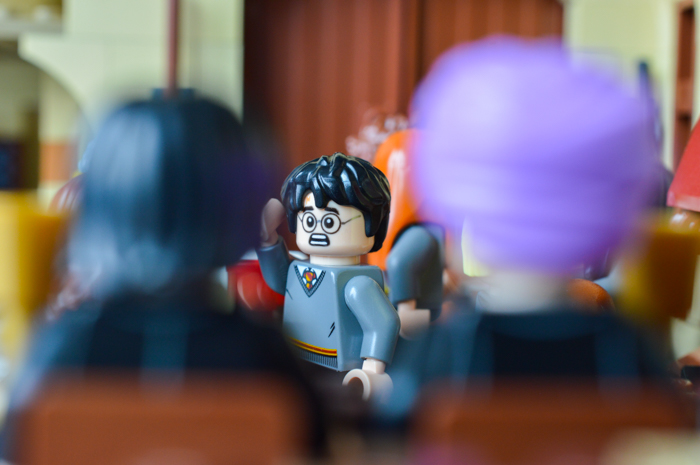
“Not Slytherin, not Slytherin.” – Harry Potter and Philosopher’s Stone, page 91-92.
On an ongoing basis, whilst I’m still in a Harry Potter photography place, I’ll probably keep the hall fairly empty in order to shoot photos more effectively. It’s actually a really good scene space when empty and I’m in love with the bokeh produced by those windows when using my macro lens!
An empty Great Hall. A boring photo, but lots of potential to imagine!
I love the potential of this space, but here are some of the things that I would love to have seen in this area that I feel were missed by the set designers:
- A little space/stool for the sorting hat within the Great Hall itself
- The ability to have all four house banners up at once
- More space for the teaching staff as I would love to be able to get at least all the heads of house in there seated
- More food to represent the first night feast would have been a simple improvement for the set, giving more feeling to the room
The tower
Within the tower it gets even more cramped. Each floor is more of a little vignette than a cohesive piece, and whilst the details are nice, it seems to have some odd choices. Rather than a potions classroom (which we also get in the Whomping Willow set), it might have been nicer to have Dumbledores office (with a gargoyle at the bottom of the rotating stairs perhaps), or even a miniature bathroom with Myrtle. This would then make a little more sense as to why the Basilsk is hanging around!
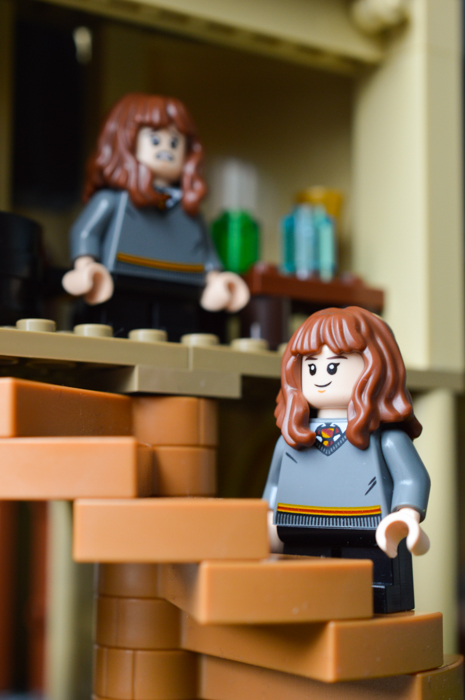
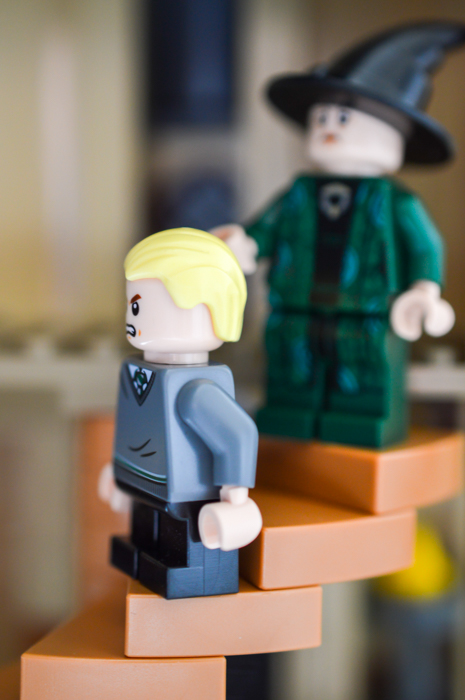
Whilst I think these tower rooms could definitely be improved but they can house a figure (or two) for some small scenes! The spiral staircases (if you blue tac them into behaving and staying still) are great for portrait scenes across floors!
“You must not be seen. Miss Granger, you know the law – you know what is at stake… you – must – not – be – seen.” – Harry Potter and the Prisoner of Azkaban, page 288.
“Wandering around in the middle of the night, how dare you.” – Harry Potter and the Philospher’s Stone, page 176.
The rooms themselves also work for nice backdrops to photos of figures. Again, those hatched windows really come into themselves in the background!
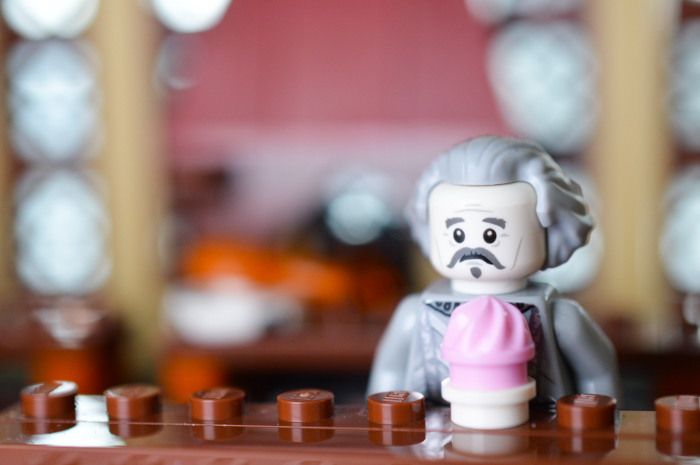
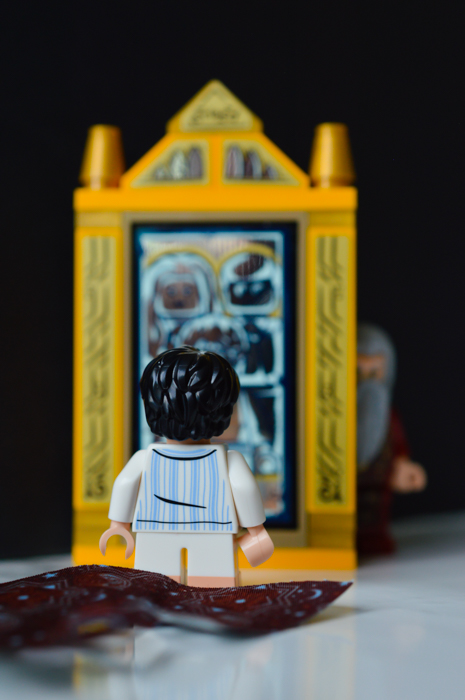
This one was taken in the small room containing the sorting hat, a spider and a trunk of gemstones (aka Dumbledore’s office?).

Albus contemplates the Philosopher’s Stone.
The following photo was taken in what was formally the potions lab on this floor. I thought Hermione might like it as a small study room instead!
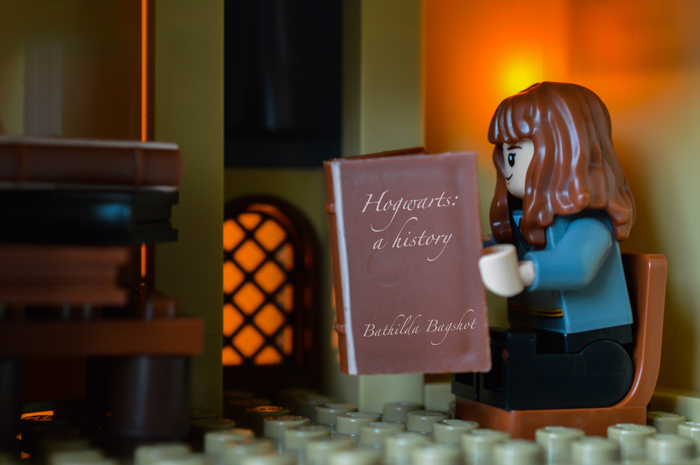
Hermione finds more time to memorise Hogwarts: a history.
At the top of tower we get the mirror of Erised, and behind that, a little brick built Fawkes.
Fawkes is cute, but I think a proper molded model would have been better. He does look pretty awesome perched on top of Hogwarts, but his tail would not stay in place very easily! Unlike the models of the owls, he also lacks detail which means he is a little dull to photograph. I’m not convinced how much use I will get out of this model.
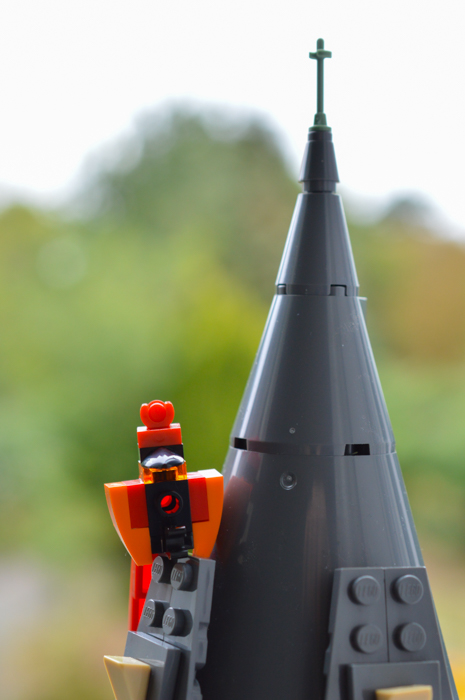
Fawkes likes to keep watch over Hogwarts from up high!
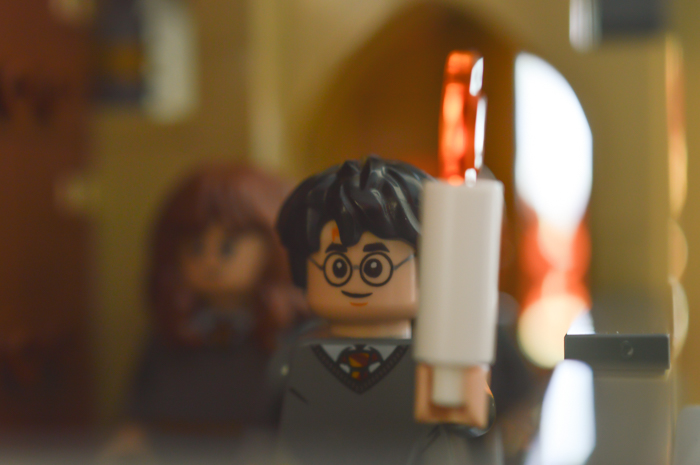
Let’s also take look at the mirror. I understand that this set was trying to add in details from Books 1 and 2, and I love the mirror piece (except for more stickers) however it just kind of sticks out like a too-large thumb in the set itself. To photograph it, I ended up taking it out of the set completely. Asides from all the stickers around it, I do love all the interchangeable screens. This means we can create different scenes to photograph! I couldn’t resist getting the CMF pyjama Harry to have a peak!
“How long he stood there, he didn’t know.” – Harry Potter and the Philosopher’s Stone, page 153.
It also means we can re-create some of those scenes at the end of book 1!
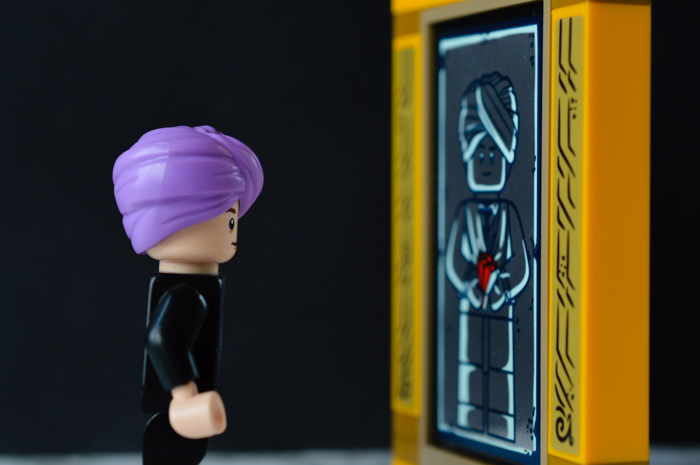
“I don’t understand… is the stone inside the mirror? Should I break it?” – Harry Potter and the Philosopher’s Stone, page 211.
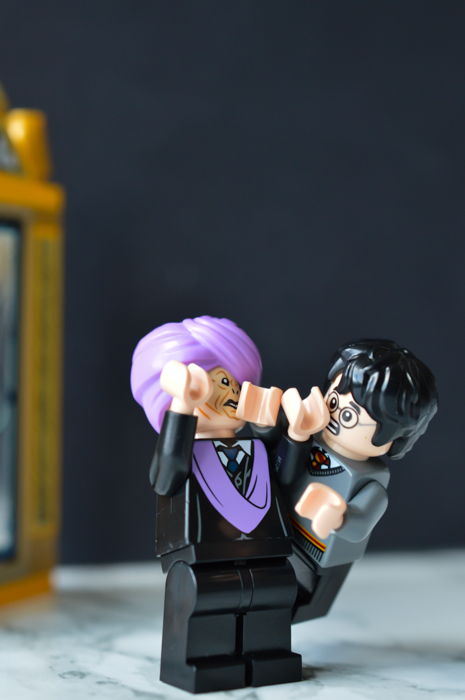
“Harry jumped to his feet, caught Quirrell by the arm and hung on as tight as he could.” – Harry Potter and the Philosopher’s Stone, page 214
One of the final elements of the set is a brick built Basilisk. I’m not quite sure why this was included as it doesn’t seem to have a natural home within the Great Hall. Still, I thought it at least deserved some kind of photograph. It doesn’t look that scary, as giant snakes go, and it was hard to make it tower over even a tiny Harry. I’m not sure I will have many photos with this model and will be interested to see how other photographers make use of it!
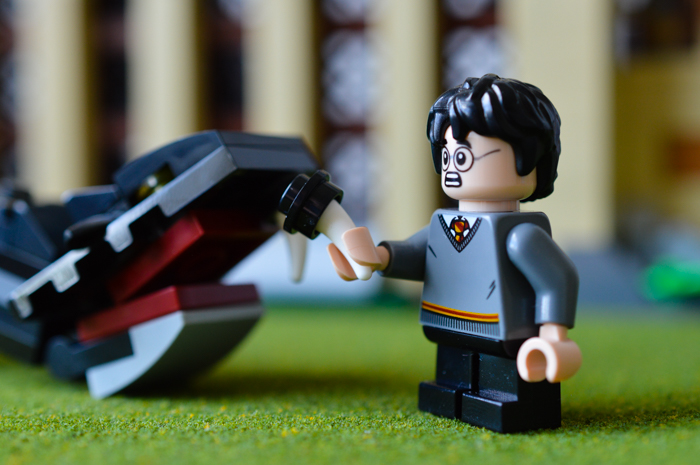
Harry sometimes dreams of fighting the basilisk outside in the daylight. No one ever said his dreams were logical.
The minifigures
All say ‘Magic cheese’ please.
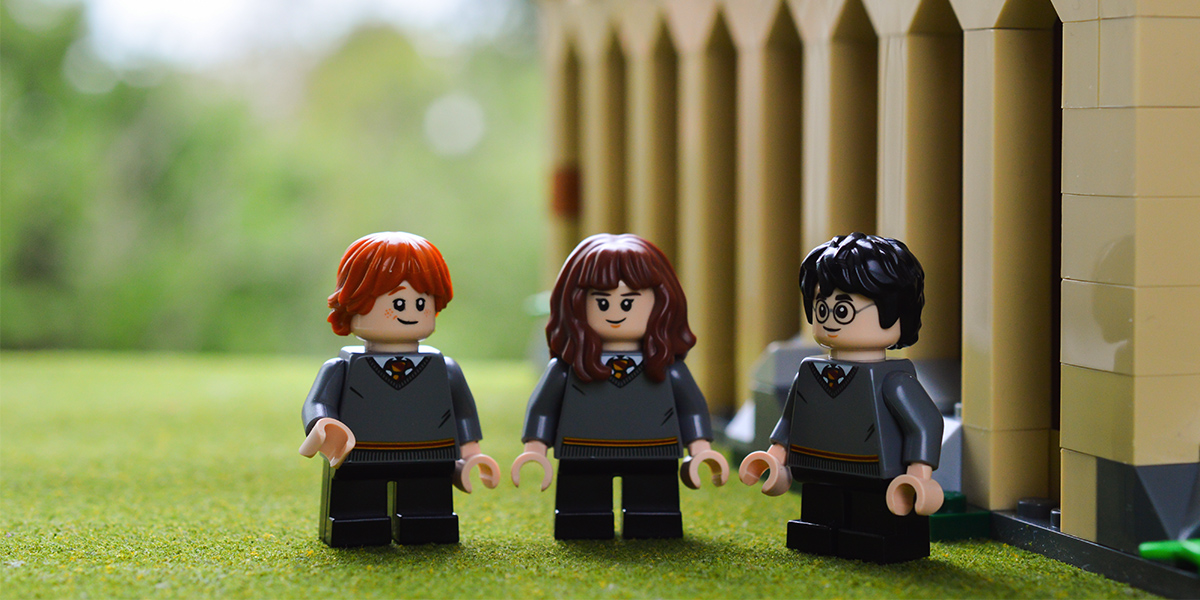
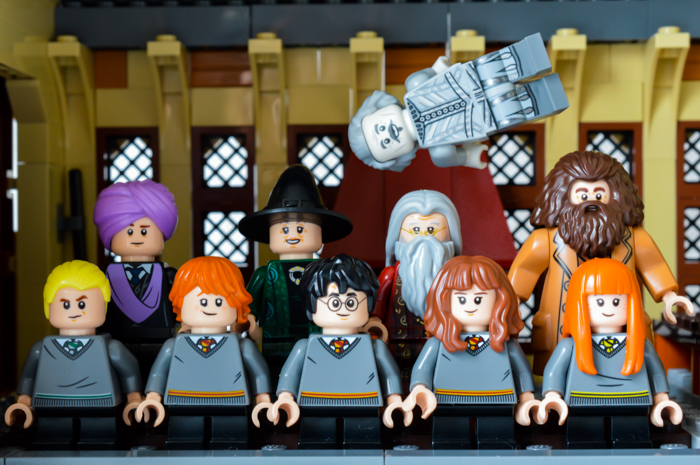
As a toy photographer I obviously obsess over the figures that come from a set. With this set, we get an impressive 10 figures including: Hagrid, Nearly Headless Nick, Professor Quirrell, Professor McGonagall, Albus Dumbledore, Draco Malfoy, Susan Bones, Hermione Granger, Harry Potter and Ron Weasley.
All of the figures but Hagrid come with two faces: a happy one and a worried/scared one. This is really appropriate for the nature of life at Hogwarts and this is brilliant to re-create different scenes for photographs.
The clothing decisions within this set are interesting and there are some things I would have preferred to be different. For example, the students are all in the standard grey uniforms, but it might have been nicer to have them in robes as this is what they wear in the books!
The kids all have small, non-moveable legs, whilst the adults all have standard legs. I also wonder why the decision was taken not to have Dumbledore and McGonagall wear the new dress piece, but at least this way they are more flexible to pose for photos!
The one figure that stands out as an odd inclusion is Susan Bones. Would it not have been better to include Ginny Weasley? I mean, asides from having a Hufflepuff sweater, I think she looks pretty similar! I would have also liked to have seen a young Neville figure. I love the CMF Neville, but it would be great to have a non-gardening figure at the same age point as this collection!
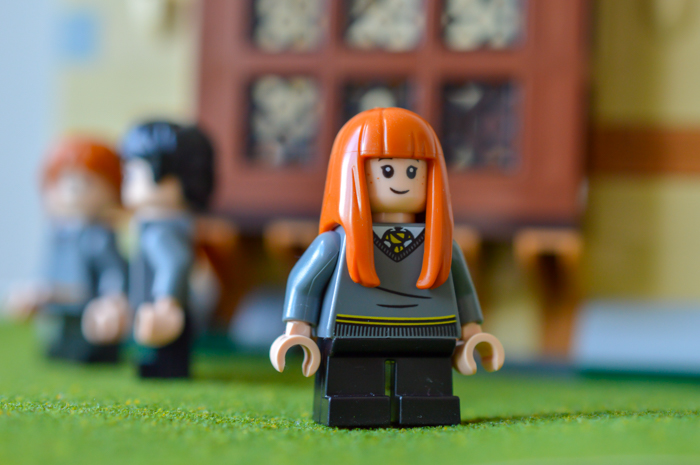
Susan goes for a walk around Hogwarts. She might not be main cast, but she can be a star too!
Overall, I’m pretty happy with the figures included, although it would have been great to get figures of all the house ghosts! Likewise, the other heads of house would be good additions. However I think there was a LOT of scope for characters to pick for this set and it must have been hard to make those decisions!
Final thoughts
As a whole, the set really does look magical, and provides us with a home for all our new Harry Potter minifigures to explore. With the Whomping Willow expansion, and the potential for more areas of castle to be added, this is a set that can really be used effectively by a toy photographer shooting Harry Potter scenes (or anyone looking for a giant castle-esque feel to their photos!)
The exterior works perfectly as a backdrop for photos and with a bit of manipulation of the inside of the hall it can also be a really useful space. Additionally, the set of figures included is a great start to any Harry Potter collection and gives a lot of scope for photos. Despite my initial reservations of it being too much of a play-set, using a macro lens for photos and re-imagining the inside for my own purposes means I got a lot more out of it than I thought I might. Overall then, for photographer fans of the series, it’s a must-buy to be able to immerse photos in the Harry Potter universe.
Do you have this set? How have you found it? Have you taken any photos of it yet? Are you planning on buying it but are just not quite sure yet? Let us know in the comments! I’d love to hear your thoughts about it!
- Lizzi
Disclaimer: This set was provided by LEGO for review.
What a great piece Lizzi. I seldom shoot indoors and seldom shoot sets. You’ve inspired me to think about both for this cool set. I love your quotes and scenes from the book, and your cool use of the many figs. My kid loves this set whereas I’m more into the figs, the lantern, the pink umbrella, etc. You’ve helped me think bigger. Thanks!
Thanks Doug! Good luck with the set! This was actually my first time shooting indoors and with a set in a very long time! It was hard to get back into this kind of photography! Turns out, I’m much more of an outdoor photographer!
That pink umbrella is just amazing! I don’t think it made it into any of my photos, but it will do, I’m sure! 😀
I loved reading your piece and am now anxious to get the set. I wasn’t sure before. I really appreciate all ofd your ideas for shooting within the set itself.
Thanks Mary! It really is a great set! Have fun with it when you get it!