Whether you are just getting started on your toy photography journey or some where further down the line, using leading lines can drastically improve your photographic compositions.
What is a leading line?
Leading lines are exactly what you think they are, lines that lead. To be more specific, their purpose is to lead the viewer’s eye through your photograph. They are a guide, if done with purpose they can point your viewer to exactly what you want them to pay attention to. They lead the viewer to the main subject with, you guessed it, lines. The best part, you don’t need any fancy equipment. All you have to do is find them, harness their power and use it to your advantage.
Why write about leading lines?
Leading lines are one of those photography rules that everyone uses. There are reasons why certain shots in movies and TV stand out, and one of those reasons is the use of leading lines. Toy photography is more about the photography than it is about the toys. I am always trying to grow as a photographer and I just happen to be using toys as my subject, as opposed to using people. Because, I want to be a better photographer, and a better creator, I am always watching videos on cinematography and photography.
One of these videos I saw recently was called Leading Lines – How to Instantly Improve your Films & Photography. In the video, they talk about scenes in movies, and how they use leading lines to improve the story.
It’s no surprise to me that using leading lines elevates the moviegoing experience. It’s one of those small things that make a big impact. And that’s why I wanted to write about leading lines.
We often take leading lines for granted. We forget that we can use leading lines to improve our toy photography, or we don’t even realize we can. As toy photographers, we can forget to use those simple photography tools to take better toy photographs.
Finding leading lines
Improving your toy photography doesn’t always have to be difficult. Finding leading lines and using them is one of those simple and easy ways to improve your toy photography. The best part is that leading lines are everywhere. You’re probably using leading lines in your photography already. Our eyes naturally find lines, and we follow them even without meaning to do it. When you look for those lines, and put your toys where the lines direct you, your subject will stand out.
Here are some examples of what most photographers, especially portrait and landscape photographers, use as leading lines.
- Roads
- Fences
- Bridges
- Doorways
- Walls
- Trees
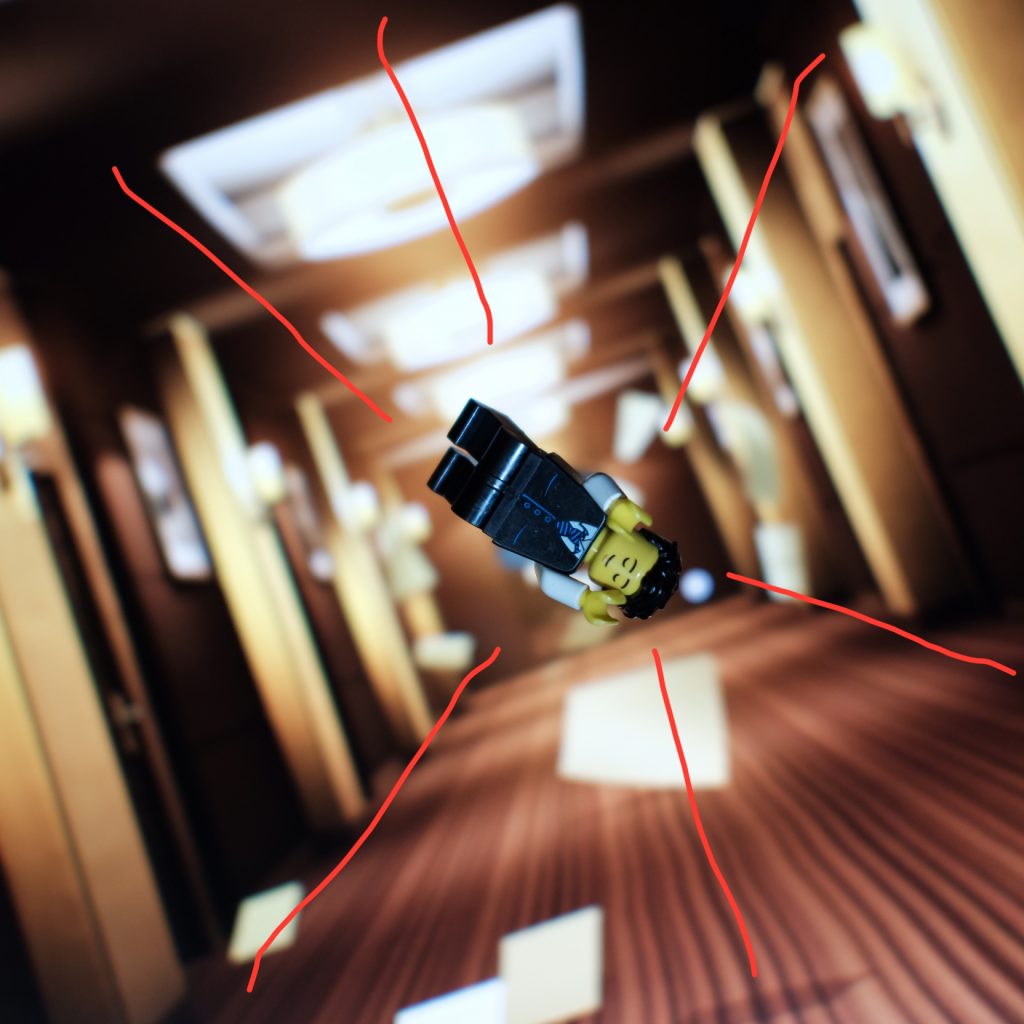
- Hallways
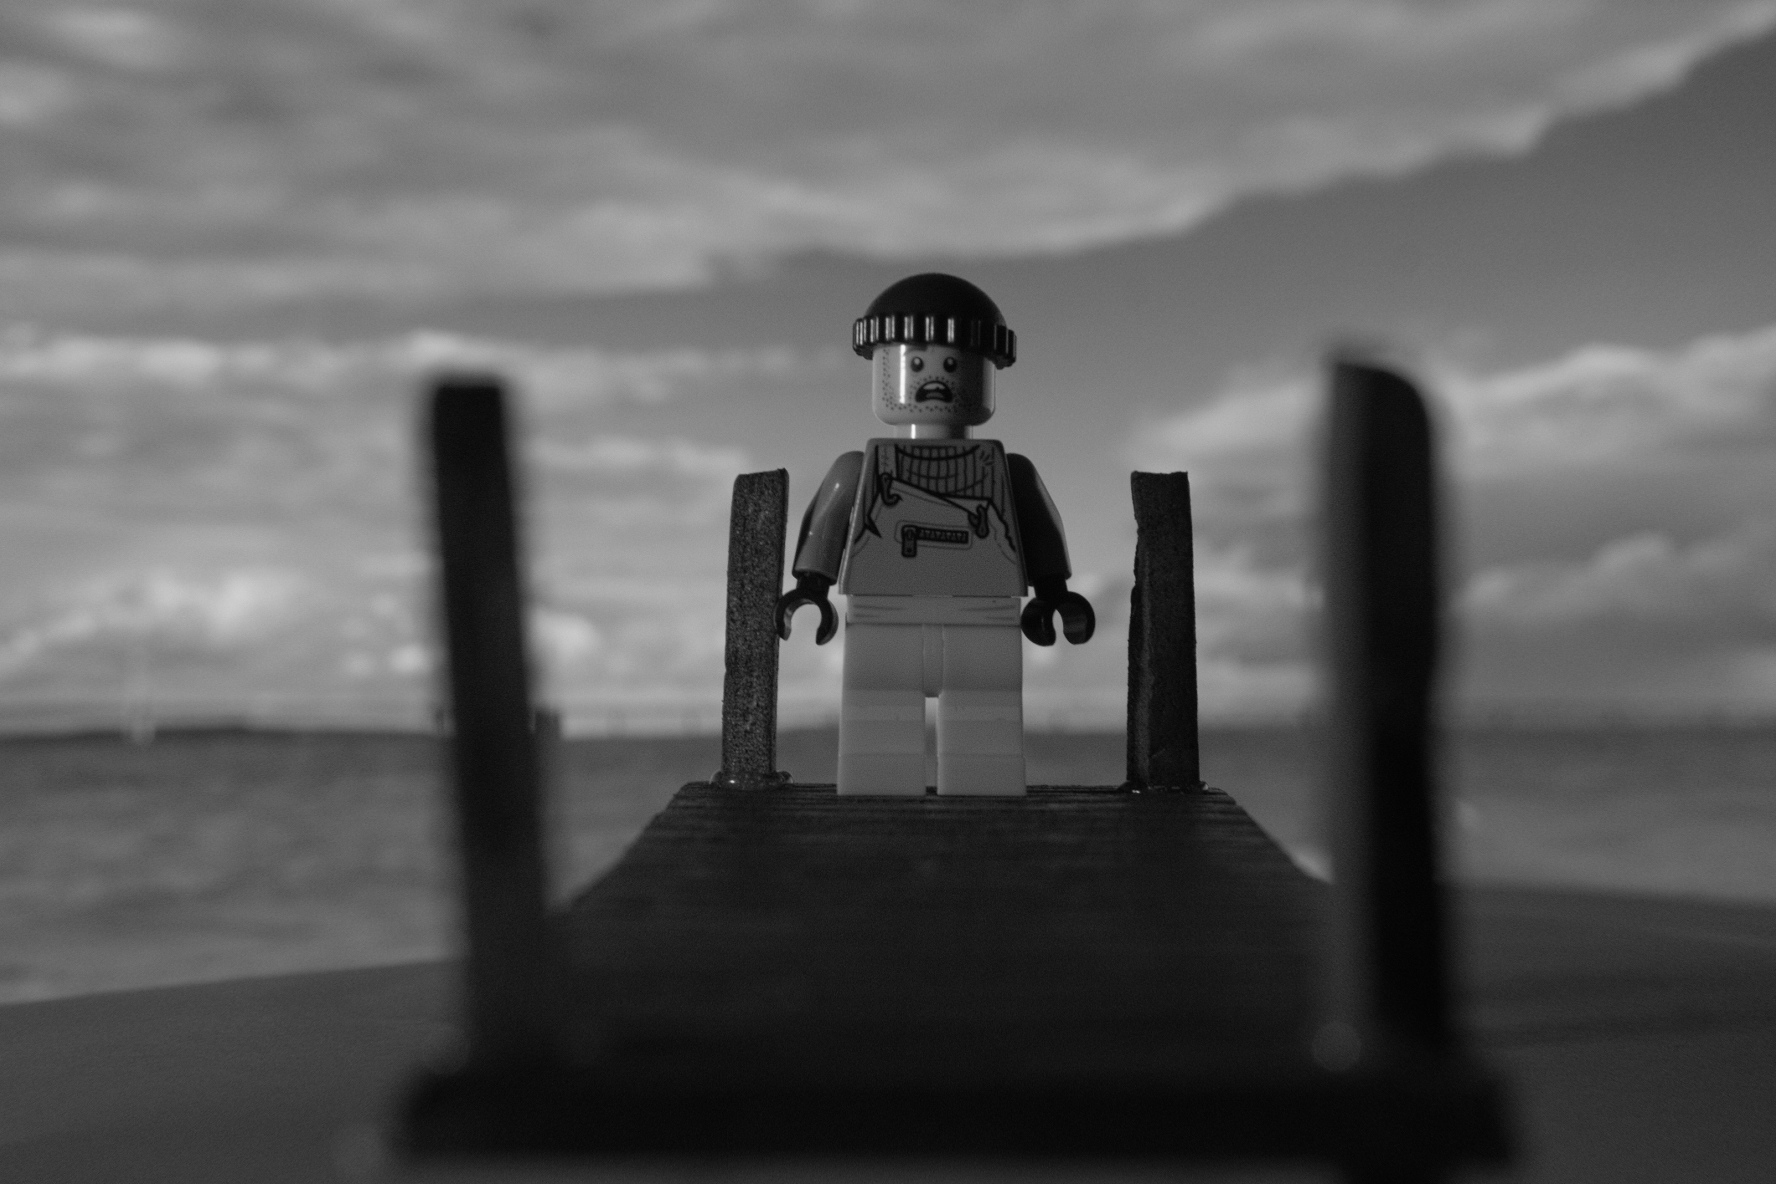
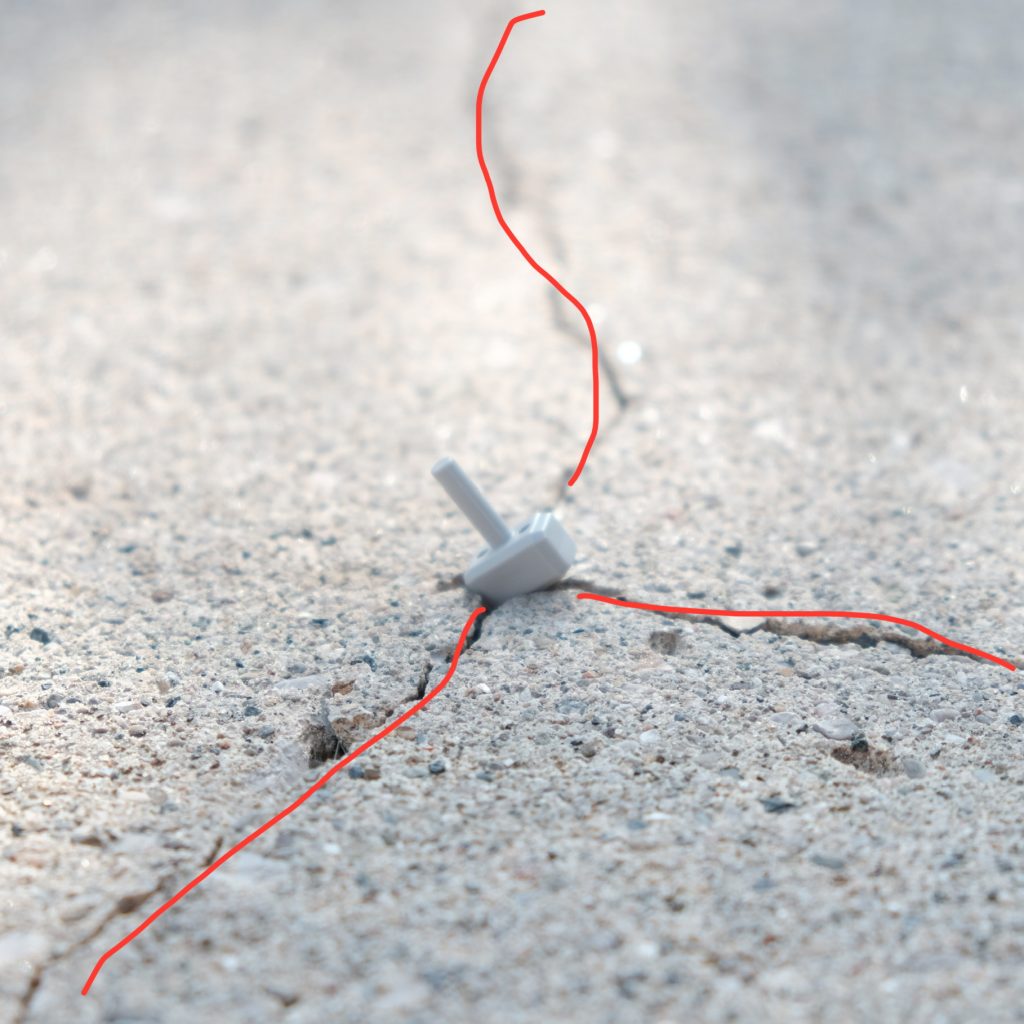
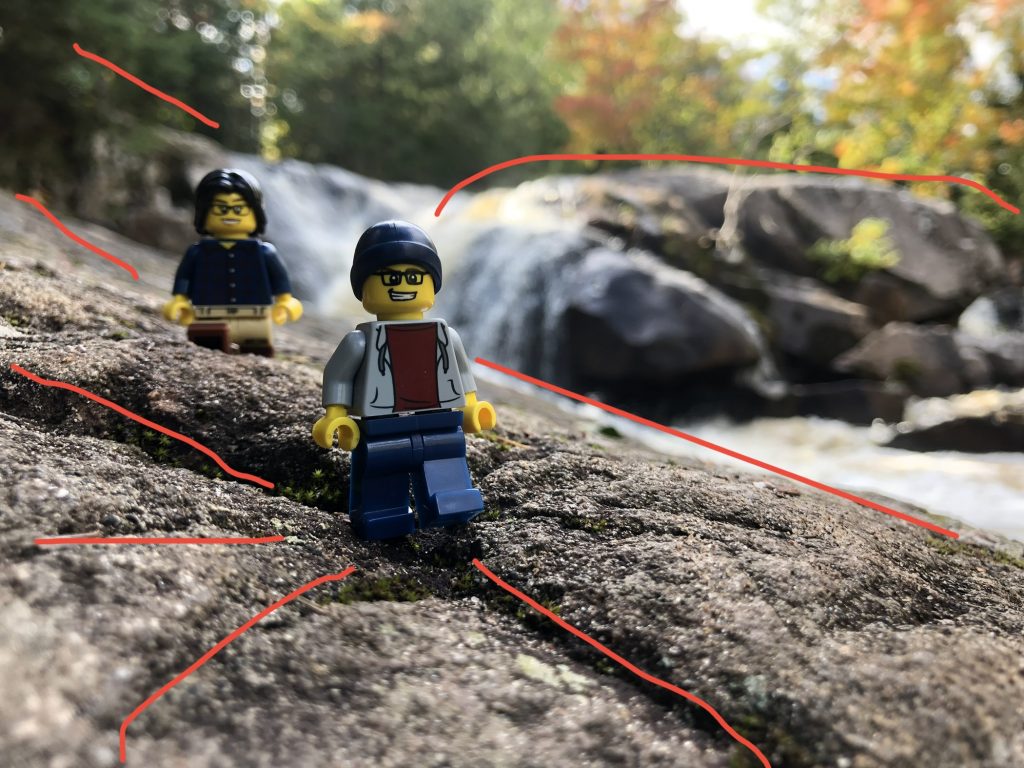
Now, I realize all those things are not really specific to toy photography, and can be sometimes difficult to use based on scale. A large road would not necessarily direct your eye to the small, insignificant minifigure at the end of it. Instead, you can use the sidewalk lines, wood grain and even the cracks in the concrete. It doesn’t matter whether you are the kind of toy photographer who takes your toys out on location, or you mainly shoot at home—you are in control of your scenes. You have the power to place your toys where the lines lead. Once you start looking for leading lines, you will see them everywhere. You’ll start using leading lines, without thinking about it.
Toy placement
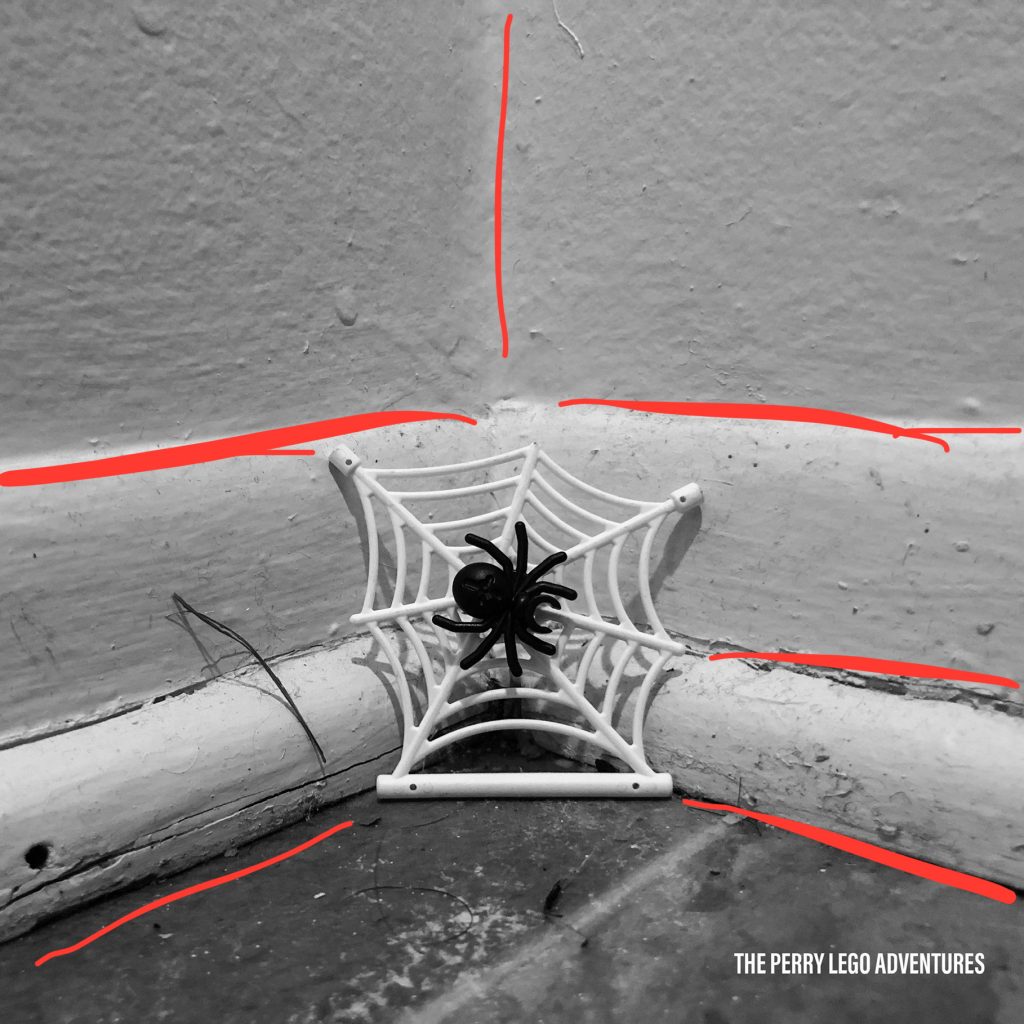
When it comes to using leading lines in toy photography, take a look at the scene you are building, find the natural lines in the scene and place your “main subject” where the lines lead. Make sure what you want the viewer to look at is placed where the lines lead. Below are some examples of the different types of leading lines you can use in your toy photography.
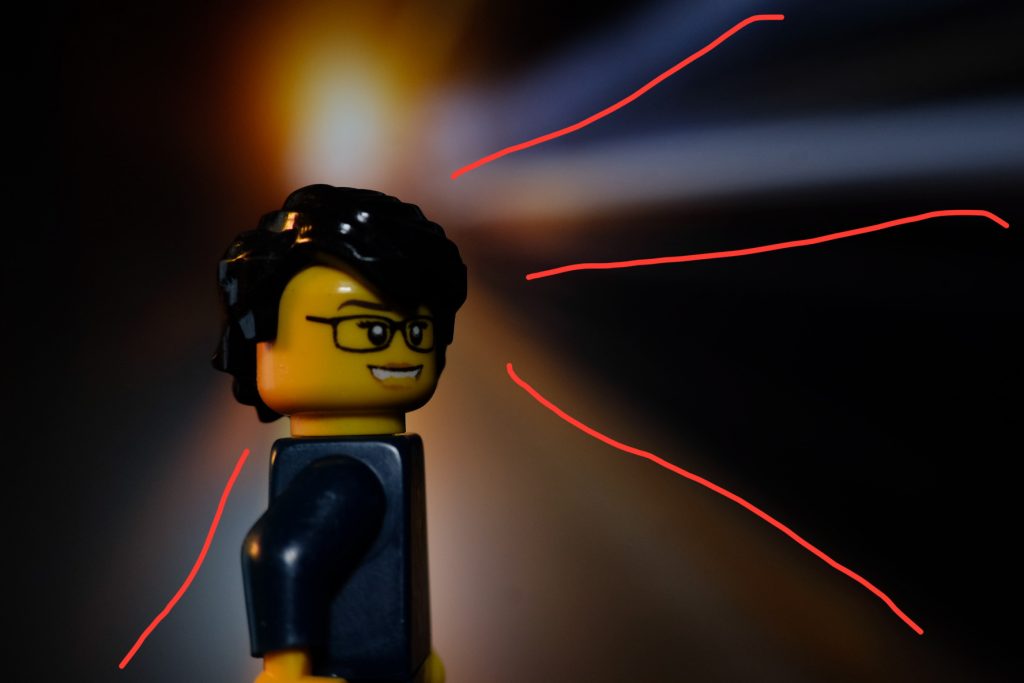
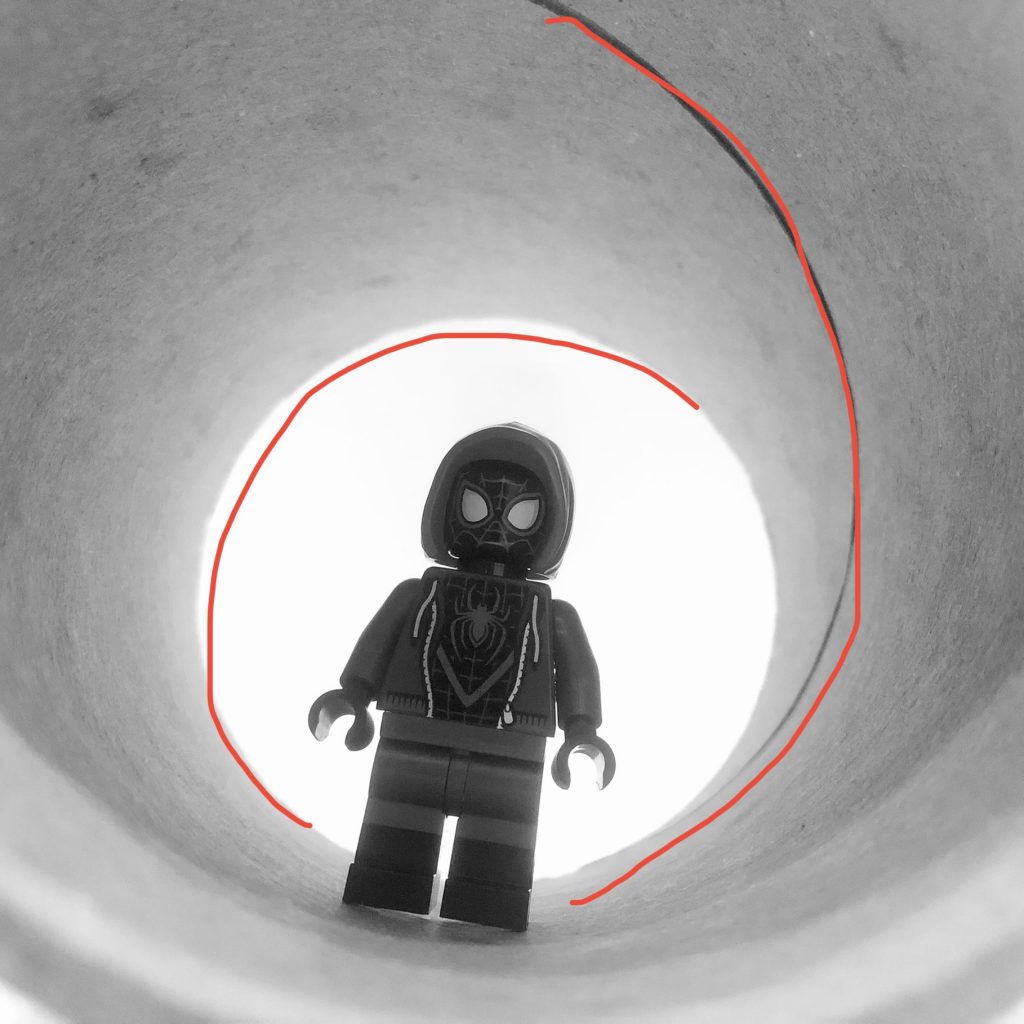
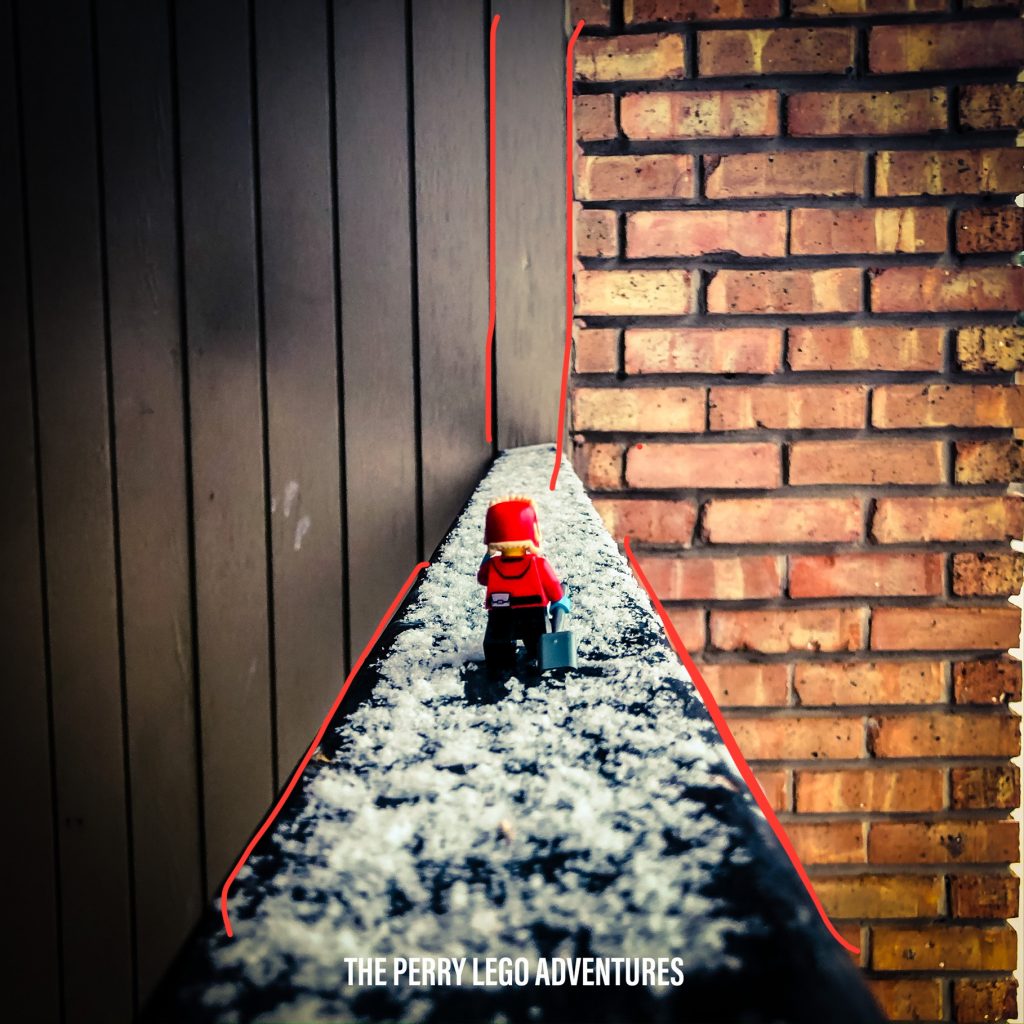
Experimenting with leading lines
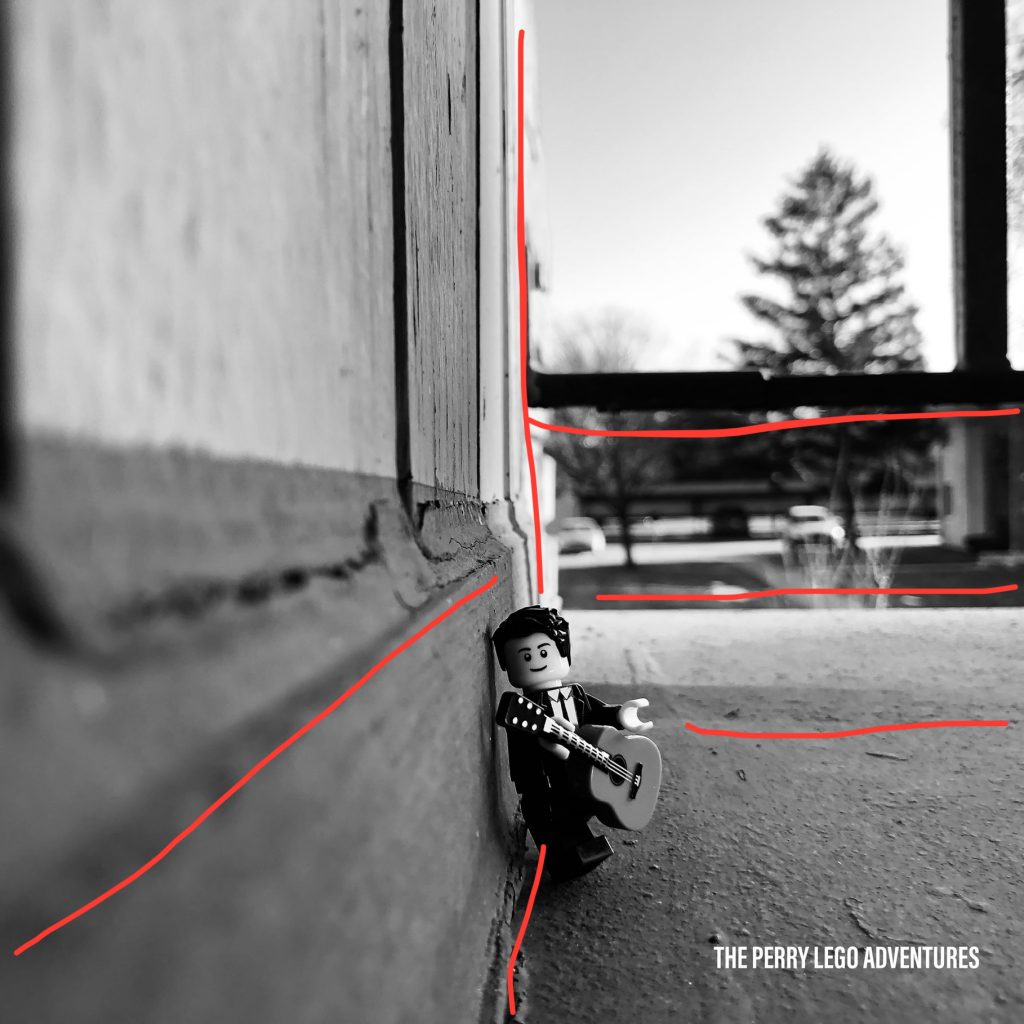
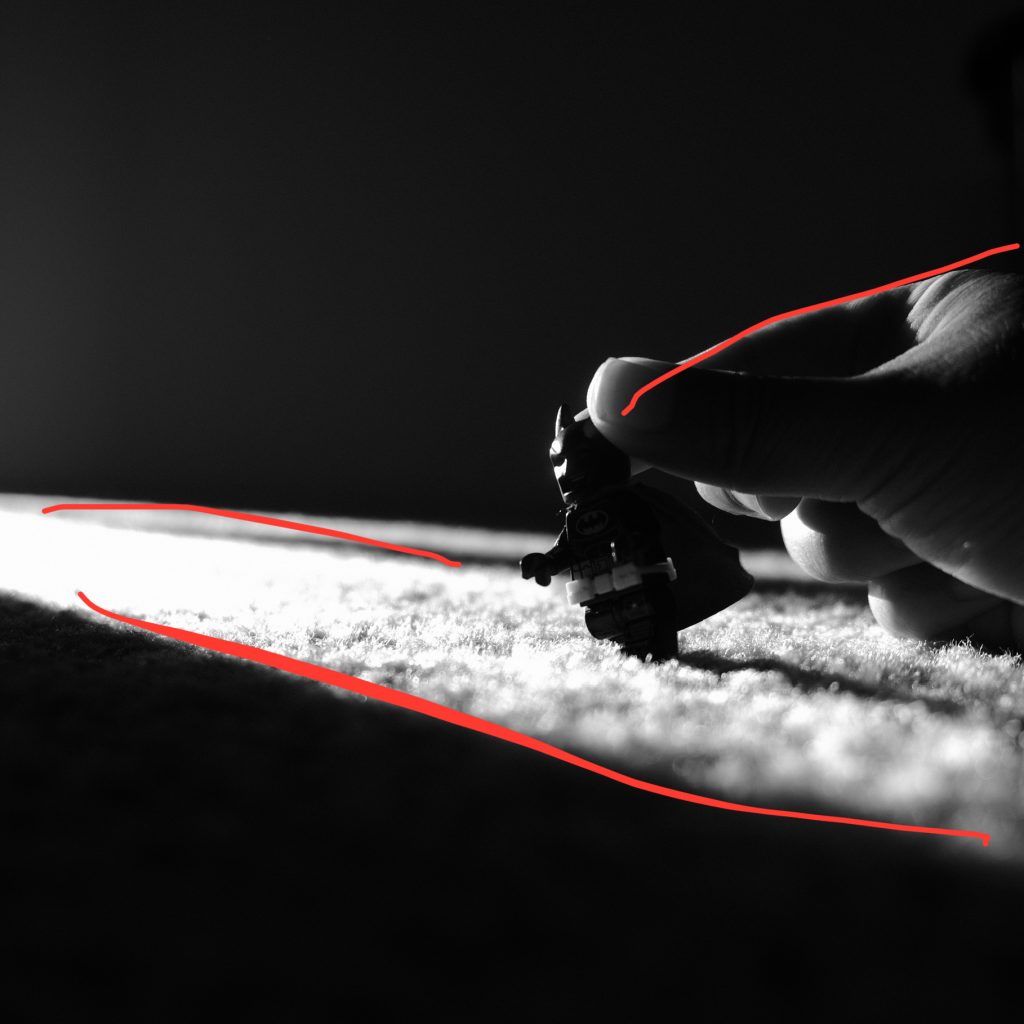
There are so many ways to use leading lines to your advantage. Now, there are plenty more ways and types of leading lines you can use than the ones I’ve showed you above. I encourage you to look for leading lines and use them. Try to use light and shadow, cracks in the sidewalk, walls, and even other toys as leading lines in your toy photography.
Look at the photos you’ve already taken. Have you been using leading lines already? Let me know below.
When I was writing this article, I didn’t go out and take new photos. I went through my Instagram feed and looked for photos I had already taken using leading lines. You’d be surprised with how many you have.
And if you don’t already use leading lines, I encourage you to do so. Or at least remind yourself that you can use them to your advantage. When you start using leading lines in your toy photography, you will be able to guide your viewer. Just as I have guided you.


Nice work Sabrina! I love how you illustrated your photos to really drive home the point about leading lines. Also I love how you showed both the obvious and subtle limes you can find when you look. <3