
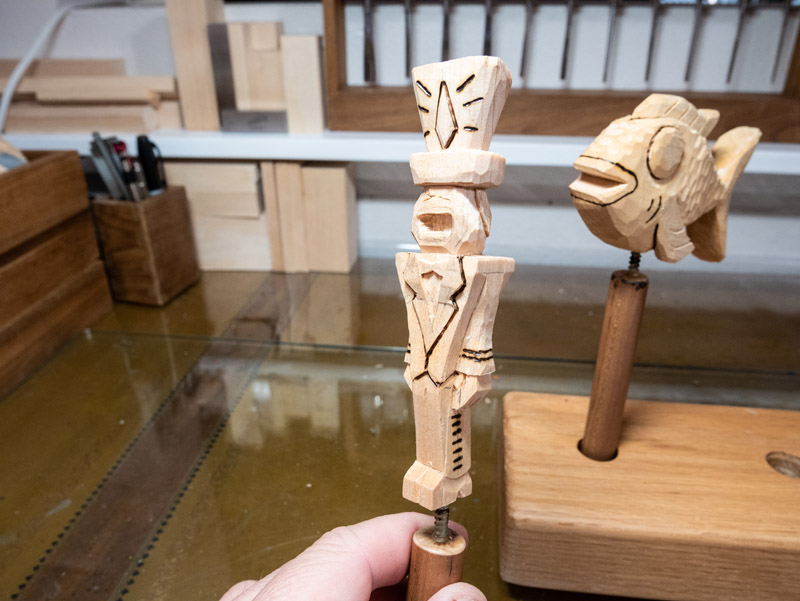
I’ve been away from the toy photography hobby for a bit. I’ve taken a few LEGO minifigures and vehicles on camping trips, but haven’t done much more than that and write an occasional review. Since late spring, my free time is going into exploring and learning a new hobby, character carving. It’s been a blast to learn. It started with a simple Easter gift for my niece—a small chip carving piece—and it quickly snowballed to something bigger. As I began exploring different characters and subjects, I knew I would carve something toylike and that would find its way into some fun photography. So Hobby vs. Hobby it is!
Blame the robots
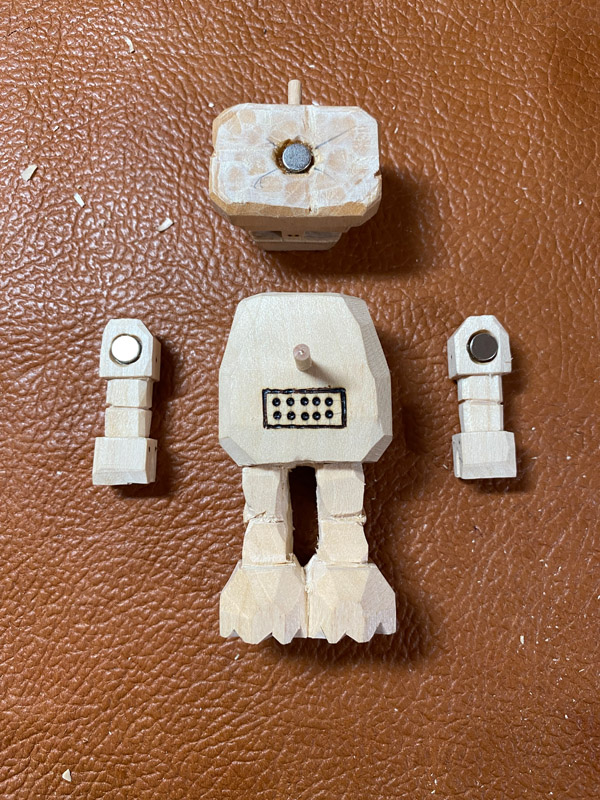
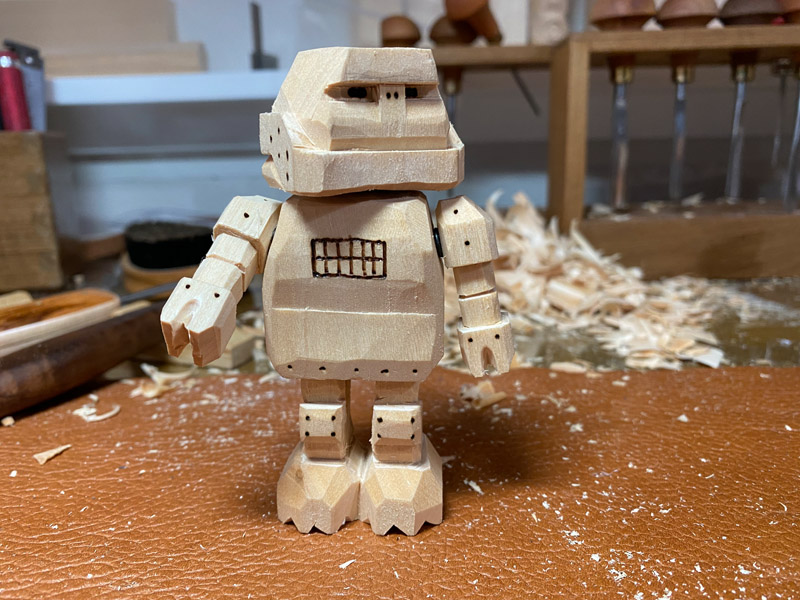
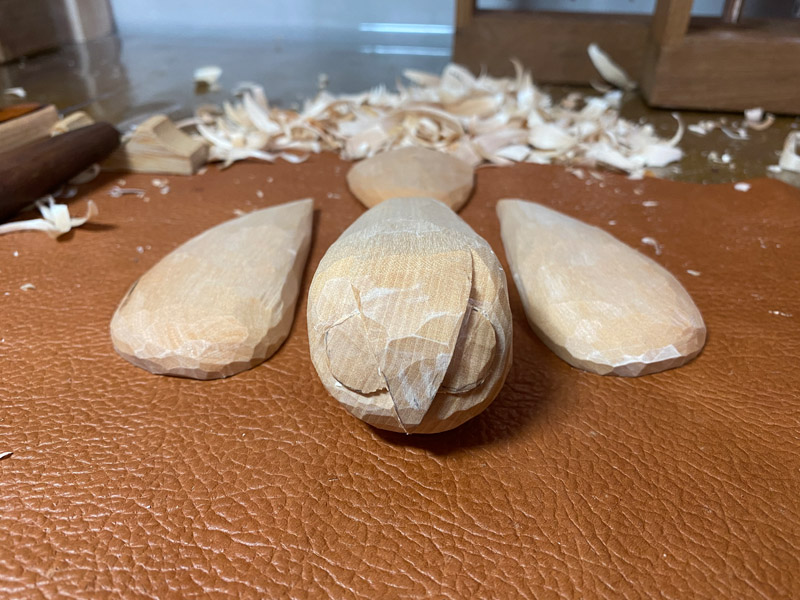
I carved a robot for my second character. It is a pretty natural subject for me and related to an intaglio printmaking series I did several years back. It makes me happy to find the character in the wood. This robot is a humble start, and it still puts a big smile on my face.
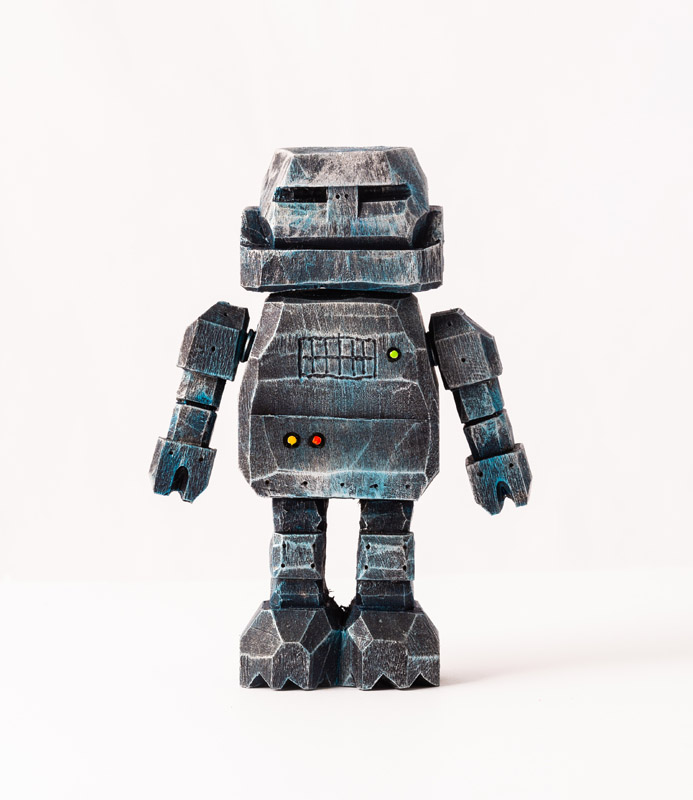
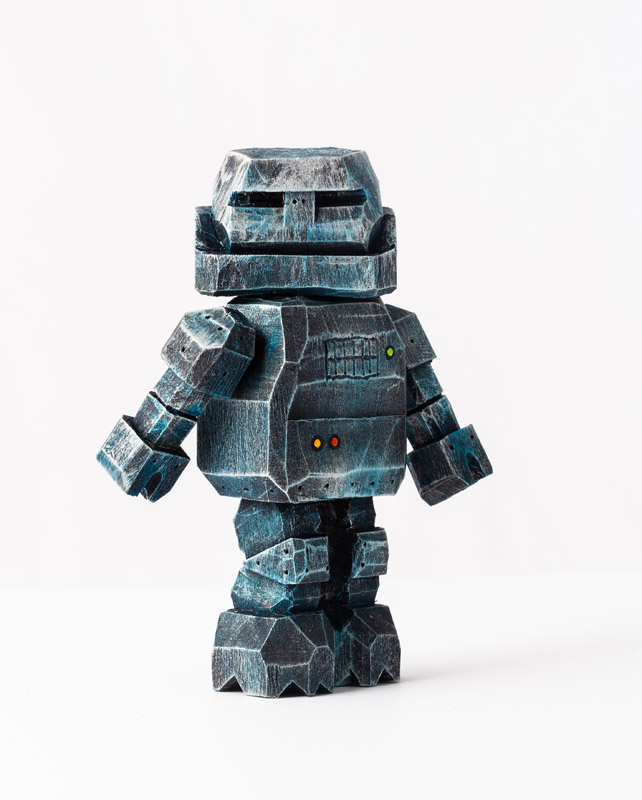
More robots = more smiles.
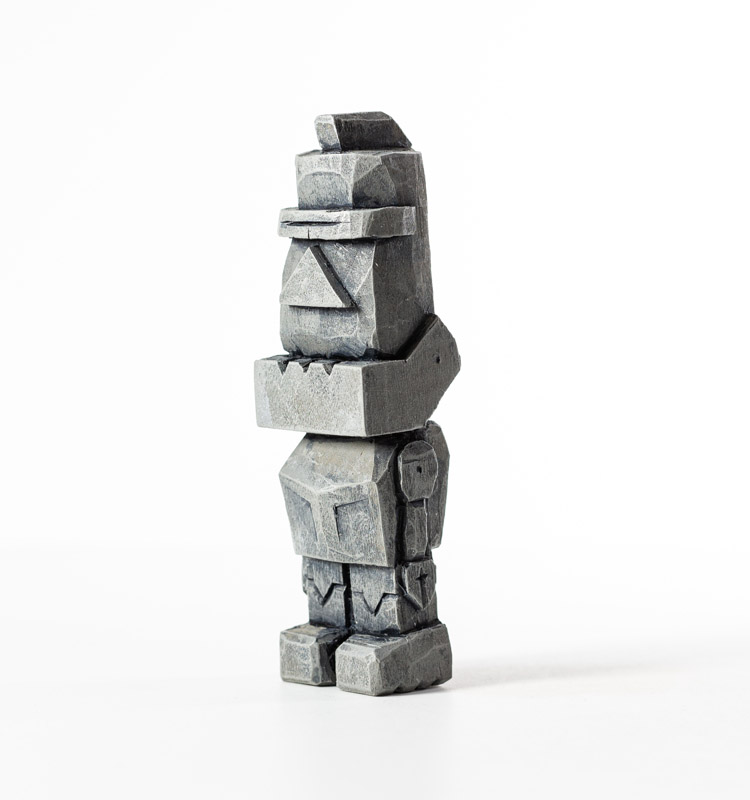
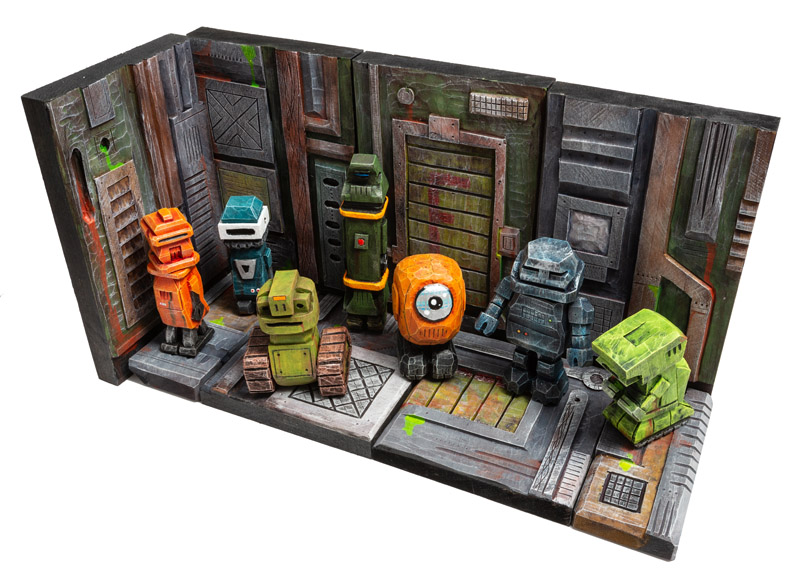
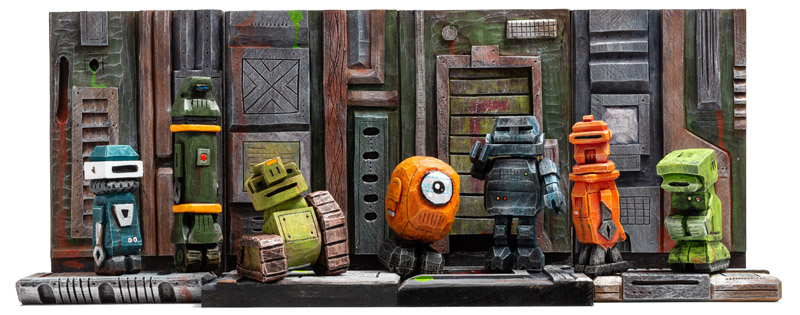
Nor-Man Translation Bot 
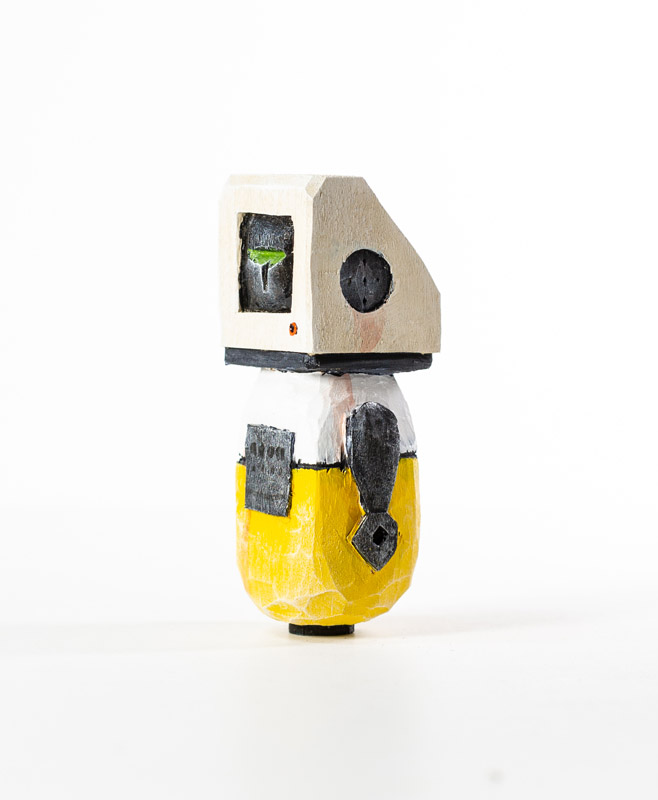
Packing Robot #7 
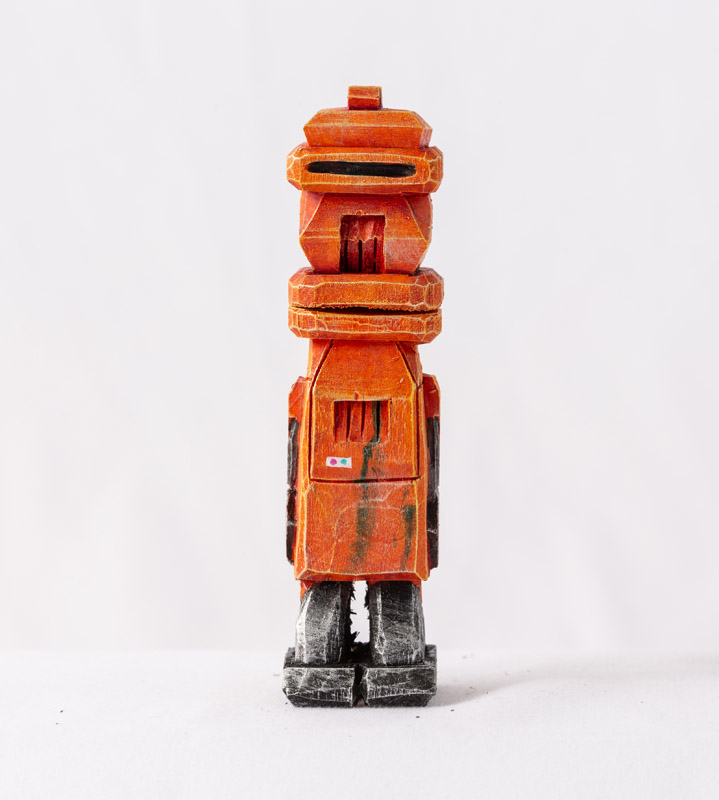
Fetching Robot #38 
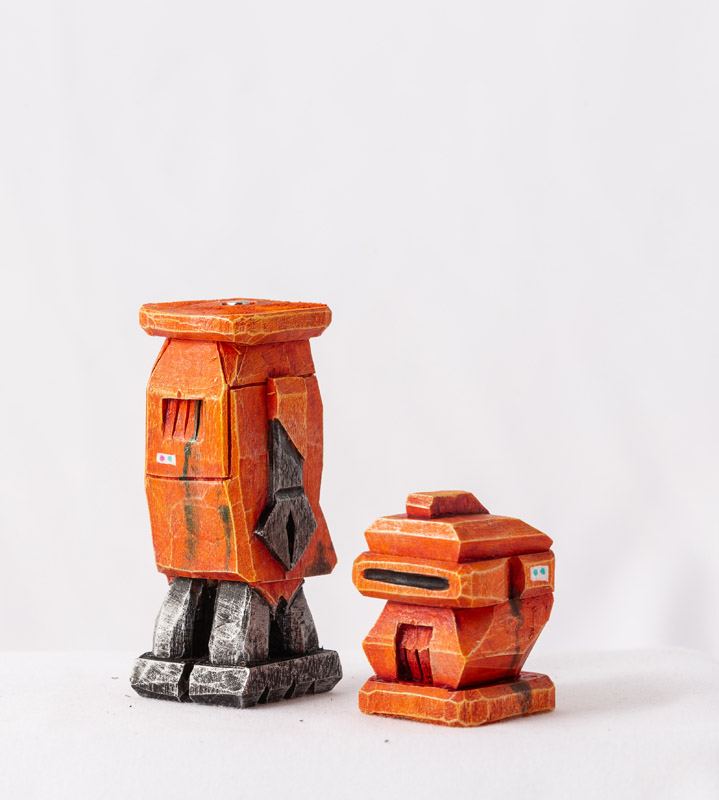
Nor-Man Service Bot
Among other characters and explorations, the robots have started to multiply. I’m having a blast trying things, learning the nature of wood and my tools. After a few static robots, I added a couple rare earth magnets to give some ‘playability’ to the bot. That led to a movable head and arms, and more robots and will continue on and on.

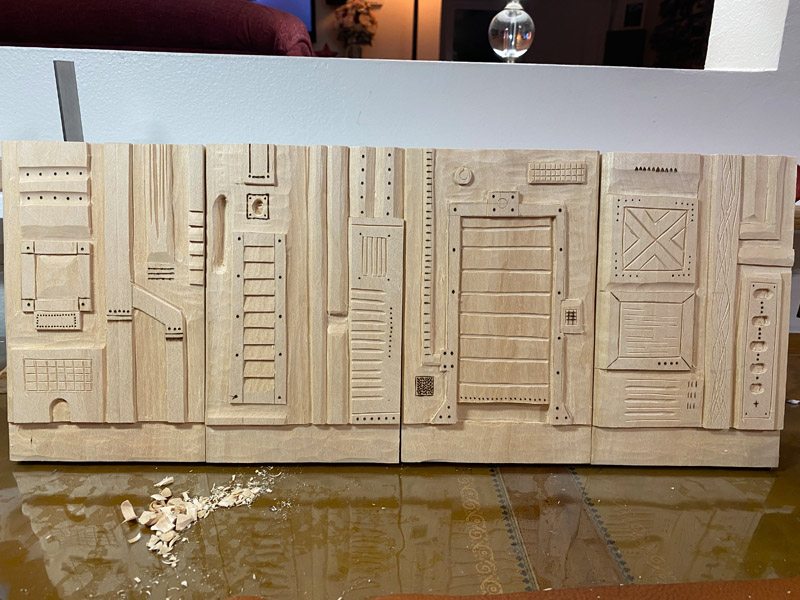
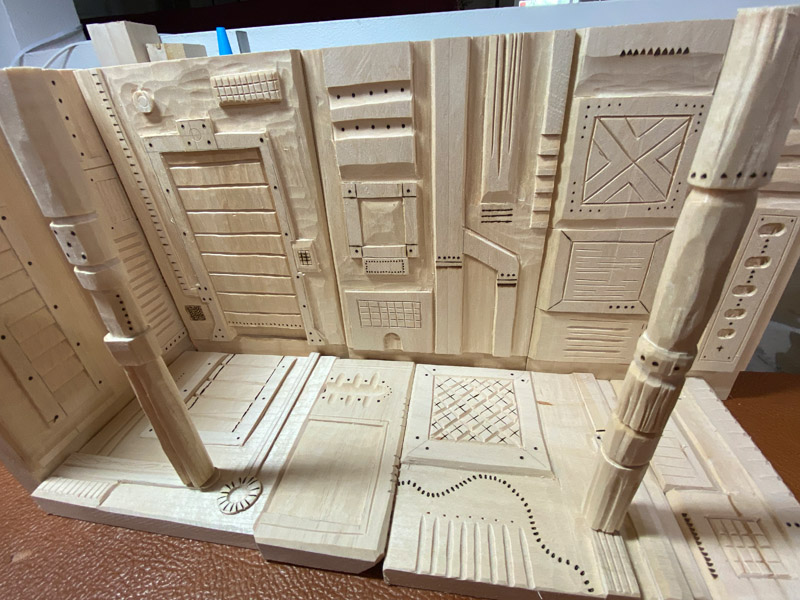
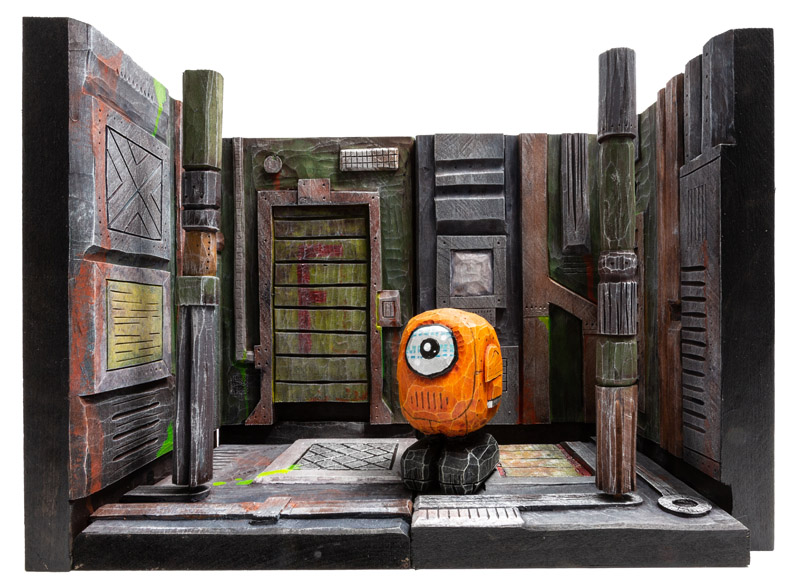
The Robot Lab F21
The robots needed a home, so after some quick prep I started carving away. Hand-carved wooden greebles? Sure, let’s do this! The walls and floors are modular, easy to rearrange and I can add to them in the future.


YouTube U
This is the first hobby that I’ve learned almost entirely through YouTube. Learning from these carvers who share their process, practice and knowledge is special. Here are a few that have been inspirational and educational:
First and foremost, Doug Linker: Doug presents in a straightforward and easy to follow manner. His videos range from explanatory to showing the work happen in real time (and he carves fast).
Anything from Jögge “surolle” Sundvqist from the Morakniv Swedish Knife Grip Sessions. (I want his apron and his shop, and his skills.)
Other carvers with great channels and information to share:
Kevin Coates
Roger Stegall
Dennis Stallings
Along the way I’ve joined a local woodworking club and meet a few other carvers. I’ve been able to sit and carve with some remarkable craftspeople. As a newbie it is quite an opportunity to sit and learn from someone who has been working at the same craft for 20, 30, even 50 years. They’ve been welcoming and encouraging from the start.
Behind the scenes
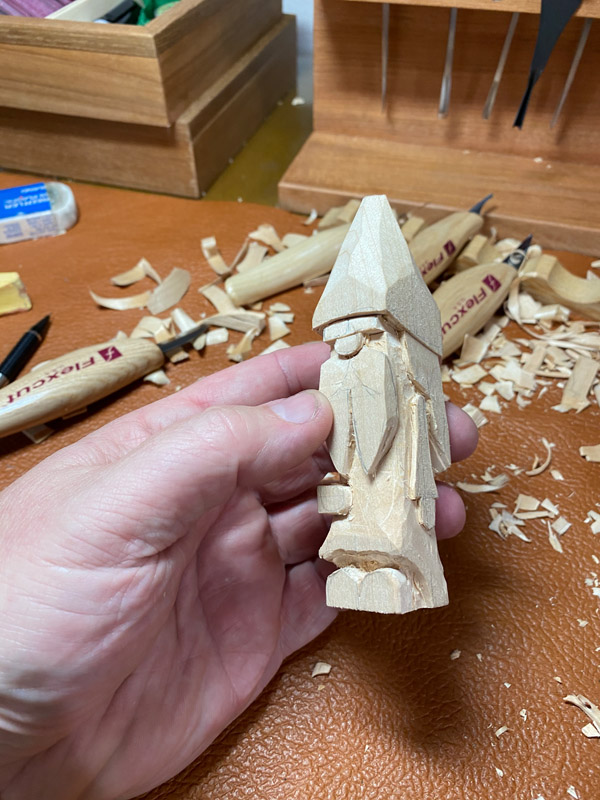
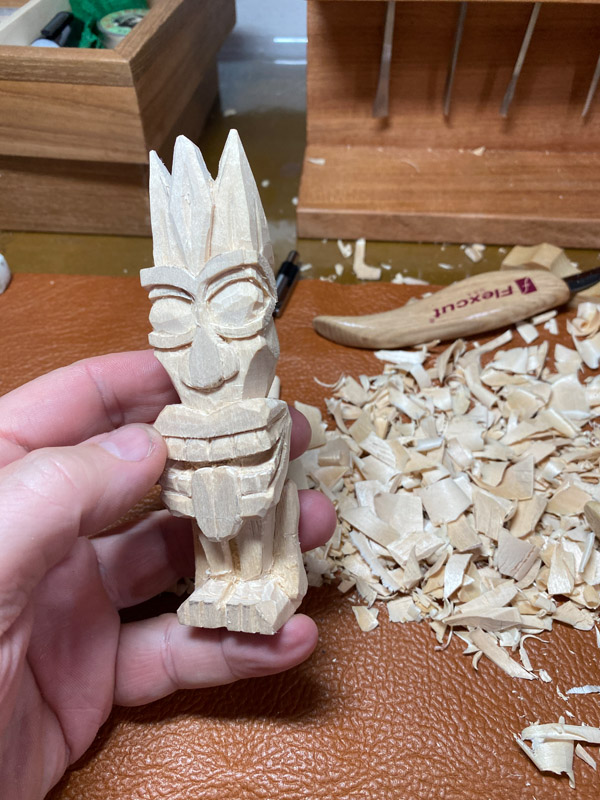
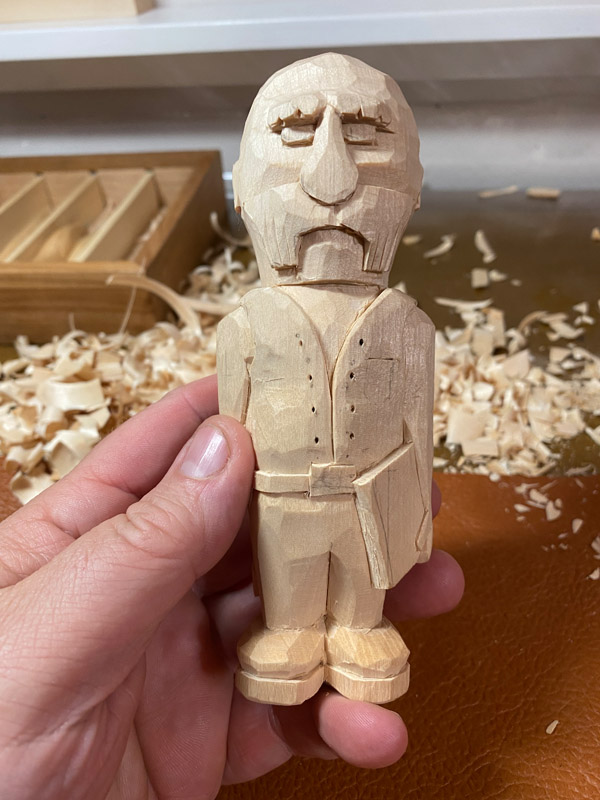
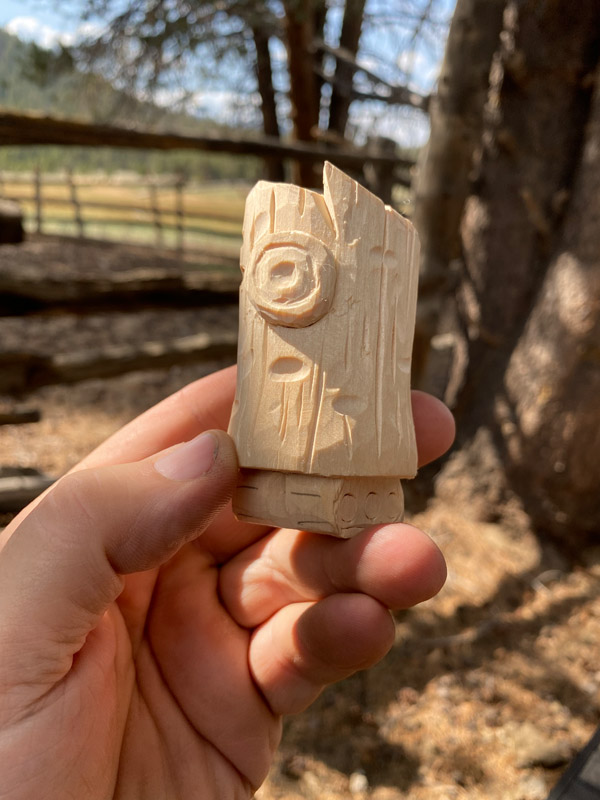
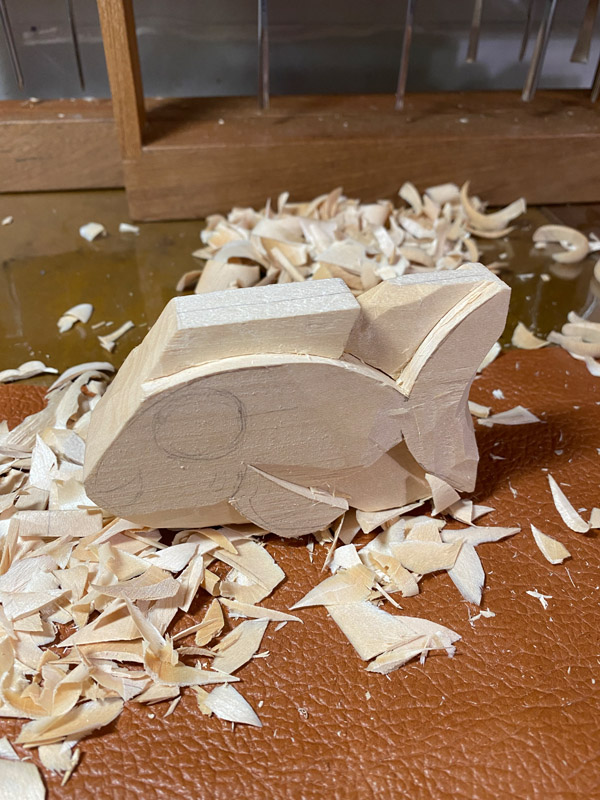
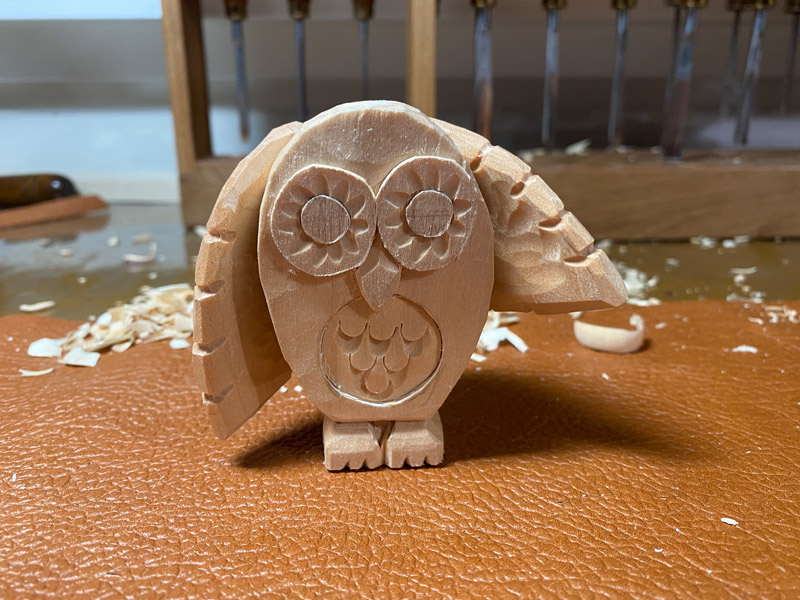
Assorted work-in-progress pics of various carvings.

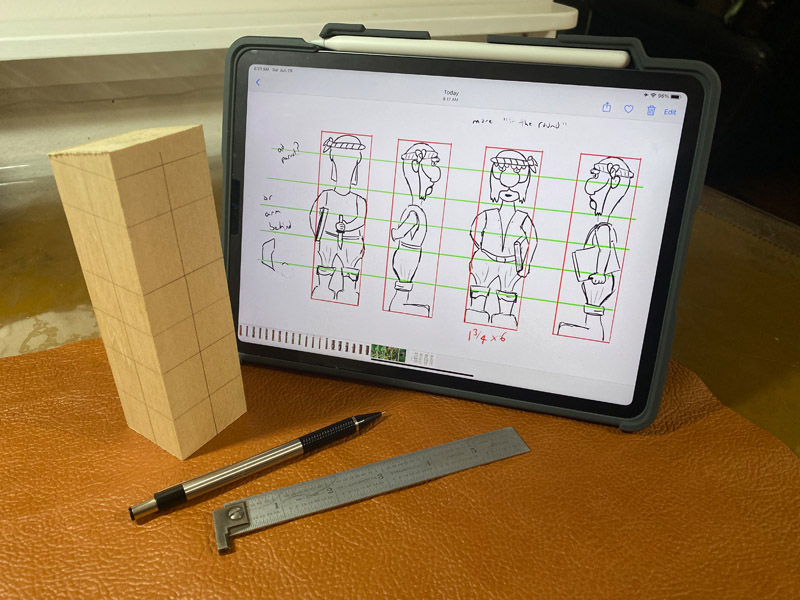

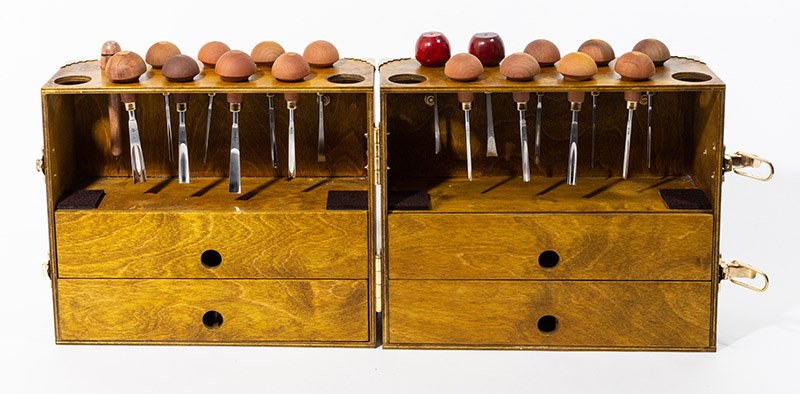
I’m also discovering what tools and workspace are best for me. I want a kit that is easy to move and can be packed away. After trying out and building a few different boxes/wraps/etc., I built my own carving tote out of 1/4″ plywood and brass hardware. So far it’s working out well, and it is definitely one of a kind. More info here.
Just start.
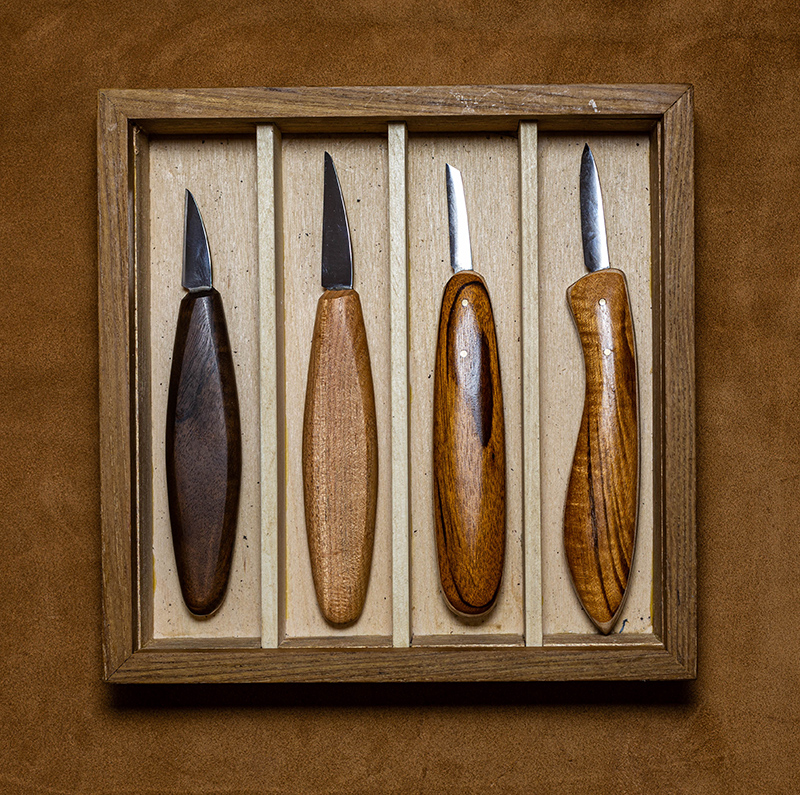
If you want to get started in making your own toys, all you have to do is start. You need a sharp knife and a way to keep it sharp (VERY IMPORTANT), some wood to carve and a slash-resistant glove (no unintentional red “paint” allowed).
Basswood (Linden/Lime if your not in the US) is a fine grained and relatively easy to carve wood, and it’s preferred by many carvers. I started with Flexcut knives, as they are more readily available, and I still use a couple of them. Check your local area for Rockler or Woodcraft stores, or your local art supply store. Amazon will have gloves and some basswood as well as Flexcut knives. I would really recommend finding a local woodcarving club if you’re inclined to get serious about your fun.
What’s next?
Well, more carving for sure, and more photos for sure. Thanks for reading, please reach out with comments or questions.


![AI is ruining toy photography [a personal viewpoint]](https://toyphotographers.com/wp-content/uploads/2026/03/Together-As-One-Ultra-Magnus-revealed-scaled-500x383.jpg)
So inspiring. Great contrast of wood and robots!
These are fantatic, Matt. Please let me know when you start taking comissions 🙂
Awesome – You really developed a great skill and a wonderful way to create your characters from scratch!
Nice work, Always look forward to your creative side , Matt
Great post, I really enjoy it, Matt!
These are beautiful! Great job.