Recently I went spelunking through the internet, looking for a 3D model of an action figure I could print and shoot. This is how I ended up photographing a character I know absolutely nothing about. Here’s the story, told in a rambling fashion intended to amuse and astonish, with a dash of education thrown in, so you can say with a straight face, “I’m not idly surfing the internet, Mom, I’m learning something!” Though between you and me, we’ll keep the educational part to a minimum. Let’s jump in!
Note: This post touches on issues of mental health and depression. If you think you are suffering from depression, or having feelings of self-harm, please call the Substance Abuse and Mental Health Services Administration (SAMHSA): 1-800-662-4357 in the United States, or Google a similar service in your country. There is help out there, and it does get better.
I have written about my struggles with depression on this blog before. When the Beast of Depression reveals its ugly head I tend to react, among other ways, by retreating to my couch, watching mindless TV and pining for the chances to engage in my hobbies. Not that watching TV is bad per se, or my couch is a bad place to be. I often relax by watching a movie or hockey while sitting on my couch (it’s a comfy couch, after all, and I personally picked it out of thousands). This is a healthy way to unwind. It becomes a major sign the Beast is lurking when I find myself needing to be on the couch, all the while thinking about my hobbies (which are normally conducted just downstairs from there, but it seems so damn far away), instead of being in my studio working on my hobbies and thinking about my couch.
I have been dealing with depression head-on the last few years, and I’ve learned the best way to combat it is to come up with a creative idea and force myself to work on it. Once I start working on something, I often get deeply involved and the depression sulks off into a corner.
Lately I have felt the Beast skulking about, and realized I had run out of ideas.
As you can image, this is a bit of a problem. For me, fighting the Beast without an action plan is like fighting a war with a spatula. The best you can hope for is surviving long enough to flip pancakes for the enemy as they occupy your capital. (Note: Depression also makes for really painful metaphors.)
The Beast of Depression is a jerk.
I needed a plan. Since I was stuck on my couch mindlessly watching YouTube on the TV, that plan came in the form of a sponsorship to one of my favourite diorama channels, Black Magic Craft. It seems there are many companies that make highly detailed miniatures for 3D printing and painting. That seemed like something I could force myself to do, so I found a source for 3D comic figures, PREYcollectionSTUDIO, and subscribed to their Patreon feed for access to this month’s models.
Unfortunately, none of the available models were characters I knew. They offered Tiger Claw from Teenage Mutant Ninja Turtles; Goliath, who is some sort of gargoyle; and Spawn. I decided to go with Spawn since I’ve seen the character before, and he has a kick-ass cape which seemed fun to paint.
I downloaded the 17 separate model files and got to work.
The part about 3D printing
I recently added another 3D printer to my studio. If you’re not aware, 3D printers come in two basic types (there are actually many types, but for the home user it’s basically just the two): The first is a filament printer, which works by melting plastic in a stream and moving a head around to deposit that plastic into whatever shape is being printed. The second uses ultra-violet (UV) light to cure resin in a liquid bath in the shape of the object in question. Both work by printing a single layer at a time, until the desired object takes the proper shape.
I had a filament printer, which is great for larger objects, but loses some of the finer details. Recently, I purchased an entry level resin printer, an Anycubic Photon S, which is better for smaller objects as it preserves the fine details. This seemed like the perfect project to give the new printer a workout.
Resin printers work by lowering the print bed into a vat of liquid UV-activated resin, which gets cured by UV light coming from a specially configured LCD screen. Since this printer deals with resin and UV, it’s a tad bit messy and requires extra steps, so let’s walk through it.
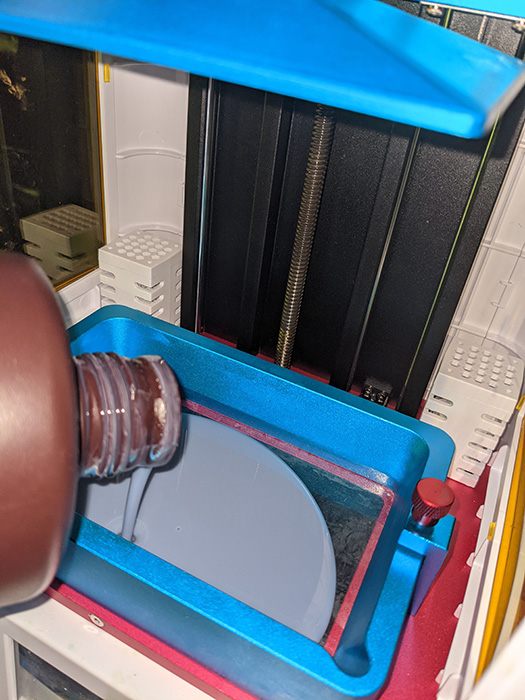
The first step is to fill the vat with resin.
Then you tell the machine to print, at which time the build plate lowers into the vat of goo and begins to do its work, one layer at a time.
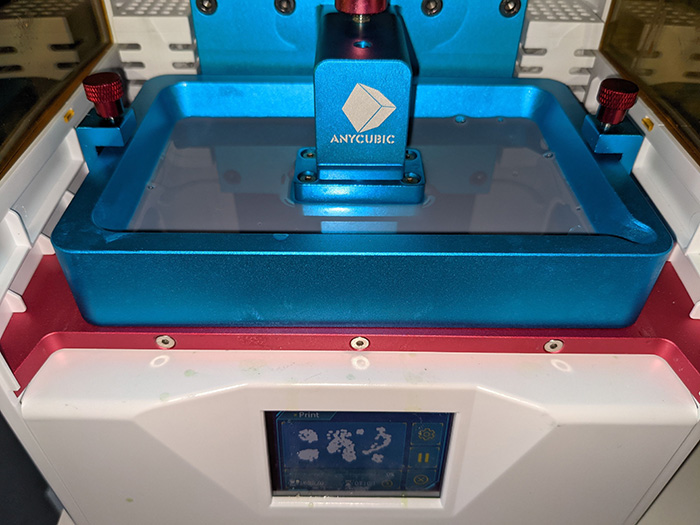
Over time, layer by layer, the build plate moves up, up, up, until your print emerges from the vat of goo. It’s hard to picture here, but if you remember The Lord of the Rings, where the Uruk-hai orcs were birthed from the vats below Orthanc, it’s a lot like that but a lot less growly (and ends better for the people of Rohan). It also prints the part upside down.
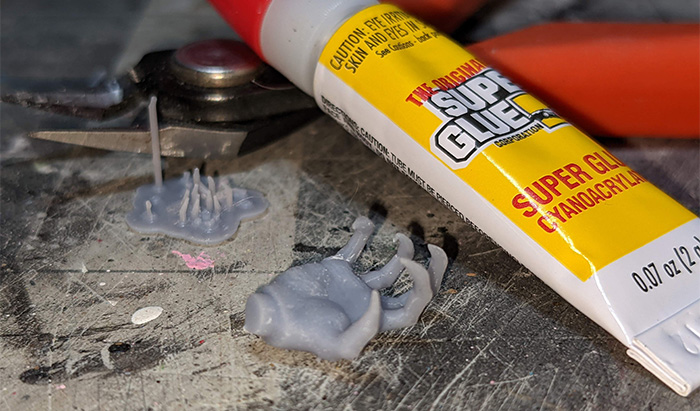
When done, the print looks like this:

This is one of Spawn’s claw-like hands. If it appears to look a bit messy to you, that’s because it is a bit messy. It still has liquid resin on it. This is where the lengthy cleanup comes in. Before I cover that, let me just mention that by the time I had the first part printed, I could feel the Beast of Depression starting to back off a bit.
For resin printed parts, the first step of the cleanup process is to scrape the part off of the build plate.
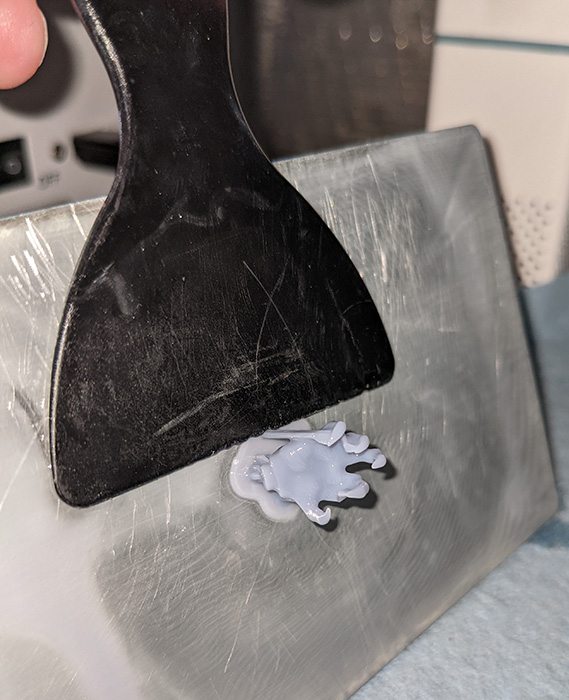
Then it get cleaned by dunking it into a bath of 91% isopropyl alcohol for about five minutes. This washes away the uncured resin and leaves only the bits you actually want—at least in theory.
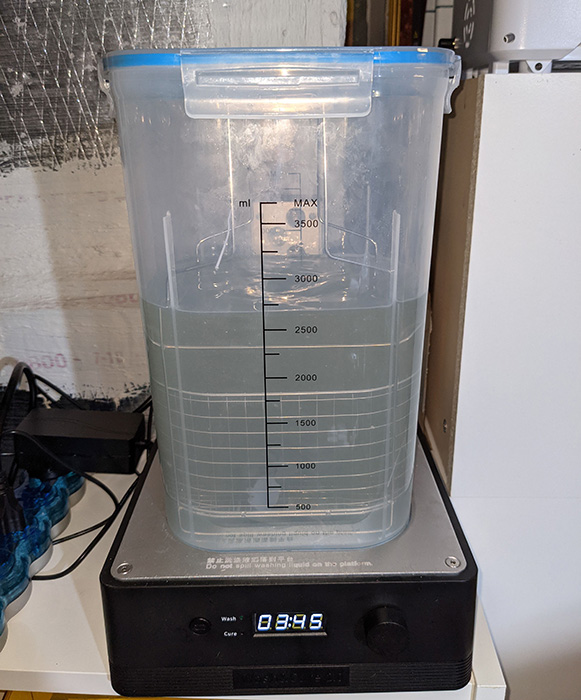
Then, once the part is dry, it needs to be fully cured by placing it into a UV oven (I say oven, but it’s really just a strong UV light, so no real heat is applied, though the lights are slightly warm-ish). This also takes 5–10 minutes, depending on the size of the part. I did several parts at once for this, to save time.
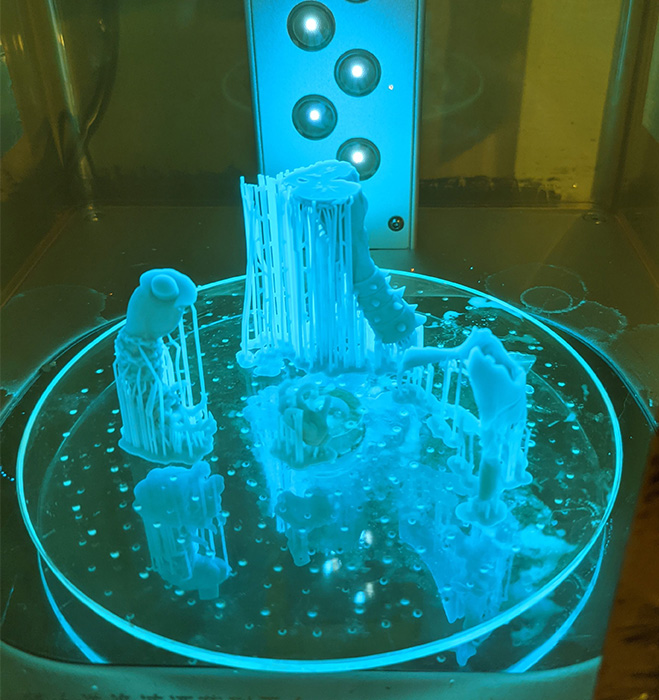
The part about finishing the figure
Once the parts are done in the UV oven, the resin is nice and hardened, and the supports can be cleaned up with the careful application of some nippers and some nail files and sandpaper. Then it is assembled with another clever application—cyanoacrylate (aka: super glue).
One of the main reasons this figure had so many parts is that Spawn has a long, flowing cape, which printed in multiple parts. This left unsightly seam lines, which I tried to smooth with some wood putty.
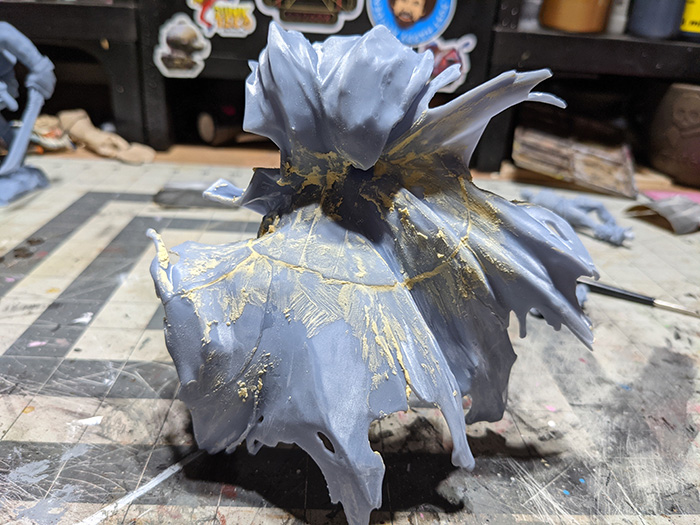
I finally got fully immersed into this project during the assembly of the cape, and that feckless Beast of Depression skulked off to the corner with its tail tucked between its legs. Begone, you good-for-nothing psycho hose beast!
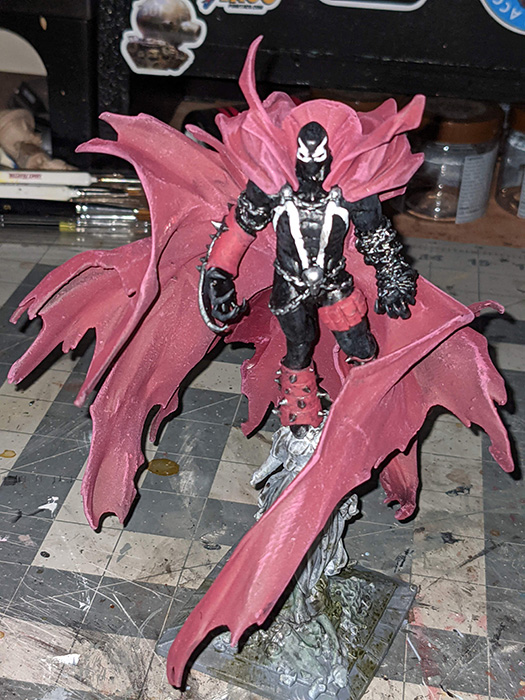
Anyway, once everything was all assembled, and the wood putty properly sanded, I painted it with some acrylics, and ended up with a finished figure.
So that’s nice and all, but this is a toy photographers blog, Dave—mind getting to that photography bit some time soon-ish?
I hear your imagined (let’s face it, I am writing this before you even have a chance to get angsty about this rambling tome) cries of anguish as I slowly get to the camera bits. Fear not, that point of the story is here!
Now that I had a figure all looking spiffy on my workbench, it was time to toss it in front of my lens. But I must warn you, frequent readers of this blog will soon realize they have seen this part before. That’s because you’ve seen this part before. The way I shot this figure is nothing new for my workflow. Let’s review it anyway.
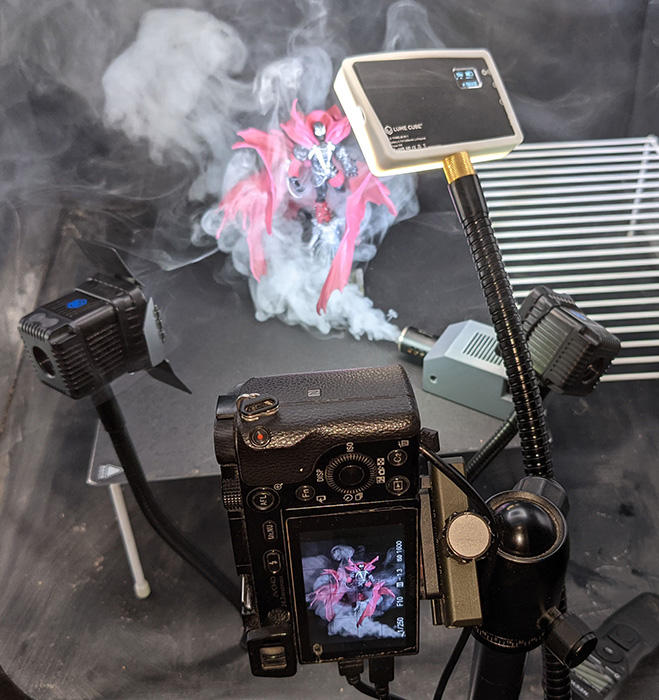
I tossed the figure into my light box. Then I added three strategically placed Lume Cubes. Two cubes on each side to highlight the cape, and one from the top to light the figure itself, and to highlight the smoke. Oh, I forgot to mention, there was smoke—ya know, for atmosphere. For that I used my new favourite tool, the Microfogger 2. Then I pointed my camera at it (told you this was the photography bit!), focused, triggered the smoke machine and let the magic unfold. Occasionally, I hit the shutter when the unfolding magic was particularly magical.
It all looked a little like this:
Straight from camera, it looked a little exactly like this:
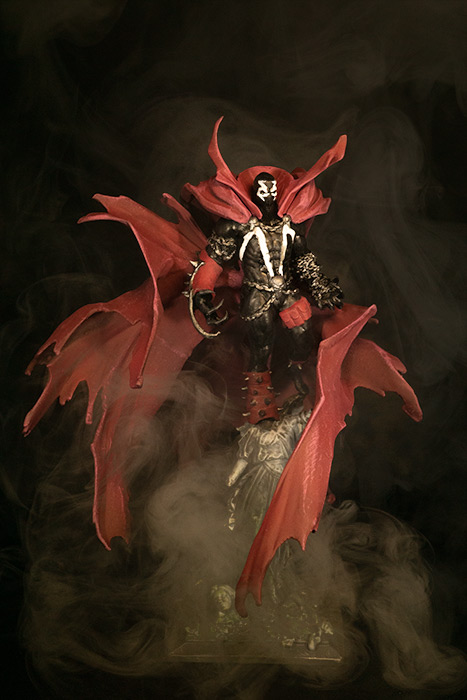
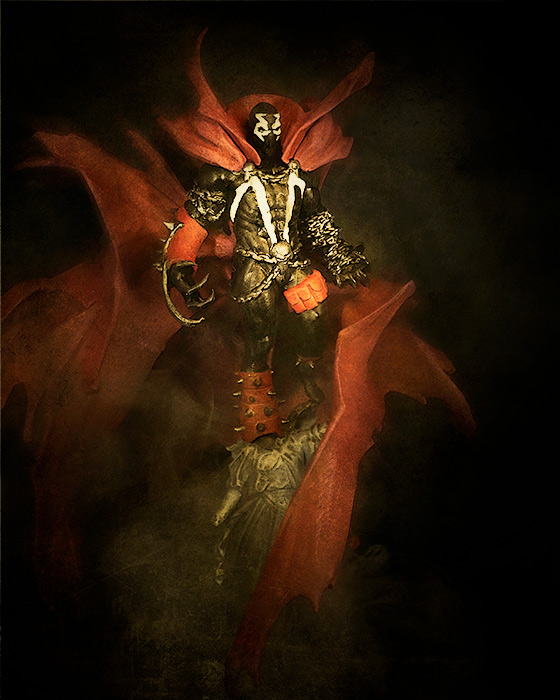
Satisfied with the magic my camera was capturing, I took it into Photoshop to finish. It was mainly to add some brightness/contrast and other colour grading, but also to fine tune the paint job. I also added some cape blur to make it look more ethereal.
The final result is presented thusly for your edification, and to serve as a stunning and sudden conclusion to today’s events. I give you Spawn.
Th-th-th-that’s all folks!
So that is the story of how I faced the Beast of Depression, and kicked it to the curb, with a clever application of 3D printing, cheap craft paints, the largest video site on the internet, the science of capturing light with electronics and a little luck.
All that, and I still have no idea who the heck Spawn is….
[dave]



Fascinating, Dave – congrats on developing a way that works to combat your depression.
Thank you for sharing! That is a great way to combat a monster