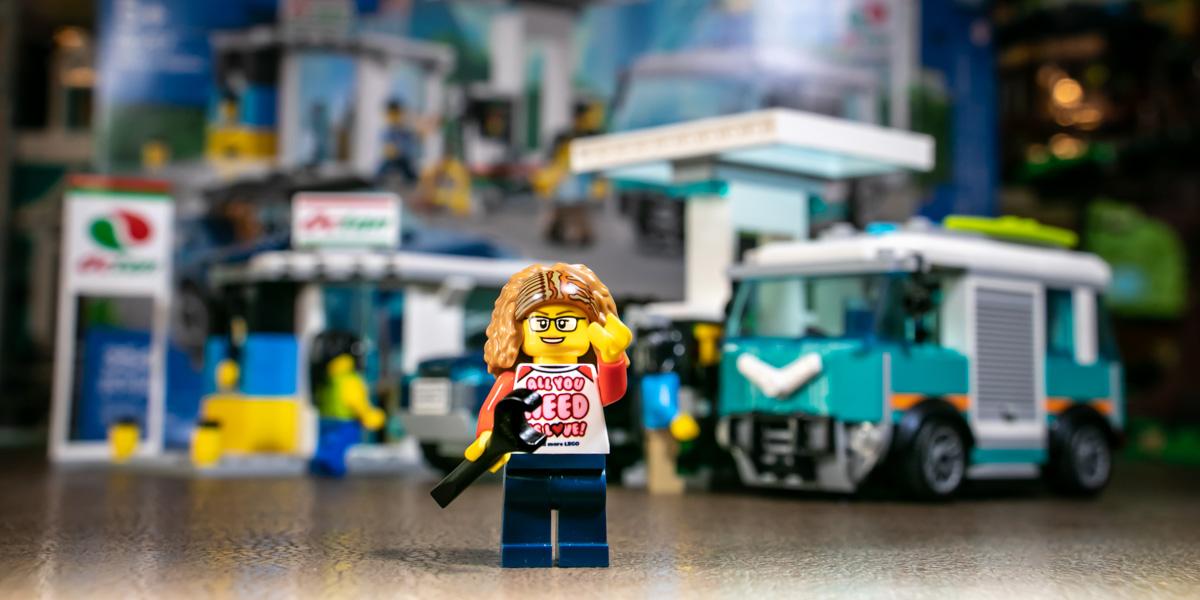
Hello! I’m excited to be building LEGO again, and this time I’m letting my signature figure (sig fig, or LEGO-me) do the honors, since I’m giving her one of the cars in the set! Come follow along and explore the build process and the photographic potential of the LEGO City Service Station set 60257.
As you view these photos, keep in mind that my sig fig (and the scissors and wrench she uses) do not come with the set.
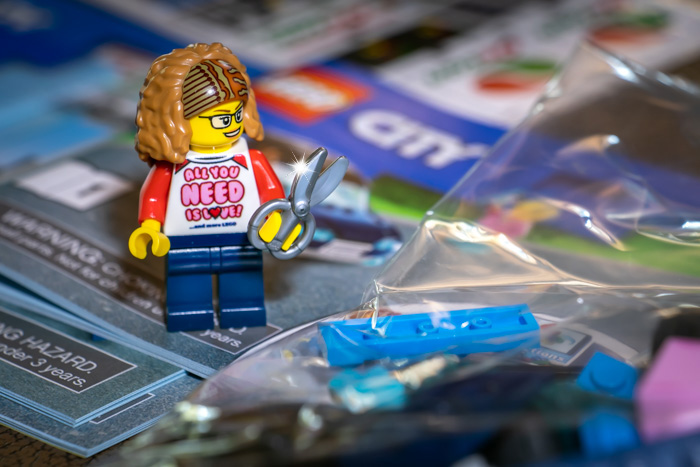

I like how LEGO building instructions always start with assembling a minifigure. It’s such a friendly thing to build a person before diving into the brick sorting and pairing process.
A great set for building with friends
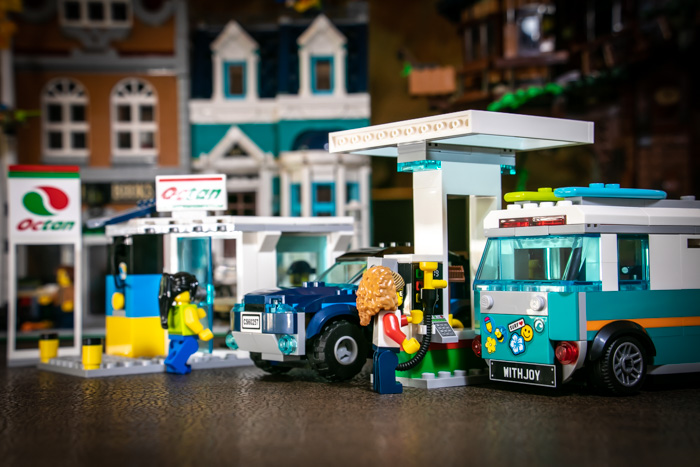
This set is an easy build. If you like building with friends or family, it’s a perfect activity. There are four major elements to build: a car, a camper van, the gas pumps and the gas station. So this could make a great 30–60-minute activity for four people.
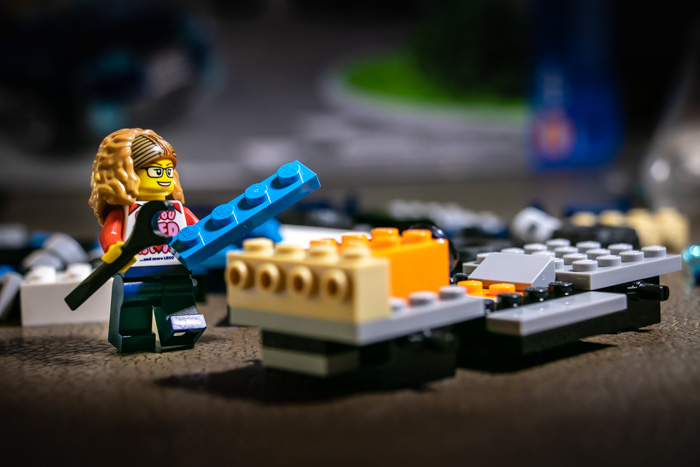
I built with my daughter helping. My focus was the camper van and taking photos to document the process. My daughter assembled the smaller car, the gas station and the pumps, and she still finished before I did. Mostly because I was taking a bunch of pictures instead of connecting bricks…and because towards the end I decided to customize my camper van! But more about that later.
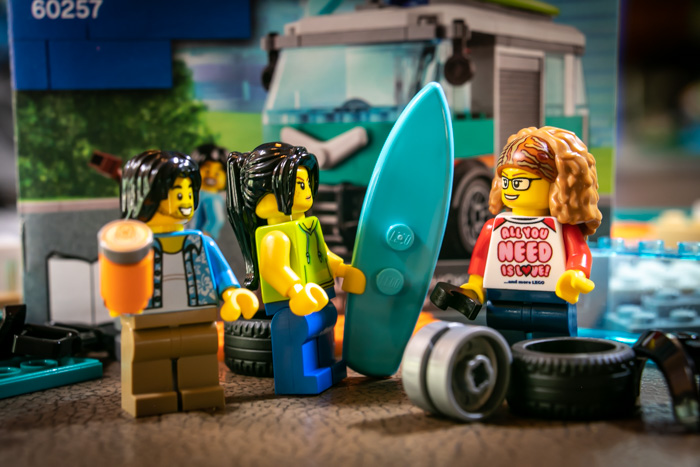
“Dude! You’re giving her my surf board?”
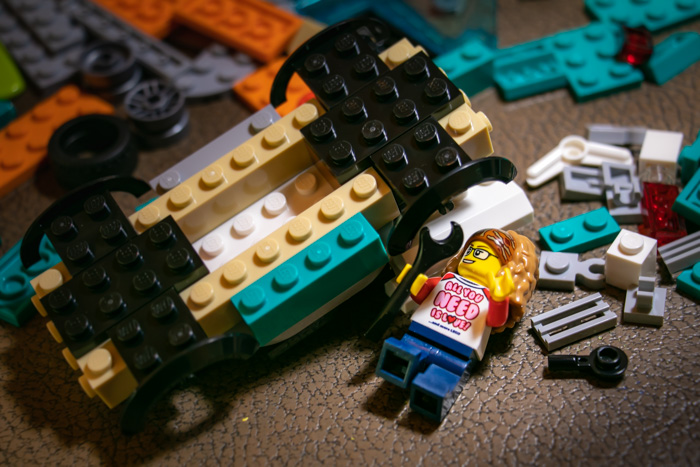
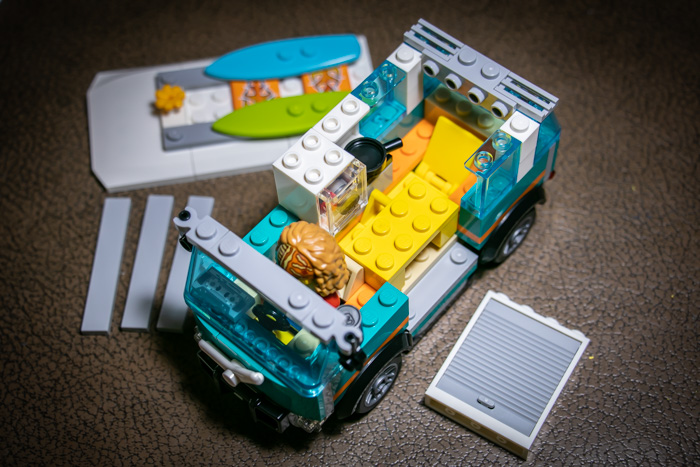
The set comes with four people: two surfers, a woman and the service station employee (or maybe he’s the owner? you decide!). The chihuahua dog figure was a nice addition to my LEGO animal collection. I was also happy to add the surfers’ clothing to my LEGO clothes closet. Hawaiian shirt and sleeveless hoodie. Very nice.

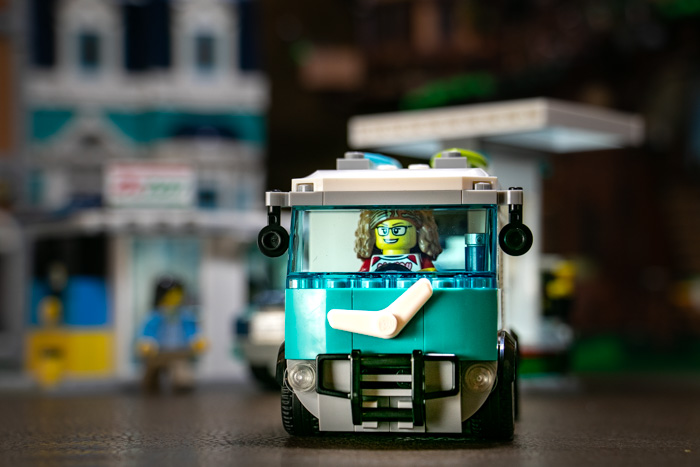
Both vehicles are a solid build and great for play. More importantly (to me), they feel like they’ll transport well when I take them on road trips for toy photo outings. The tops pop off easily to insert the minifigures. Note that the doors and hood of the blue car don’t open. And both vehicles have open air for side windows (which actually makes it easier to get photos from that angle).
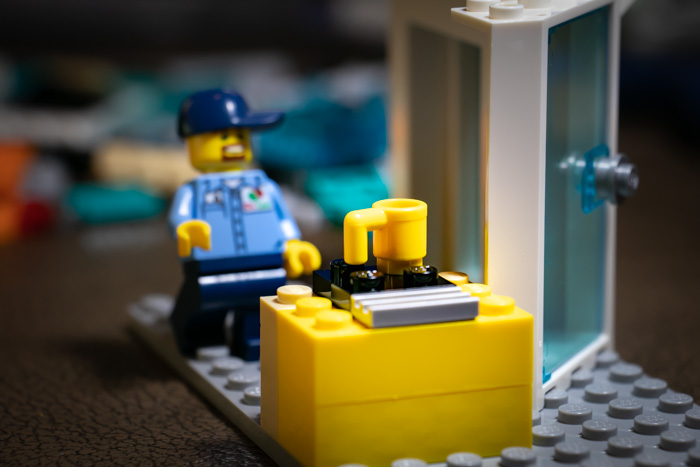
The gas station is a cute open set-up that’s easily accessible for posing figures for photos as the minifigures buy coffee, hot dogs or a newspaper to take on their trip. I should probably have included more photos of the gas station, but found myself too excited to build the camper van to focus on it!
The camper van
I’m impressed with the solidity and resilience of the camper van. I don’t feel like it would have any trouble with me dropping it directly into my backpack and taking it on a trip. That said, a couple little bits (like the side mirrors) could rub free if I did that, so I’ll probably protect it inside a resealable bag at least. This will ensure bits that do work free won’t be lost and can be quickly restored before taking photos on the road.
A special moment
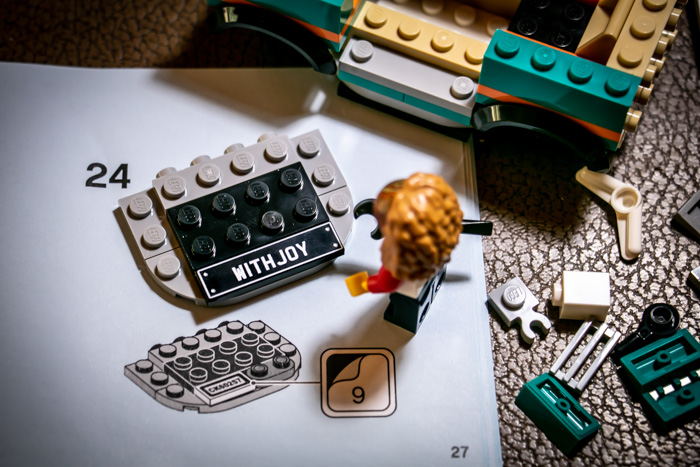
Last year I was thrilled to purchase a yellow Volkswagen Beetle, and I got it a custom “WITHJOY” plate that reflects something important to me. It’s kinda hard to express in words that make sense outside my head.
I don’t simply desire joy, I pursue joy. I choose a joyful outlook despite plenty of reasons to feel otherwise. Sometimes joy doesn’t make “sense” in an objective way. To many people, investing time, money, and energy in toys doesn’t seem a rational way for an adult to live. But toy photography brings me joy. And every time I look at that yellow bug (which is like a toy car, in a way), it brings me joy.
Shortly after buying the car, I ordered this custom plate from Firestartoys. But I didn’t have any vehicles to put it on, so I tucked it away in my LEGO box until the right moment.
THIS WAS THE MOMENT. And this was my first customization to the set.
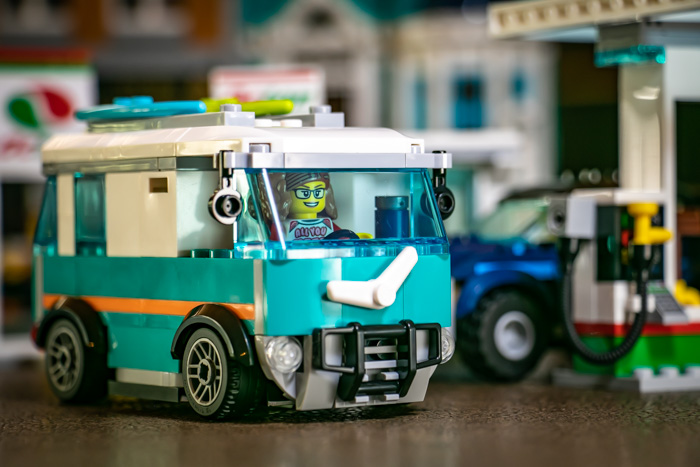
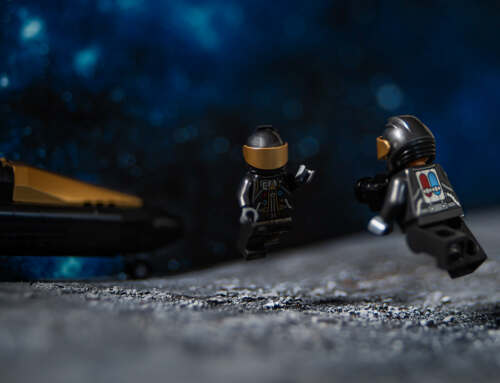
Time to fill ‘er up with fuel for the journey!
Those with a keen eye who own this set may recognize that I did not use the LEGO stickers for the back of the van as the instructions indicated. I found some other stickers that fit my personality more and blended them together with the surf theme. I saved one small space in the lower right for the day that I find the perfect teensy tiny sticker of an octopus. I’m a huge fan of cephalopods!
Toy photo window trouble
You may not be able to see it very well in these shots, but the LEGO windows scratch easily. These small imperfections aren’t really noticeable when you’re playing, but for a photographer they can sometimes be a big deal. (I am encouraged by seeing these photos; it looks a lot better than I anticipated when I first noticed the scratches during the build.)
I also don’t like the blue tint to the windows included with the set. While they look attractive with the colors of the vehicles, the greenish cast they give the minifigures’ yellow skin (blue+yellow=green) makes me think the figures are feeling a little car sick.
I’ll either seek out some clear windows of the same dimensions or perhaps remove it like they did with the side windows. Any other suggestions? Please drop it in the comments if you have an idea!
Interior of the camper van & customizations
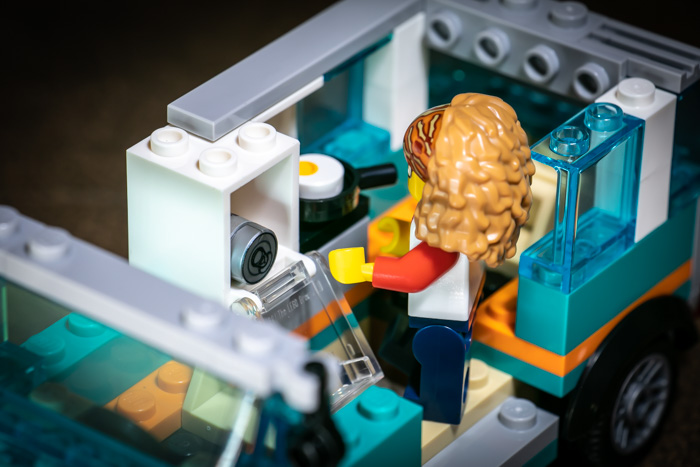
I noticed that the camper van comes with a side door that opens upward and becomes a sort of awning. Immediately my sig fig asked for some camp chairs and a table she could use on her trips. How could I deny her?
In keeping with the cheery colors of the van (and as a nod to my yellow joy bug), I chose to build yellow camp furniture. Then I re-engineered the inside of the van to accommodate two chairs and stack the table on top of them during travel, to keep all the accessories inside the vehicle for easy transport.
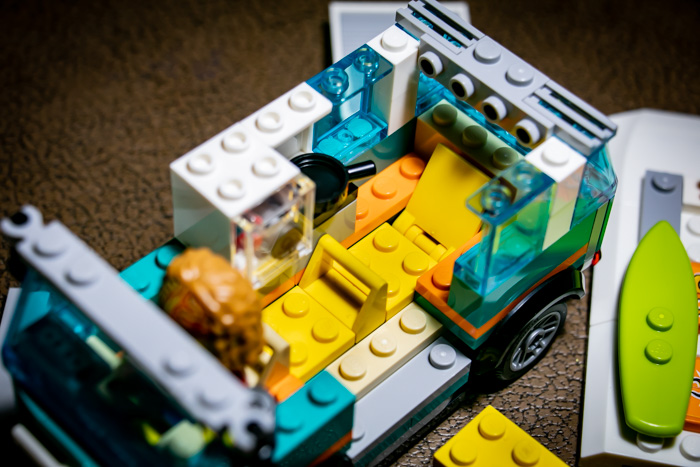
A side benefit of the camp chairs is making the inside of the van look like it can transport two friends with the driver. Technically, I haven’t re-engineered it well enough to allow minifigures to actually sit inside (their bodies are too wide and bump into the stove and fridge), but I plan to keep playing with it until it works.
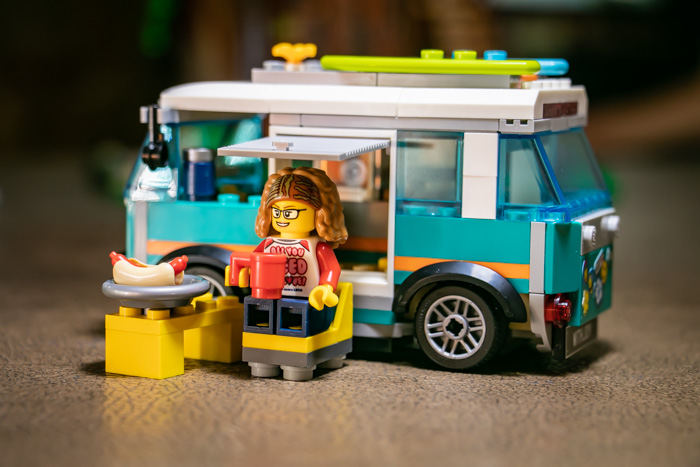
To be extra clear: The plate, red mug, yellow camp chairs and table do not come with the set (the hot dog does, though!). I decided to blend my customizations into this review because our site is all about enjoying LEGO, and LEGO is all about building your own creative solutions! If you want to know exactly what’s in the set, see Set 60257 in the LEGO shop for details.
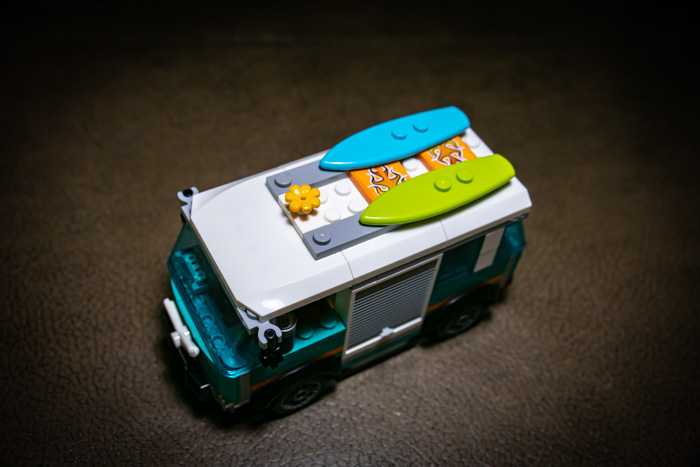
My final custom touch (for now!) is the roof. I added a flower to the front and some plates with fire stickers. Since my sig fig isn’t a surfer, I’ll probably find something else to put on the roof (a kayak, perhaps?), but for now they fit the vibe well enough.
Headed for the big blue
As I write this article, I’m planning a weekend trip to the Oregon Coast. I’m looking forward to bringing the camper van along and seeing how it looks in its native habitat!
Follow my sig fig’s online adventures on Instagram and Facebook at: #mightysmall_sigfig


I love your article and the fact that you included your customizations in the article. A good reminder that we are not required to keep the sets as they come. Maybe we’ll run into each other at the coast one of these days. I like to slip out there regularly. And thanks for the reminder also that the vehicles can travel too. I tend to make mine and leave them out for my granddaughter to play with!
Hi, Mary! I appreciate your comments, always. Glad some of this inspired you. I’d love to meet up on the coast sometime! I’ll post a photo of my VW bus vehicle travel box in the BTS on one of my photos and tag you so you can see how I travel with it.
We need more LEGO set reviews done by LEGO minifigures, Teddi 🙂
I’ve always wanted a camper like that IRL.
Looking forward to seeing how the van does on your trip! Safe travels (to you and your bricks)
Great review Teddi. I love your customizations and suggestions specific to toy photographers. I think I may go by my local lego dealer and pick up this set. I think the van will be perfect for my own kayak collection.
ps – congratulations your yellow VW beetle and I love the customer license plate. It makes perfect sense to me! <3