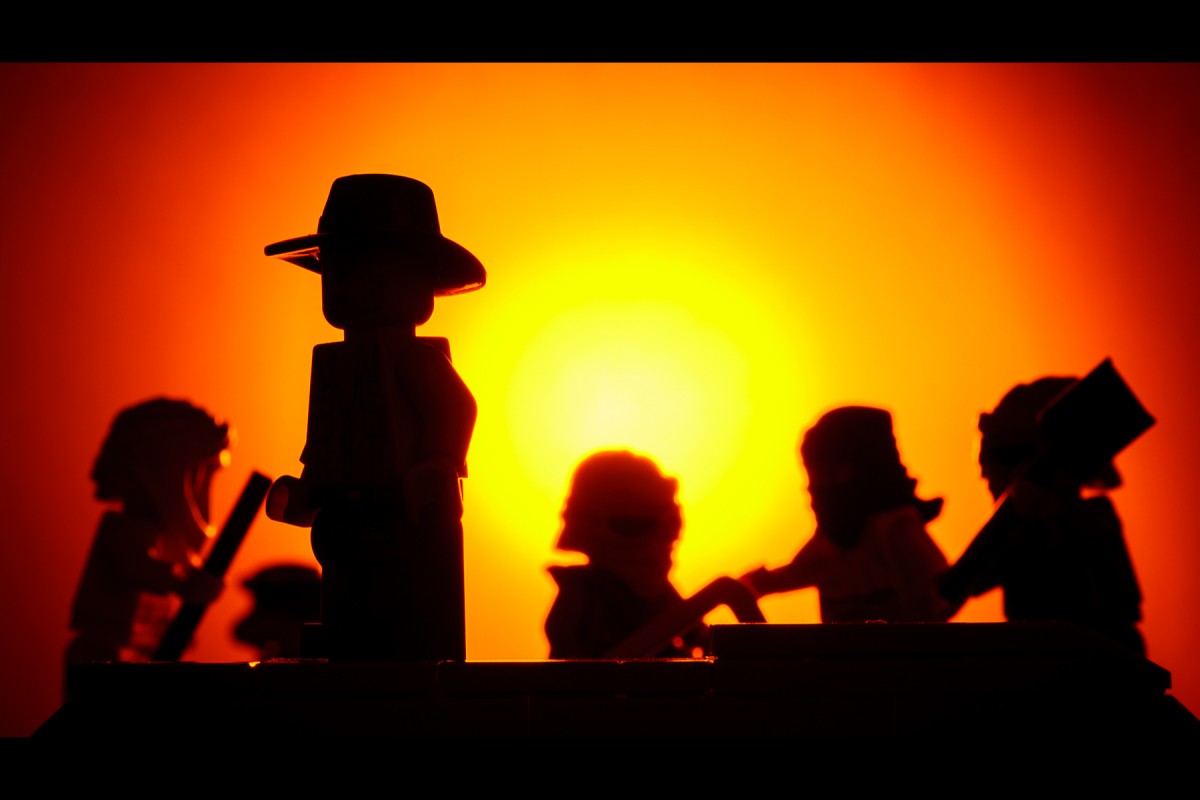
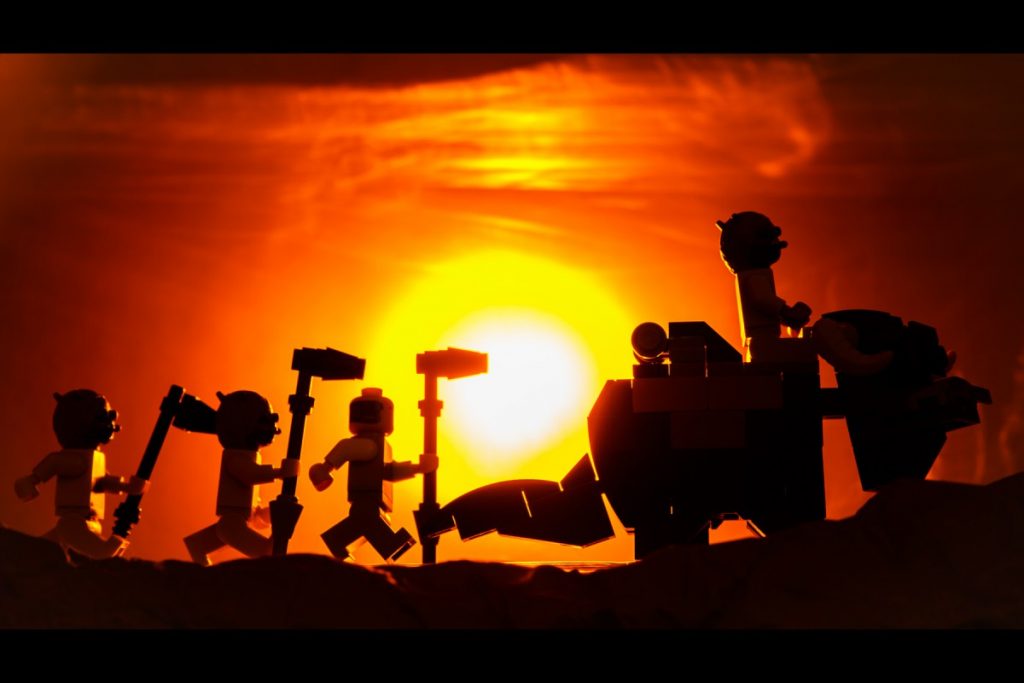
Out of all three Indiana Jones movies (sigh… four), one of the most visually striking scenes for me is when Indy and his crew are digging in the desert at sunset searching for the Well of Souls.
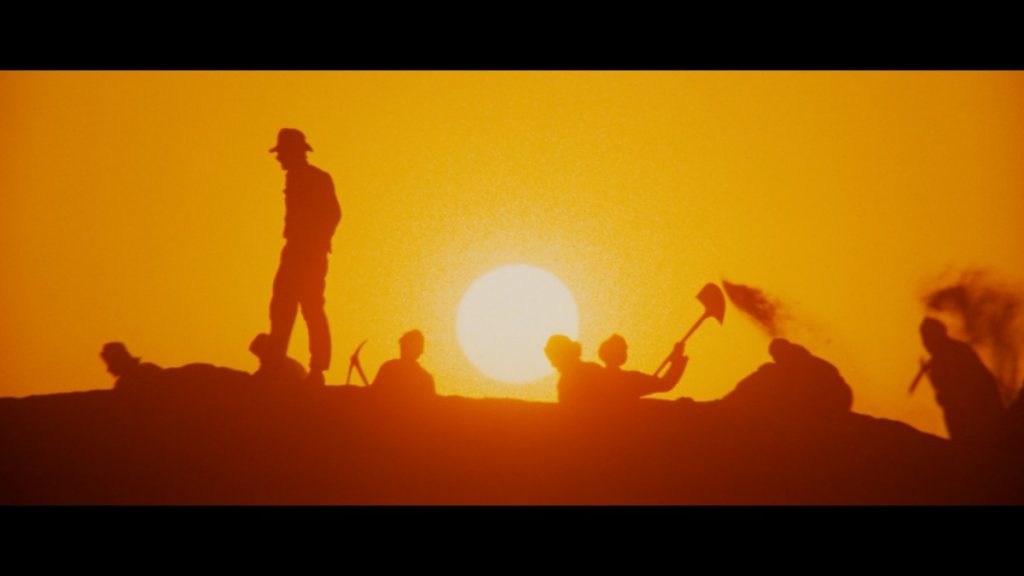
The silhouettes of Indy and co. against the bright orange setting sun is such an iconic look, that I couldn’t resist attempting to replicate it in toy form.
Thankfully, faking a sunset turned out to be a pretty easy effect to put together. So much so, that I’ve used it countless times since Indy.
Overwatch 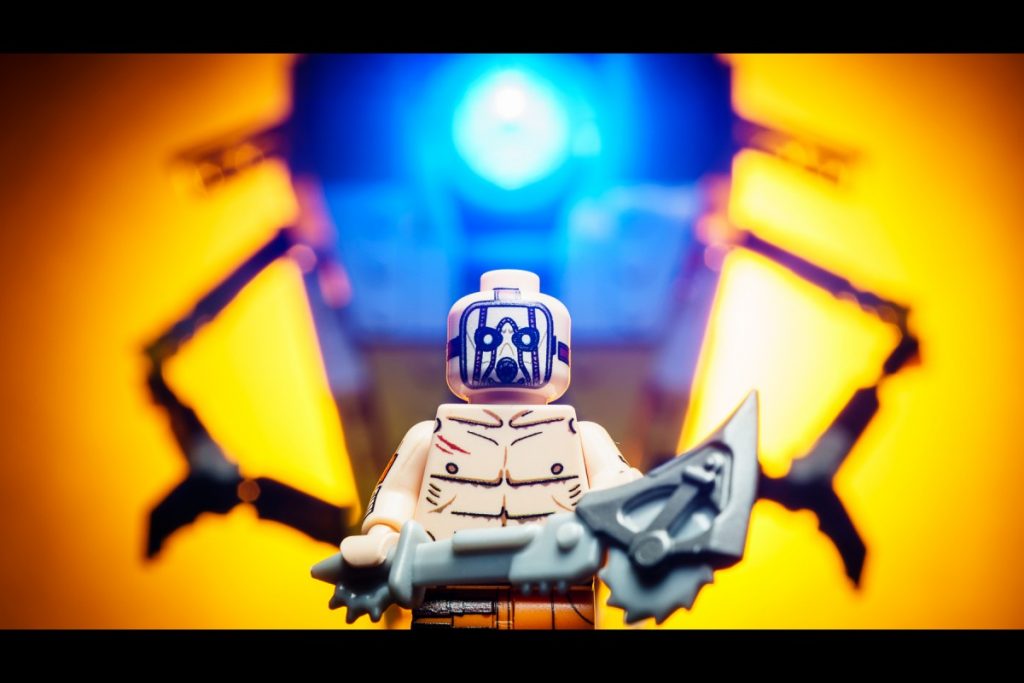
Borderlands 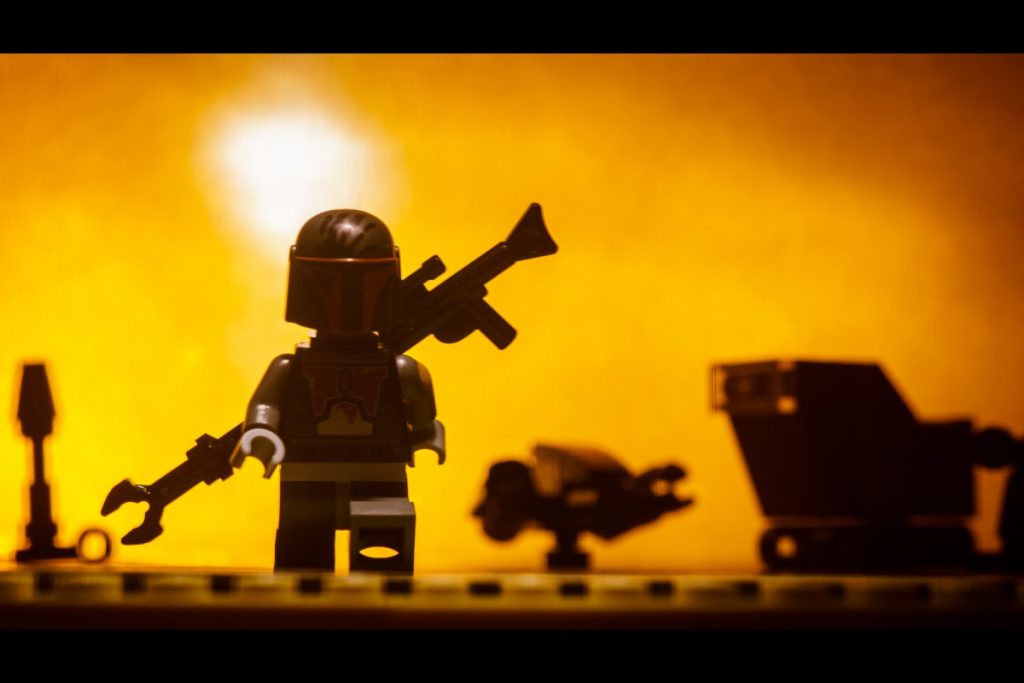
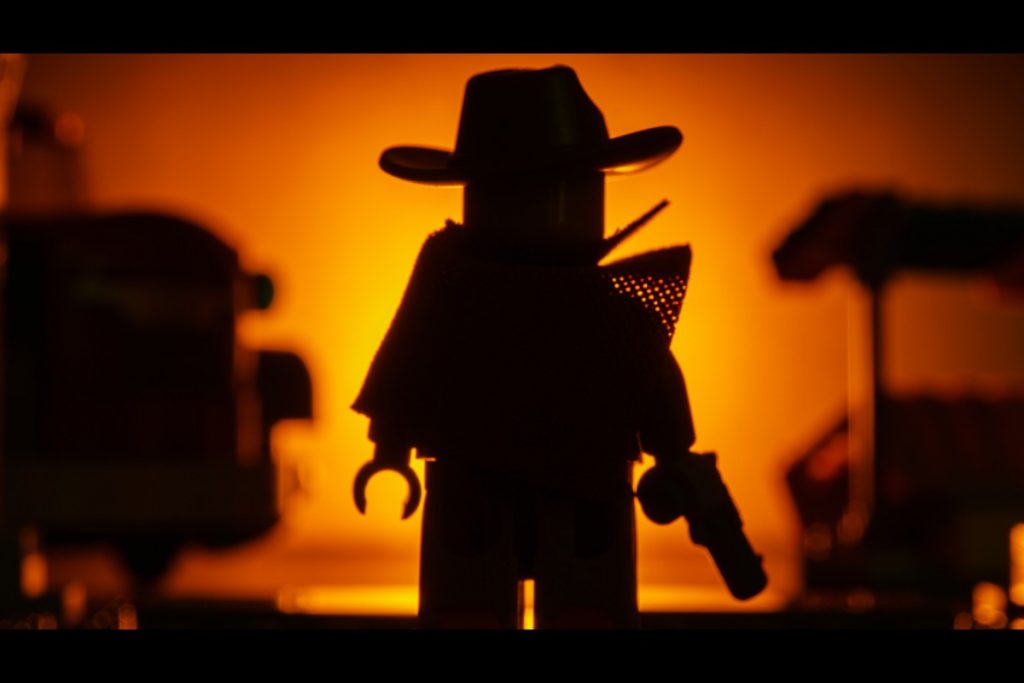
The Mandalorian 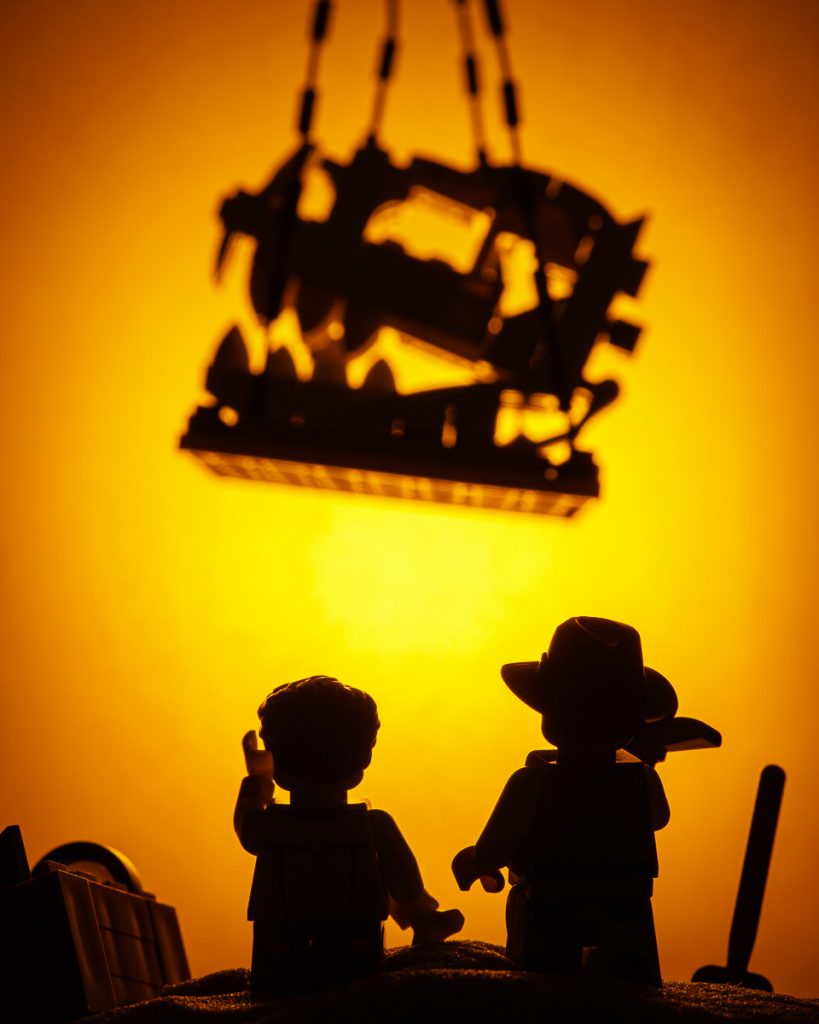
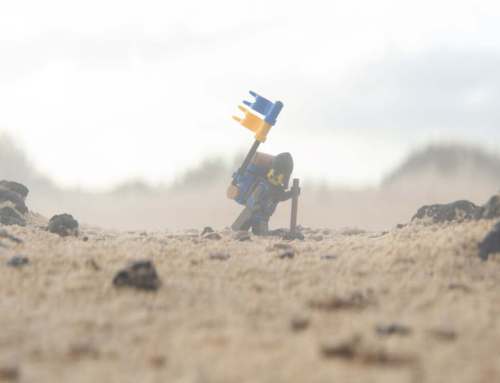
Fossils 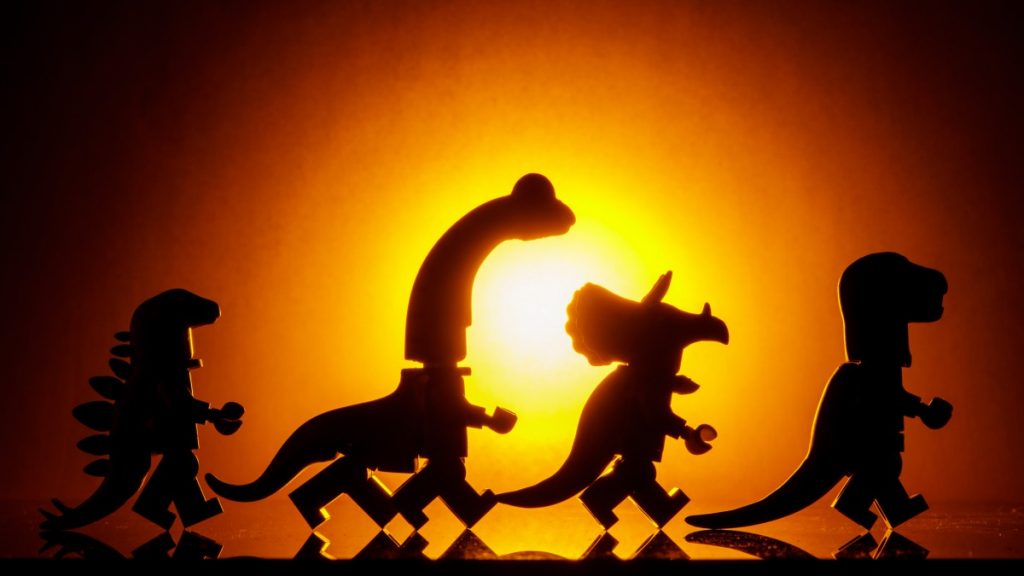
Dino Dudes 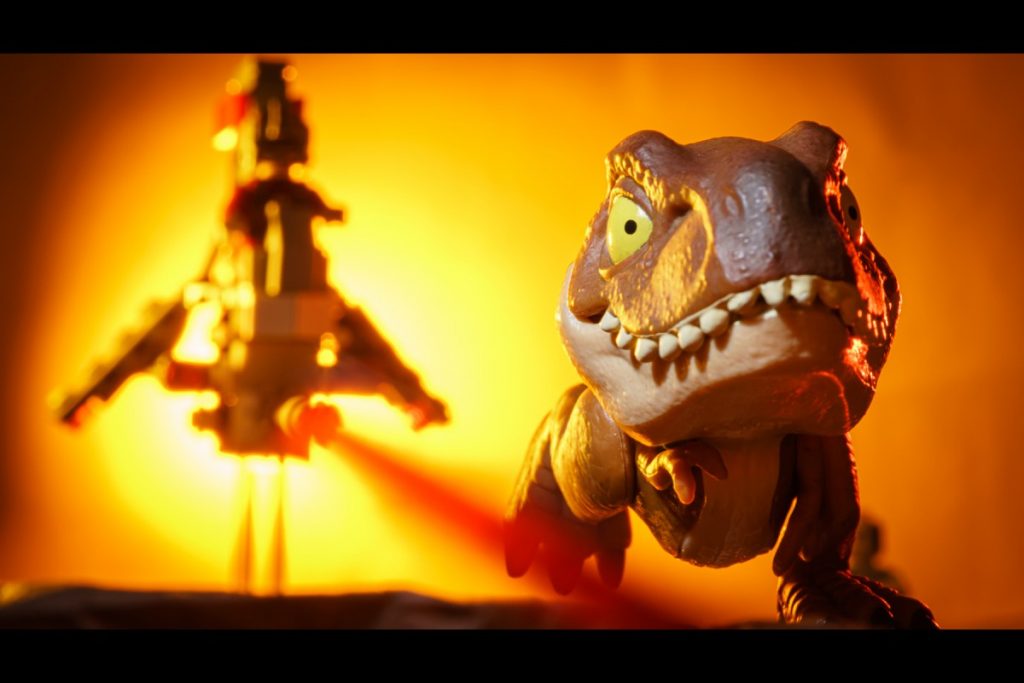
Womprats?
In this post, I’ll go over just how I pull off this effect so you can create your own iconic sunset silhouette scenes.
Materials needed
This sunset silhouette is built using three primary items:
- A light source to create your sun
- A colored gel to modify the color of your light source
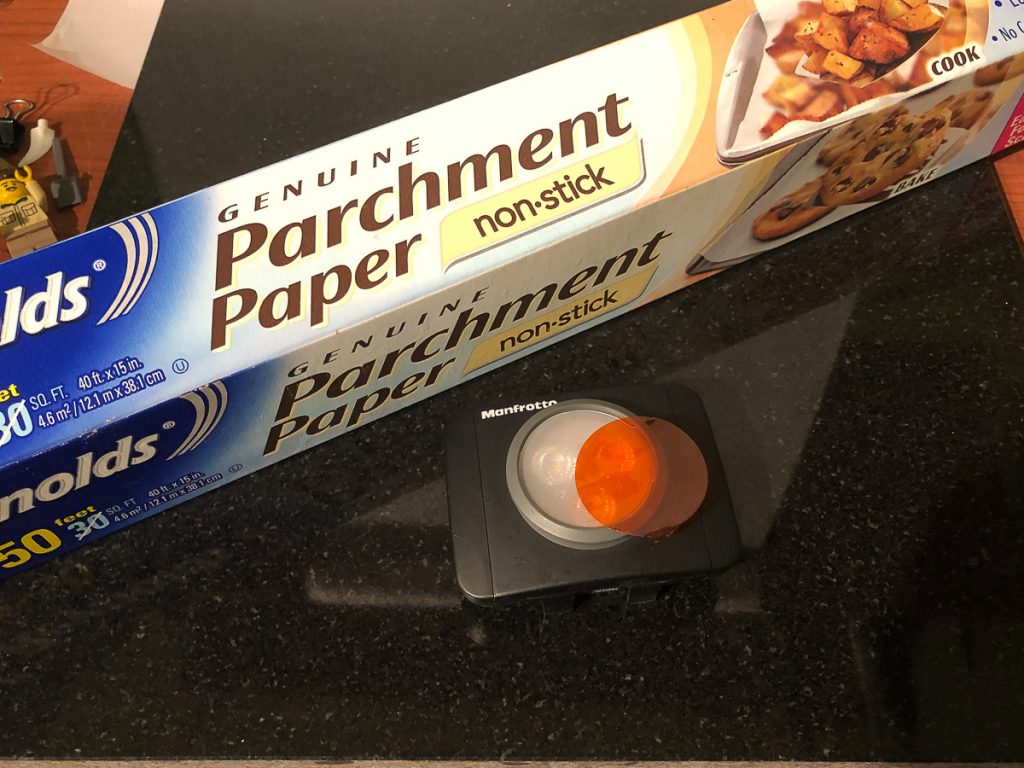
- Parchment paper* or any similar translucent material to act as your sky/background
*I just learned that parchment paper comes in different colors. I used white paper because that is what we had in the kitchen. 🙂
Set up your sky
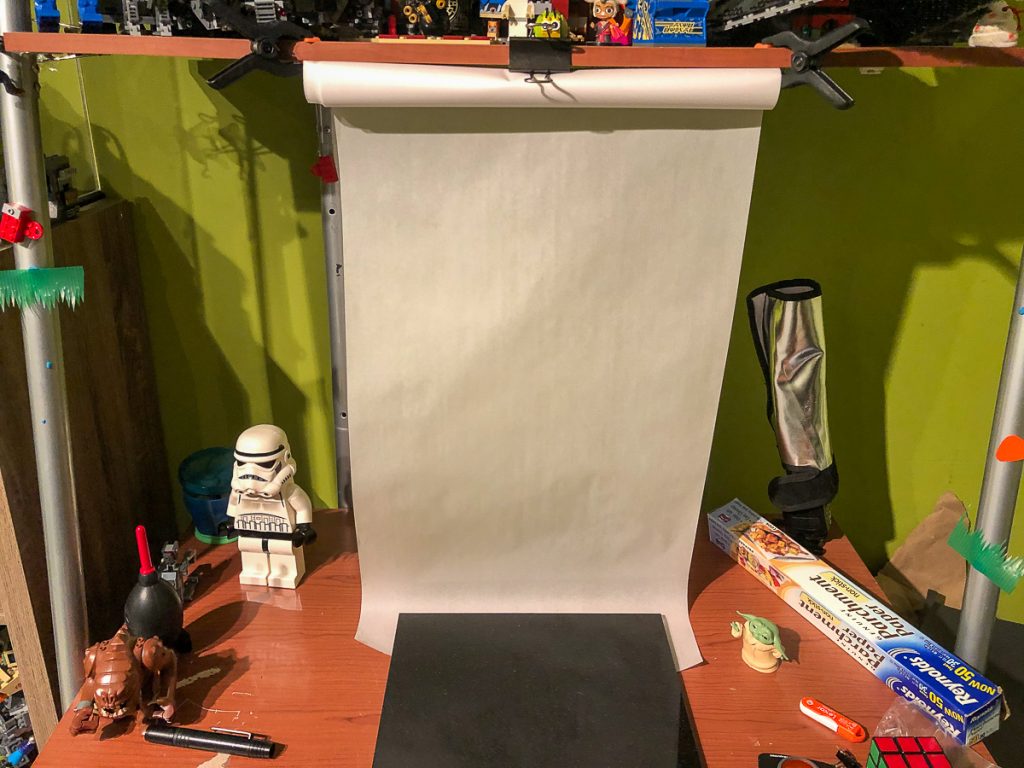
Step one is to get your parchment paper in place. You’ll want to position it behind your subject, leaving enough room behind it to set up your light source. You’ll also want to make sure it covers the entire background of your shot, otherwise you’ll end up with a harsh light drop off at the edges.
Parchment paper can be difficult to keep in place with tape, so I ended up using a couple of cheap plastic clamps to secure mine.
Bring On the Sun
With your background ready, it’s time to grab your light source. You can use anything you can get your hands on, though try to stick with a small, round beam like a flashlight if possible. I’m using a Manfrotto Lumimuse 3, which is a great, inexpensive light for toy photography.
To modify the color of the light, I cut an orange photography gel to fit the light, but anything that you can place in front of your light source to change its color will work.
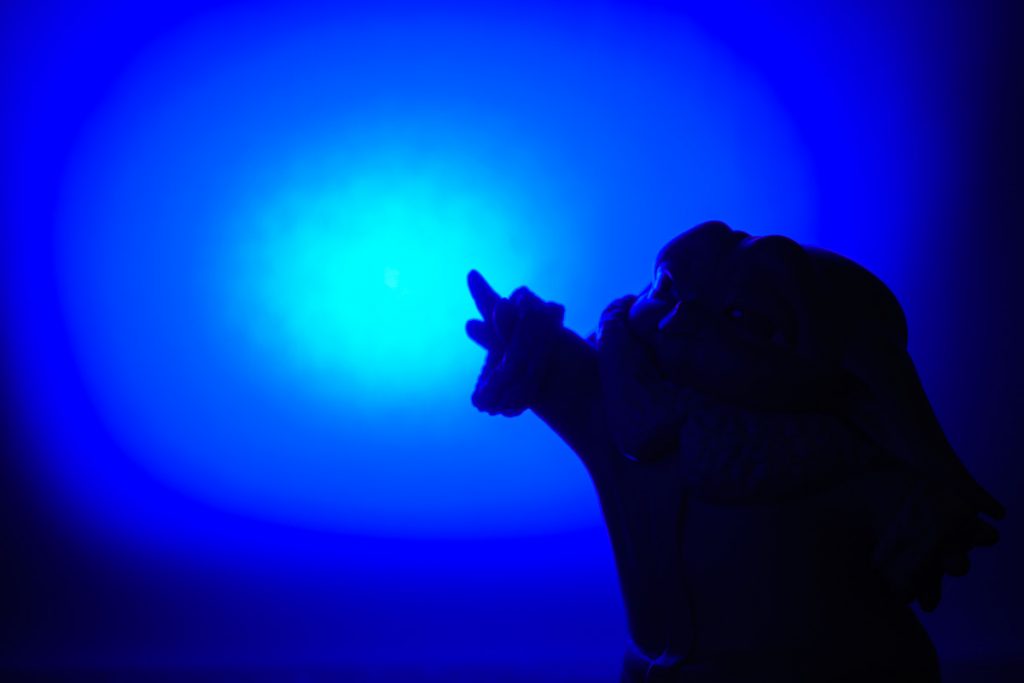
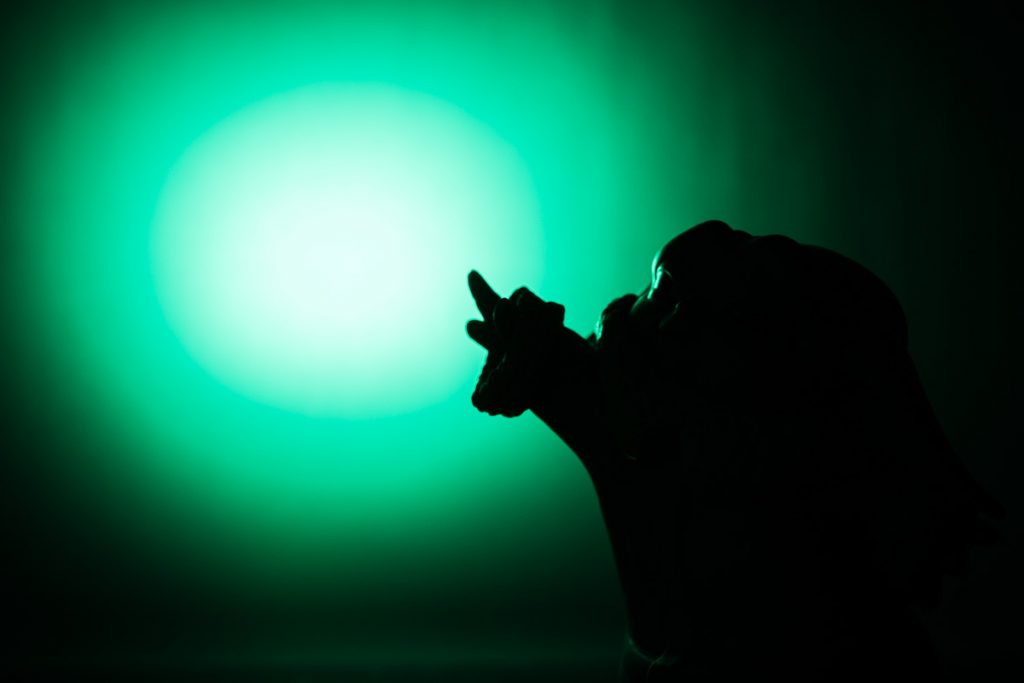
It doesn’t have to be orange. You can use this effect with a variety of colors for different looks.
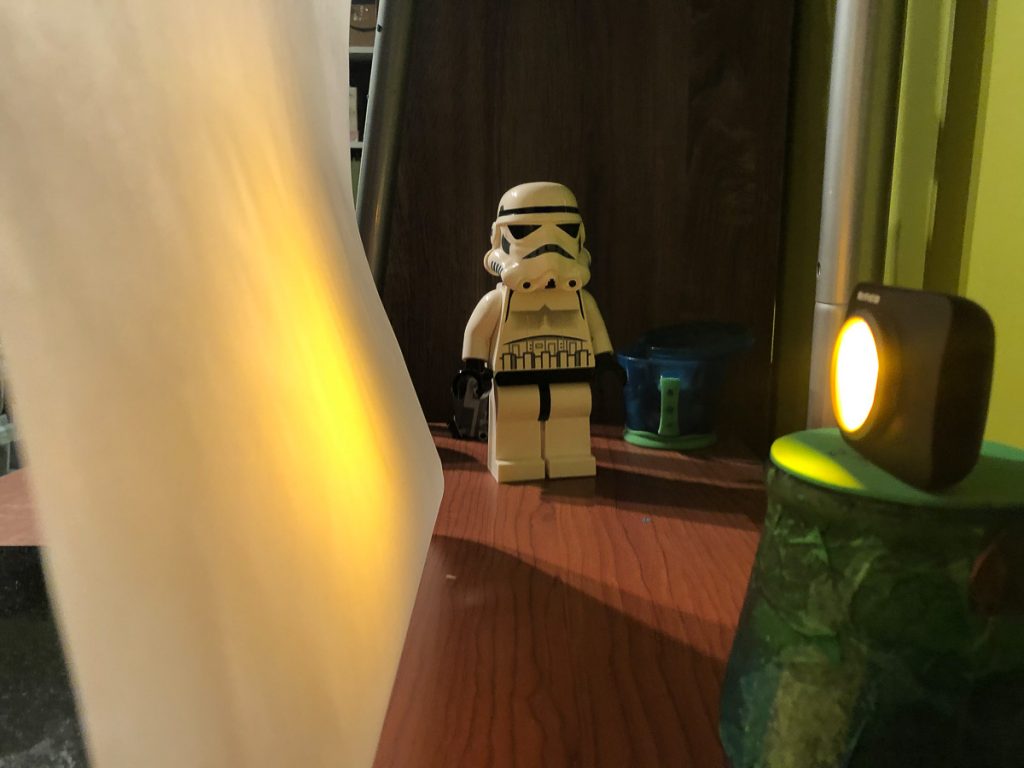
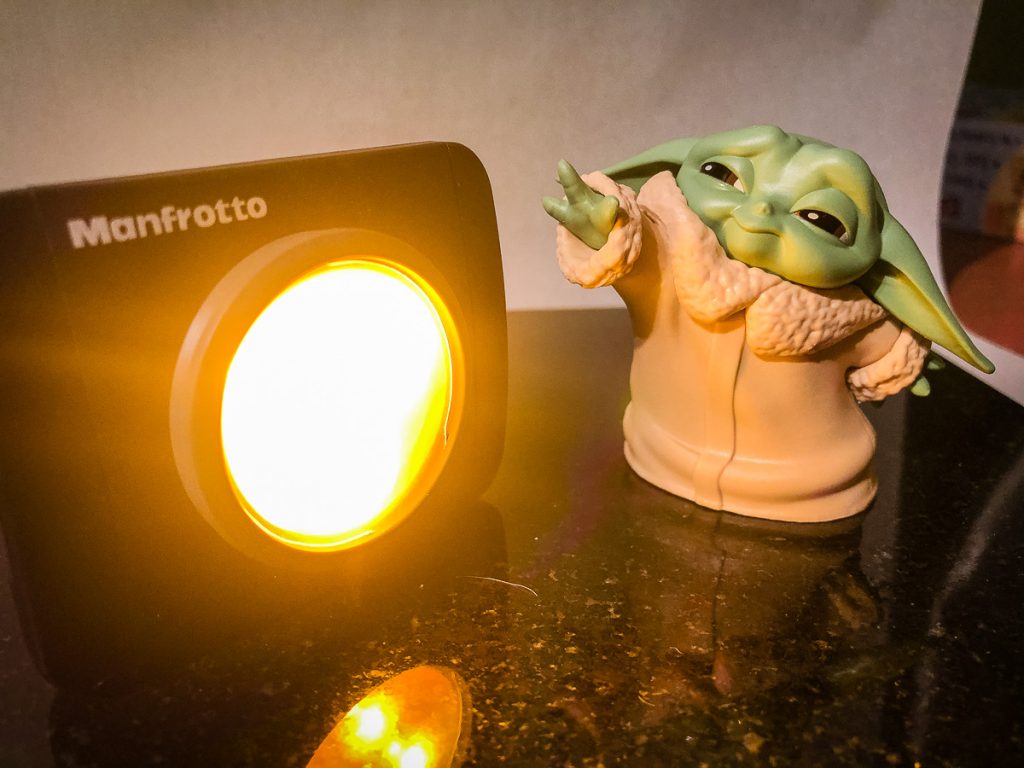
Once you have your light source and your modifier, place them behind your parchment paper pointed towards your camera. The parchment paper acts as a diffuser, softening your light and spreading it out.
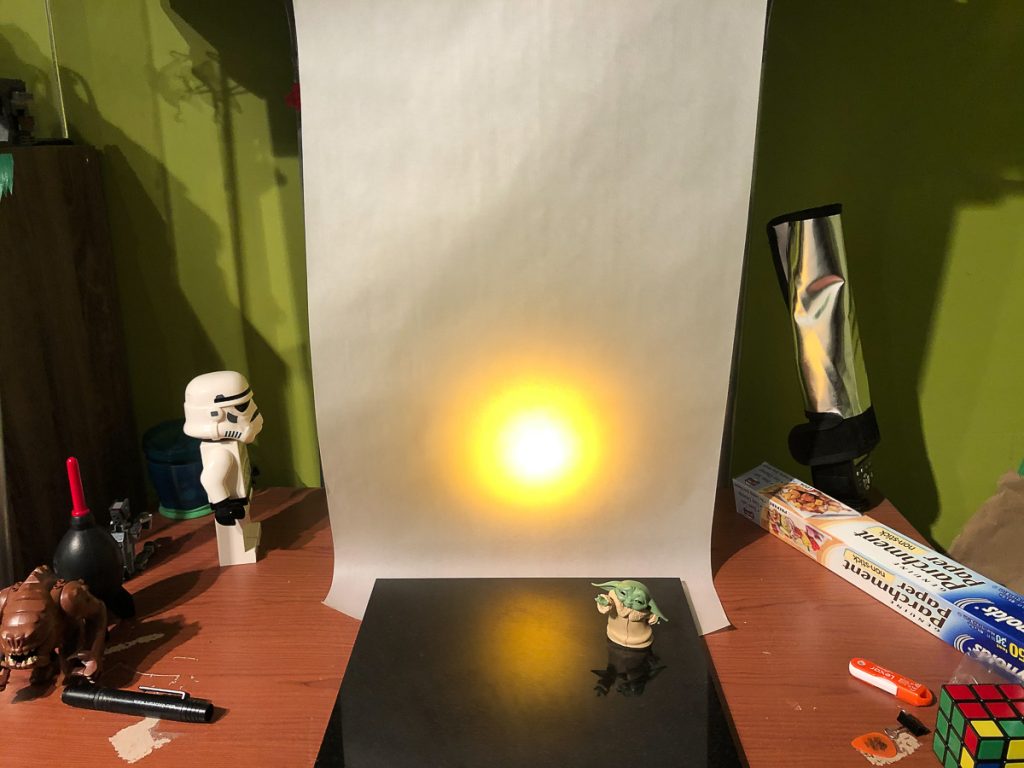
The further your light source is behind the paper, the bigger your sun will appear. The closer it is, the smaller your sun will be. Experiment with both the height and the distance of your light until your sun is just where you want it.
Set your scene
With your sunset in place, it’s time to arrange your scene. Just like varying the distance of your light behind the parchment paper, you’ll want to do the same with your figures in front of the paper.
The best distance will depend on the camera and focal length you are using. I typically start 5–6 inches in front of my background and adjust accordingly.
Camera settings

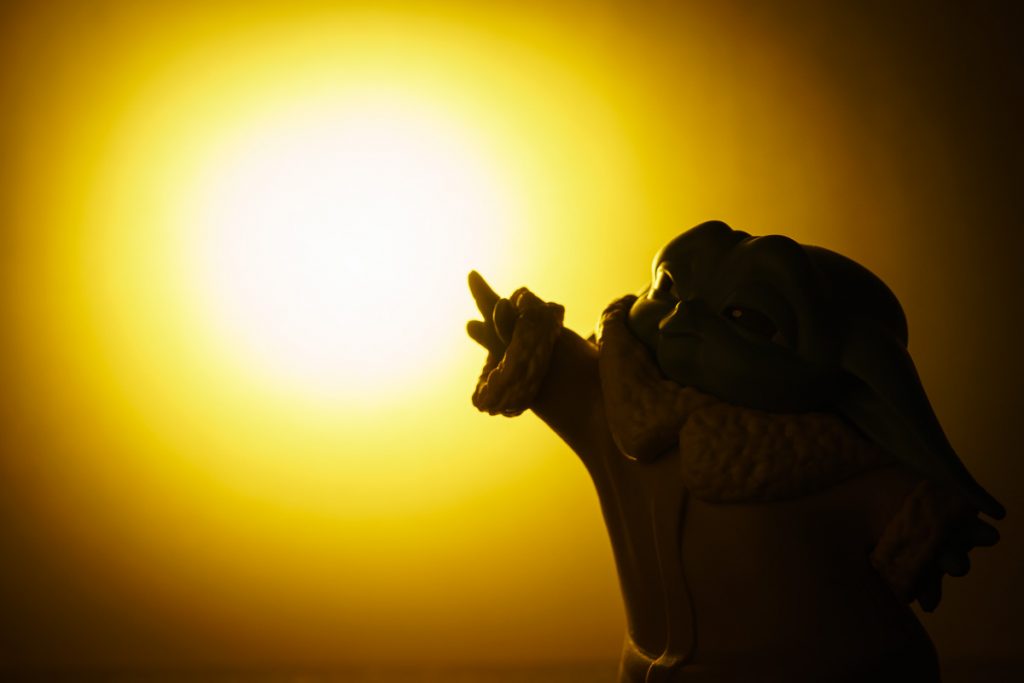
When framing your scene, focus on your subject’s edges to get a sharp, clean silhouette. After setting my focus, I turn off all other lights in the room aside from my sun, so I can dial in my exposure.
I highly recommend shooting in manual mode so you can use both your aperture and shutter speed to dial in the intensity of your sun.
I typically start with an aperture of f/8.0 and adjust along with my shutter speed to get the brightness and spread of the light that I want.
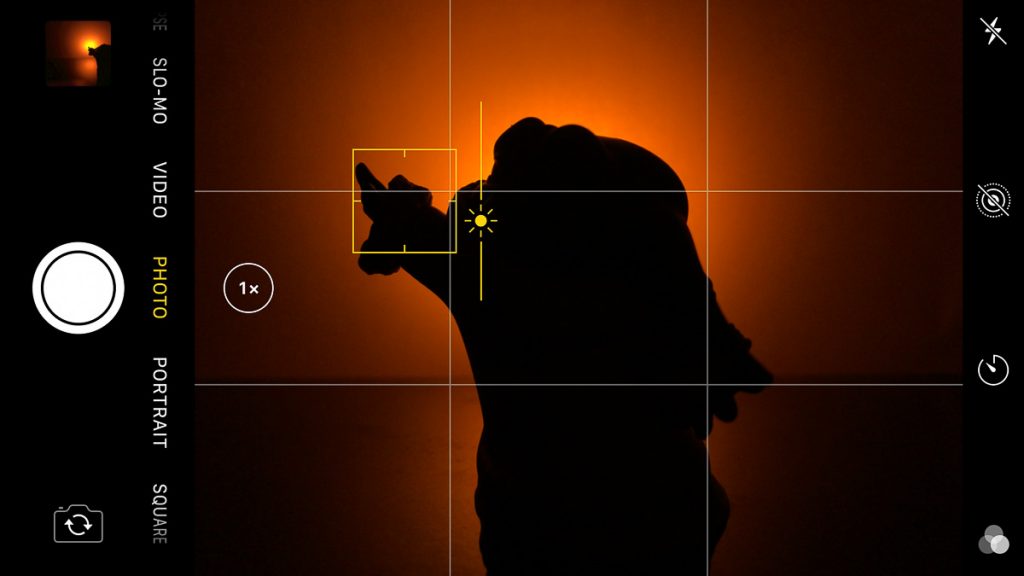
If shooting with your phone, just tap to focus on your subject and adjust your brightness until you get your desired effect.
While this is an easy trick to set up, like anything, I encourage you to take your time, adjust, shoot and refine. Don’t be discouraged if it’s not coming together for you immediately. While shooting, 90% of my time is trial and error.
Tips & advanced techniques
Once you get the effect down, here are some tips for taking it a step further.
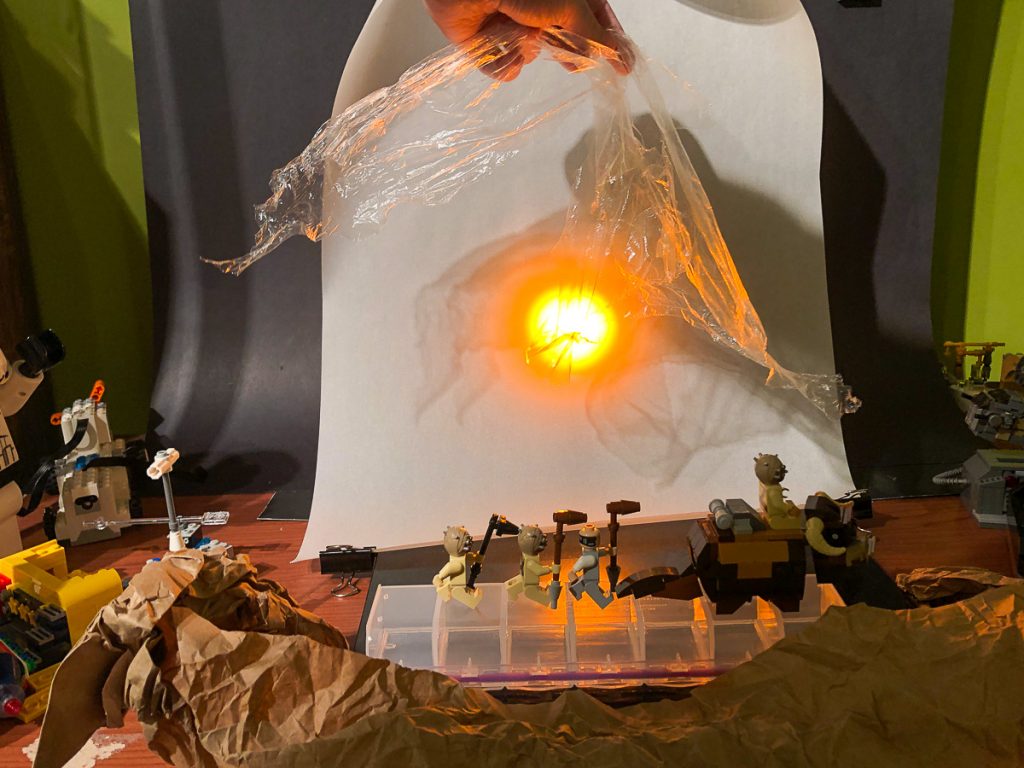
Adding some imperfections to your sky can give the illusion of clouds along with your sunset.
To do this, I’ll gently move a piece of plastic wrap back and forth during my exposure.
You can also add items to your foreground to create a textured surface to your silhouette. In my photo with the LEGO Tusken raiders above, I used a crumpled paper bag to make the scene more interesting.
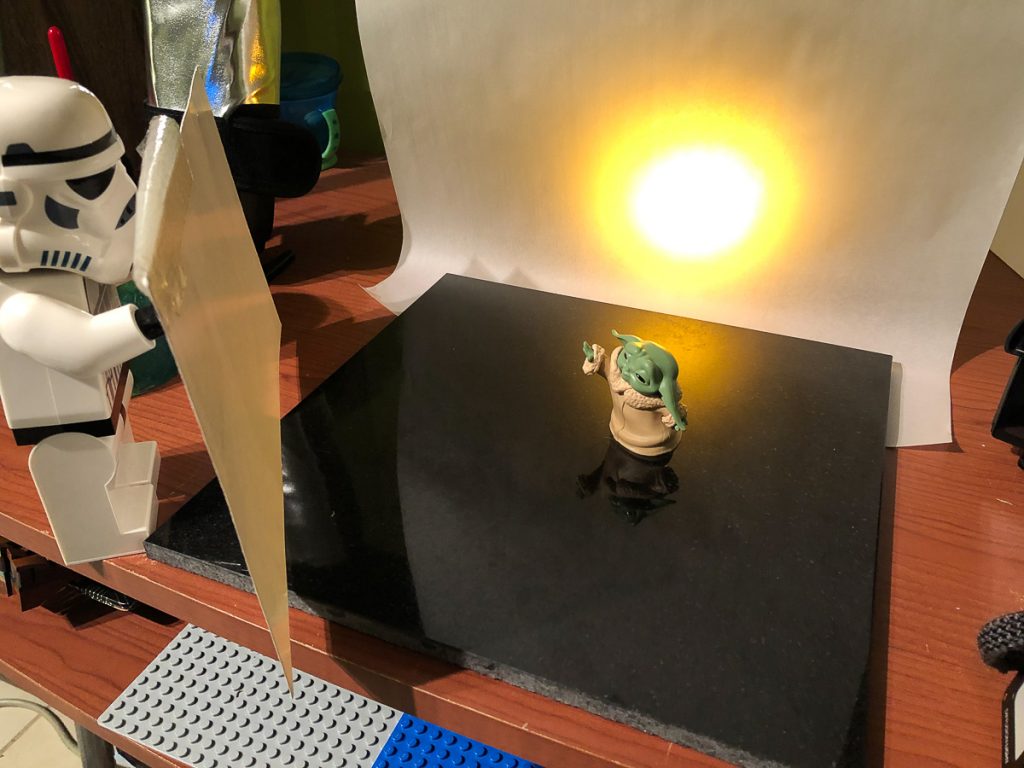
Don’t be afraid to add a little light to your subject. I’ve used a bounce card (a white piece of card stock) to bounce some of the orange light from the sun to the hit front of my subject. This can go a long way to sell the effect, so be sure to give it a try.
I hope you enjoyed this tutorial and that you give this effect a try. Have fun with it, and be sure to comment below with a link to your images.


Damn Alan – this is fabulous! I really do need to try this one! I really appreciate you showing the BTS and how simple this is to create with easy to procure items. You’re the best!
Awesome tip!! Sharing with others soonest!
Awesome walkthrough, Alan! The silhouette shots (and those you used for the fossils review) are stunning.
I’ve played around with silhouette a bit, but am often frustrated that I can’t quite get the light right so it’s not something I use as much as I’d like to. I’ll be referring to this from now on!
It’s funny, I tried recreating that exact same scene from Raiders a few years ago. I didn’t actually have an Indy figure, or know how to light it quite right, so I cheated a bit and used all-black pieces for the figures to simulate the silhouettes ?
https://www.flickr.com/photos/thereeljames/34765662522
I was watching Dinosaurs the Final Day with David Attenborough, and in it there’s a scene of some archaeologists digging in a sunset. I wanted to show a friend what they did there, and that led me to your LEGO fig shot. Excellent. It’s one of my favorite scenes of all time. I love that someone made a LEGO version. 🙂