
Our February MeWe challenge was “leap.” This required our community members to get their toys off the ground in any way they could. In today’s post I want to show you a few of those techniques from several toy photography viewpoints. Because when it comes to making your toys fly, there is no “right” way.
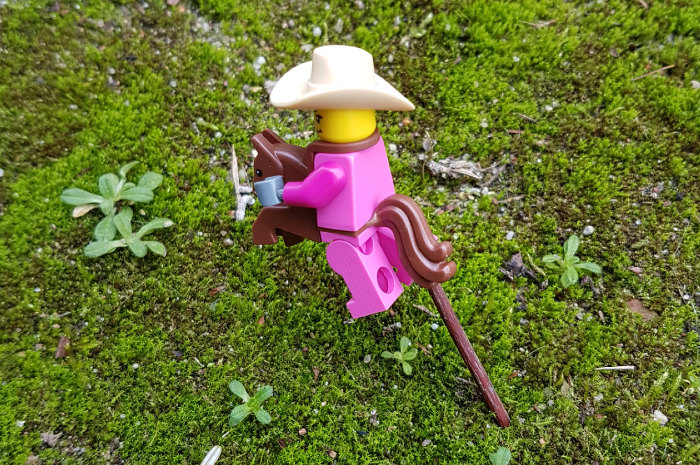
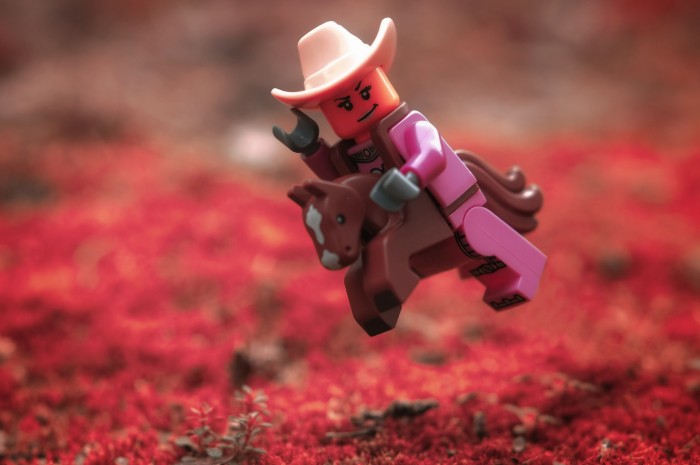
David Valdez
In toy photography, a toy in motion—whether it’s jumping, falling or flying—will bring the shot to life in a magical way. I always carry wire in my camera bag to help achieve these poses. Wire doesn’t just help with complex poses, it even helps with simple ones like walking. Heck, there have been plenty of times when I’ve needed wire just to keep a toy from blowing over in the wind.
Most of the time, using wire in a shot means it will have to be digitally removed later. But it’s usually worth it. For the most part I shoot 1/12 scale figures, so the wire I use needs to be strong. I use a solid 12-gauge copper insulated wire. It’s very inexpensive and copper is malleable so I can twist it any which way and it won’t break. I keep a few pieces on hand between 12 and 14 inches, which is usually enough.
To mount the figure I try to find some place to jam it in between body segments. Some figures have belts or plastic capes that will hold the wire. With other figures I’ve used a Dremel to drill a hole in their back. Especially those like Spider-Man who always seem to be in the air.
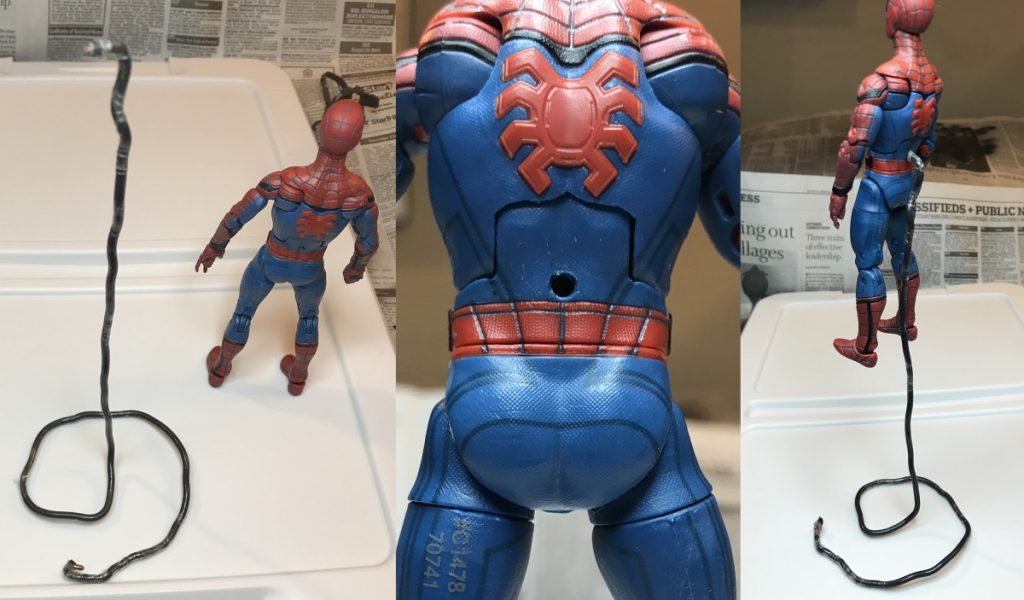
The best time to start thinking about digital editing is while you’re on the shoot. I find its best to use a tripod. Once I have my shot I will remove the subject and wire and take another photo of the same scene. This is the easiest way to paint out the wires digitally. You can erase the wires, and the background photo (without the subject) can be used to fill spots where the wire was. If you’re using practical effects like smoke or dust, this method probably won’t work as well since each shot will look very different from the next. I remove the wire in Photoshop by using the clone stamp, patch or healing brush, or some combination of the three.

Sunny Ang
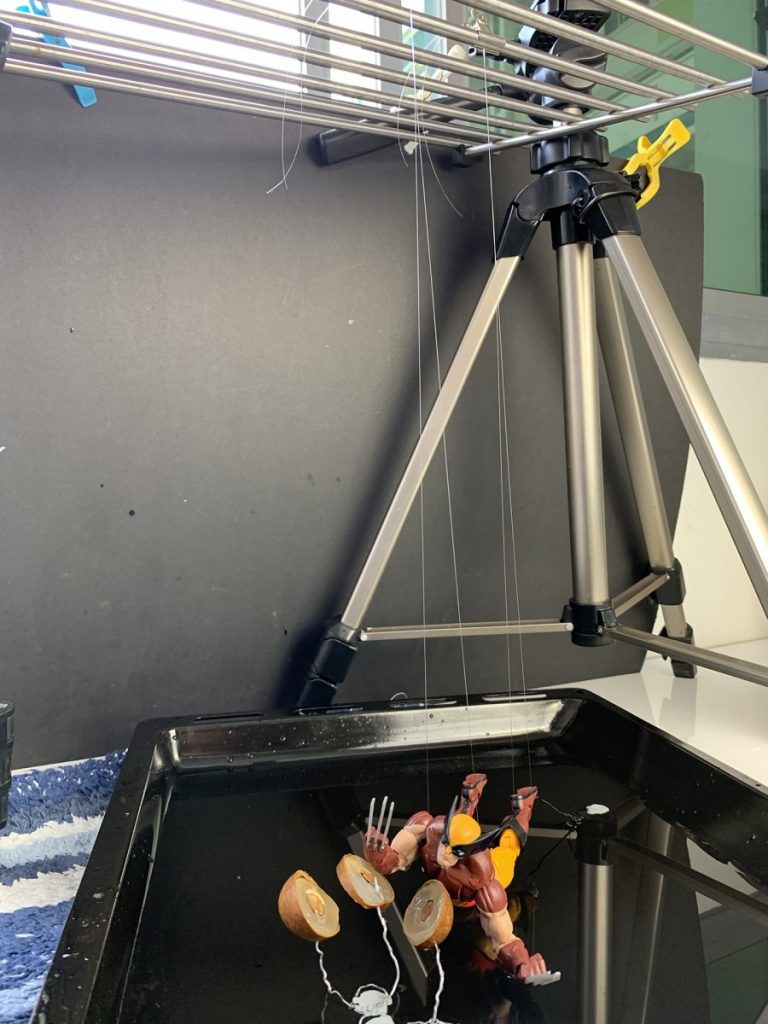
I sometimes wish toys were alive so they could get into poses themselves. Alas, that is not to be, and they need a little bit of help. This is where my blue tac, different sizes of flexible wires, fishing string, hot glue gun, rods and tripods come in.
What you use to suspend the toys mostly depends on the size of the toy and what kind of shots are involved.
For smaller figures, like a LEGO minifigure in a static scene (ie, no flying debris involved), a thin wire similar to those used to secure toys in their packaging would do the job. I will make a circular base at one end of the wire and then secure the figure with blue tac on the other.
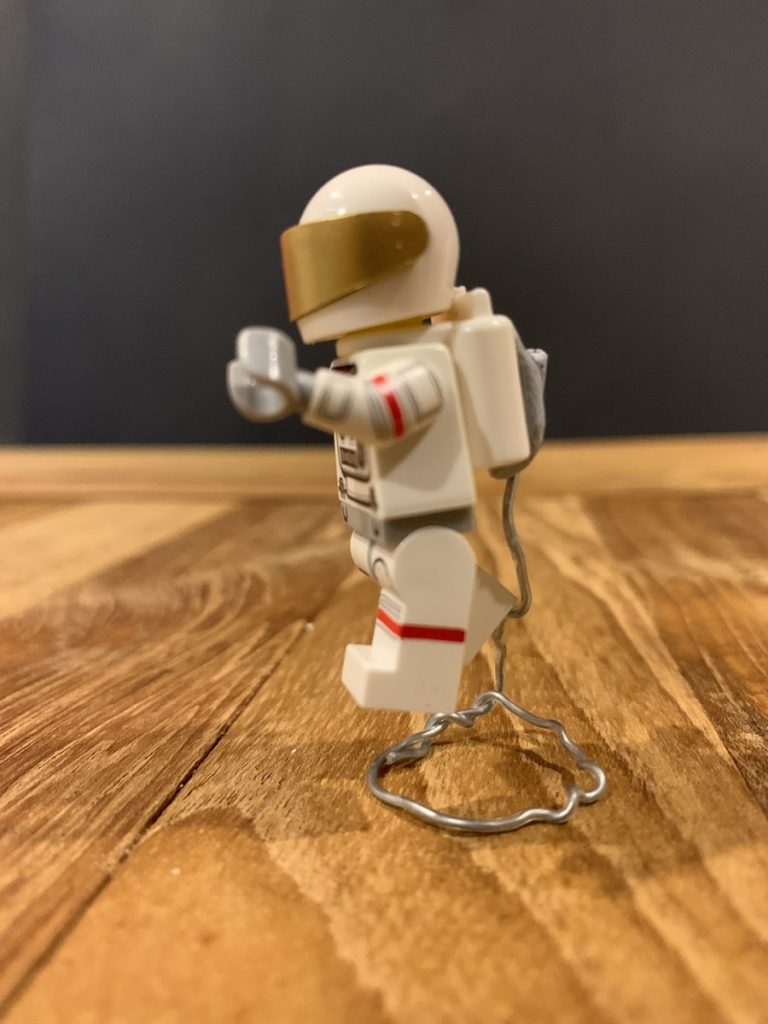
If I have to kick up some dust with compressed air near the figure, then I will lock the the circular base down with either blue tac, glue from a glue gun or simply sticking it into the ground if I am working on a soft surface.
As for larger figures, I will use a slightly thicker, flexible aluminium wire and secure the wire to the figure with blue tac on one end, and then weigh the other end down with something heavy.

When shooting indoors, I will suspend bigger figures with the help of poles and fishing line. After going round the arms with the fishing line, I will clip the other end of the fishing line to the pole. The same things goes for the legs. To prevent the figure from swinging around, I anchor the figure with a short wire at the leg with the help of some blue tac.

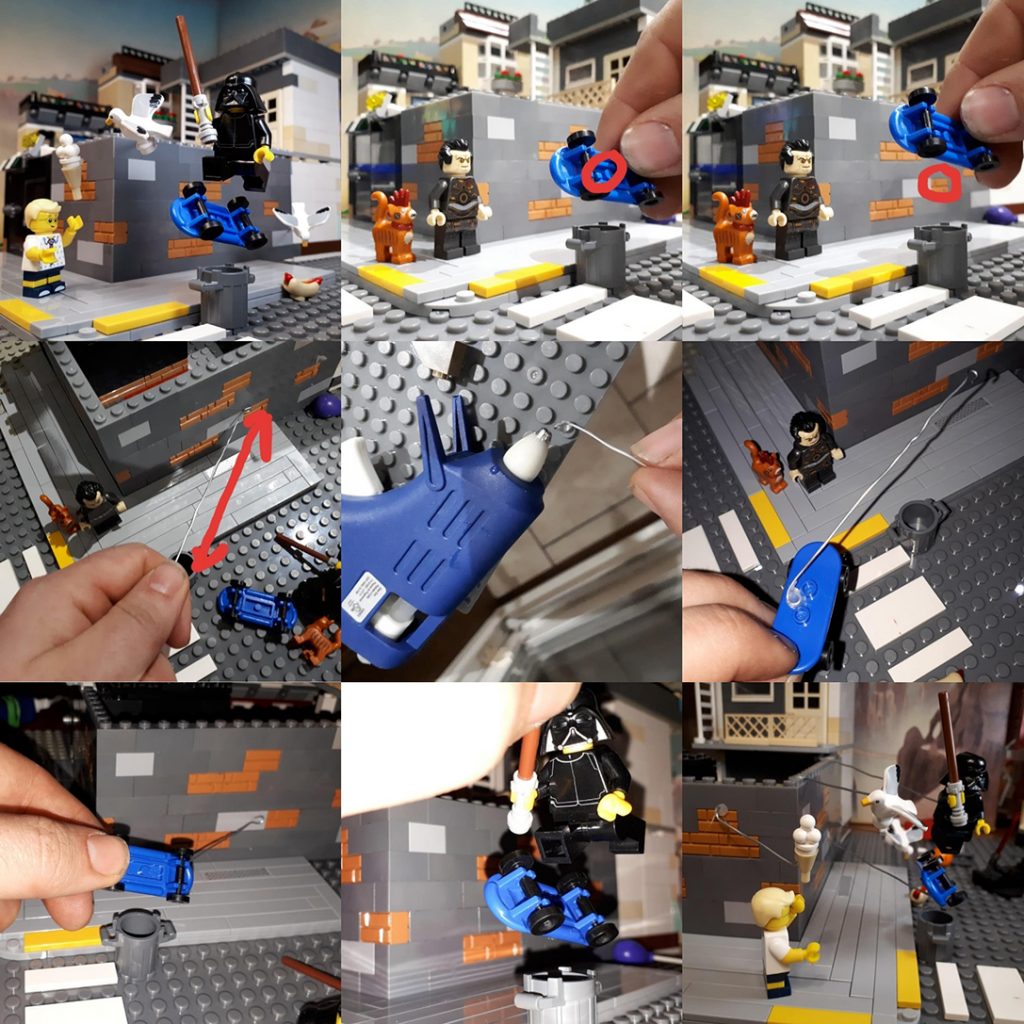
For all these action shots, I usually use a tripod and shoot in manual mode. I will take a shot of the scene with the figure. Then remove the figure and—still in manual mode and without moving or changing the camera settings—take another shot of the scene, less the figure. This is to facilitate easy clean up of the wire in post. (Here’s a video I found on how to remove the wire in post.)
Whenever possible, I would like the figures to stay in position on their own after setup and take my time to shoot the scene. But if I am in a hurry and have a friend with me, I will get them to hold the wire for me while I take the shot.
Matthew Wyjad
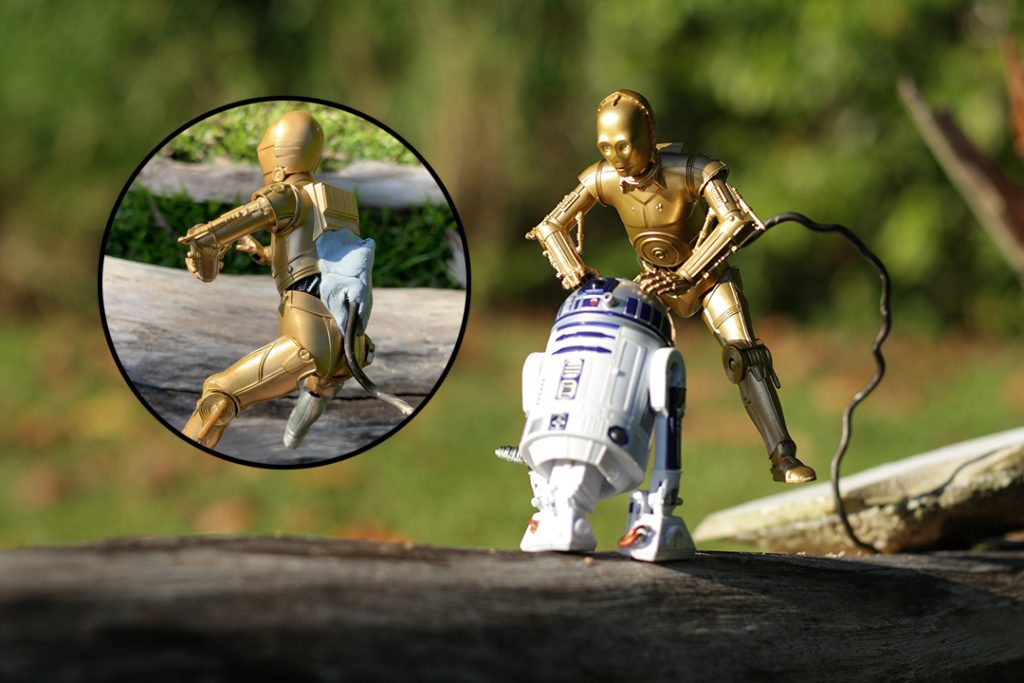
I do a lot of 3-D stereo photography so wires are particularly tricky for me. When you clone wires out of a stereo photo, your brain highlights any incongruity between the cloned texture in each photo and it will look like it’s “flashing.” To avoid this I try to use simple backgrounds with little texture so the cloning is consistent between the shots. But when I can’t use a simple background I work hard to hide all my wires behind my subjects, unless I’m shooting 2-D only—then I just put the wire or stick wherever is most convenient and clone away.
I prefer hot glue in-studio rather than sticky tack for connecting figures to wires (and I’ve heard recently about cordless glue guns for outdoors). It holds solid with very little glue and allows you to suspend toys on horizontal wire at greater distances. It also detaches quite well from figures and I have yet to damage any printing on my LEGO. With minifigs I usually use 20-gauge steel wire from the dollar store, but I often use bamboo skewers for heavier action figures. On the fly in the great outdoors, I just use any ol’ twig I can find nearby and wedge it wherever I can.
Hiding wires is not too complicated. First choose your camera position. Second, hold the figure where it is going to be positioned and then keep in mind a point that is hidden behind it. Measure out and cut a wire from that point to the figure and glue both ends. With the camera in the same position every time, repeat these steps for every object you want to float. It’s not really that time consuming and requires no retouching after you shoot.
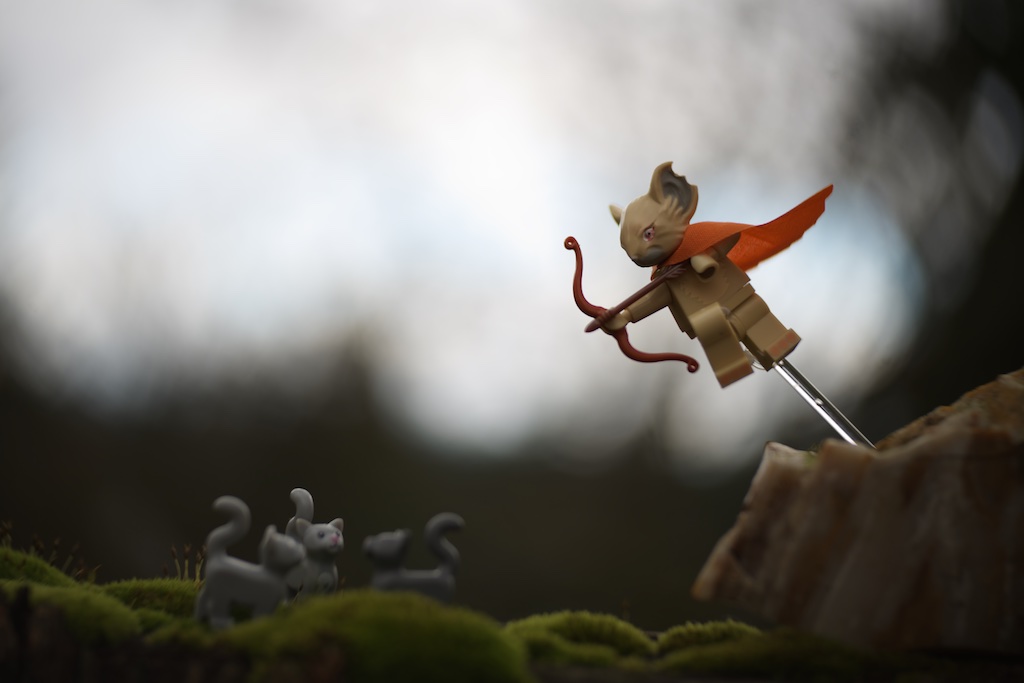
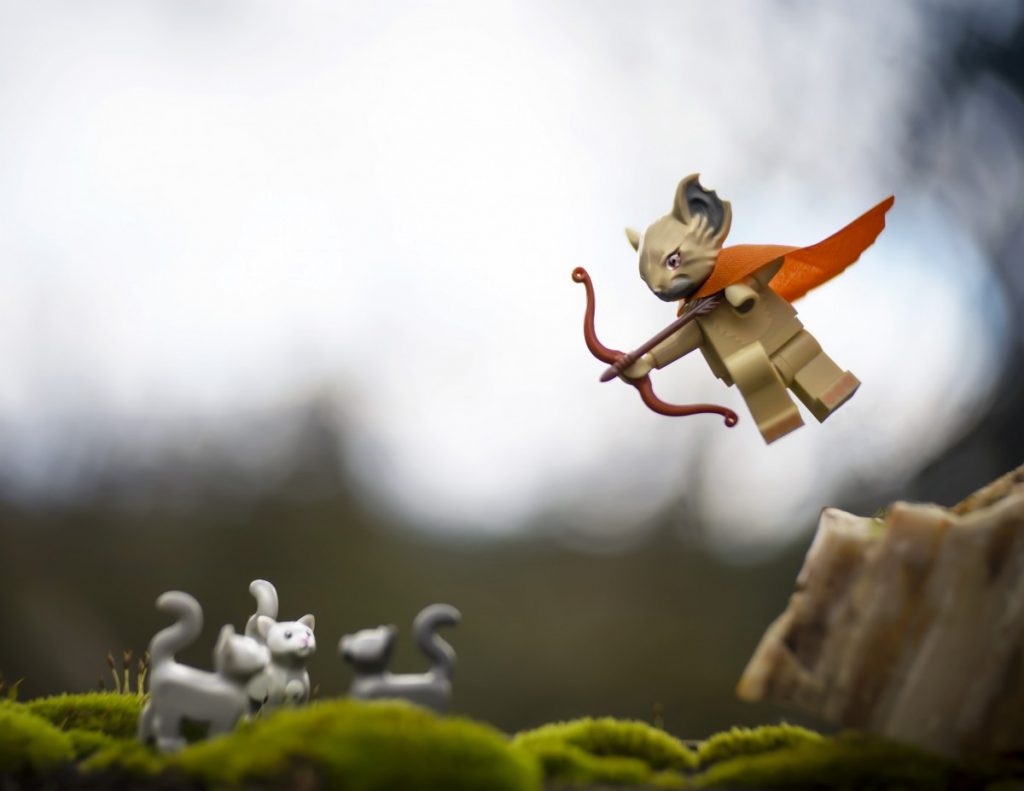
Tomasz Lasek
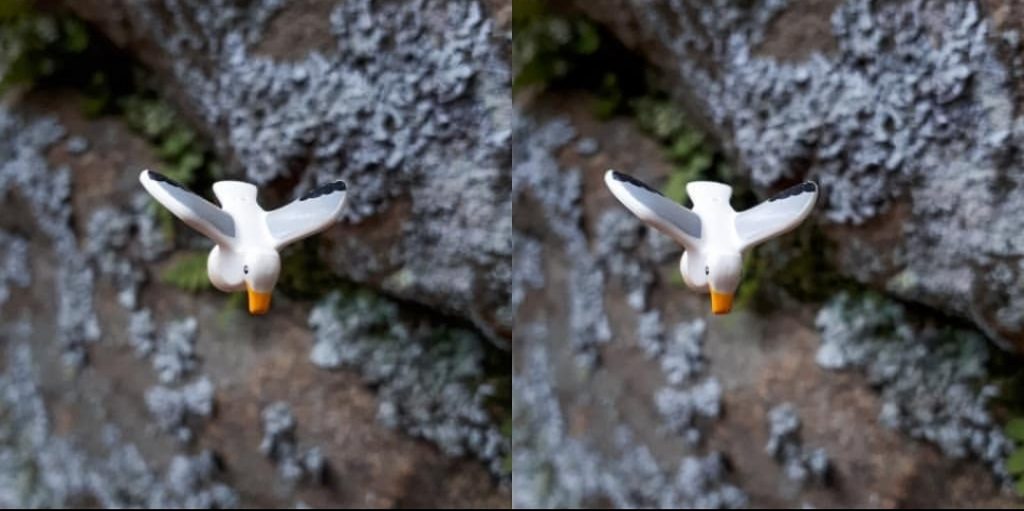
I love taking various action shots when minifigs are jumping, flying, falling or just floating in space.
Unfortunately, fate spoiled my telekinetic abilities [not to mention that both hands are usually needed for telekinesis and they usually hold the camera or other utensils], so I have nothing more than to use wires and other stands for minifigs.
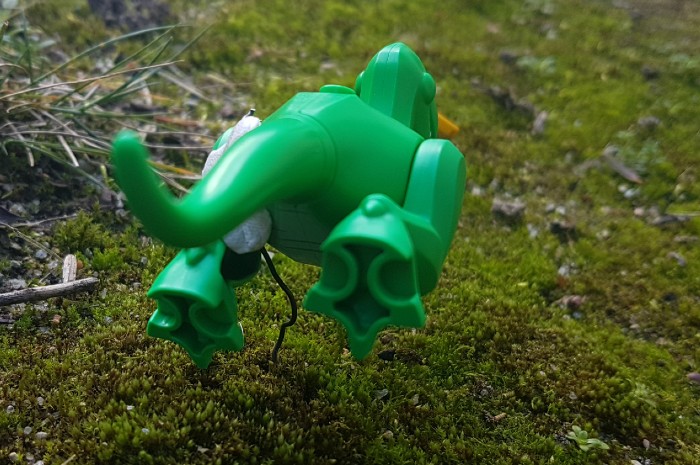
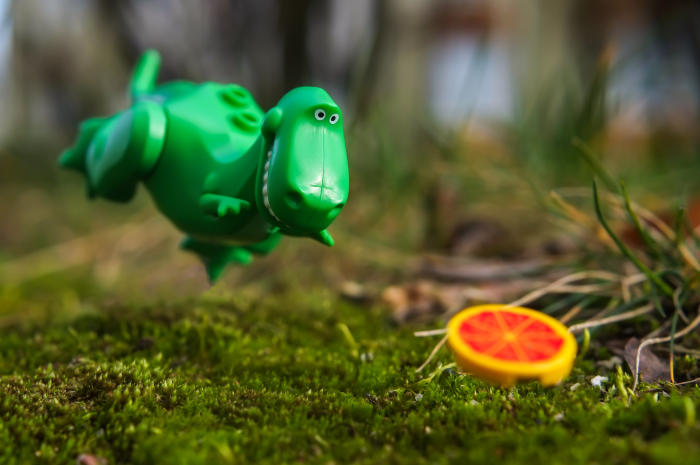
Usually I use quite soft and flexible aluminum wires of varying thickness. In most cases they are enough. I attach them to my plastic heroes using blu tac. But sometimes the wire is not enough, especially when conditions are difficult [e.g. wind or too-soft ground]. For such occasions I have a few carefully selected sticks that perfectly match the holes in the feet of minifigures. Sticks are at the same time thick and stiff enough that when stabbed into the ground, they do not tilt under the weight of the minifig. Sometimes I also use a 1 x 12 trans clear bar [which Shelly talks about next], especially when shooting indoors or in water. I also use a third hand tool, like Shelly describes, to hold the wire or bar when shooting at home.
Generally speaking, I choose the type of minifig support depending on my needs. Wire is very useful—the only problem is to stick it in the ground/base in such a way that the minifigure doesn’t move.
So far, I haven’t learned the clever technique of taking two photos—with and without a minifigure—and magically connecting them with the computer, so I use the tools offered by the Touch Retouch app and I remove the stand from picture. This app is really handy and may be even better than telekinesis!
Shelly Corbett
I’ve used all the above mentioned techniques to get my toys to “fly.” I love the wire and tack version, but it can be a little temperamental. And while I think the hot glue gun is brilliant for adhering wire to a figure, it takes advanced planning. There is one more method I want to share with you. While this is my go-to method, it only works for LEGO minifigures: the 1 x 12 trans clear bar.
I carry several of these in my traveling toy box at all times. With a 1″ x 12″ trans clear bar I’ve made a bike fly, sent a turtle shredding, and even launched a mouse into mid-air. The advantage of these bars is that they attach firmly to a minifigure. They can also be combined together for a longer reach and the clear plastic nearly disappears under certain conditions (the magic of a LensBaby lens).
Since there is no pointy end to a trans bar, I carry a small hand clamp with me. This handy tool stabilizes the bar or can hold a bounce card in place. Consider it the third hand you never knew you needed in the field.
Of course there are other trans bricks that you can use to raise your toys off the ground. I also carry a few trans bricks with me in my toy box. These are super handy to create space below vehicles like speeders and create an illusion of floating.

In conclusion
If you’ve ever wanted to create dynamic images with your toys, now’s your chance! We’ve shared four fantastic methods for you to play with. As David said: “a toy in motion—whether it’s jumping, falling or flying—will bring the shot to life in a magical way.” Like many techniques, it will take a little advanced planning to make your toys fly. But with the additional effort, you too will create dynamic toy photos.
Now we want to see your toys fly! Feel free to keep tagging your photos #tp_leap and we will see you on the interwebs. If you want to take part in future MeWe challenges, join our community here.
~ Shelly


Thanks for all this great tips !
great tips! i’ve used the wire and tack trick but shooting the scene without the character in it is new and brilliant!
Lara – yup! This is a clever community! So glad you found this article helpful!
really appreciate you sharing some of these tips.. i think this is something more people would like to do to take make some of their pictures ‘come alive’ and think its a lot of fun.. thanks for the ideas!