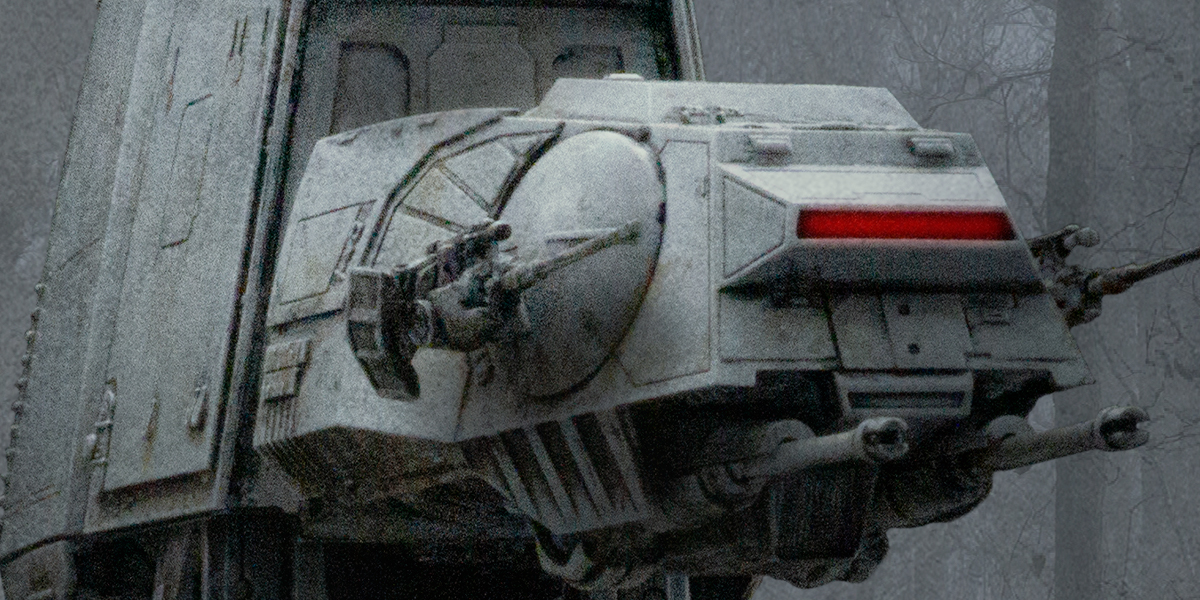
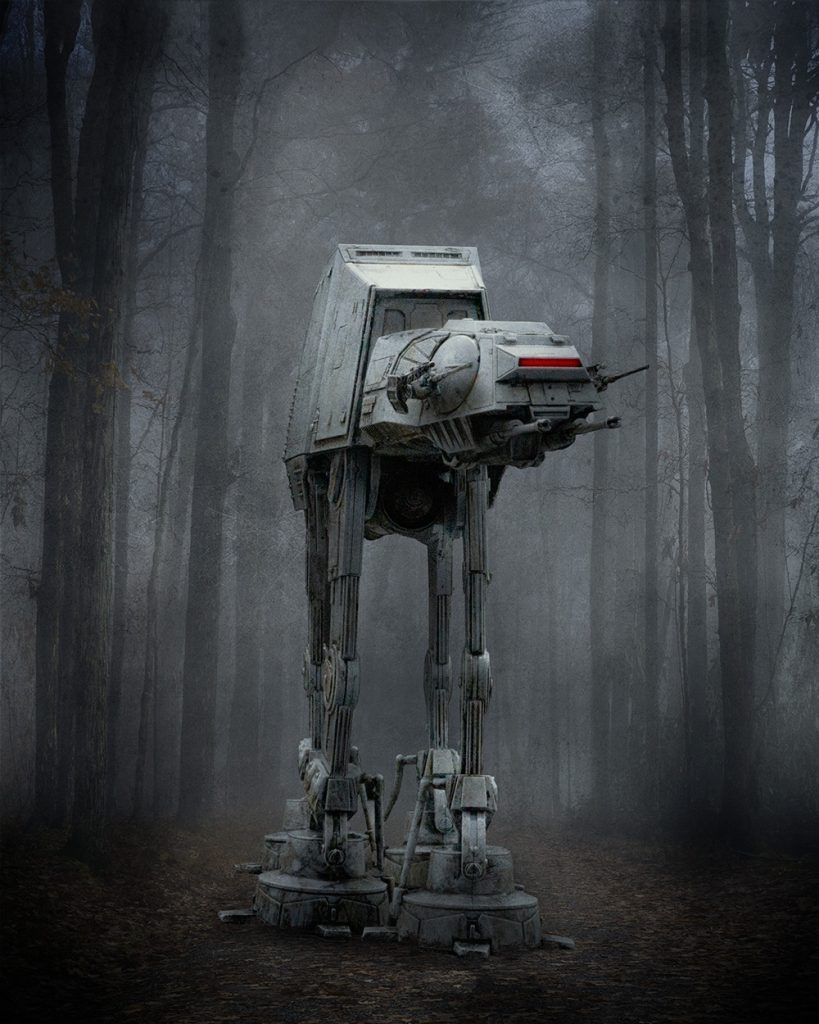
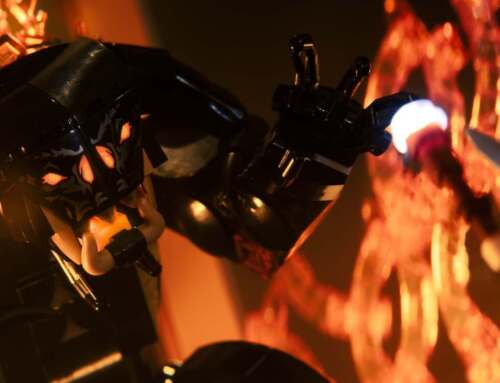
For my entire toy photography career any non-LEGO shot I took used pre-made models. Aside from some props, what came in the box gets put directly in front of the camera. I was inspired to try something new, and I ended up with this image:

This post is a behind-the-scenes story of how I created the photo above.
Making the model
A few months ago I started watching Adam Savage’s Tested on YouTube, which is all about making props and models. A large part of making these things is the paint job that takes a shiny bit of plastic, foam, wood or metal, and makes it look worn and used. This is a process called weathering.
I am not very good at building things with my hands, but I found the idea of weathering objects to make them old looking—and in the process more realistic—incredibly fascinating. I decided to give it a go.
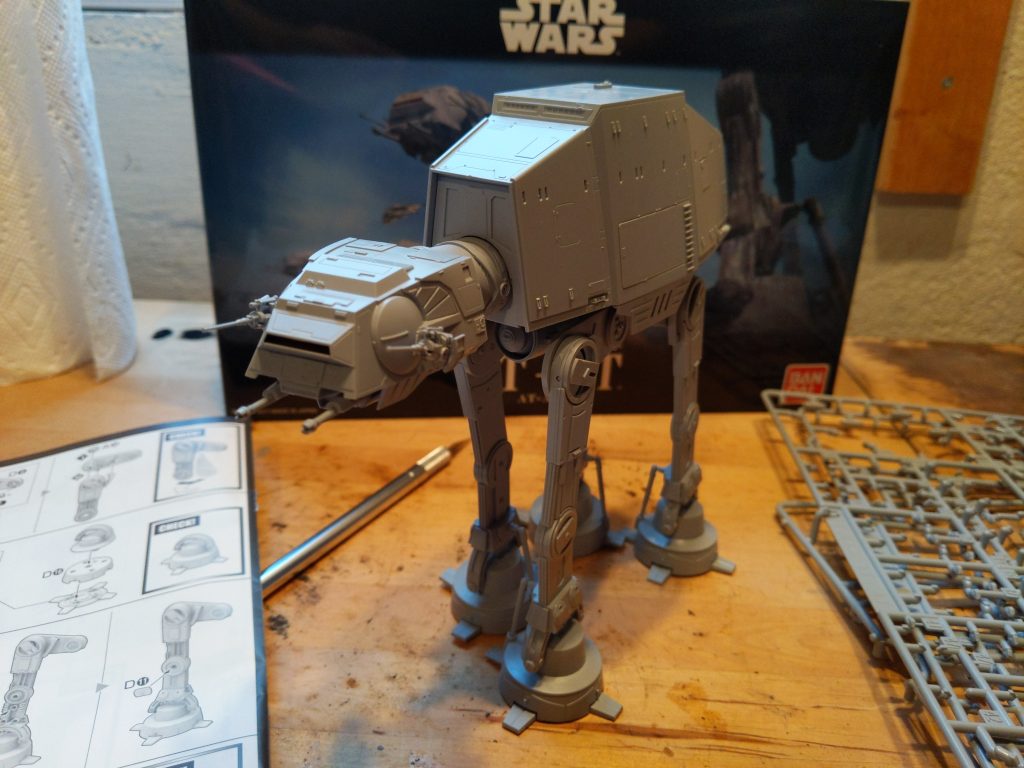
So I looked for a model that was easy to assemble, and came across a Bandai 1/144 scale AT-AT, which I purchased, along with a mess of paints, brushes, and various other model-making tools.
A few hours later I had this model assembled.
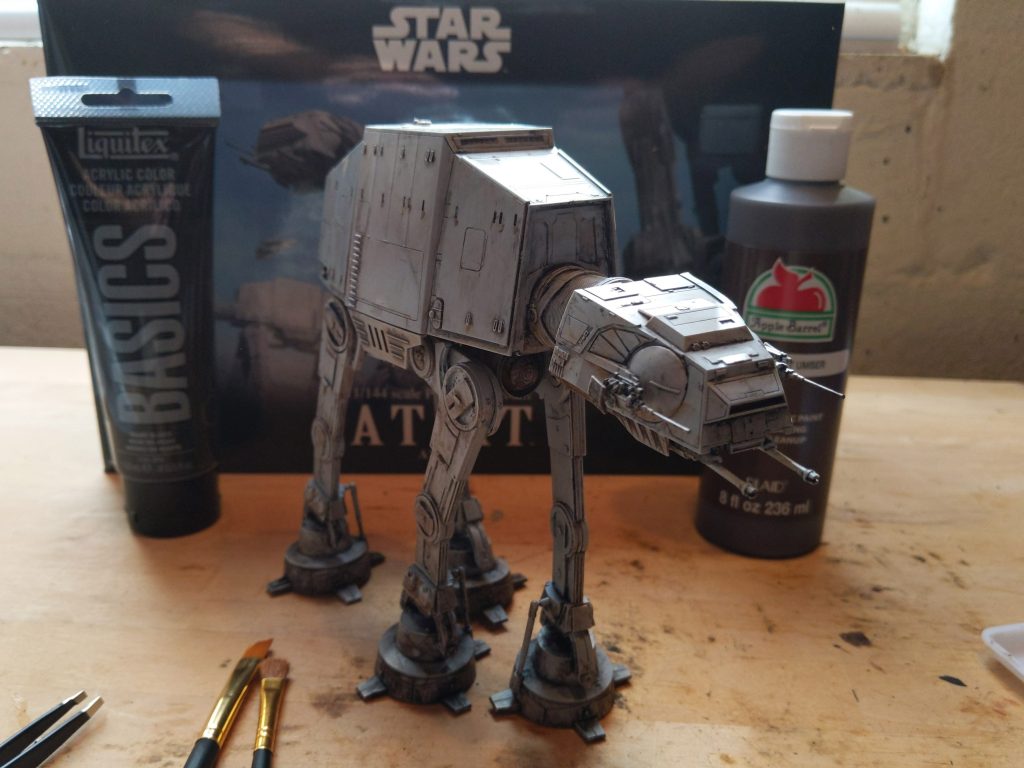
I had a model of an AT-AT, but now I had to decide how to paint it. Traditionally, AT-AT walkers are known for being on the ice planet Hoth. However, they can theoretically exist anywhere. In fact there was one guarding the shield generator on Endor.
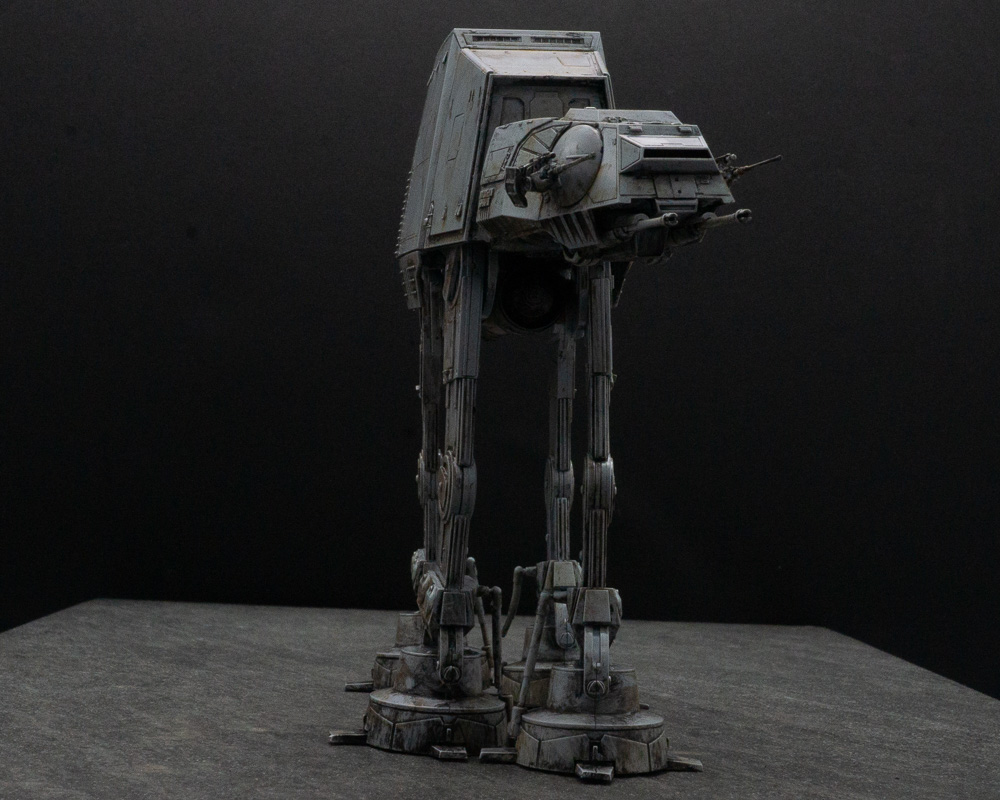
Not being a traditionalist, I decided to paint my AT-AT as if it had spent its life deployed on Endor. I grabbed my paints and a paint brush used for the prop-weathering techniques I learned watching Tested, and aged up my freshly made AT-AT model.
This is the result.
With the model taken care of, it was time to make an image.
Deciding on the concept
So the first question I had to answer was what image I wanted to make. I decided to see if my photo archive would provide some inspiration. Endor was shot in the redwood forests of California, which I visited previously, so I had hopes.
I went to Google Photos and searched for images of forests.
(As an aside, I highly recommend uploading your photo archive to Google Photos as the AI behind the photos search is *AMAZING*. Thanks to Photos search, I have found more elements for my work in my archives than anywhere else. It’s free. Use it. Thank me later.)
I didn’t have any suitable images of the redwoods, but I did find this rather interesting shot I took a few years ago in the mountains close to my home:
The background
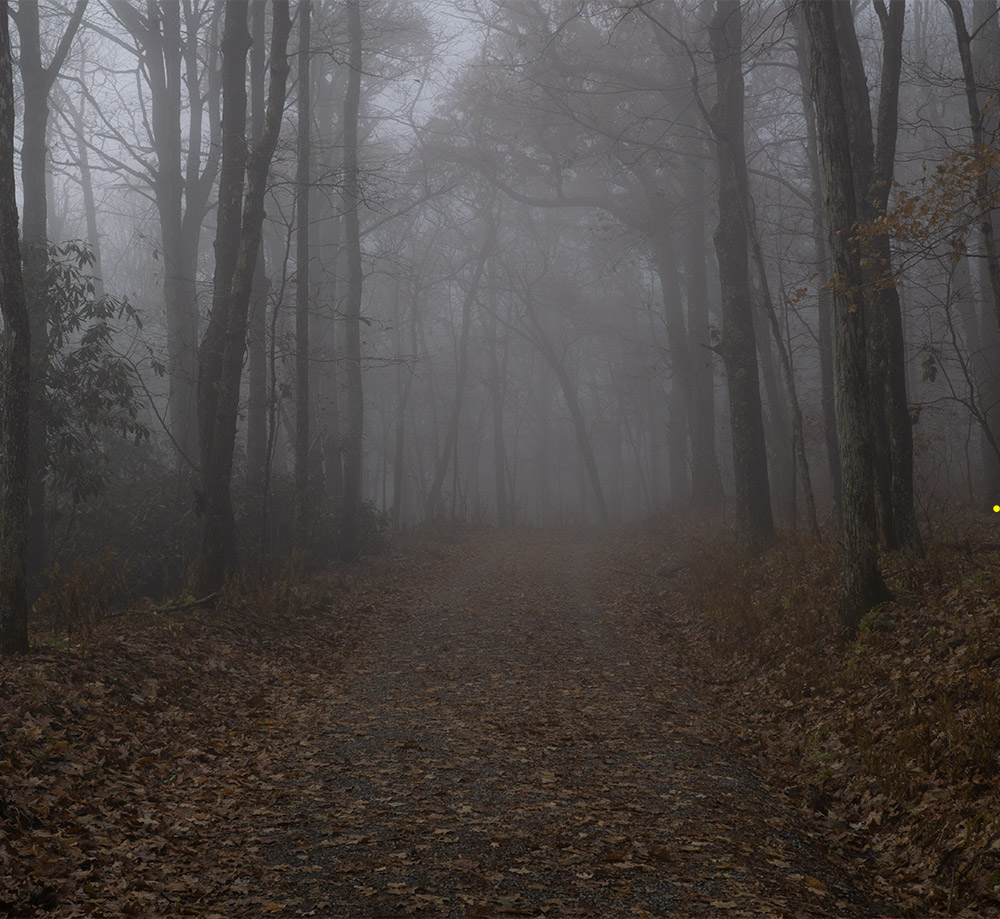
The atmosphere of the misty woods spoke to me. I figured it would make a decent analog for Endor. The problem is that the perspective is wrong. AT-ATs are 75 feet tall in real life, and this shot didn’t have enough height to make it work.
Such things are not a problem for someone armed with Photoshop (which solves all known problems). I played around with many options, but what ended up working best was the simplest solution: I shrunk the ground down in half, and stretched the trees by 2x.
This gave me the tall trees I needed for the shot. Now I needed to capture the model.
The model
Shooting the model was quick and easy. I set up the model in my lightbox, and posed it with the head looking off to the side. Then I adjusted the lights and camera settings to get a proper exposure, and hit the shutter.
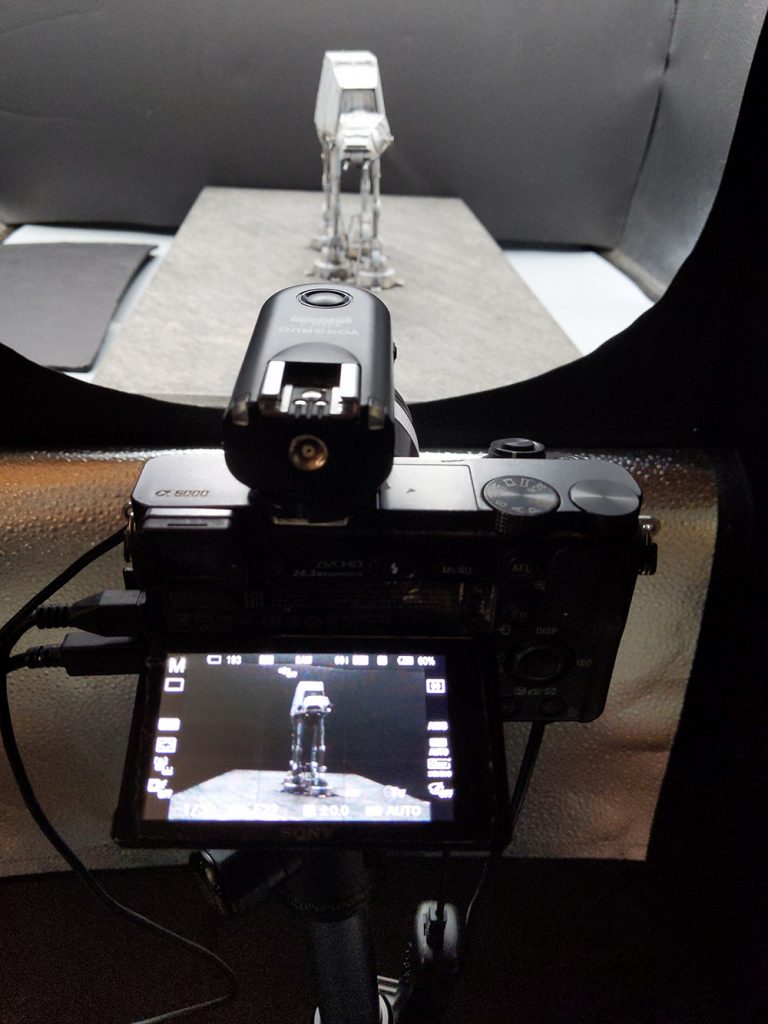
There are many things to consider when doing composite work—direction of light, focal length, color balance, etc. One of the more important ones is getting the horizon line correct. If the horizon doesn’t match between background and foreground it can ruin a composite.
I wasn’t sure where my horizon needed to be. To solve this, I simply started with a very low horizon line by having my camera pointed low on the AT-AT, taking the shot, raising the camera a bit, taking another shot, etc., until I was sure I had the right horizon somewhere in the shots I took.
Then I imported the images into Photoshop, picked the shots with the right horizon, deleted the rest, and got on with the process of merging the two images.
The image with the correct horizon line looked like this straight out of camera:
The final image came together quickly, with some colour matching and some texture overlays.
Final thoughts
I was super pleased with how this image came out. It looks surprisingly realistic (as in something that would have come from Lucasfilm). However, when I thought about it, this doesn’t seem overly surprising, as compositing models into shots was exactly how the Star Wars trilogy was filmed in the first place.
So really, what I ended up doing is going back to the original way the AT-AT was brought to life, which is kind of cool, if you ask me.
I have already ordered the next model I plan on making, painting and shooting. Old school, sometimes, is the best school.
[dave]
Want more toy photography goodness? Subscribe to our weekly email round up so that you never miss a post. You can also listen to episodes of the podcast!


Leave A Comment