I’m super excited to share this technique with everyone. Dubbed ‘Light Stenciling’, it’s a trick I’ve used in multiple shots, and I’m always floored by the results. It’s easy to pull off, doesn’t require a ton of gear and can add a really cool effect to your toy photography.
What is Light Stenciling
Light stenciling is a process of placing a stencil between a light source and your camera in order to burn specific, pre-defined shapes into your exposure. You can keep the stencil in place during your entire exposure, or move it out of the frame while your shutter is open to allow your background/ambient light to bleed in.
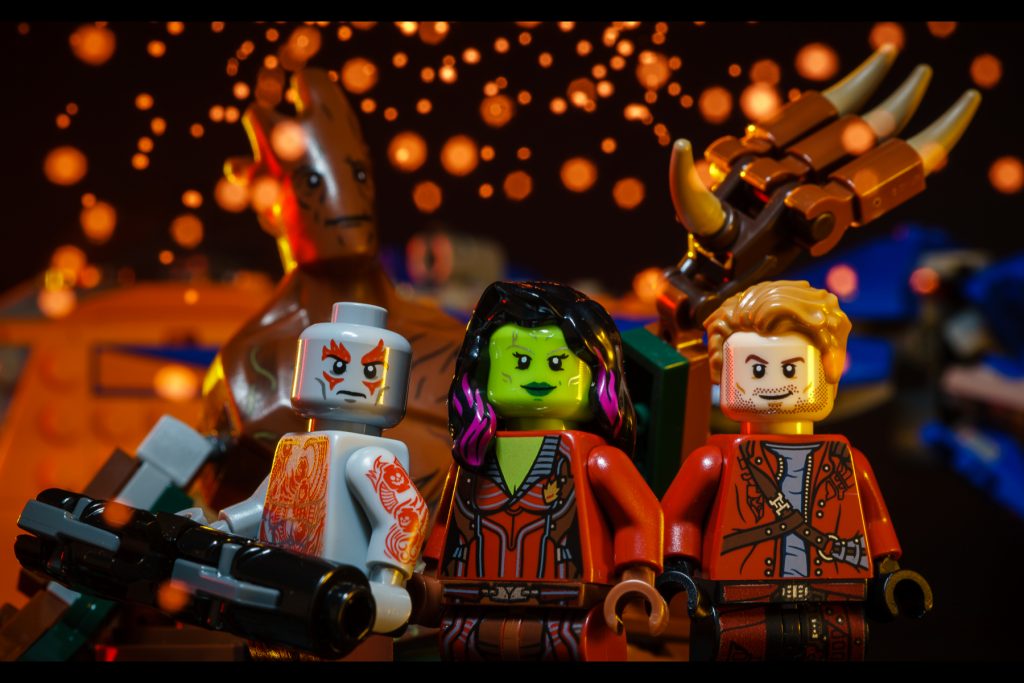
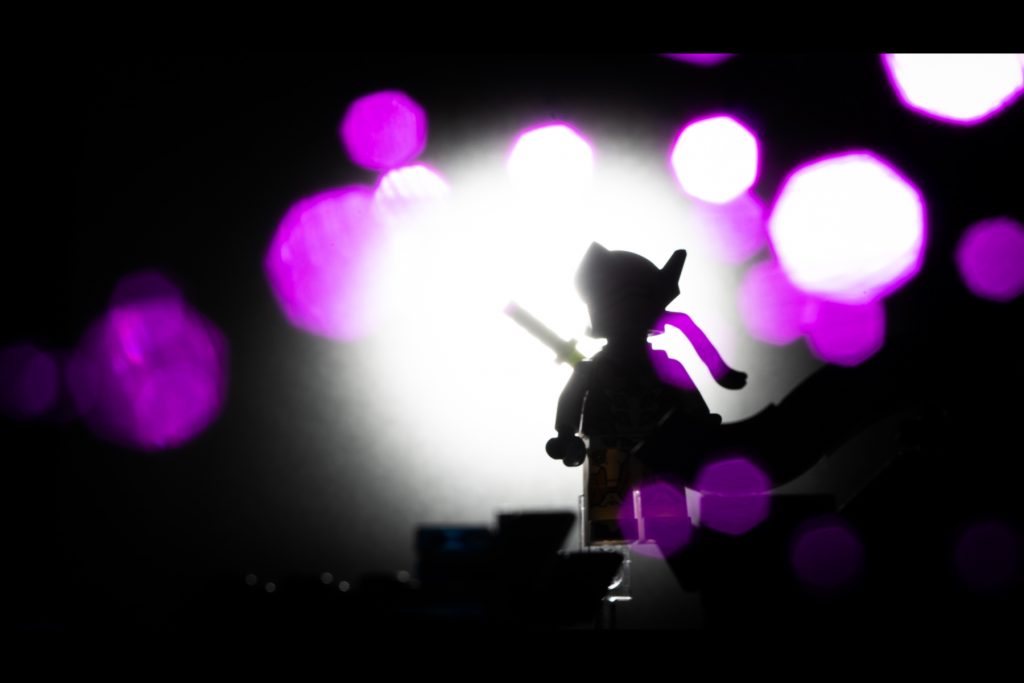
I’ve used this effect for everything from Guardians of the Galaxy to Overwatch and it’s one of my favorite, practical effects to achieve in camera. Here are some examples:
Why not use Photoshop
Before we get into the technique, I wanted to address a question I get asked on Instagram all the time. Why not just use Photoshop? Sure, you absolutely can do this type of effect in Photoshop if that’s your prerogative. For me, one of the biggest draws of toy photography is creating these types of effects practically, in camera. It’s a fun, creative challenge, and super rewarding when you nail it. I also completely suck at Photoshop, so there 🙂
Materials needed
As I said in the intro, there isn’t a ton required to pull this effect off. You’ll need black paper to create your stencil, a light source such as a flash light or strobe and a camera that allows you to control your shutter speed.
If you have off-camera flashes, those will be much easier to work with, but if not, any light source that you can quickly turn on and off will do the trick.
Be sure to bring along some patience, as with my other tutorials, this one is going to require trial and error in order to get the look you want.
Getting Started
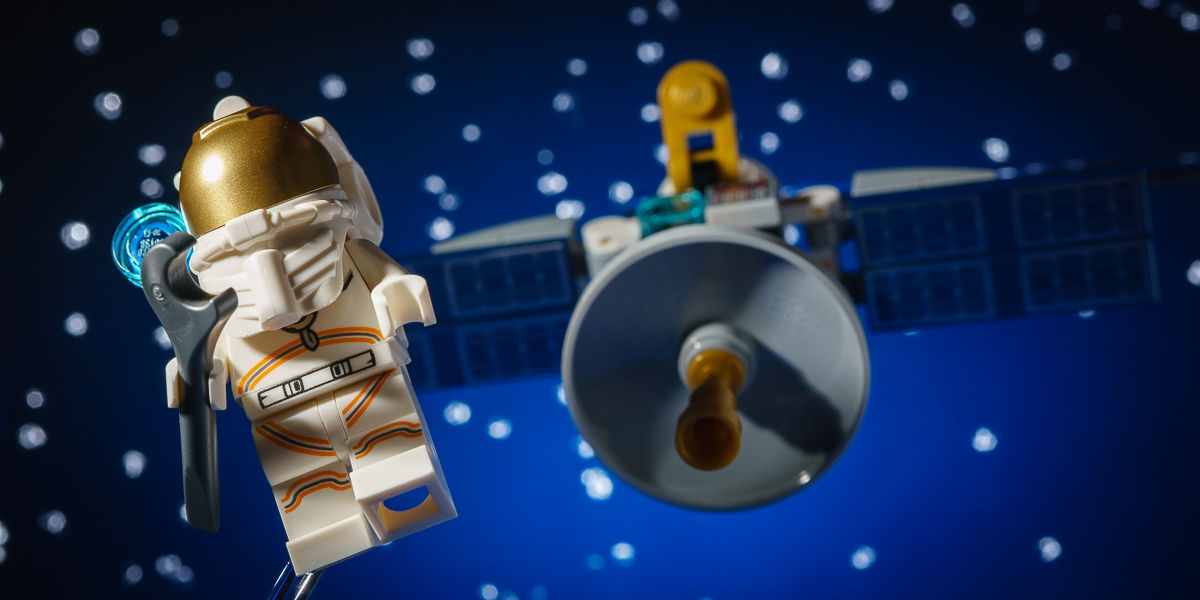
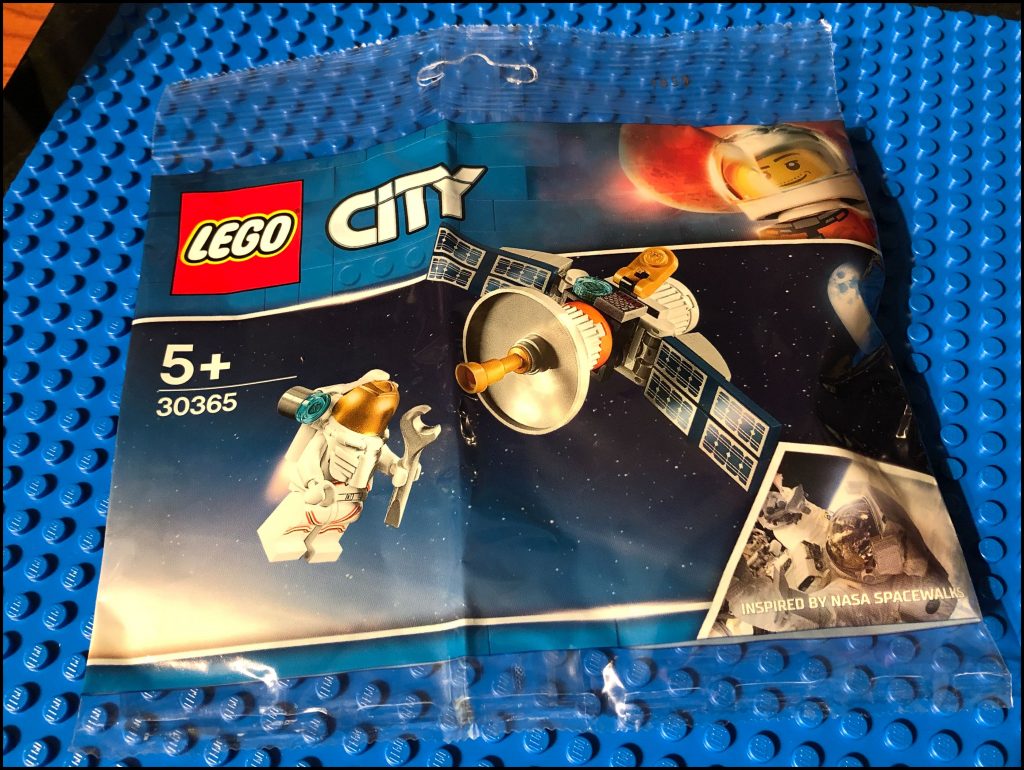
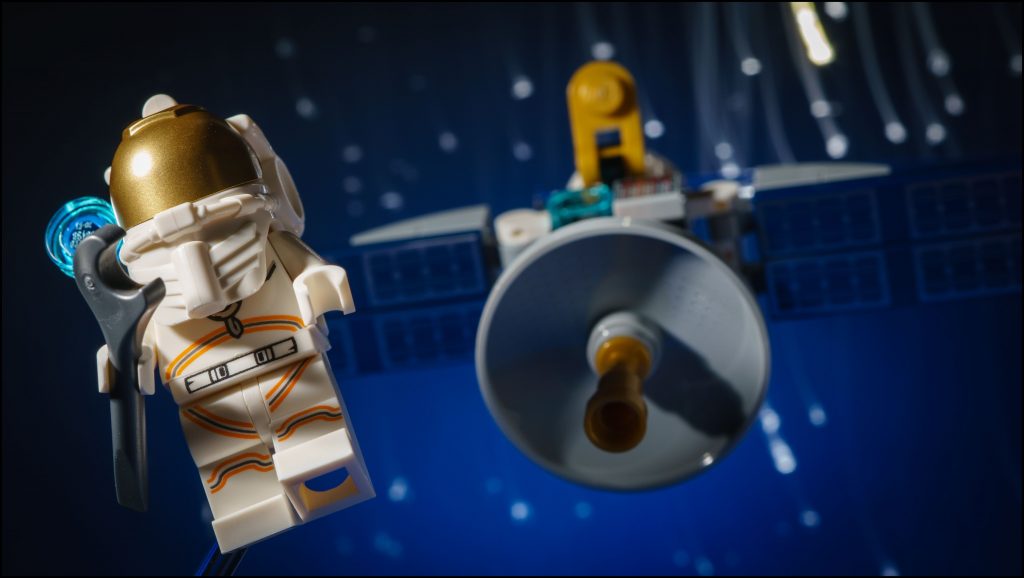
Before you begin, think about the effect you want to pull off. For this tutorial, I’m going to recreate the satellite repair scene pictured on the front of the LEGO City polybog 30365. I’ll be using my stencil to add stars to my shot.
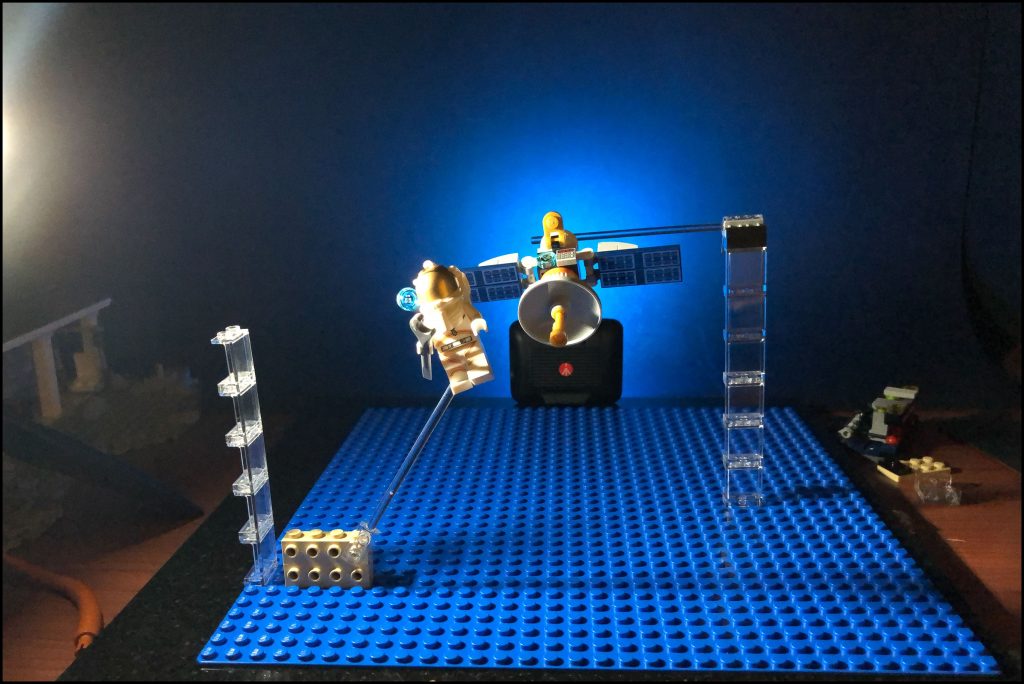
Make a Scene
Here’s my quick and simple setup. I’m using a Manfrotto Lumimuse 3 to light my subject and another Lumimuse 3 with a blue gel to light my background.

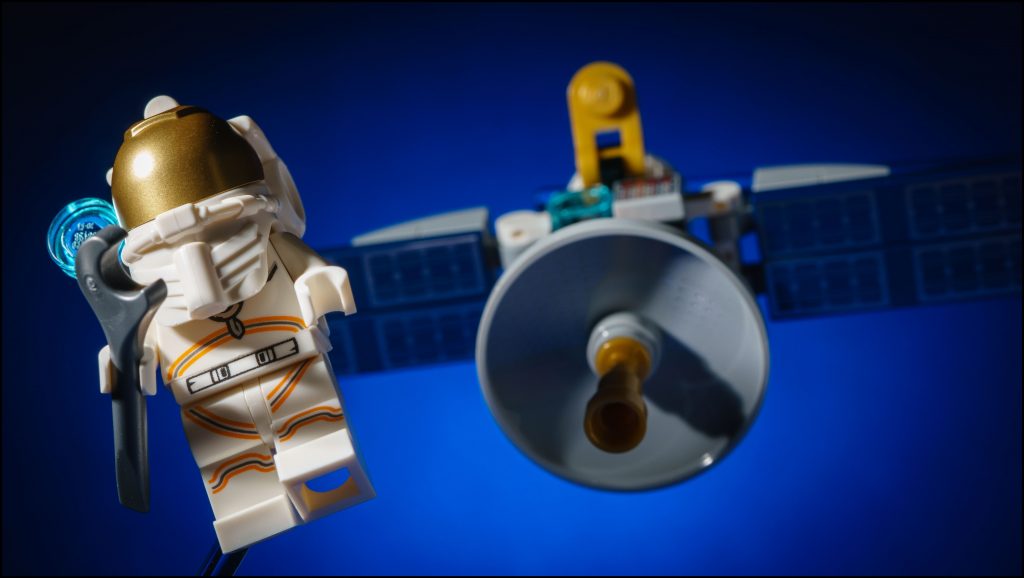
Here’s what my shot looks like before I introduce the stencil.
50mm (FE 50mm F2.8 Macro)
Create your Stencil
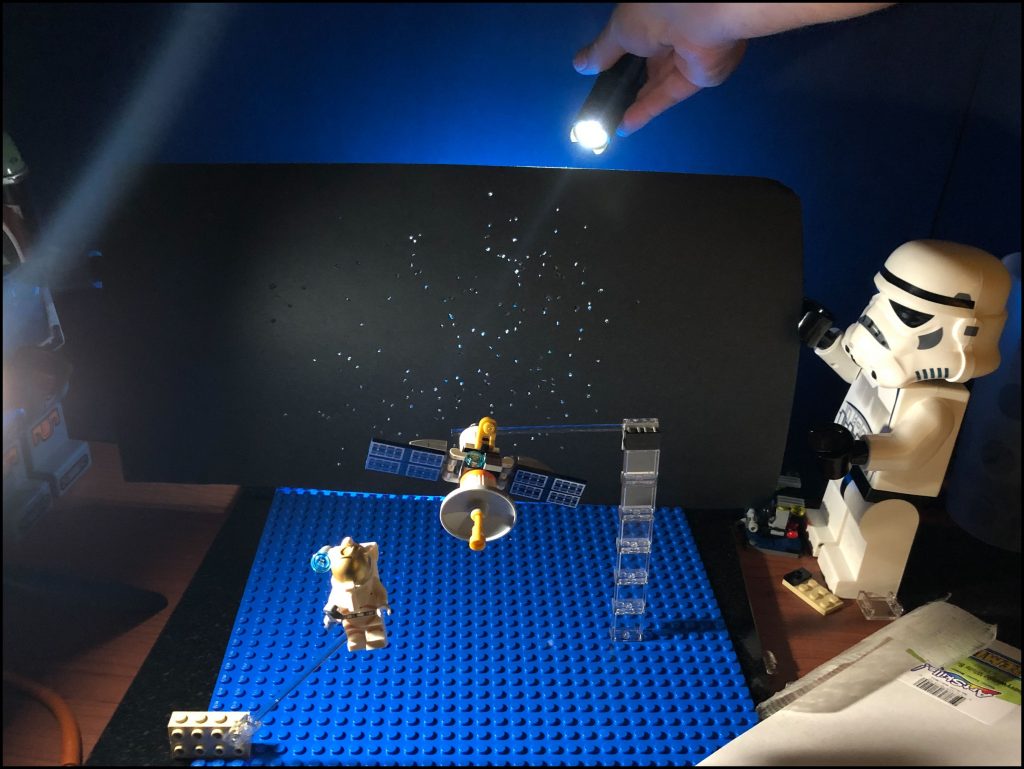
With my scene set and my exposure dialed in, I’m going to use the black paper to create my stencil. I’ll start by cutting the paper so that it completely covers the scene.
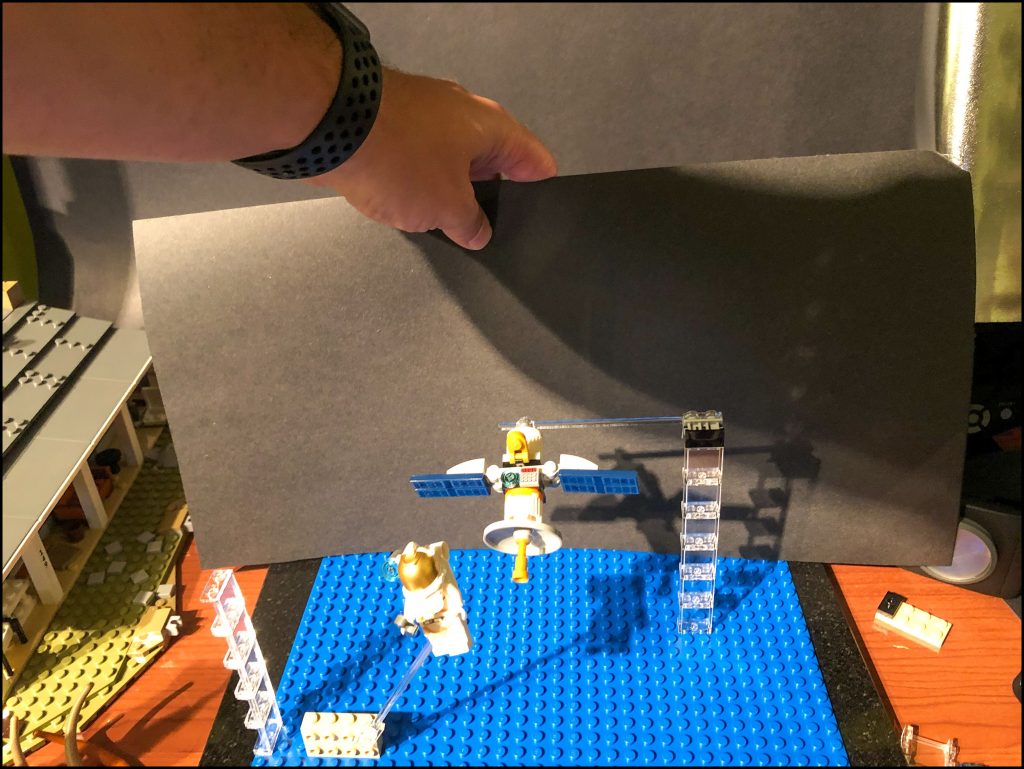
Since my goal is to add stars to my shot, I use a pushpin to punch a bunch of random holes in the paper. I’ll then put my light source behind the stencil and point it at my camera to illuminate the holes.
Take the Shot
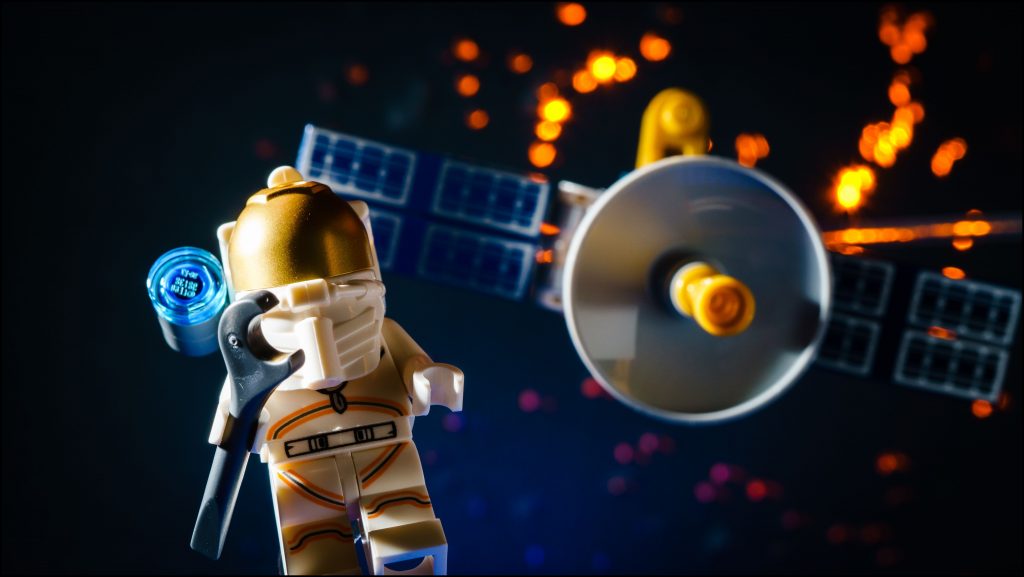
You’ll need to do some experimentation with your shutter speed to allow you to balance both the exposure of your subject, stencil and your background. In my case, I started with a 3 second exposure and worked my shot like this:
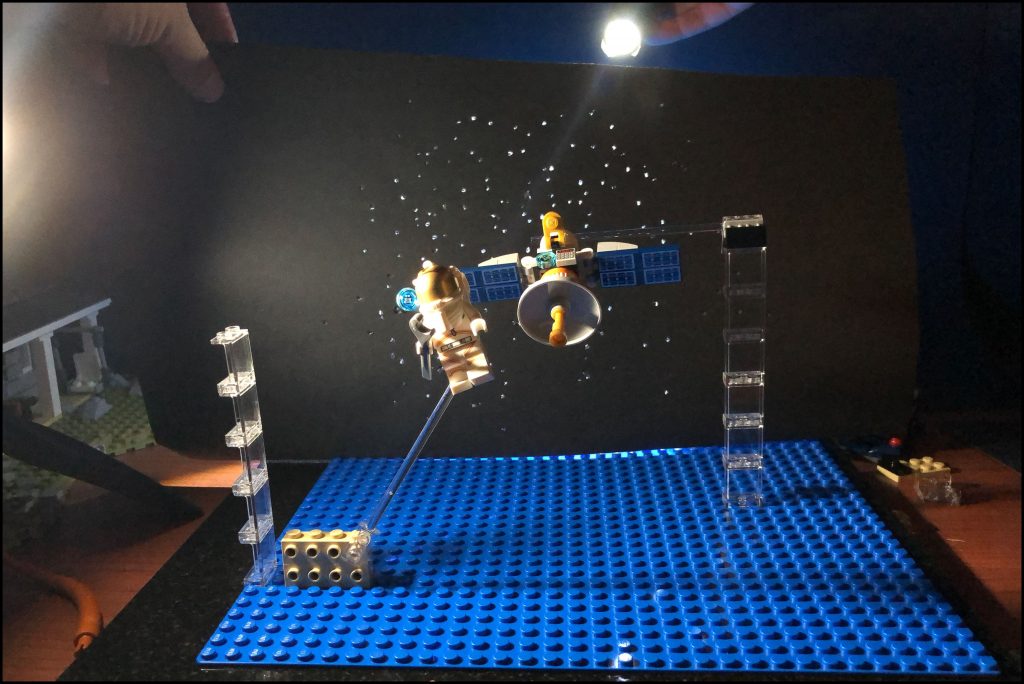
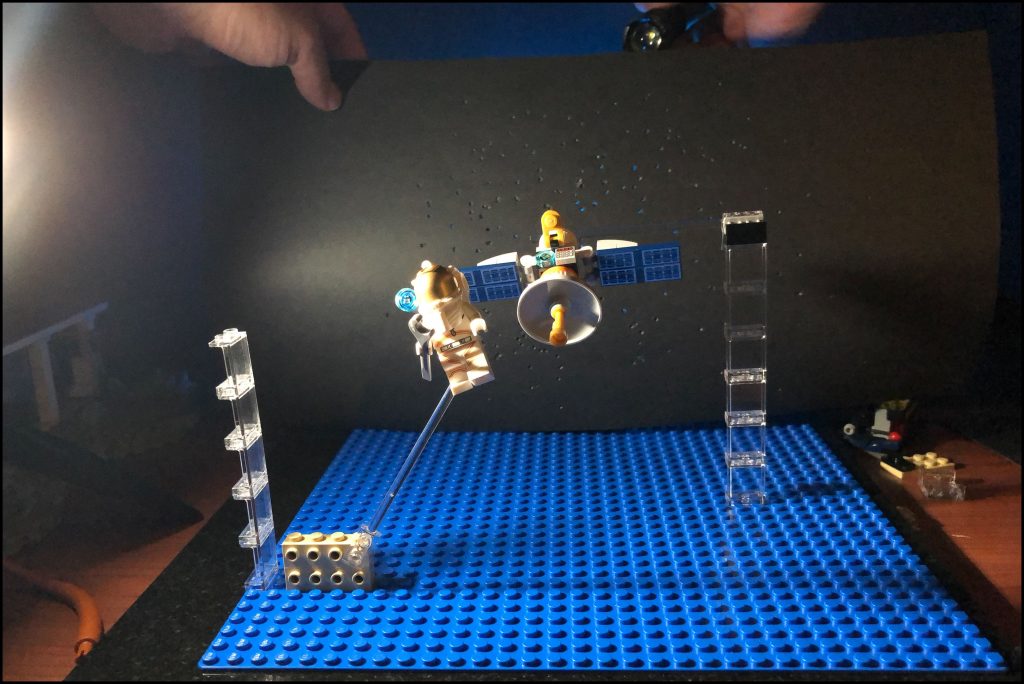
I split the exposure 50/50 between my stencil and my background, but you may need to change this depending on your scene and the look you’re going for.
Here’s my image with both the stencil and background. I used a flash to light my stencil, so my exposure time is much shorter than when I was using a flashlight. Your mileage will vary depending on the intensity of your light, so make sure to adjust accordingly.

50mm (FE 50mm F2.8 Macro)
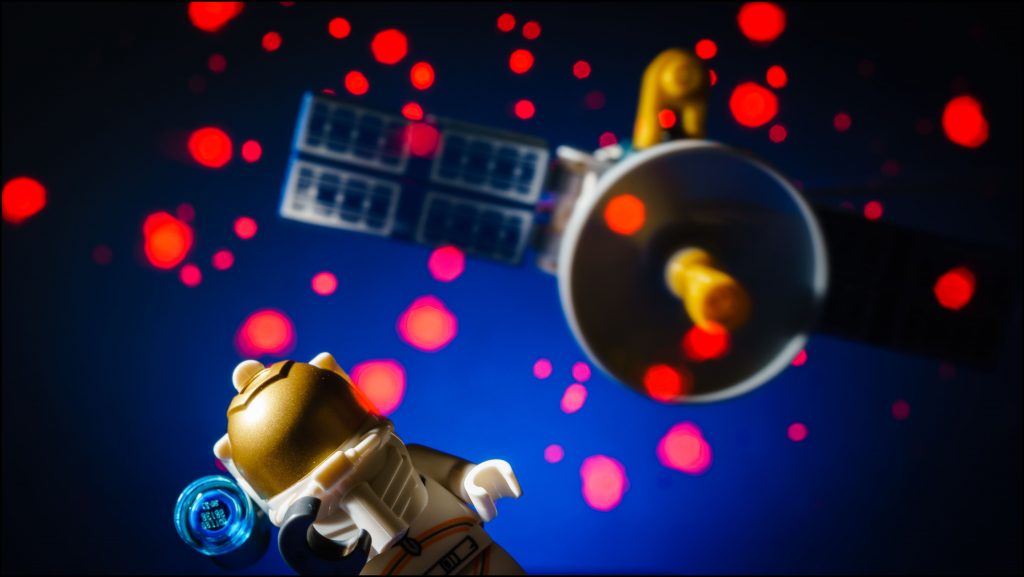
It’s important that you turn off your light source as you pull your stencil out of the shot. Otherwise you could end up with streaks of light which could ruin the effect (or look super cool).
Advanced Techniques
Once you get this technique down, there are plenty of ways to build upon it. You can add color to your stencil light, vary the distance between your stencil and your lens, or even add the effect multiple times in a single exposure.
Closing
I hope you enjoyed this how-to, and that you give this technique a try. If you have any questions, please drop a comment below. If you use this technique, be sure to post a link to your photo for us to check out. Thanks for reading, and happy snapping.


Thanks for this wonderful tip!! And I agree with you that sometimes achieving effects in-camera is more satisfying!
Thanks! Glad you liked it. I love the challenge of coming up with practical effects. I have nothing against Photoshop, but seeing a shot come to life on my camera’s LCD screen is pure magic for me 🙂
Cheers!
Great post Alan, I look forward to trying this technique out! I agree playing around in camera is so much more fun than PS. Mostly because Im not that creative and I live by the happy accident.
Thanks for sharing your knowledge!
Thanks, Shelly. This post only scratches the surface of what you can do with this technique. Can’t wait to see what you do with it 🙂 All hail the mighty, happy accident to spur creativity!
Really interesting. Thanks Alan. I wonder if this could work with phone photography? I can control shutter speed a little. Maybe I will give it a try!
You can do this with phone photography, but depending on your device, you may need an app that will allow for 1 second and longer shutter speeds. Natively, I think the iOS camera can do 1/4 second – but there are apps like Camera+2 that will allow you to go beyond that.
Good luck, and let me know how it works out. Thanks
Just checked and my Samsung let’s me go to 10 seconds. A very quick test resulted in an entirely white photo ??? so I’ll need to practice.
Very cool concept, that gives an awesome result. I look forward to giving it a go, thanks so much for sharing it.
?
My pleasure. I’m always happy to talk about the techniques I use in my photography. I’ve learned so much from others over the years, that it feels good to be able to share things that may inspire or encourage others to give something new a try. thanks so much!
So I set out to do this but ended up light painting instead. I’ll post something in the next week or so. Thanks for the inspiration!
I always love the behind the scenes and this is no exception. Now I feel like I need to redo my recent shots to add stars to the background! Perhaps another time… I think I’ll learn it before I try recreating something! ?
Alan,
this blog post is really amazing ??? such a simple and super impressive trick to create effects in camera. Big thanks for sharing ??
Appreciate the time you take to post on this site, it doesn’t go unnoticed.