If there’s one thing I could point to that makes the Star Wars aesthetic so unique is its gritty, lived-in quality. So, as a photographer of Star Wars toys, it should come as no surprise that I’ve started to experiment with achieving that look myself.
I’m certainly not the only photographer to weather my toys. So this isn’t anything new – just new to me. As a collector, a bit of a purist, and someone with a touch of anxiety and OCD, I used to shudder at the thought of scuffing up my action figures, especially permanently! Sure, it could help with a particular photo, but what if I don’t want that same look next time? Did I just “ruin” my figure?
I’ll admit that I haven’t conquered this anxiety completely, but I have finally started giving a choice few of my toys that gritty Star Wars look. My first test subjects: The fantastic line of Star Wars spaceships from Hotwheels that I recently wrote about.
While I think they’re a great way to achieve good starship photography, their major limitation is their lack of detail, despite a pretty good sculpt. Since I was attempting photorealism, I found it difficult to light and shoot them in a satisfactory way.
I’d heard that shoe polish can be effective for weathering toys, and that it wasn’t as permanent as something like paint. Two birds, one stone.
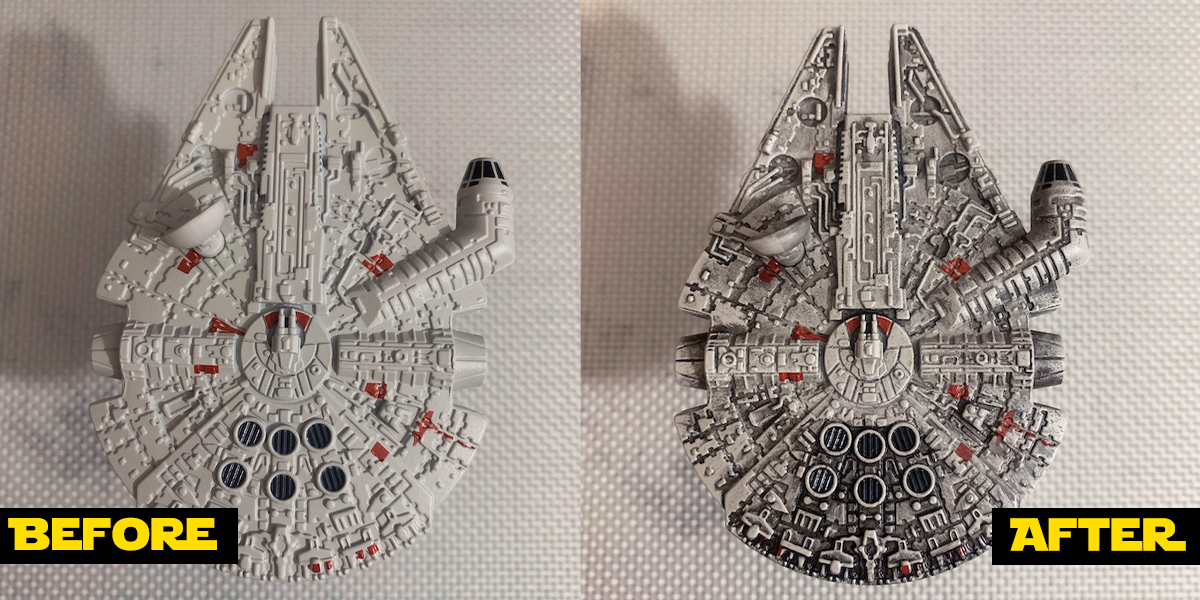
Method 1: Shoe Polish Paste
Before 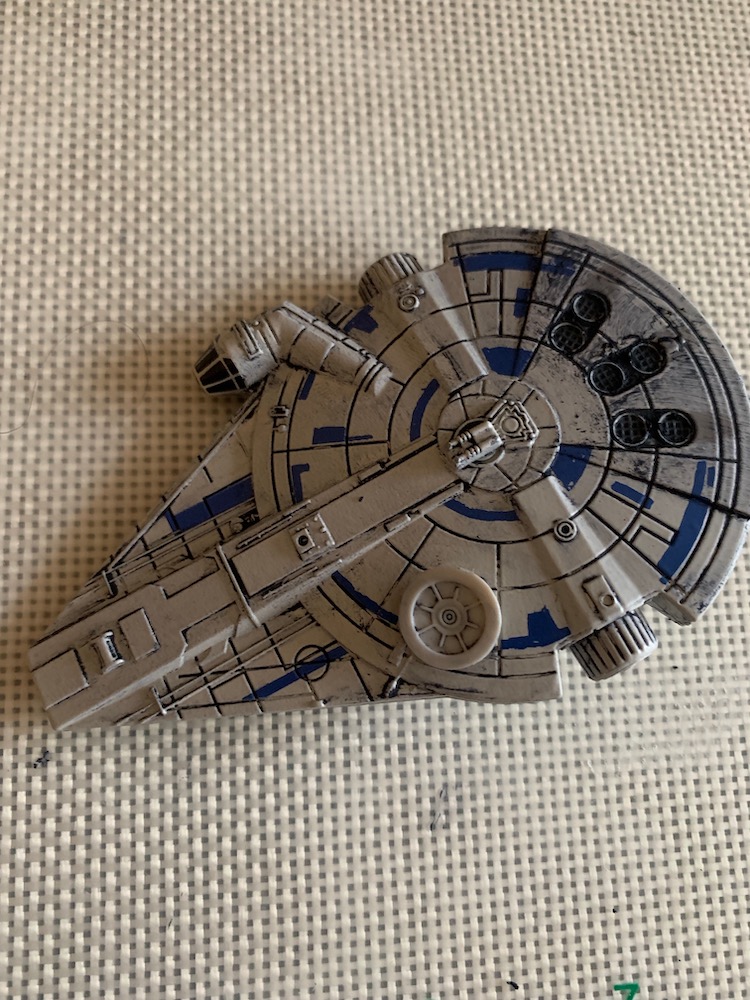
After
I tried two types of shoe polish, both found at the grocery store for less than $5 a piece. The first was a paste, which typically comes in a little round tin can. I found this a bit tiresome to use; it was a bit flaky and it left a thin residue, coating the ship rather than staining it. On the plus side, this actually helped it settle into the various crevices, bringing out the details.
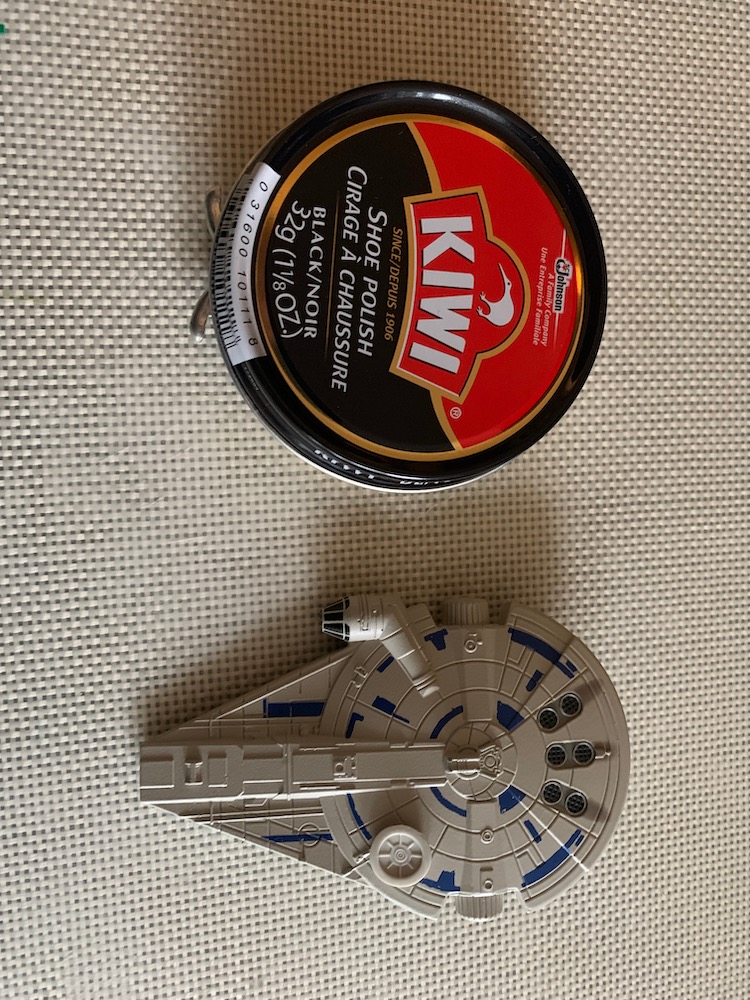
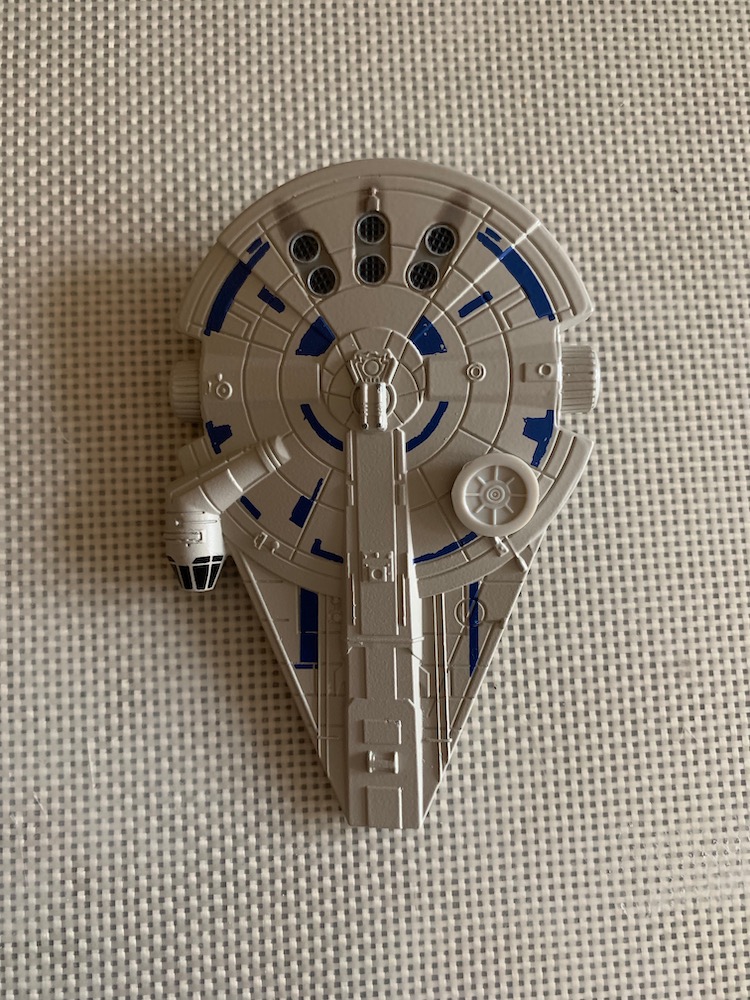
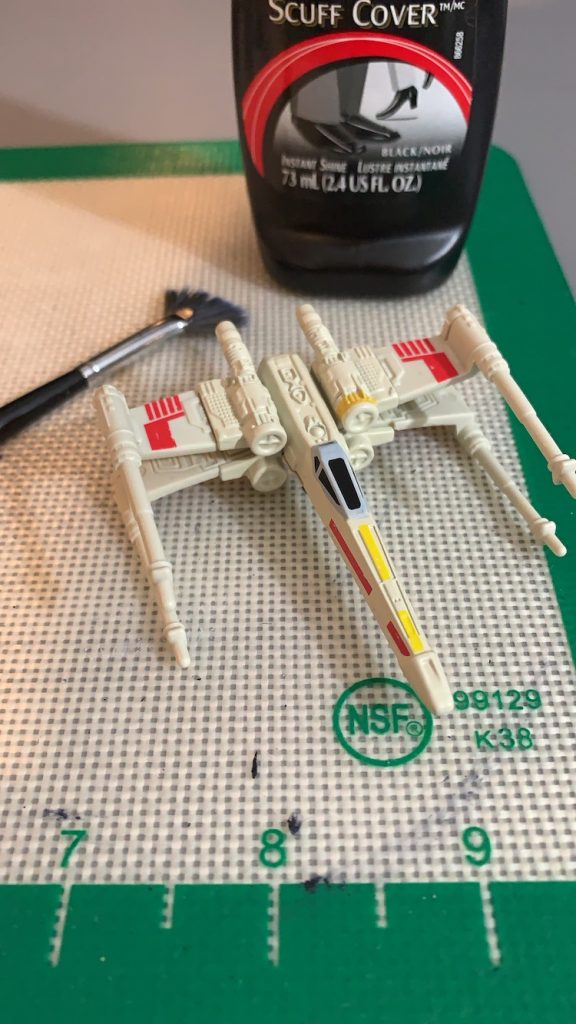
Method 2: Liquid Shoe Polish
Before 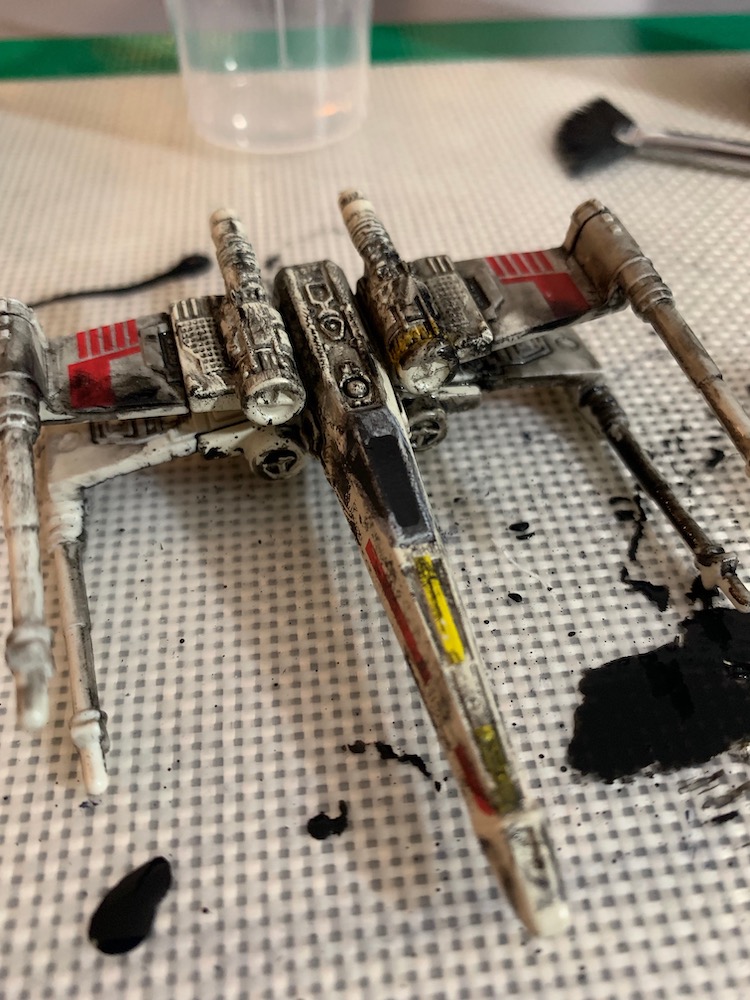
After 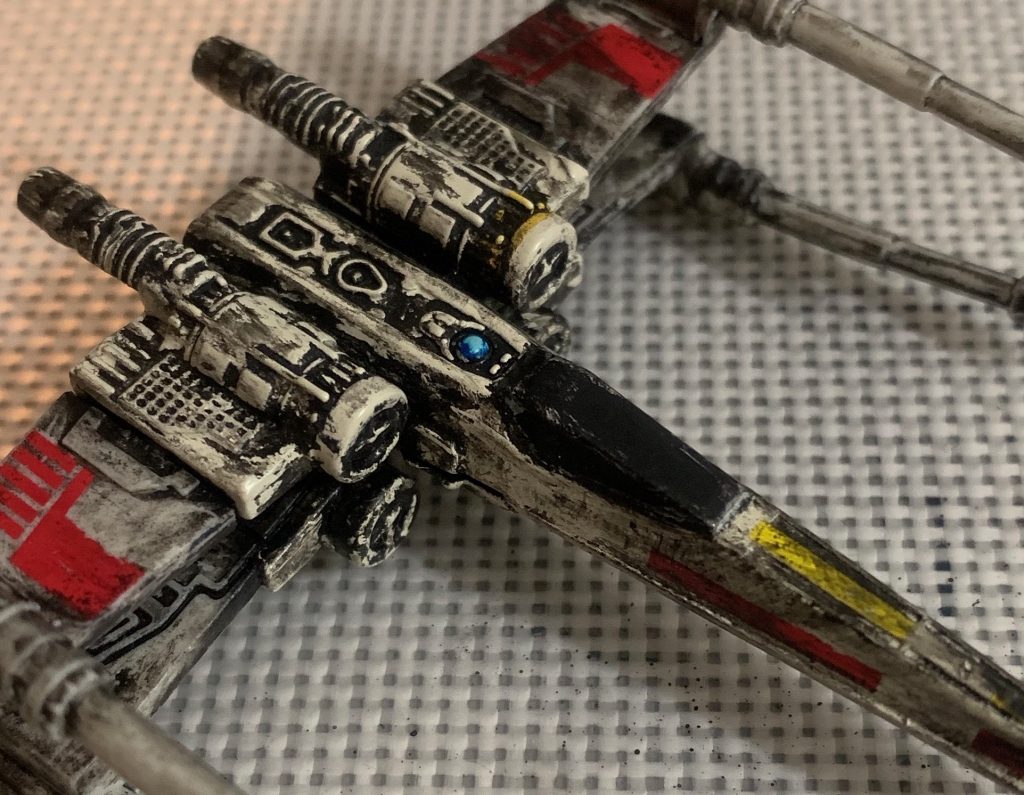
Don’t forget the Astromech!
The second method I tried, and the one I preferred most, was liquid shoe polish. I used an old makeup brush to “paint” it onto the ship, then wiped away the excess. I then used a blue Sharpie to paint in the blue dome of an Astromech droid.
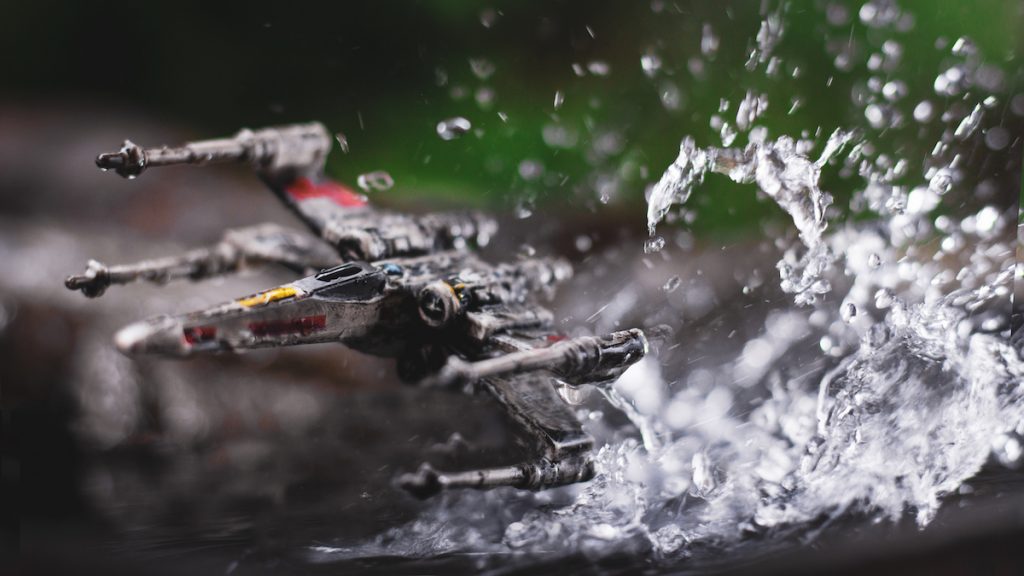
I tried paying special attention to certain areas, like around the engines and guns, and on the wings. The X-Wing was my first test subject, and I went a bit heavier than I intended, but I’m extremely happy with the result, especially once I got the ship in front of my lens!
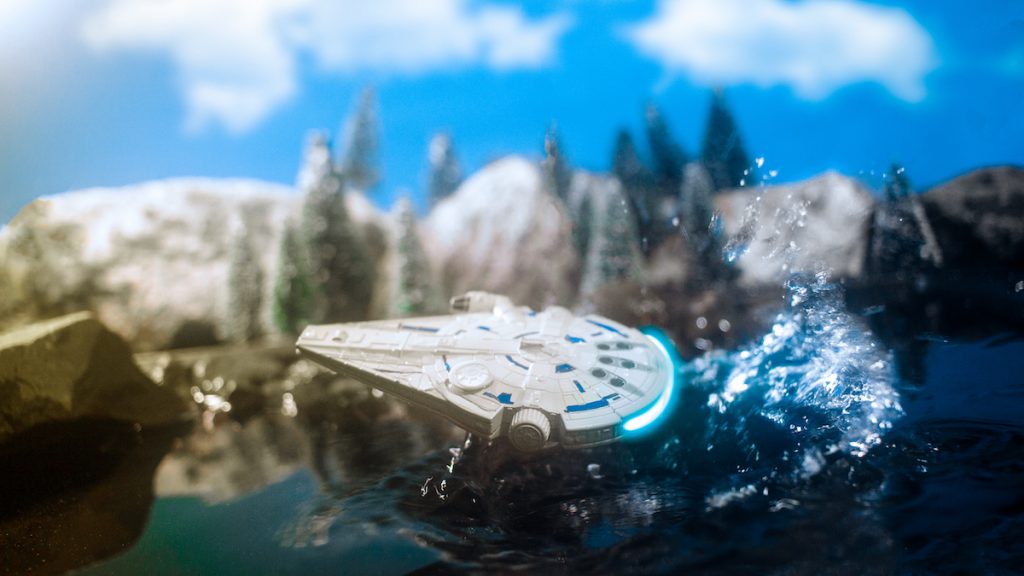
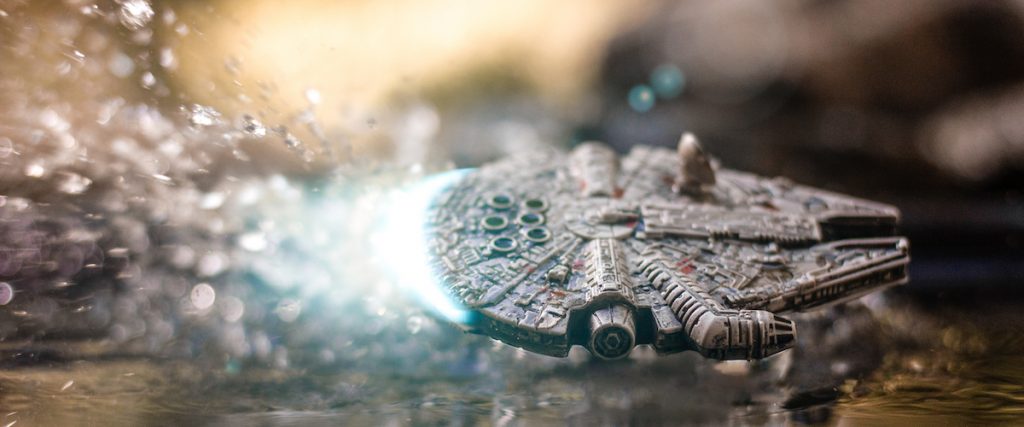
In the end, I was so happy with the results that I weathered all of the ships currently in my collection. In addition to the X-Wing, my favorite result was the Millennium Falcon, which absolutely needs that gritty Star Wars look.
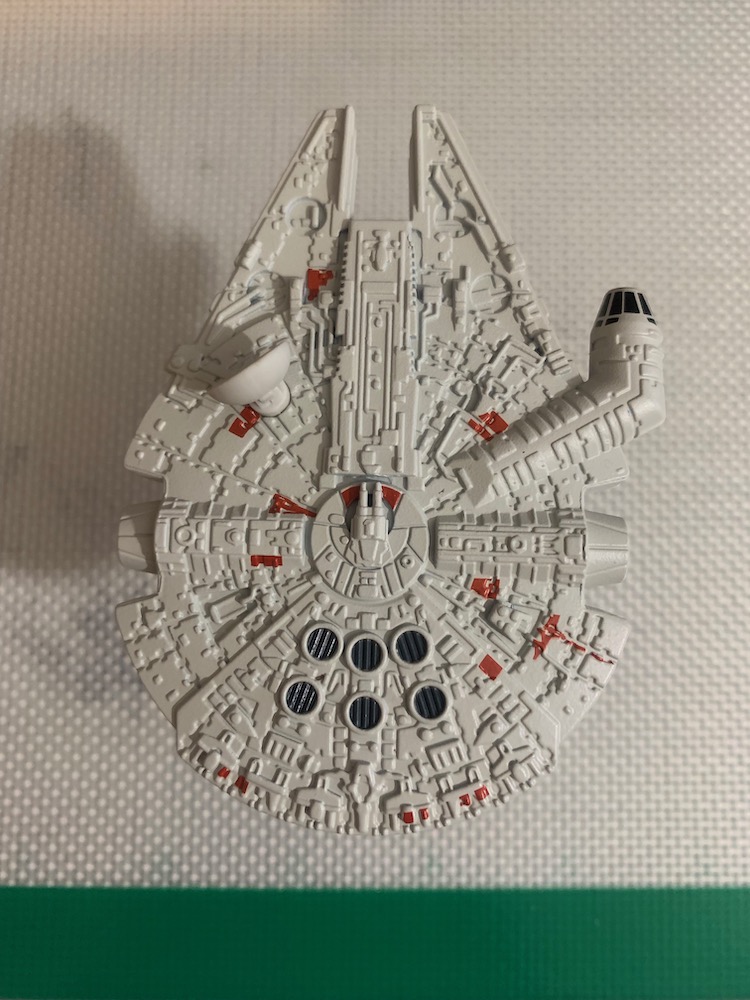
Before 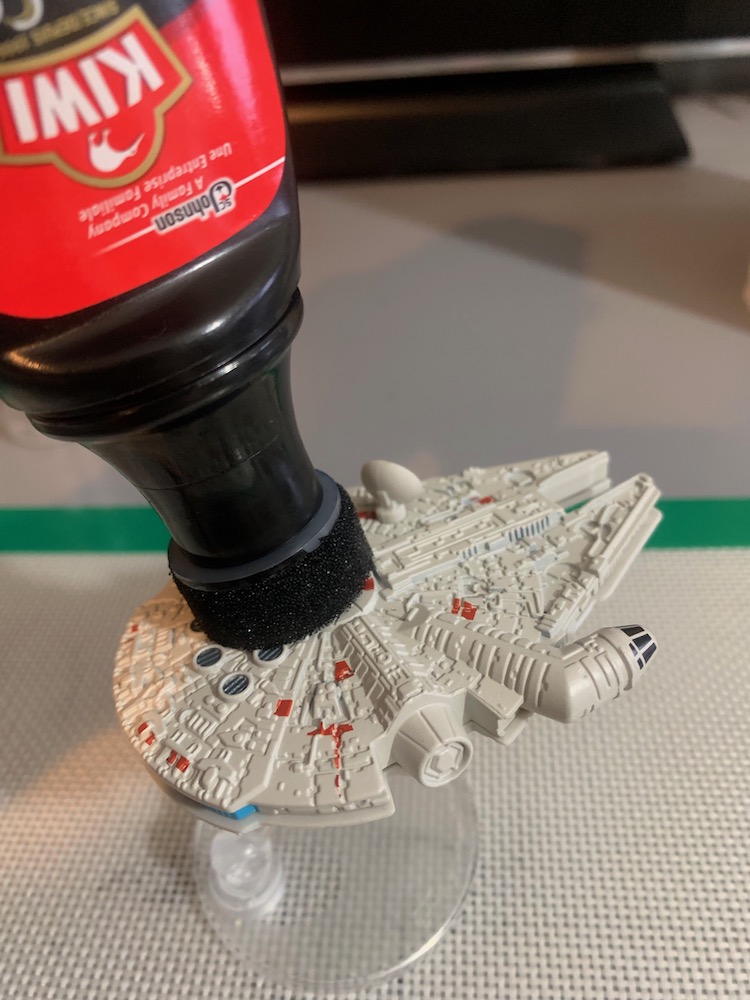
The liquid polish comes with a sponge, making for easy application 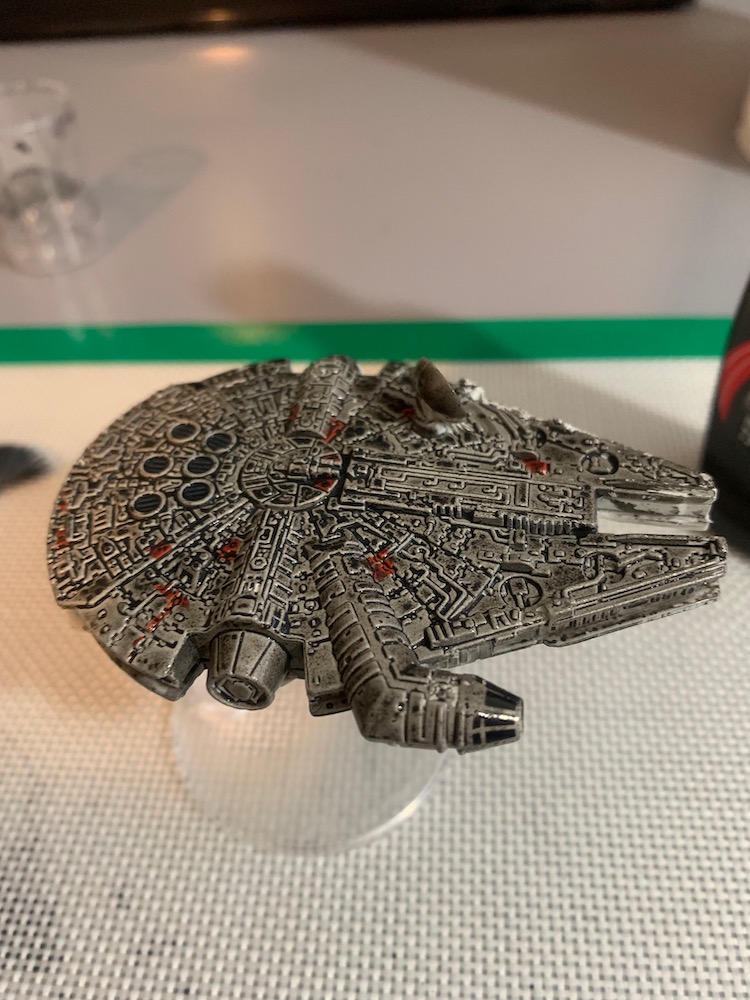
I found the best results when applying liquid to the whole ship… 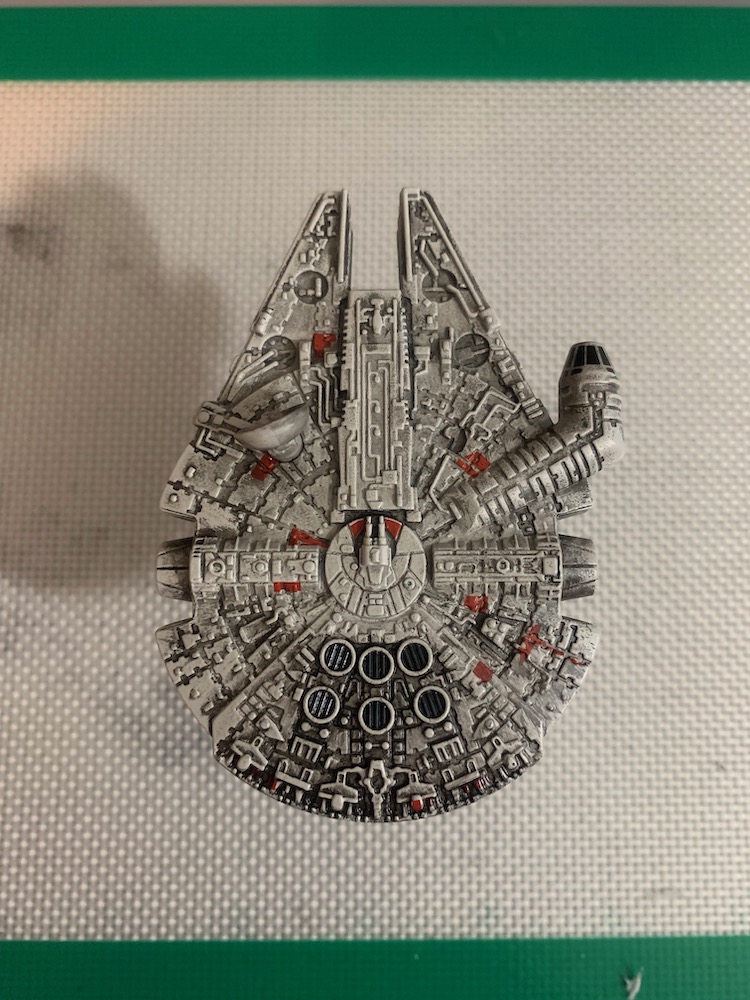
Then wiping away the excess with a paper towel 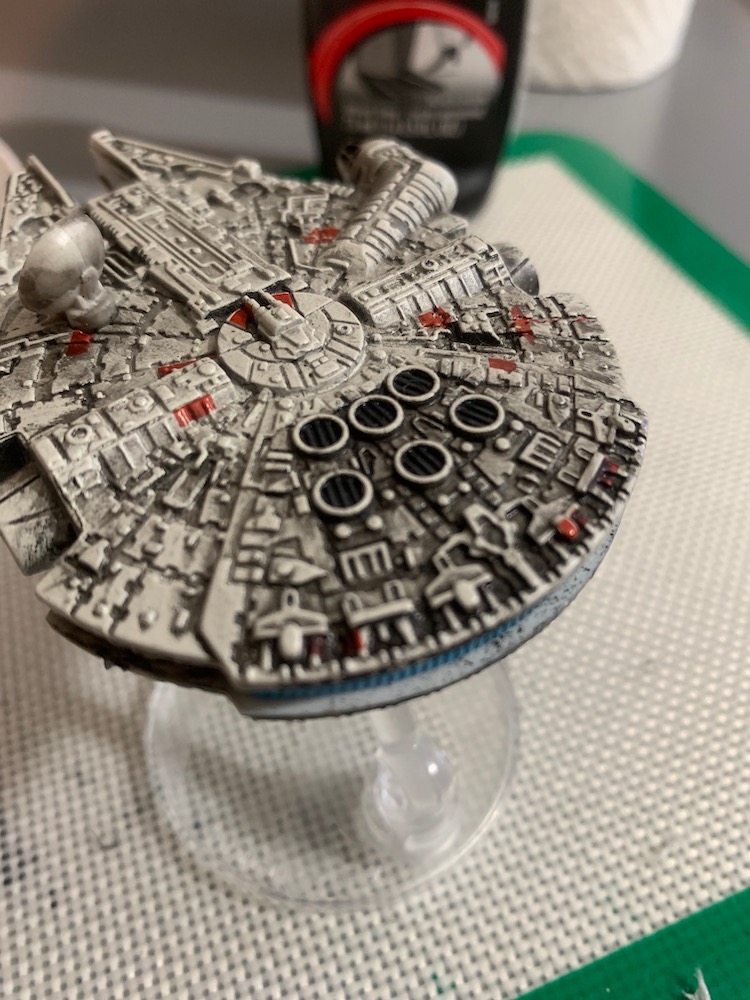
It was fun paying closer attention to specific areas, bringing out more of the details
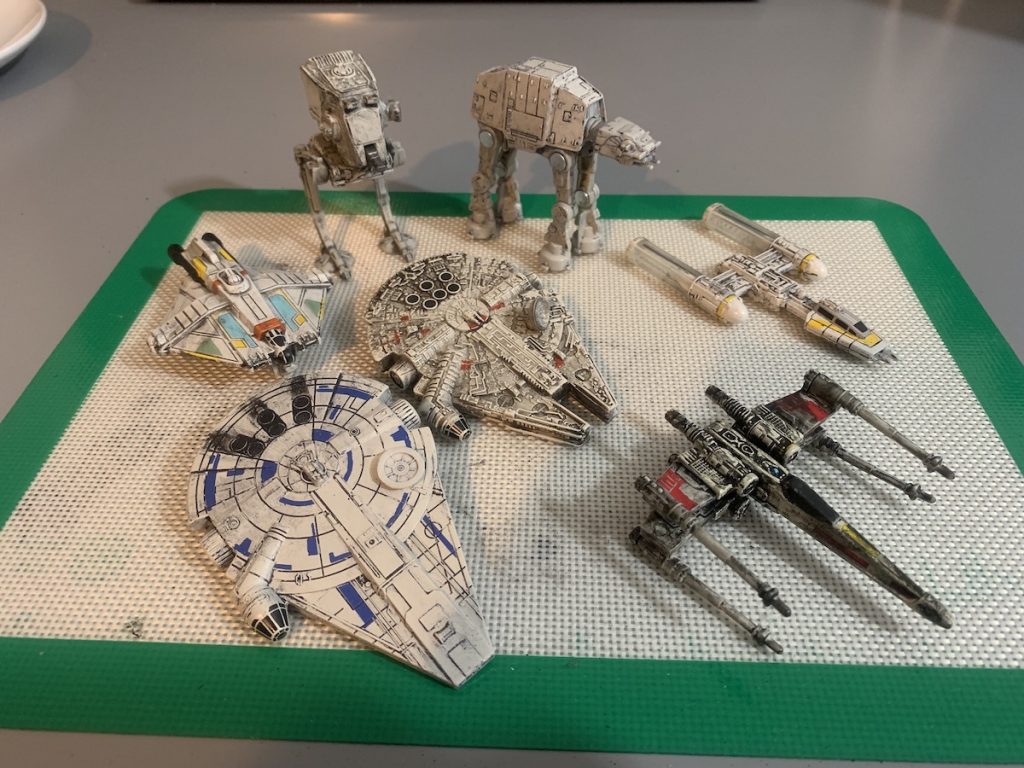
All in all, I’m extremely happy with how this experiment went, and have already begun trying it out on other toys, like some of my Black Series Star Wars figures. I think I’ll still be anxious about doing permanent alterations, but this is certainly a step in the right direction.
Have you ever weathered your toys? What method did you use, and what were the results? I’d love to hear your thoughts in the comments below.
-James
Stay in the loop with all things Toy Photographers by Subscribing to our weekly email round up so that you never miss a post, and to the podcast! You can also continue the discussion in our awesome communities on MeWe and Flickr.


Those look so much more realistic grunged up like that.
Yeah, I was honestly shocked when I finished the first one. I’m particularly impressed with how different the Falcon looks.
Wow, great effects, James! I’ll remember liquid shoe polish! Although I must say I have the same issues with permanently weathering my toys as you do. So for now, I use graphite and/or charcoal (from pencils) – it is more dusty but if you first rub it on your fingers and then touch your toys it gives a nice ‘smear.’ I usually appply this method when I build something from wood or paper. I yet have to try it with plastics.
Thanks Tobias! I’m glad to hear I’m not the only one with hesitancy to scuff up my toys. I like your charcoal idea, I’ll have to try that out next time I’m using wood or paper for something!
Totally love the liquid shoe polish look! You were very brave – not sure if I can do that just yet… I’m still a little uncomfortable with my minifigs bouncing against each other in my little containers.
Thanks Molly! I don’t blame you – I was nervous with each and every ship I scuffed up, even though I was already happy with the results. I doubt I’ll ever fully get over it!
The best part about shoe polish is that you can actually wash it off if you need to. 😀 I’ve been doing this since I saw a custom ML First Ten Years Iron Man custom on IG. I tried it and have had great success. Mega Construx figures look excellent weathered this way. I feel this is probably THE most reliable weathering tool for toys. using silver spraypaint as a drybrush is good when applied along with the shoe polish to achieve newer looking dings.
Yes! The ability to wash it off is what initially drew me to shoe polish. If I didn’t like the result or changed my mind, no harm no foul. I love that silver spray paint idea, I’ll have to give that a try sometime!
Great! really awesome effects! exellent work ^^
Thank you so much!
I know the feeling far to well of not wanting to “degrade” ones toys… I commend you on taking the plunge bud and the results are awesome! Nicely done
Thanks man!