One of my favorite things to do now when I am shooting a LEGO set as my background is lighting the interior. I love how the light adds life to the building and depth to the scene. It’s a life and depth situation!
Recently, Toy Photographers sent me the Stranger Things set of the Byers house to photograph for LEGO. One of the scenes I shot for them was of Will in the Upside Down version of the house with lots of atmosphere and light streaming through the windows of the house.
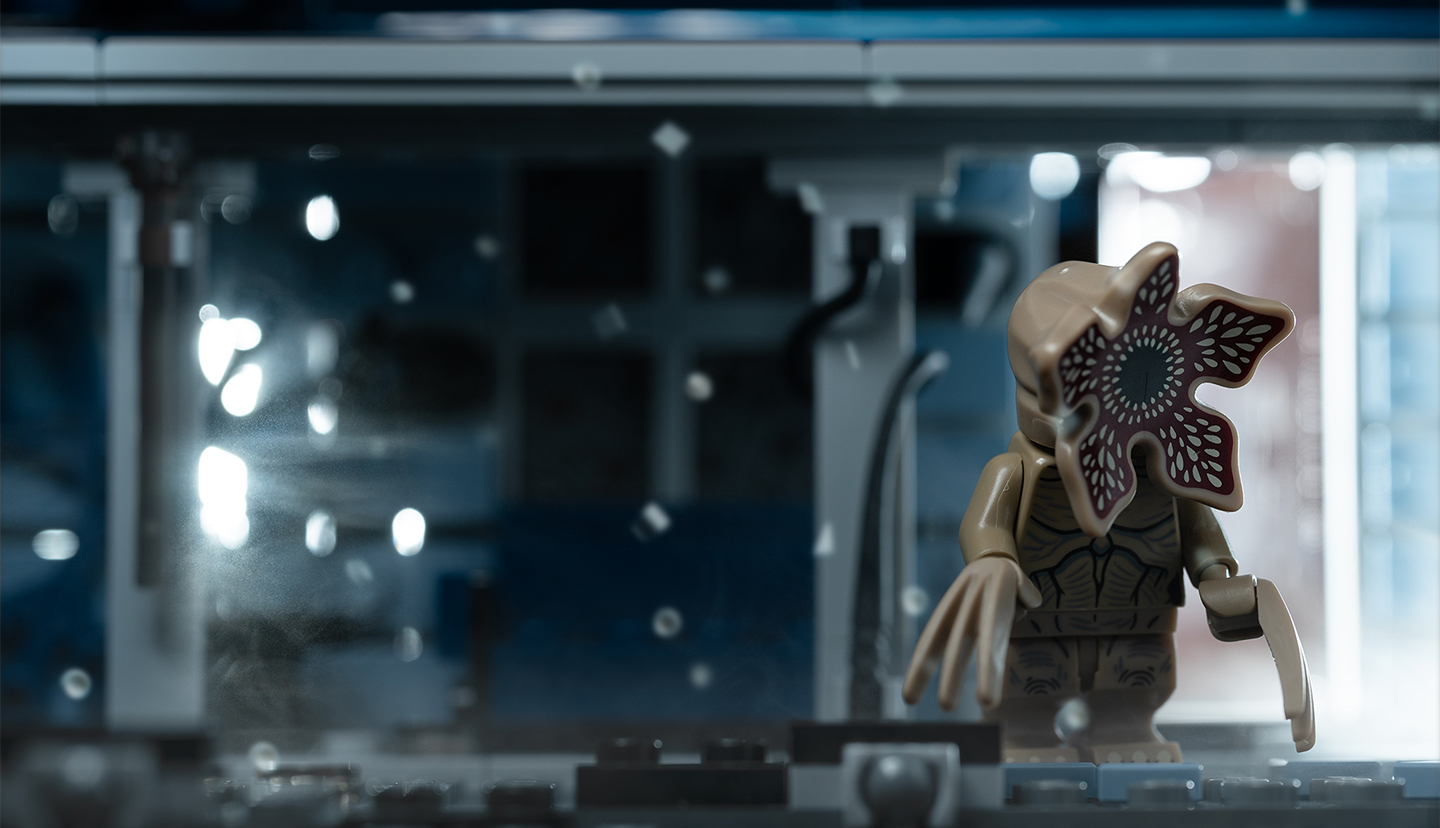
The setup for this shot of the Demogorgon lurking outside the Byers home in the Upside Down is similar to that one but I changed lenses to frame it much tighter and get a shallower depth of field. I also did a few things differently in post just to keep it fresh for this BTS.
Let me walk you through how I created this image.
The gear
I don’t have a lot of space so I like to keep my gear tight and footprint small. My stage is usually my dining table so I also need to be able to clear everything off of it quickly (although I will admit to having my family dine with a few stray minifigs watching them every now and again).
The gear I used
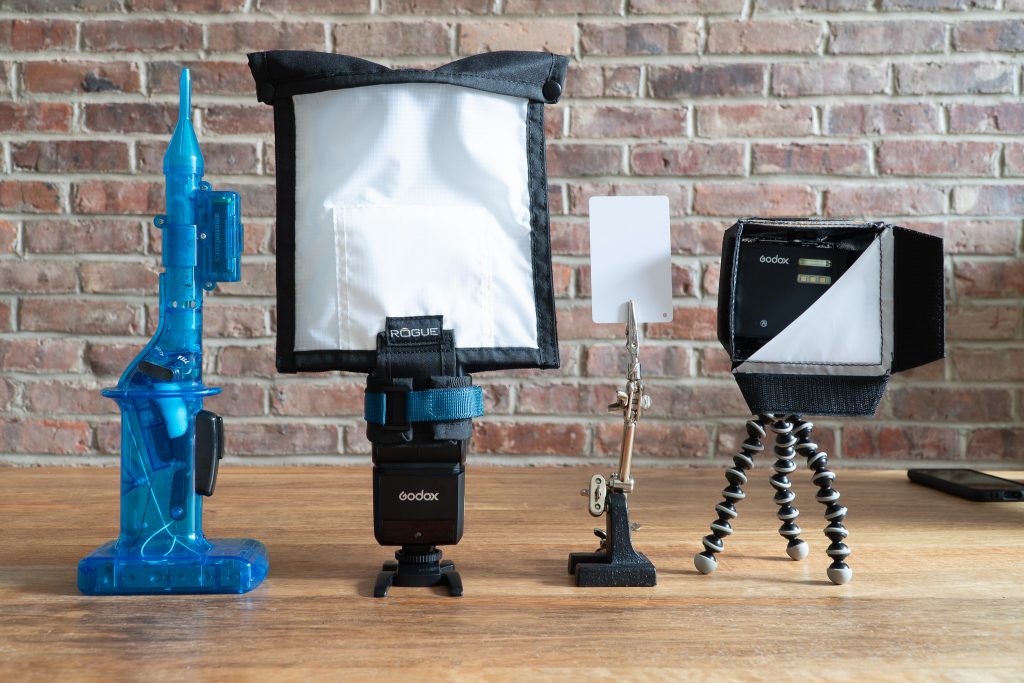
Here’s the gear I used for this shot, from left to right:
- A Wizard Stick with the adapter tip
- A Godox TT350s with a Rogue Flashbender 2 Mirrorless Softbox
- Helping hands holding a white balance card
- A Godox A1 smartphone flash in a mini softbox
The Wizard Stick with the adapter tip is brilliant for creating atmosphere in LEGO photography. The adapter tip is basically a funnel with a secondary fan that pushes the thick smoke out in a finer stream. The Wizard Stick alone is meant to be used upright, but with the adapter tip, you can use it horizontally and fit it into pretty tight spaces. Super useful for LEGO buildings!
In the past, I used Atmosphere Aerosol but found the spray too difficult to control and the greasy residue disgusting. Cleanup was always a pain in the butt. The fog from the Wizard Stick, on the other hand, doesn’t leave anything nasty behind on your minifigs and bricks but there is a slight sweet scent that lingers.
For lighting, I typically shoot with two or three speedlights, especially if I’m shooting a dark scene during the day like I did here, because I can knock out all that ambient light by just setting my shutter speed to sync speed.
For this shot, I used a small Godox TT350s flash as the main light and a Godox A1 smartphone flash as the backlight. Yeah! A smartphone flash exists! It’s not great for phone photography but you can slip that A1 into a LEGO build pretty easily. (Check out my review of the A1 here.)

Godox A1 smartphone flash
The actual surface area of the flash is tiny, so it’s a harsh light source, even for my minifigs. It’s also very bright on its lowest power setting of 1/16.
I’ve used it bare before by just laying it on its back on the floor in a MOC and letting the light bounce off the light gray ceiling to create a nice light. But for inside the Byers house, there’s very little space to do that.
To soften and spread the light more, I slipped a cheap mini flash diffuser over it to create a tiny softbox:
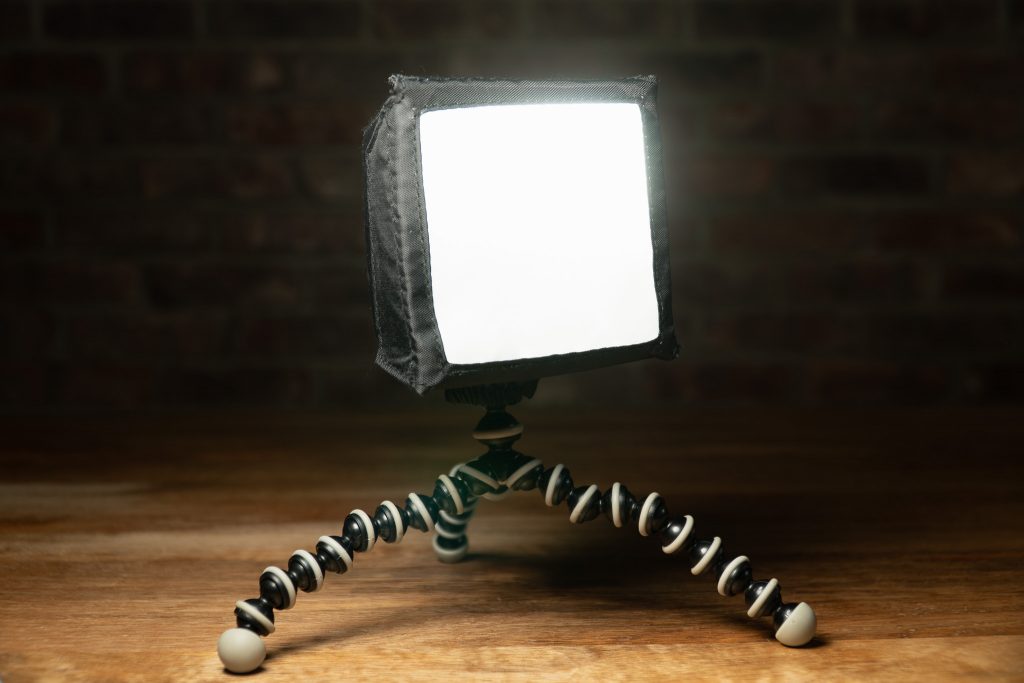
Mini softbox
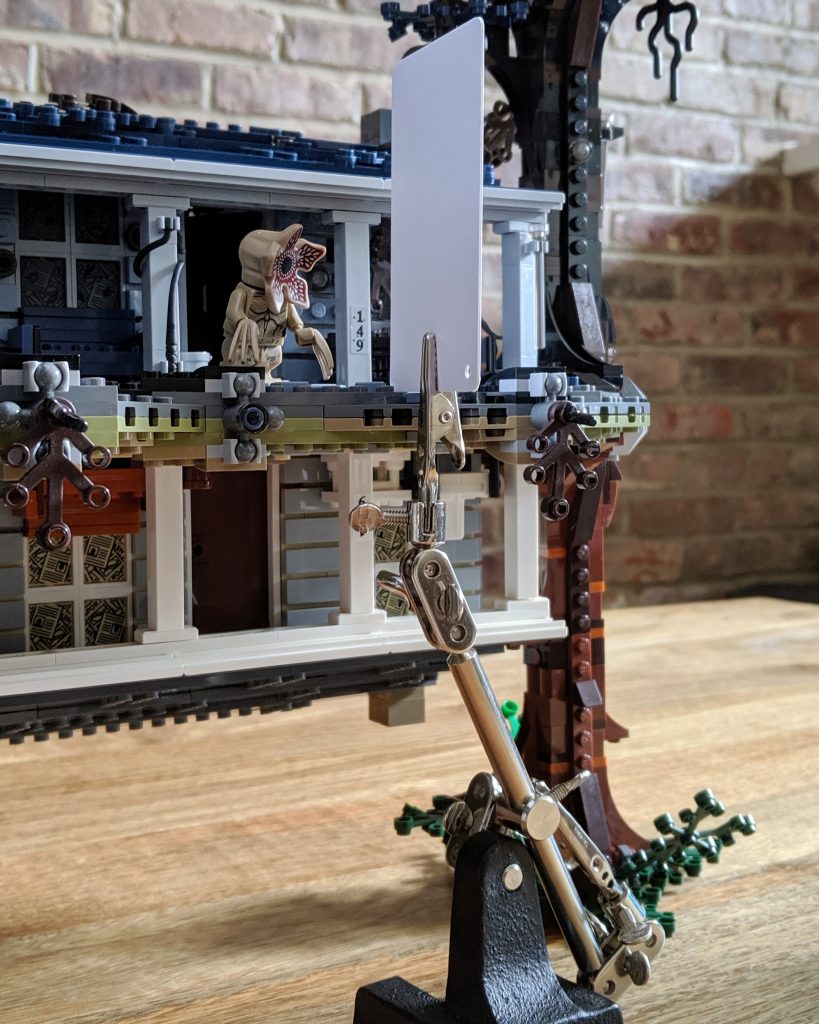
The setup
For the LEGO shoot, I separated the houses and shot them individually but since it’s a hassle to take the trees off and undo every one of those ball joints, I shot them together for this BTS post and just put my lights on tabletop tripods to get them at a proper height:
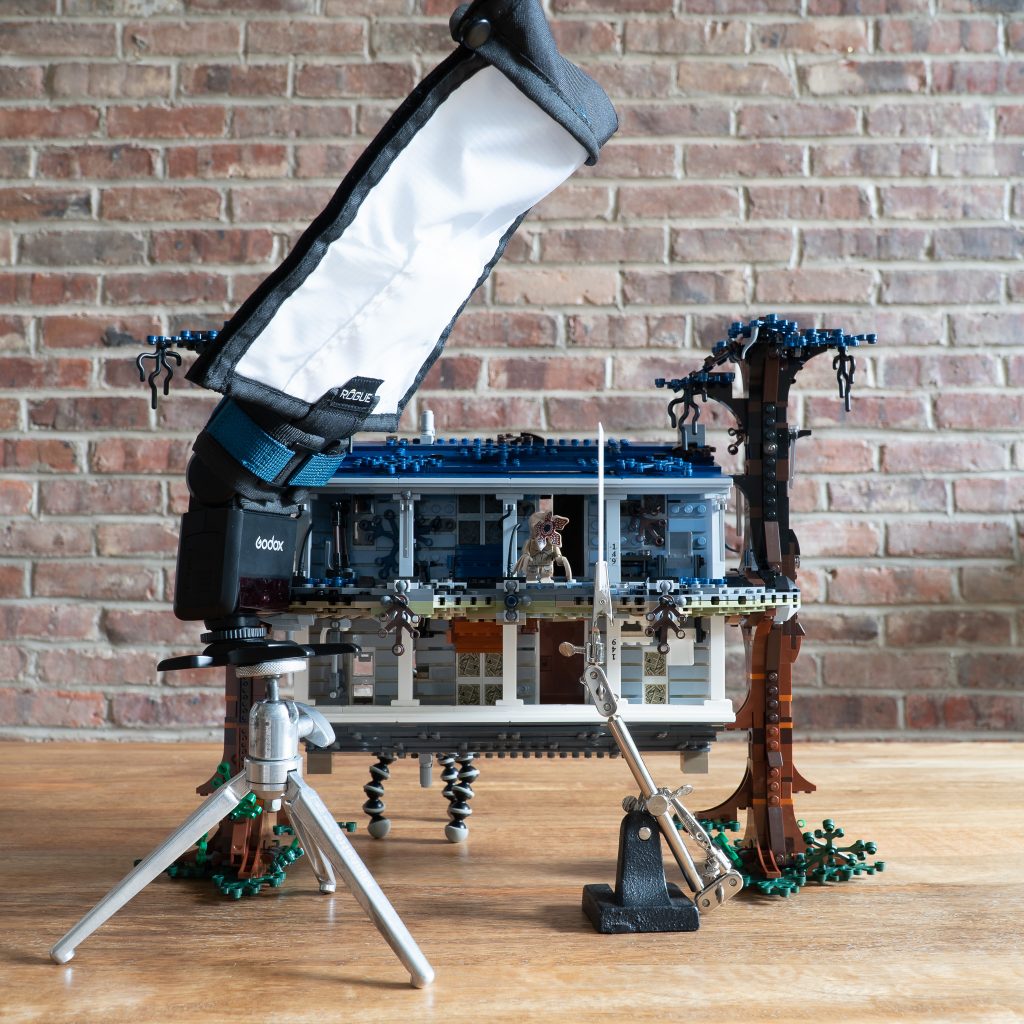
The complete setup on the dining table
When I am shooting something with background light, I set this light up first without any other lights on so I can see how it affects the scene.
I wanted the Demogorgon framed in the backlight but the quadruple window panes in the center of the Byers house are opaque with newspaper print (those printed parts are nice though). On the other side of the main window, it’s completely covered by the alphabet wall panel. No light is going to get past that.
The only option I thought of was to open the door and frame the Demogorgon there.
Here’s what the smartphone flash alone and a little smoke did for the photo:
Just the Godox A1 for backlighting
The light in the door separated the Demogorgon from the otherwise dark scene and the dappled light in the leaf-covered window created some interest.
Next, I set up the main light. The Upside Down is dark and spooky, so I positioned the main light away from the set, with just the edge of the softbox lighting the Demogorgon and spilling onto little else.
As I learned from the cinematography of the LEGO Movie, I try to avoid frontally lighting minifigs so I put the Demogorgon’s back to the main light. That meant breaking a composition guideline about breathing space but I went with it because I think it adds to the tension of the scene anyway. The lighting here is more important to me.
To bounce some of that light back onto the Demogorgon though, I have the white balance card held up on the opposite side:
The white balance card held up by helping hands
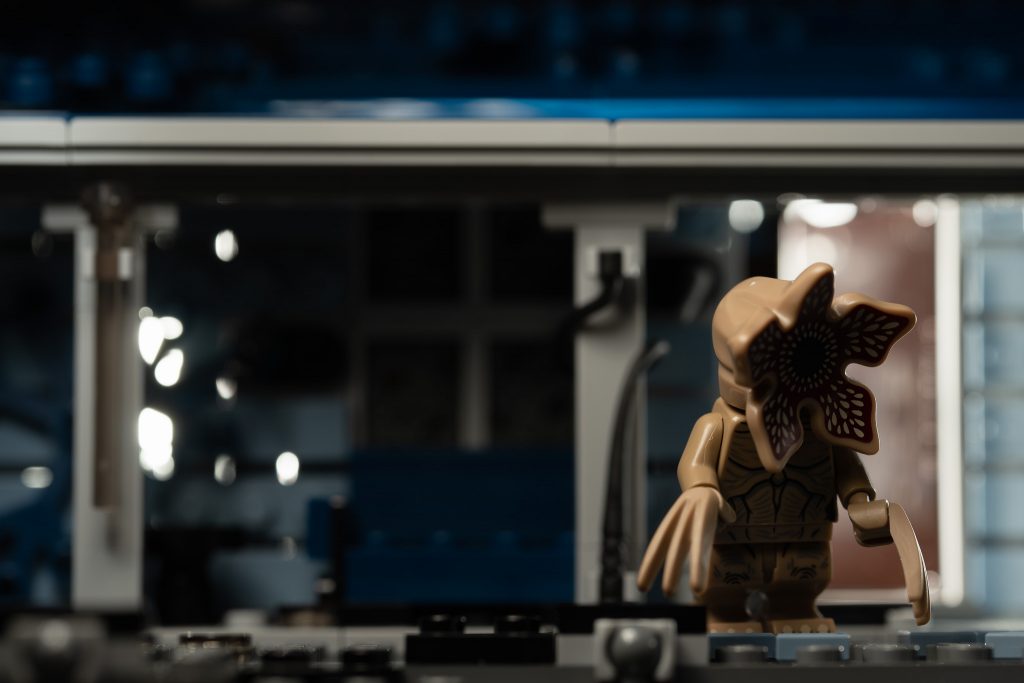
Here’s what it looks like without and with the white balance card in place:
Without bounce card
With bounce card
The shoot
With everything in place, I set my Sony a6500 with a Sigma 70mm f/2.8 macro lens on the tripod and set it to f/4, 1/160 and ISO 100.
I like to use a tripod any time I am using a macro lens but also because I need to keep my hands free for other things like adding smoke:

Using the Wizard Stick to add smoke
Post-processing
Post-processing is typically just a matter of making quick adjustments to contrast, color, sharpness, etc in Lightroom but this one was also going to be an easy composite in Photoshop to get those flaky spores floating around the Upside Down.
For the LEGO shoot, I added the “particulates of evil” using a brush but for this shot, I wanted to make them out of actual LEGO pieces. Stepping on LEGO bricks apparently makes them evil so might as well give them the role they were made to play!
I took a few white 1×1 pieces, scattered them onto a black foam sheet and took this picture:
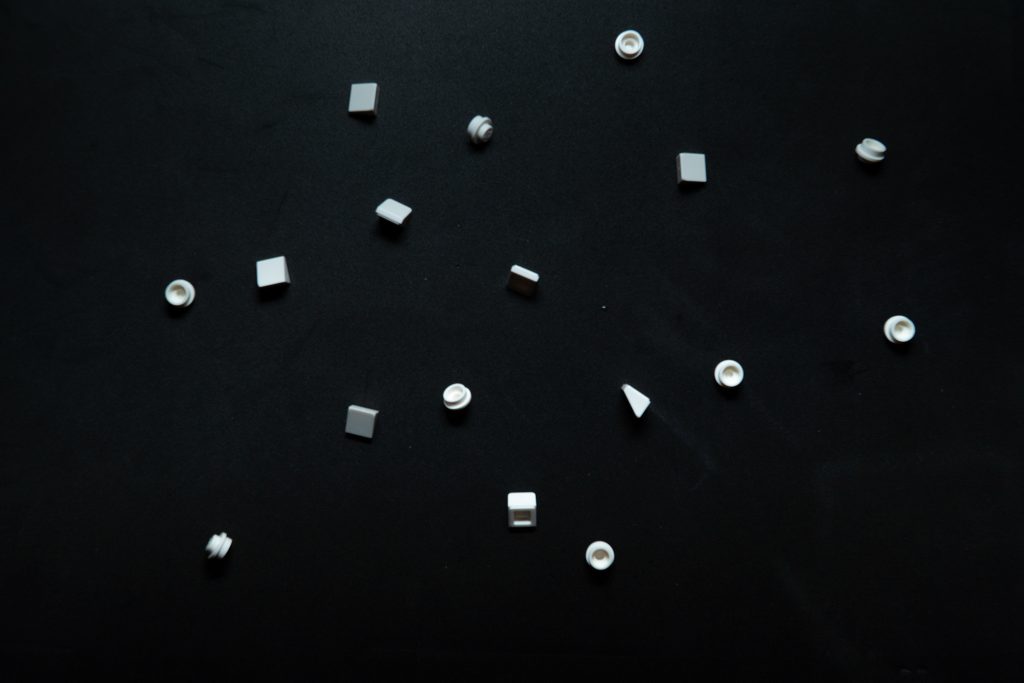
Benign bricks since they’re not on the floor or floating
I shot them against black because my Upside Down scene is dark and dropping the blacks out of this photo would be super easy in Photoshop.
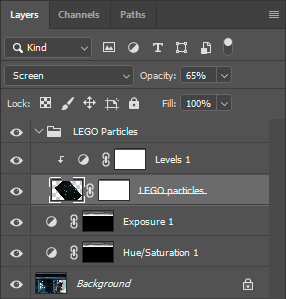
The LEGO particles layer set to Screen mode and 65% opacity
I opened the main photo in Photoshop and added this photo of the white bricks as a new layer on top of it. I renamed the new layer “LEGO particles” so it’s easier to follow along.
I set the blend mode to Screen so that only the white bricks from the top layer appeared over the dark scene. Any remaining black areas on the top layer were knocked out by adding a new Levels adjustment layer and clipping it to that layer.
I added some Gaussian blur and lowered the layer opacity to 65% to make the bricks semi-translucent and out of focus.
To create more depth, I duplicated the LEGO particles layer, made it smaller and rotated it to create “particulates of evil” in the distance. I also blurred them a bit more.
That sounds like a lot of work but actually took only about 5 minutes to do.
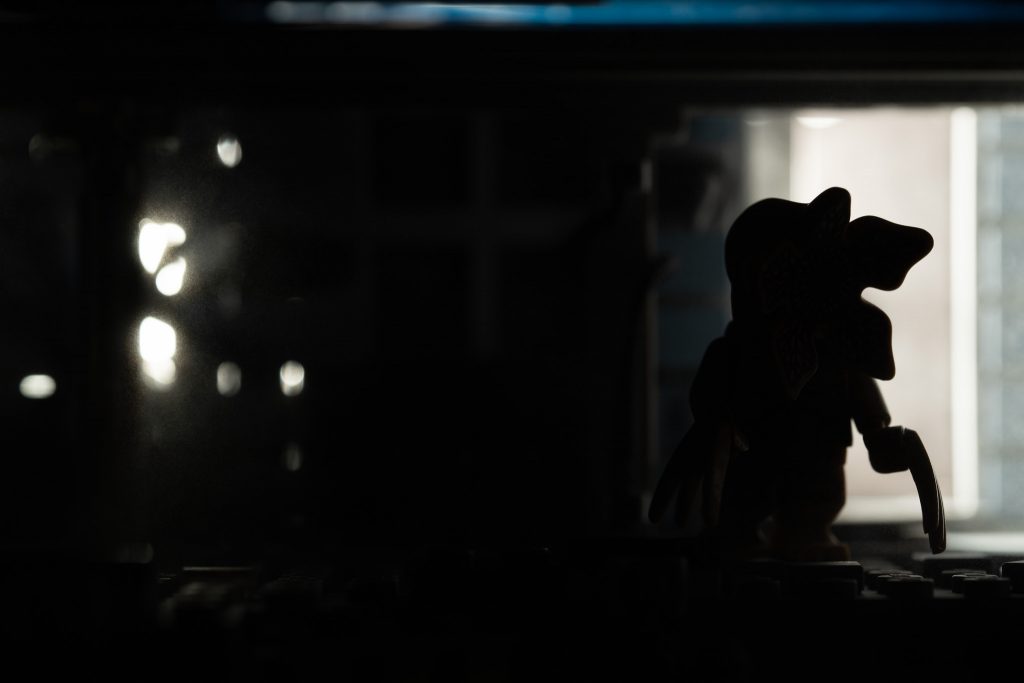
Here’s the photo straight out of camera:

Straight out of camera
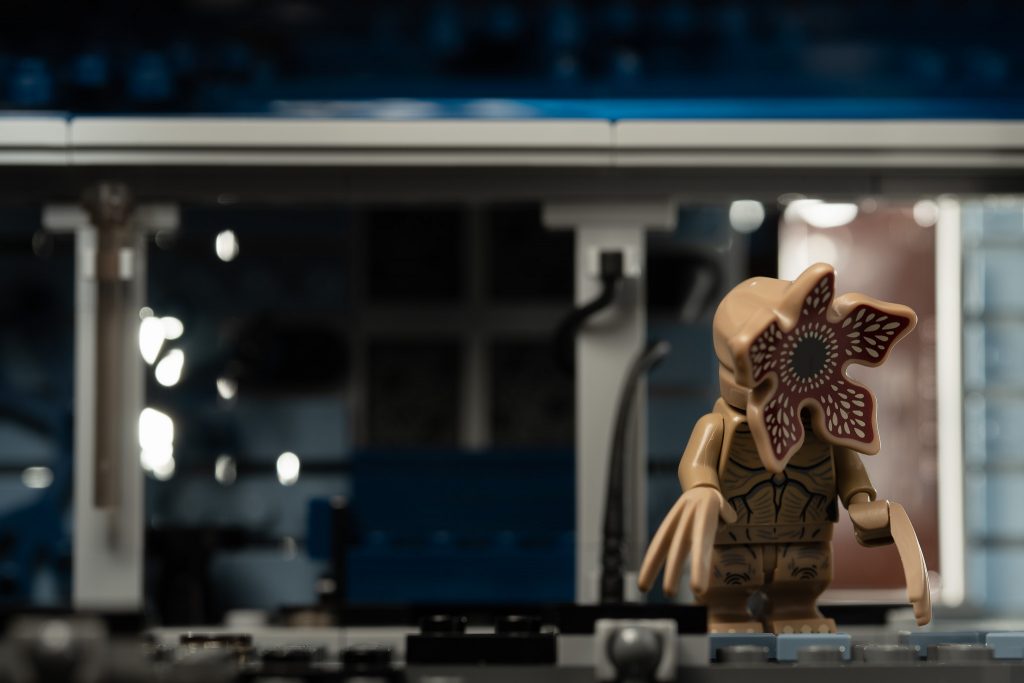
And here’s the final image with the cooler temperature, increased highlights, punchier light streams and the “LEGO particulates of evil”:
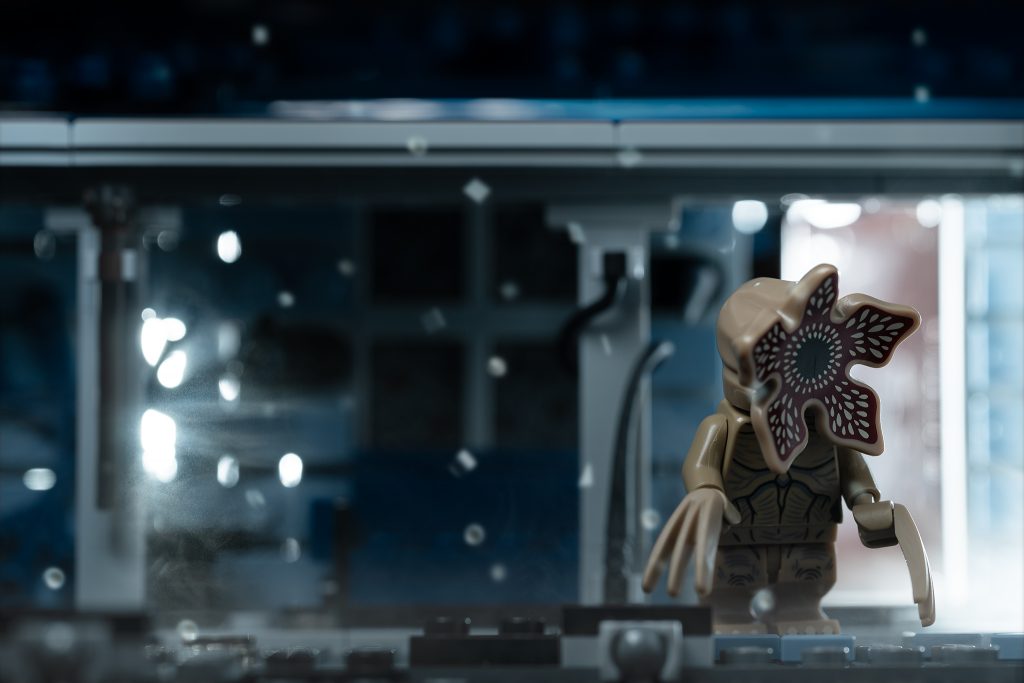
Final shot with LEGO particles of evil
Stranger Things for photographers
Overall, I’m pretty happy with the efficiency and result of both the shoot and edit. I’m sure there are areas where I could improve and will continue to find new and different ways to do things so leave a comment if you have any feedback or suggestions for me.
If you are eager to shoot some Upside Down scenes, Stranger Things The Upside Down 75810 is out starting today, June 1.
The rooms are pretty tight and packed with detail but I’ve managed to get several nice photos in those as well. The front porch with the swing and furniture also make for interesting scenes and the minifigs themselves are outstanding.
The Demogorgon is great fun to shoot because he’s got such an interesting shape but the digitrade legs and head have even more limited movement than a regular minifig. I was often frustrated getting one foot to connect securely to the studs on an angle, probably due to the dew claw protrusion on the back side of the foot.
All in all, it’s a great set for storytelling in the Stranger Things universe and beyond with some imagination.
My biggest gripe, of course, is shooting the set with both houses connected.
If you are planning on buying this for LEGO photography or to display as separate units, stop following the instructions at page 118 of book 2 where the tree builds start. The trees on either side are assembled as a single unit for maximum stability and connect to the sides of both houses via Technic pins.
Building those trees (both sets) takes another hour or so of time so best to decide what you want to do with this set before completing the build.
I hope you don’t miss the fun, little Easter Egg as you open the bags! Just a bit of LEGO humor that made me chuckle. (If you have the set already and noticed it, shhh, let’s not spoil it!)
If you want to see more BTS posts like this for LEGO photography, make sure to check out Brickcentral’s Behind The Scenes section.


Great Article. I really appreciate the show and tell aspect of this at each key stage as opposed to just showing the final set up. As someone who has failed at similar lighting attempts before, being able to see non-final pics without certain lights or items in play is one of the most helpful things I have ever seen in a BTS.