Recently I created an image based off of Thanos and the Infinity Gauntlet story (as featured in Avengers: Infinity War, and the Marvel comic books).
I called it “After the Snap”. It is a fairly complex image, and involves some composite work. This is a behind-the-scenes look at how I created the image, which look like this:
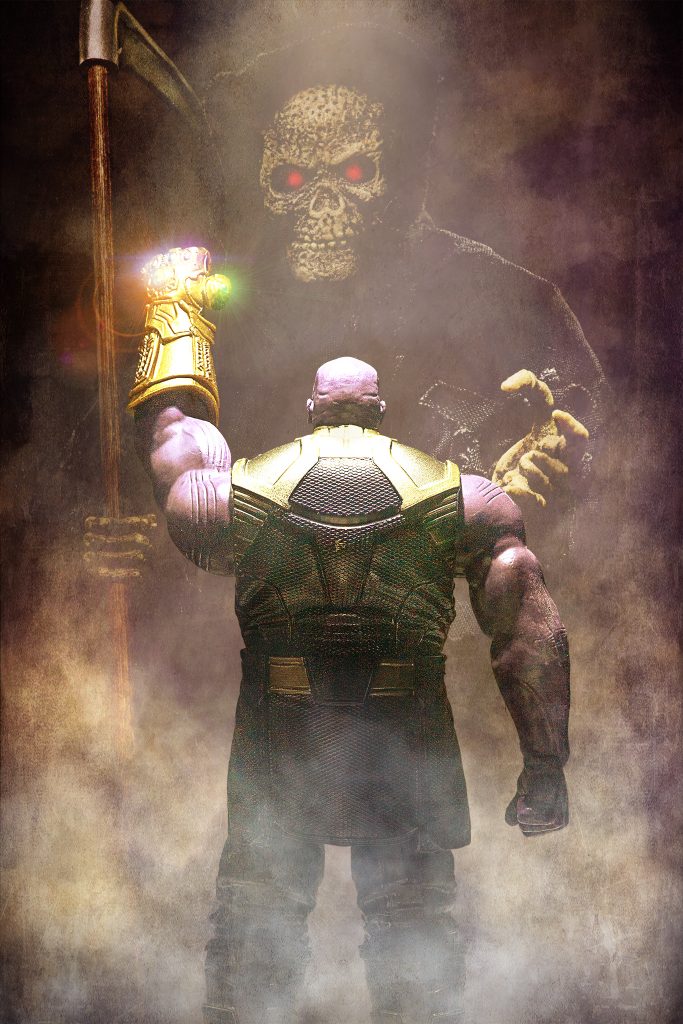
Thanos: After The Snap
The Concept
The concept for this image is a mix of the stories between the movie, and the comic books. The Thanos figure is based off of the movie. The Grim Reaper is a part of the comic book story.
In the movies Thanos is on a mission to collect the Infinity Stones in order to kill half the life in the universe in order to preserve resources for the other half. In the comic books Thanos goes on the mission to collect the Infinity Stones in order to woo back his girlfriend, who is, literally, Death.
Putting these two ideas together I imagined that shortly after Thanos finished collecting the stones, snapped his fingers, and killed off half the life in the universe, he would stand before Death and celebrate the victory.
Step 1: Capturing the Images
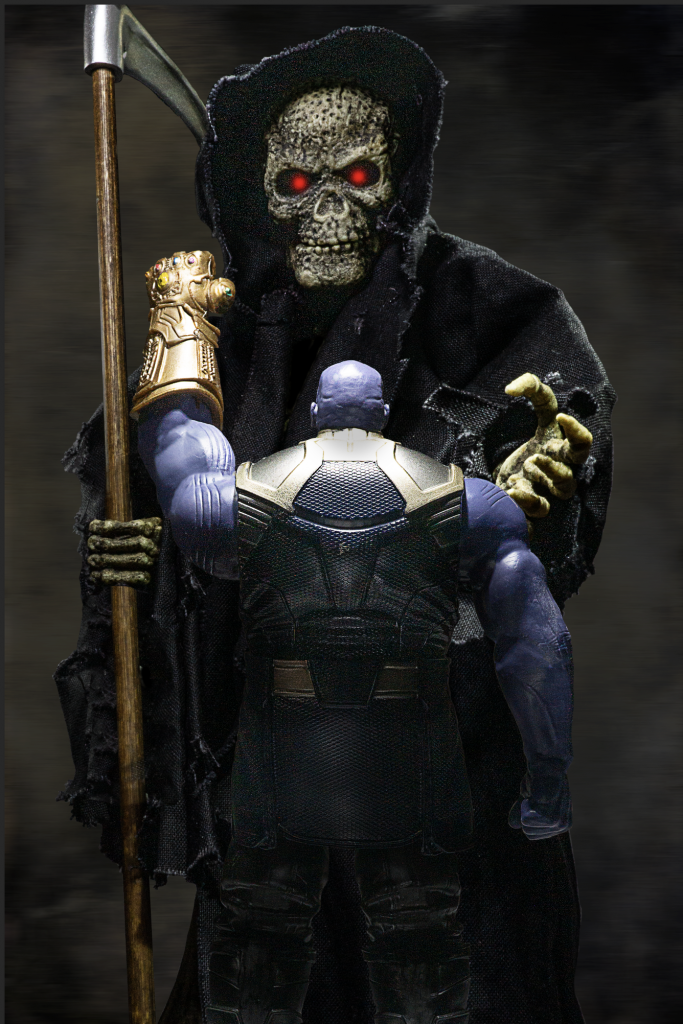
I needed to mash up two figures of two different sizes. My Grim Reaper figure stands 12″ tall, and Thanos is a 6″ figure. I wanted Death to be bigger than Thanos so it looks like she is towering over him, and to appear other-wordly. However the size difference does not match the size difference of the figures. So step one is to capture the two characters separately. I did this in my home studio, which is just a desk in my home office.
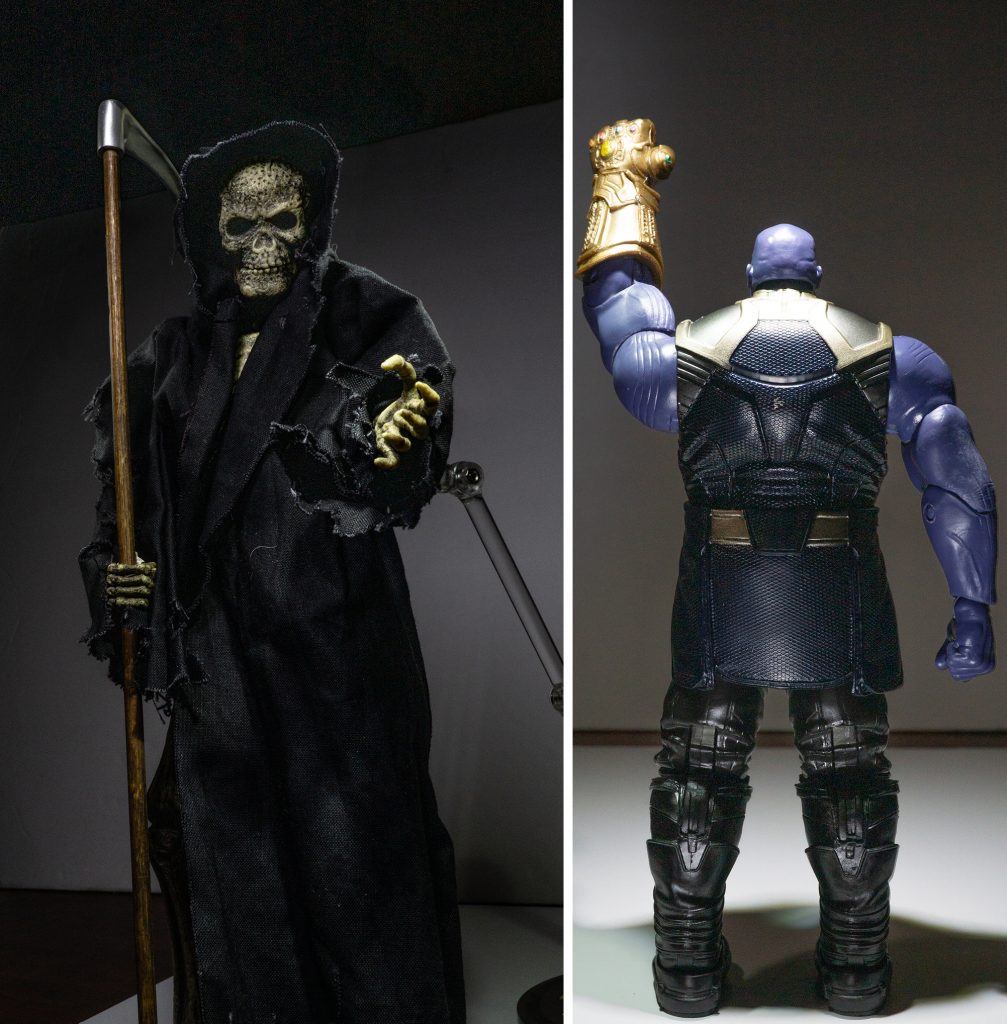
Capturing the raw images of Thanos and Grim Reaper
This is simple toy photogaphy. A couple simple lights, and some supports to keep Death from falling over. I wanted to have a light shining down on Thanos so I was sure to light him from the top to create highlights in the appropriate places.
Now that the raw imagery is captured, it is time to composite them together. To Photoshop!
Step 2: Putting The Two Images Together
The first step in post-production is to import both images into Photoshop, and remove their backgrounds. Each image is kept on a separate layer (a feature which will become useful in a moment).
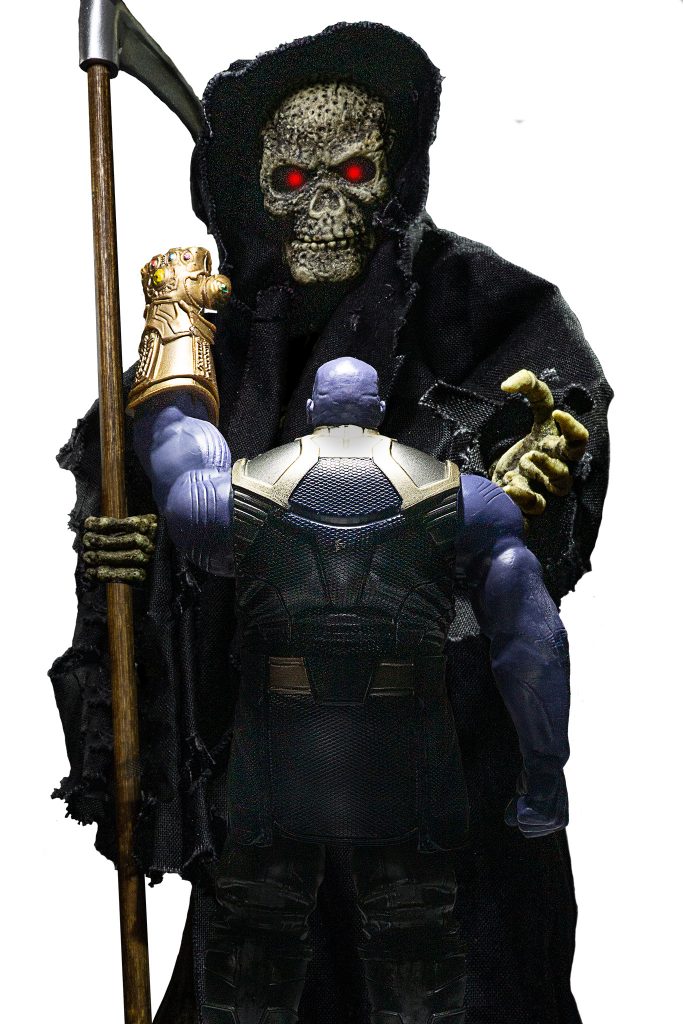
Masking out the background, and placing the two action figures on their own layers in Photoshop
At this point it is one fugly image. Leaving it like this would be a crime against good taste, so I shall continue my edits forthwith.
Step 3: Adding A Background
The next thing that needs to be done is to add a more interesting background. This was accomplished by adding a grungy texture file behind both figures.
Using a texture to act as a more interesting background.
While I was here I added some red, using a simple soft brush, to create Death’s glowing eyes. Pro tip: paint the eyes on their own layer so you can move them around. I find its rather hard to get the eyes in the right spot the first time, and requires tweaking afterwards.
Step 4: Adding Fog
The next step is to add fog to the Death layer. The fog adds atmosphere. Fog is interesting as it gets thicker and more opaque the farther away it is. It would also exist both in front, behind, and in between the figures.
This is where having each figure on its own layer helps, as a layer of fog can be easily inserted between Death and Thanos. I used a custom brush for this, with a very low opacity and flow. I slowly built the fog up over many many mouse clicks.
Adding fog to the Death layer
Step 5: Adding More Fog
If you recall in step 4, fog needs to be added in layers. I have the middle layer, but I need a layer in front of Thanos. I used the exact same technique for applying the fog (custom brush), but this time I painted it onto a layer on top of the entire image.
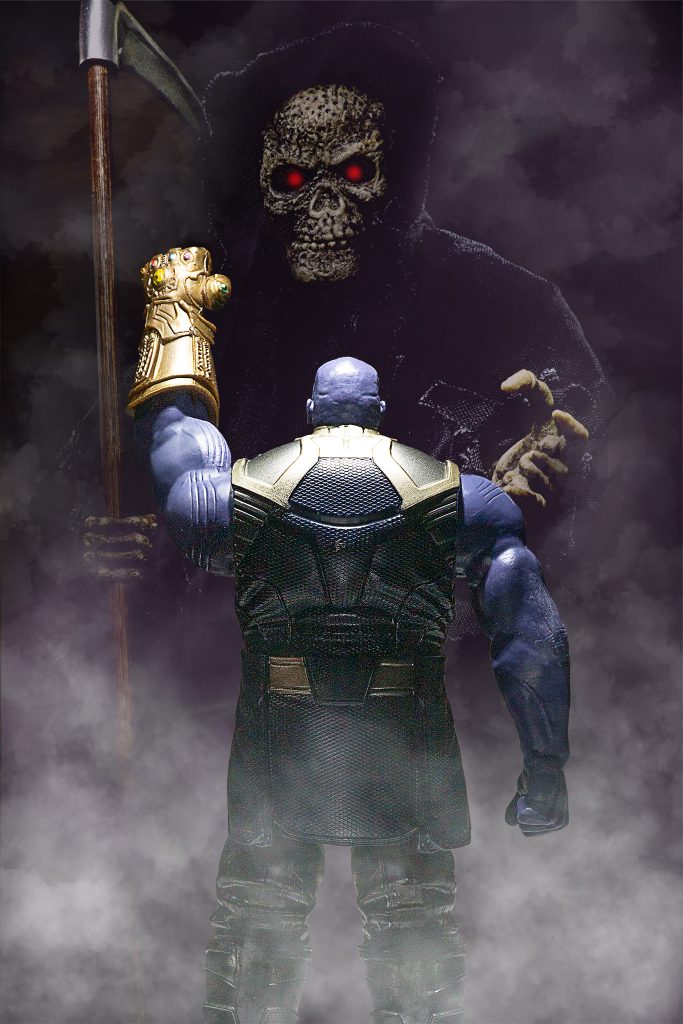
Adding in more fog on a separate layer to give the proper feel of fog thickening into the background.
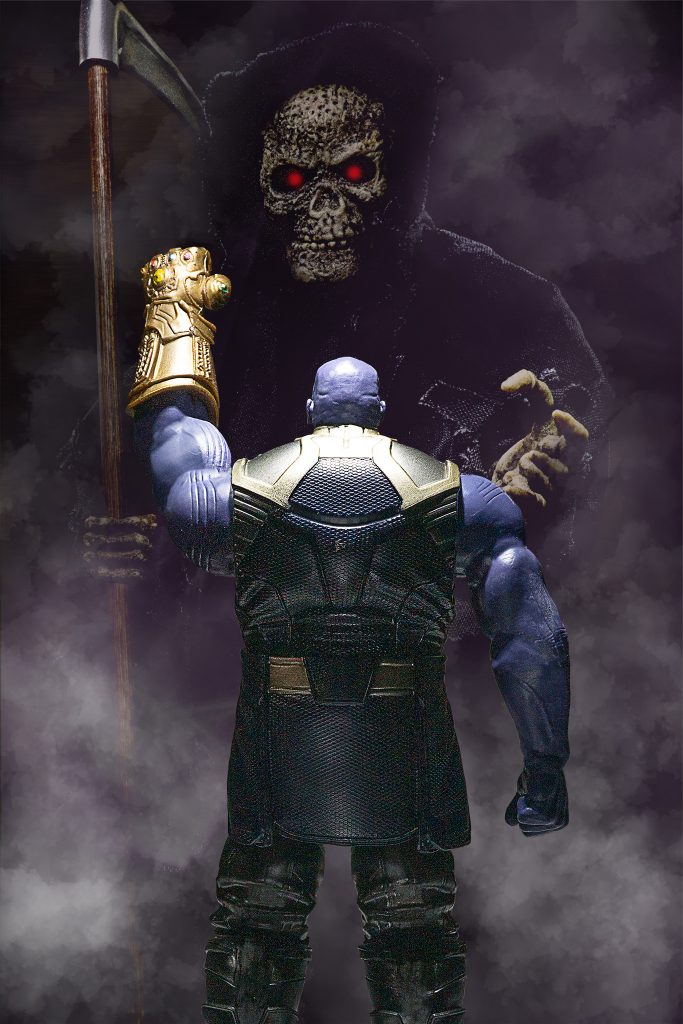
Step 6: In Purple I’m Stunning
For some odd reason the figure I have uses blue for Thanos’ skin, instead of purple. Since Thanos is famously purple, and I wanted my image to be accurate. I used a hue/saturation adjustment layer, and selective masking, to turn his skin purple.

Ensuring Thanos maintains his famous purple hue
Step 7: The Gauntlet
The glow of the Infinity Stone on the gauntlet is an important aspect of Thanos’ look. So the next step is to make those stones glow. I did this by adding in some lens flares I downloaded from a kit from Serge Ramelli. Each glow is on its own later, set to the screen blend mode, and an accompanying hue/saturation adjustment later to tweak the colours.
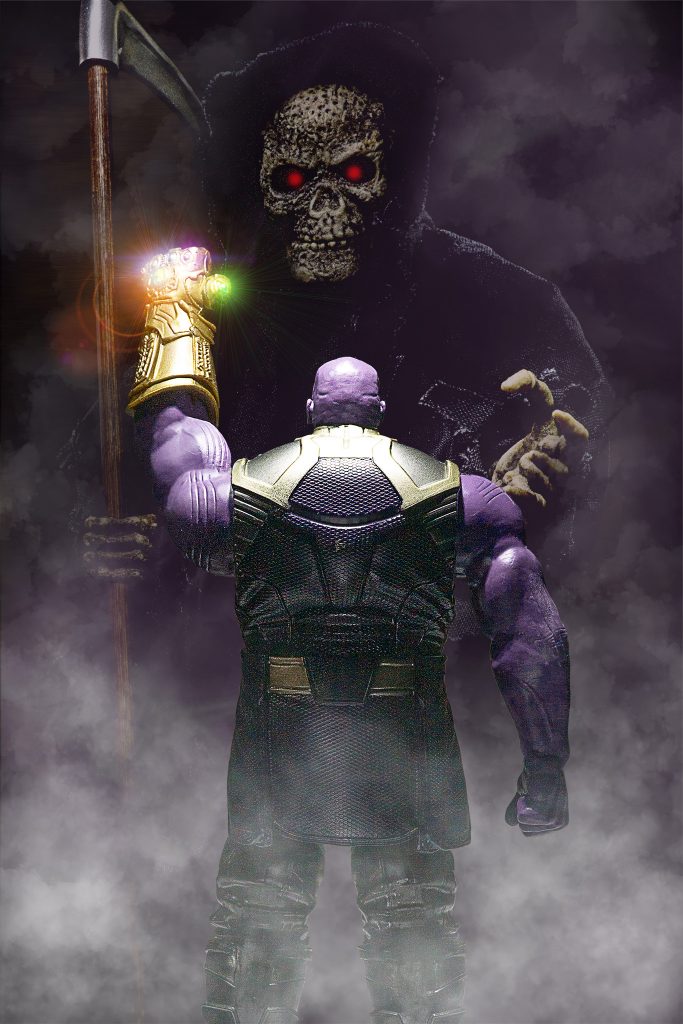
Adding glow to the Infinity Stones.
Step 8: Brightness, Contrast and Color Grading
The last steps are all slight tweaks to get the look and feel of the image the way it exists in my head.
Thanos has a lot of highlights on his lower legs which are a distraction, so I darkened them by painting black on its own layer. This directs the eye upwards.
Then I add a slight hint of a light ray falling on Thanos. Again this is done by painting white on its own later, and playing with blurs, opacity, and blend modes to get the right look.
Finally I did some colour grading over the entire image using a combination of textures, hue/saturation adjustment layers. This introduces some oranges and purples, especially in the fog.
Finally I darkened the corners to create a little vignette to finish off the image.
Thanos: After The Snap
Conclusion
This brings us to the sudden but inevitable conclusion. I hope you enjoyed this peak into the creating process that is my crazy screwed up brain. If you found this useful please let me know about it in the comments below.
[dave]
Want more toy photography goodness? Subscribe to our weekly email round up so that you never miss a post. You can also listen to episodes of the podcast!


Very cool! I would have never guessed that you composited Thanos and Death together. It looks great!
Thanks! Not suspecting a composite is the highest praise for us compositers.
Cheers!
fabulous work. and thank you for the behind the scenes insight
great stuff Dave
Thanks Stephen!