As I alluded to in my introductory post, Starting Small, my first foray into toy photography didn’t register high on the ‘interesting scale’. My best efforts consisted of planting toys in front of a bright background, pressing the shutter and slathering the results all over Instagram. The photos were what you would expect – clean, colorful and hopelessly dull.
There was nothing engaging about the photos I was sharing. The images lacked substance to draw a viewer in, and were devoid of any sense of wonder or joy. Over time, this lack of allure became apparent to me, and I challenged myself to find ways to improve.
Creating more intricate scenes and utilizing depth helped my photos break into new dimensions. To illustrate how my approach evolved, I’ve enlisted the help of MetalBeard and created underwater world for him. What better way to explore depth than battling sharks at the bottom of the ocean.
Here is a list of all the gear I used to create these photos:
Gear Used:
- Sony a6300 w 50mm f/2.8 Macro Lens
- Yongnuo YN-560-IV Flash with Pocket Box Mini
- Yongnuo YN-560-TX flash controller
- Manfrotto Lumimuse 3 with homemade blue gel
- Manfrotto Lumimuse 3 with homemade purple gel
- Manfrotto mini tripod
- MeFoto RoadTrip Tripod
- White card stock (bounce card)
- Decorative paper
- Lumix LX100 II (for BTS shots)
- MetalBeard and assorted LEGO elements
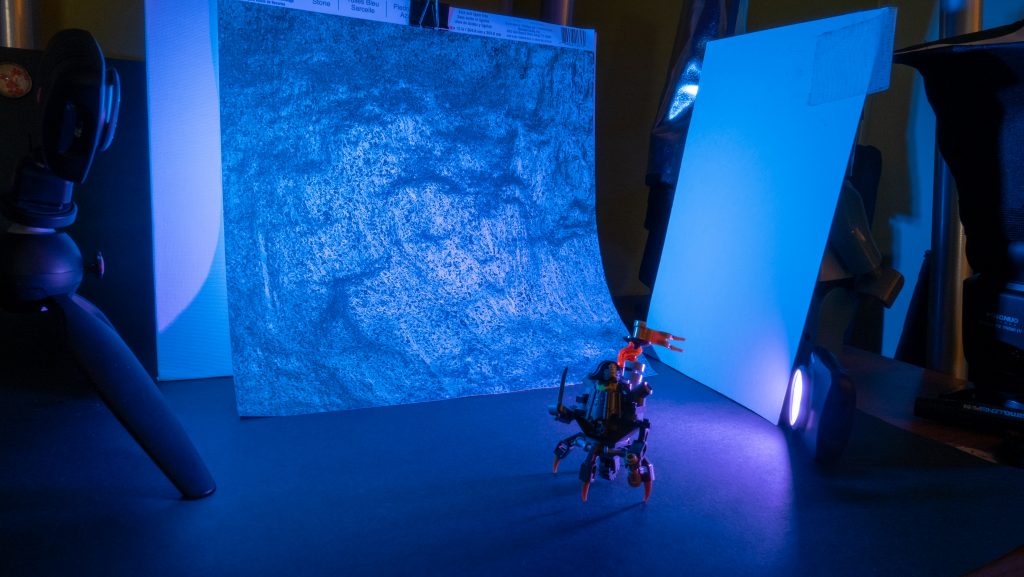
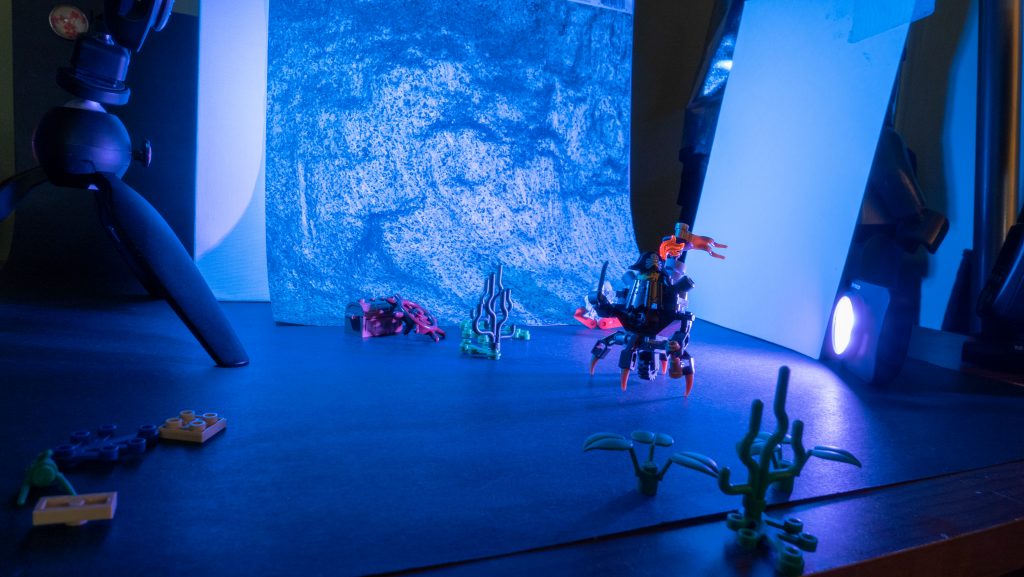
I’ll start by arranging my scene as I would have when I first begin with toy photography. My simple setups involved my subject, a background and some lighting. In this case, I have MetalBeard in front of a piece of decorative paper. To illuminate the background, I have one light with a blue gel trained on the backdrop, with a bounce card opposite the light to help spread it. I placed another light with a purple gel pointed at MetalBeard’s back for an extra pinch of color. Overhead, I have my flash with softbox pointing at MetalBeard. After setting focus and exposure, lets take a shot and review the results.
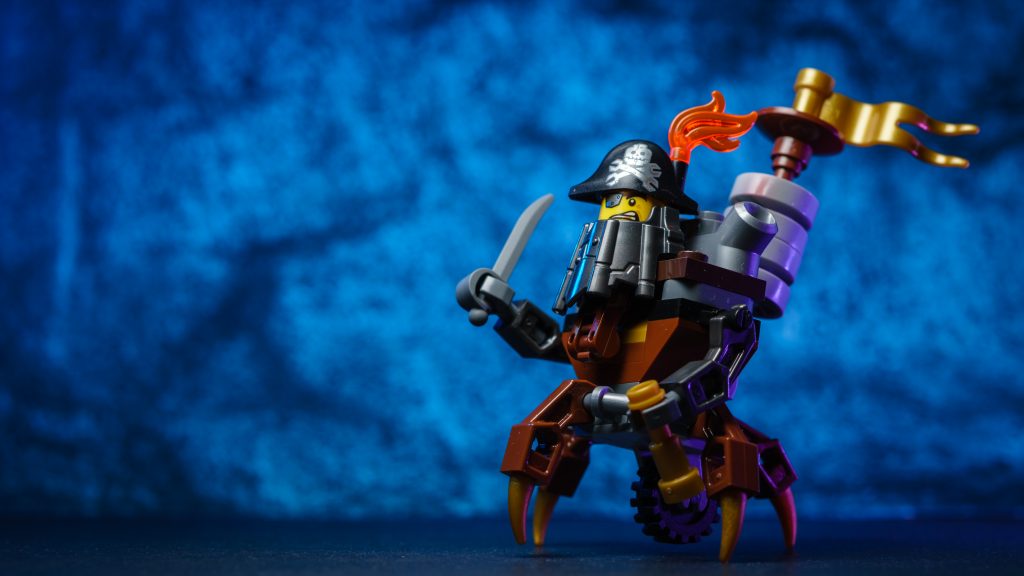
Here is the end result. There is nothing wrong with this photo. It just lacks pizzazz. Lets see how that changes as I dress up the scene.
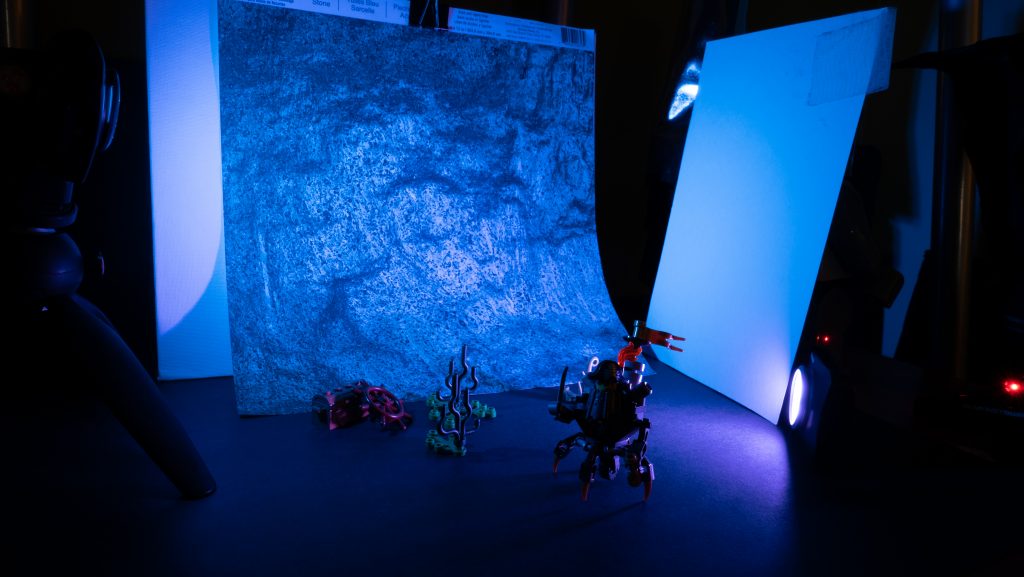
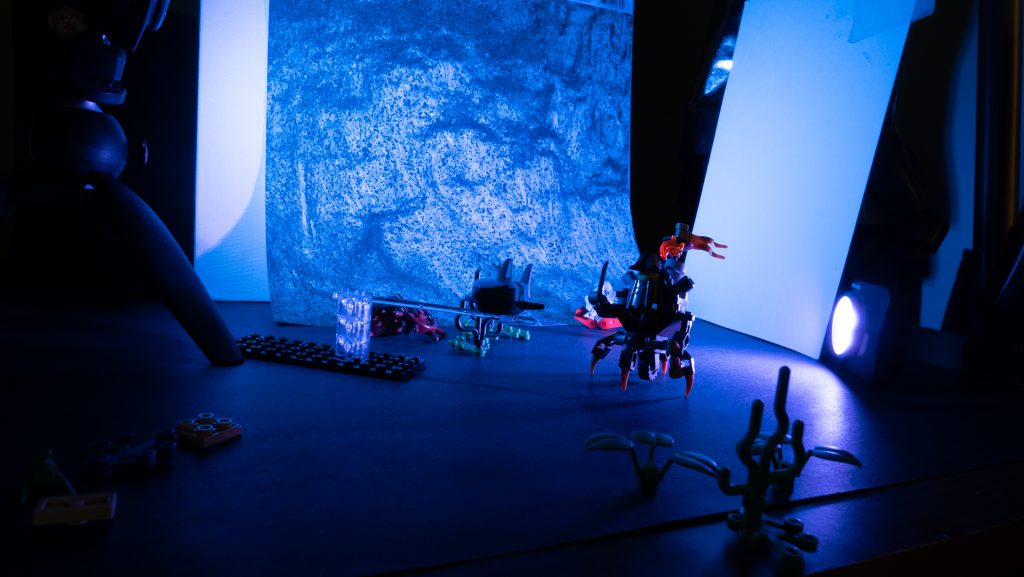
I’ve now introduced several Lego elements into the background. I’ve staggered their distance between MetalBeard and the backdrop in order to us my depth-of-field to vary to focus of these elements. This helps create distance between my subject and the background, and offers a viewer’s eye more to soak in.
With some non-competing elements in the background, the viewer has more of a hint of what they are seeing. There is more for a viewer to take in, and they may start filling in gaps to a story with their imagination. Lets continue building the scene.
Just like in the background, we’re now going to place elements at varying distances between MetalBeard and the camera. This is a great trick for pulling viewers into your world. You can use foreground elements to frame your shot, add more depth and even hide parts of your scene, such as wires or supports that you don’t want appearing in your final image. When arranging your foreground, always take care not to place elements in a way that they may overwhelm or distract from your subject (unless that is your intent).
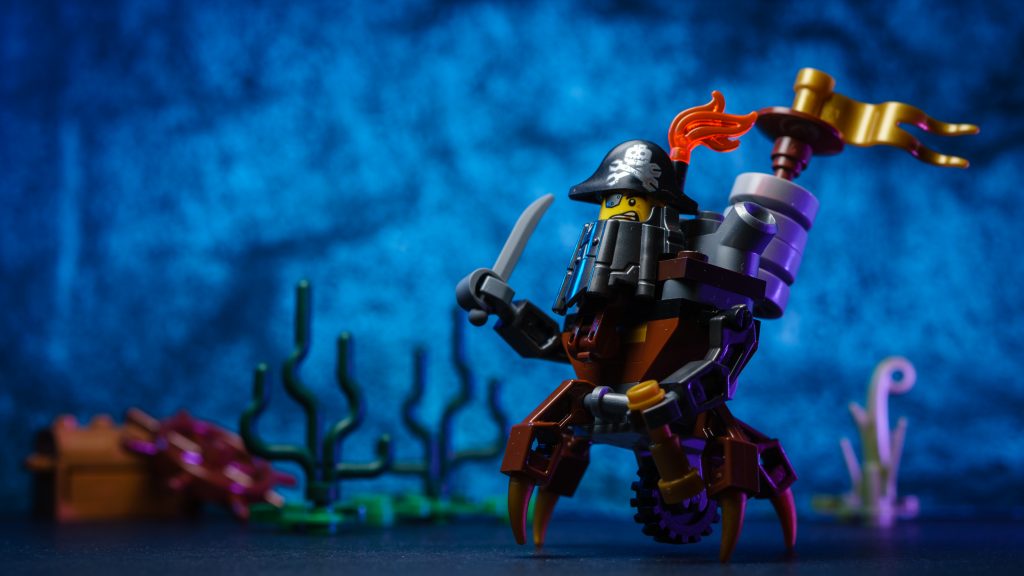
With our background and foreground coming along nicely, lets add a few more elements introduce one of our antagonist into the scene.
At this point, it’s hard to compare this shot to the original image. There is much more of a story being told now as MetalBeard cautiously watches his foe. The foreground and background have built a world for our characters to exist in. 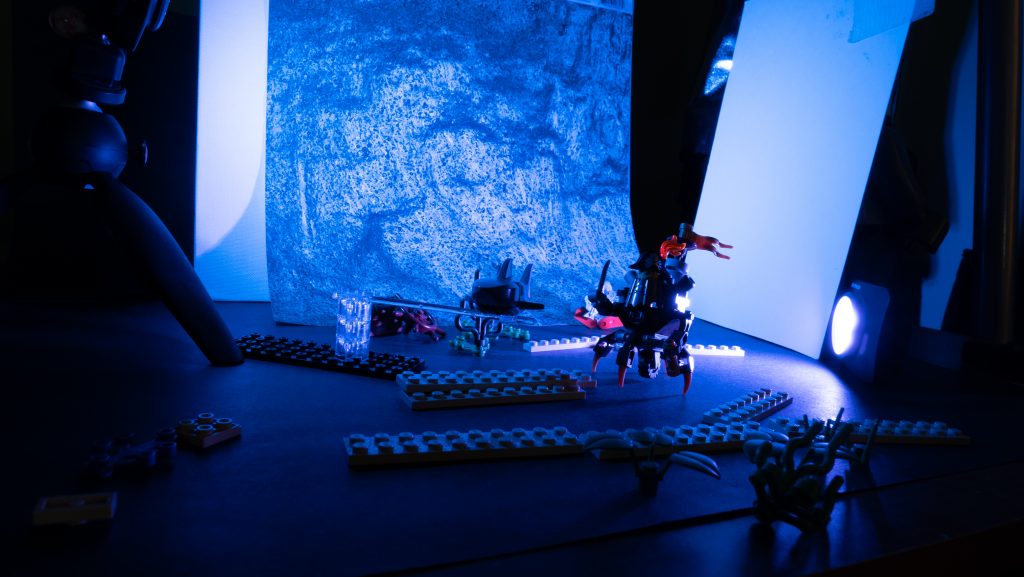
As your scene takes shape, don’t be afraid to refine and iterate. Many happy accidents have happened for me while creating a scene, where I’ve ended up with final images vastly different, and far superior from what I intended.
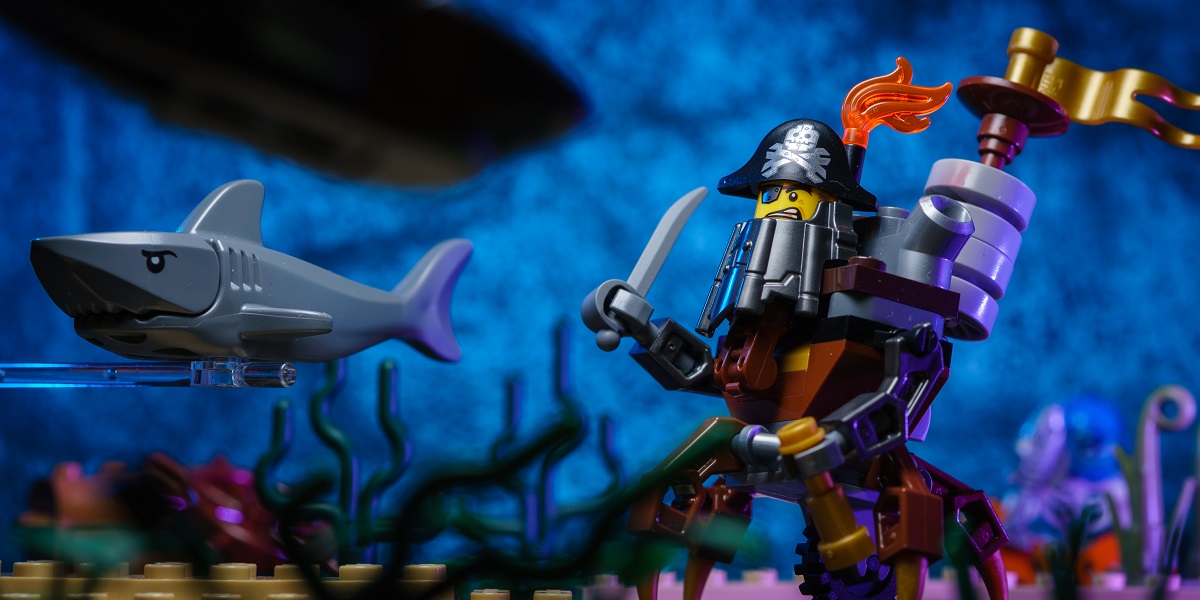
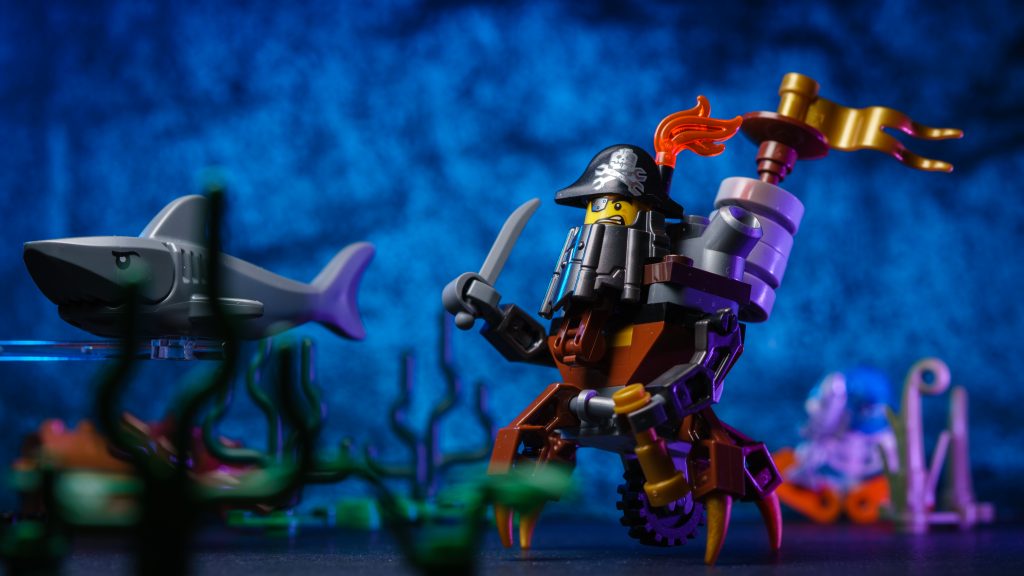
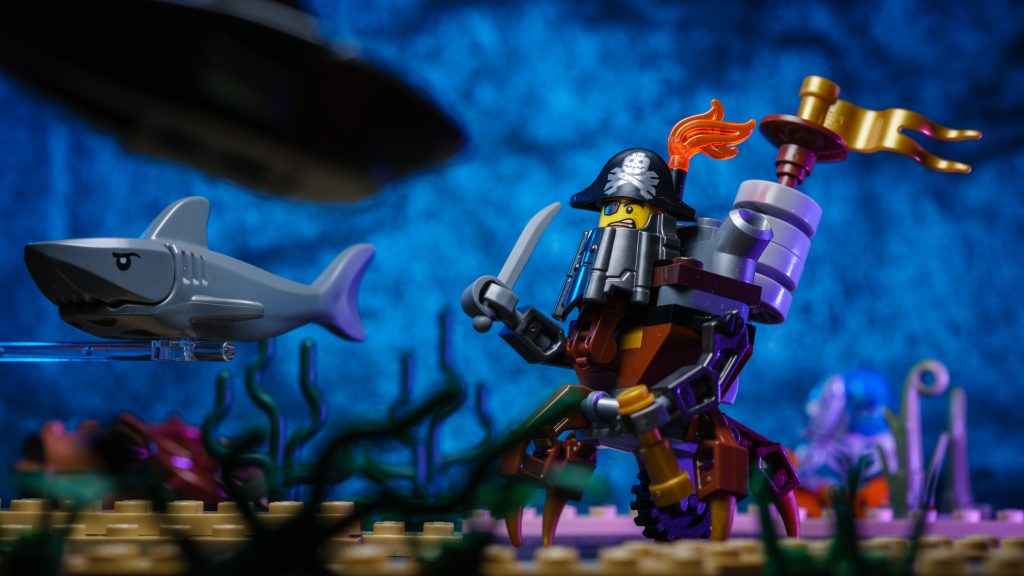 And now, our final image. The dark shark in the foreground is meant to create a sense of foreboding. It’s angled in such a way to create a leading line directly to our focal point, MetalBeard. Sand colored Lego bricks were scattered around the scene to create a sandy bottom, while an out of focus skeleton diver in the back was added just for fun.
There isn’t much comparison between the final image and the original. The final image required a lot more preparation and thought, but the effort you put into your photos almost always translates to the viewer – even if it’s only subconscious at times.
I hope this post helped demonstrate ways that depth can enhance your images. Utilizing depth is critical part of my creative process, and I continue to learn and develop through trial and error.
Experiment and explore with these techniques yourself, and don’t be discouraged if your images aren’t coming together as intended. Try adding and removing elements. Rearrange and recompose. For every image I share to IG, there are probably a hundred different variations of the scene that never see the light of day.
Grab your camera, your toys, play around and have fun.


I cannot express how much I appreciate seeing and reading about how a scene and picture comes together. Thank you so much for sharing your tips and process! Quite a different photo from beginning to end! Lovely.
Thanks so much, Molly! I’m glad you enjoyed the post. I’ve got plenty more behind the scenes topics I want to cover, so stay tuned 🙂
Wonderful post. It is always interesting how adding (in this case) or subtracting (in other cases) can affect an image. This really gives a sense of location, and sets the mood . Well done.
Excellent point, Dave, about subtracting elements to guide focus. A future post perhaps 🙂
This is a great post! It’s perhaps my greatest weakness: building up my scene with props.
It’s something I intend to work on in future photos. I’ll also be sharing this post on the Brickcentral forum soon!
I’m wondering why you left the clear rod support on the shark? Do you typically not process your photos?
Thanks so much, Anna. Props can make a huge difference in a scene. I still struggle to remember to use them effectively, so it’s an on going learning process.
Very much appreciate the share over at BrickCentral (kudos again to you and the rest of the team!).
As for the clear rod, I do process my images in Lightroom, but shy away from Photoshop. Two reasons really – first, I tend to lean towards practical effects. Typically, I’ll try to hide supports in the scene as best I can. I’ll leave them in from time to time if they don’t interfere or disrupt the scene too badly. The second reason is, well, I suck at Photoshop 🙂 That one I don’t have much of a solution for 😉
Ah, the often neglected foreground!
I love the attention to detail in your process Alan, especially seeing the photos build up depth, intrigue and interest. And I love that the foreground gets its own special attention. So often I find myself surveying the background of a frame, in towards the subject, and then stop. Of late, I’ve been forcing myself to begin eyeing the foreground as I look though my camera, just so I don’t neglect it!
Thanks for an incredibly interesting and useful post!
This was really useful thanks for writing and sharing. They way you showed the image improving as you built up the bsckgro7nd and foreground worked really well. Foreground is definitely an area I neglect
As mentioned above, Alan, showing the process by adding to the shot this way really illustrated the difference that the details in background and foreground make. Sometimes when we see a shot, we know it looks great but don’t know why. Although I like each shot you took for its own sake, the final version of the scene is so immersive and full of “story”! Excellent job.