What I’ve learned over the last two years doing toy photography is that lighting is extremely important, but not only to make a good picture in low light conditions – it can drastically change the look and mood of the photo. Lately I’ve been experimenting with lighting subjects and scenes from different angles, setting up multiple light sources and changing the positions of the LED lamps, but the images don’t always turn out the way I envision them.
The biggest problem is the glare that appears on the minifigures, especially on their faces. If I position the light so that the faces are well lit and without glare, then the environment comes out flat. If I pay more attention to the scene, then the minifigures are underlit or the glare covers their eyes and mouths. Fortunately, I found a way to overcome this problem – by combining photos in Adobe Photoshop.
Equipment
Before moving on to the main topic, I would first like to state what equipment I use when taking photos. So far, I own these three lights – two Ulanzi VL49 Mini RGB Lights and one Vijim VL120 LED Video Light. Sometimes I use all of them at the same time to light the scene from different angles. However, if I am not satisfied with the results, then I set only one light source for each frame that I will use for the final photo.
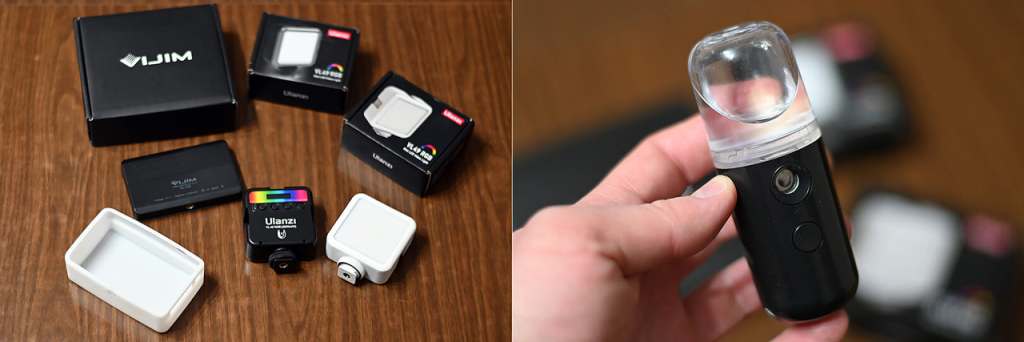
I also use a nano facial mister (also known as face humidifier or mist sprayer) to make the rays of light more visible or to create a mystical atmosphere.
Example 1 – Indoor Shot
When shooting indoors, there are situations when you might want to take advantage of the sunlight coming through the window and onto your desk, but it’s very important that you control the lighting yourself, making sure to avoid unwanted light sources. It all depends on how you envisioned the scene and what you want to achieve.
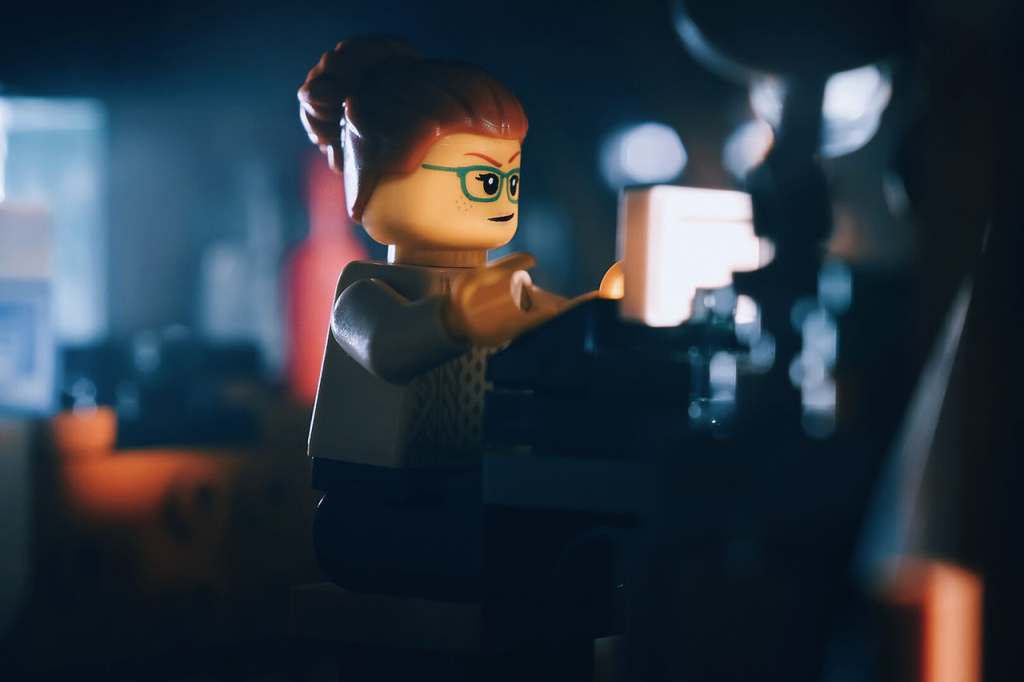
For the first example, I will show you how I took a picture of a woman I imagined writing a novel on a typewriter in the warmth of her home in the evening.
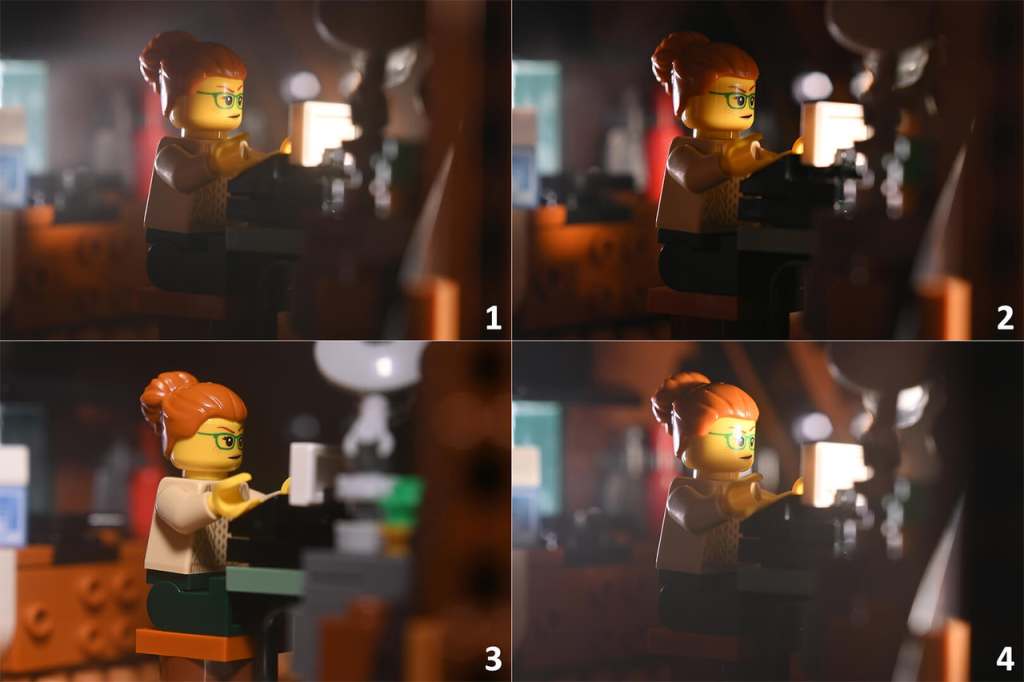
There are two light sources, one placed behind and one that illuminates the minifigure through the front window. I really liked the atmosphere in the first image and the way the moonlight is coming through the window behind the woman, but I didn’t like that glare over her right eye. I used it as a base for the final photo.
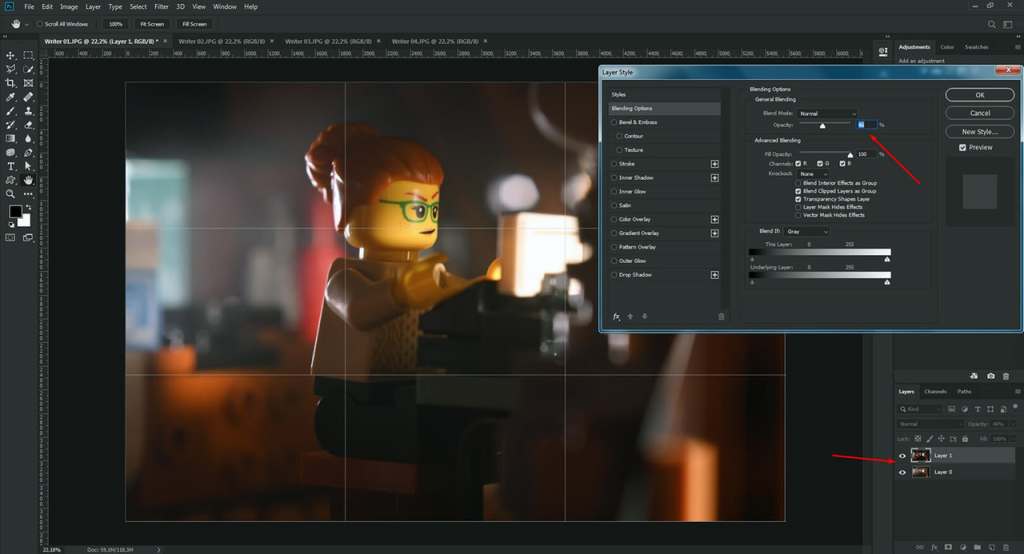
The contrast is better in the second image and to avoid that faded look in the first one, I combined them both by setting the opacity of the second layer to 46%. You can do this by right-clicking on the desired layer and selecting the Blending Options. Here you can play with the Blend Mode, Opacity and other options until you’re satisfied with the result.
For the third photo, I moved the light that was in front to the right of the minifigure (to the left from our perspective), raised above a little bit. This time the minifigure was nicely lit and there were no unwanted reflections across the face. However, the atmosphere in the room was not what I imagined it to be; as you can see the whole picture looks kind of flat.
I decided to use only a face, so I combined the third photo with the first two. I never use the Eraser Tool to remove unwanted parts of layers. Instead, I use layer masks because it’s easy to remove and restore certain parts of a layer with the Brush Tool.
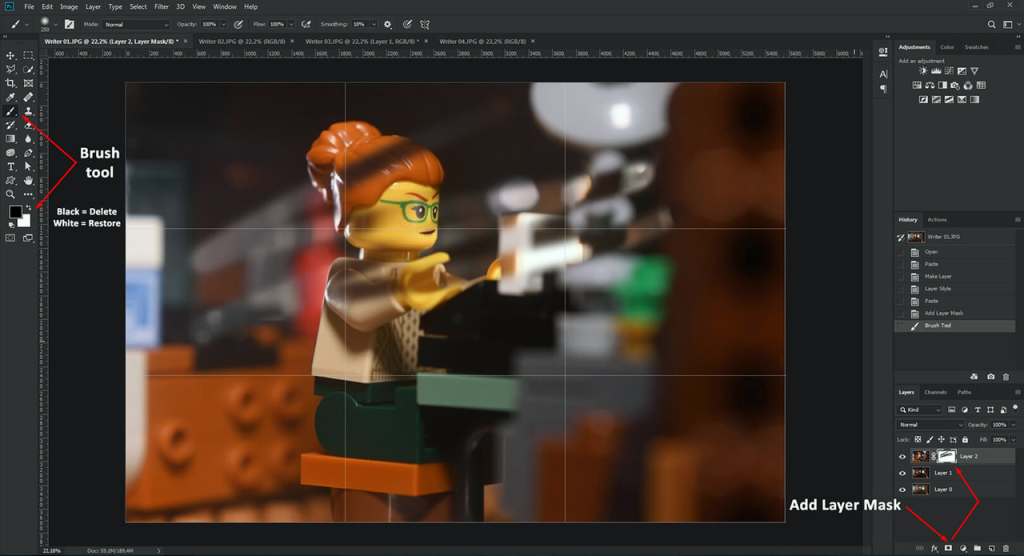
First, you select the desired layer, and then click on the Add Layer Mask icon. An additional white box will appear next to the layer. Everything that needs to be visible is marked with white color, while unnecessary parts of the image are removed with black color. You just use the Brush Tool to paint over the layer, as you can see in the example above.
As for the fourth photo, it was one of the failed attempts to light the minifigure from the front, but I liked how the table lamp was lit. It looked like a light bulb was shining, so I wanted to add that to the final photo. The procedure is exactly the same as in the previous situation. You can use it as many times as you want, as long as you have enough images (layers) to grab certain elements from them.
IMPORTANT: Keep in mind that when taking photos, the camera must be fixed and stable, so that each scene looks identical (minus the lighting). If you move the camera, you may have to retake each frame.
At the end, I merged all the layers and saved the photo to my PC. But that was not the end of the editing. I transferred the image to my phone and there I played with different settings in Snapseed, Lumii and Lightroom Mobile. You can do this in any app on your phone or computer, but you don’t have to. It all depends on your style and preferences. Here’s the final photo.
Example 2 – Outdoor Shot
When you’re shooting outdoors, whether it’s in your backyard or somewhere in nature, you often won’t need to use additional light sources because you’ll have natural lighting at your disposal. You can use a piece of paper or cardboard to reflect sunlight onto your subject(s).
On the other hand, it can happen that the sun is too bright, so you will have to set the scene somewhere in the shade, and then there’s a possibility that the shadows will cover the minifigures or other elements that you want to be well lit. A LED light could come in handy in this situation.
Note that if you don’t want to carry a lot of equipment with you or if you only own one LED light, it will be just enough, because you will combine all the frames into one final photo. This time, I will not explain the procedure in detail, because everything is practically the same like in the previous example.
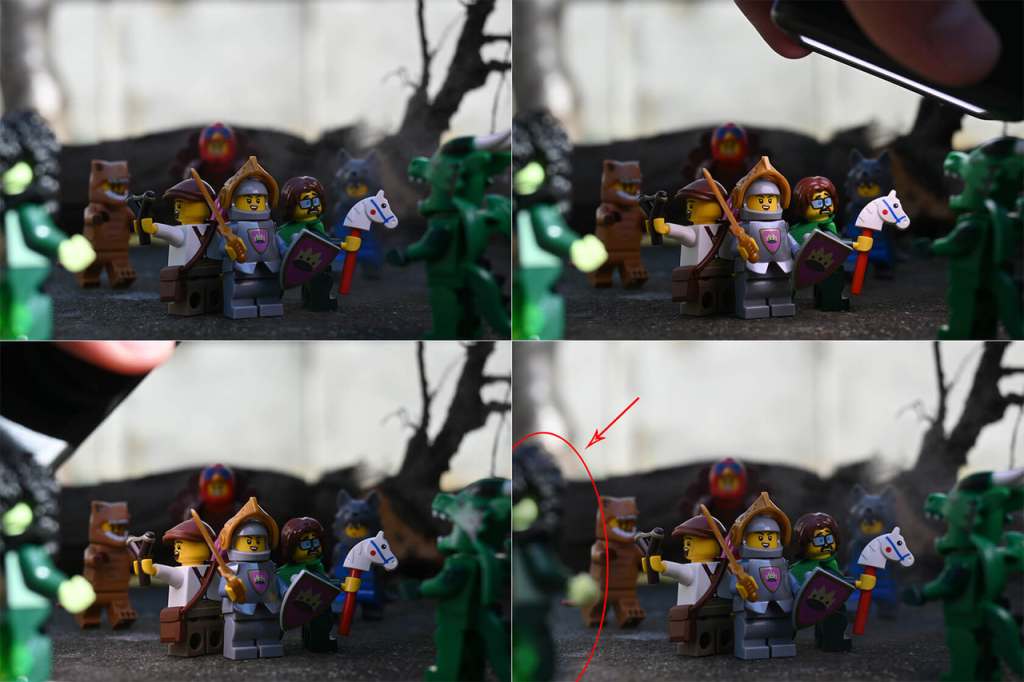
For this photo, I imagined three kids playing and fighting imaginary monsters. Or those could be grown-ups in costumes playing with their children on Halloween. You can interpret the scene however you want. I put the camera on the floor and then lined up the minifigures in the frame.
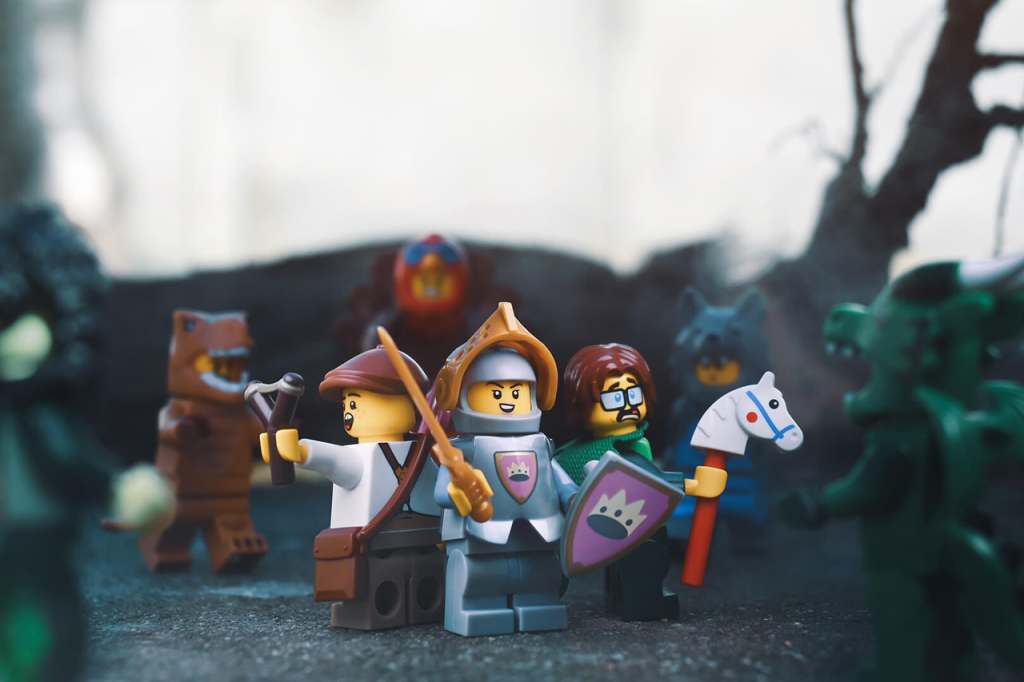
As you can see from the second and third photos, I moved the LED light around to make sure that all the children are well lit. It wasn’t a problem that the light and my hand were visible in the frame, because they would be removed using the first image, which served as a base. The banshee minifigure on the left was overexposed, so I blocked out the sunlight with my hand and only used the fourth picture to add her. This is the end result, after combining all the photos and additional editing. I removed the unwanted reflections using the Healing Brush Tool.
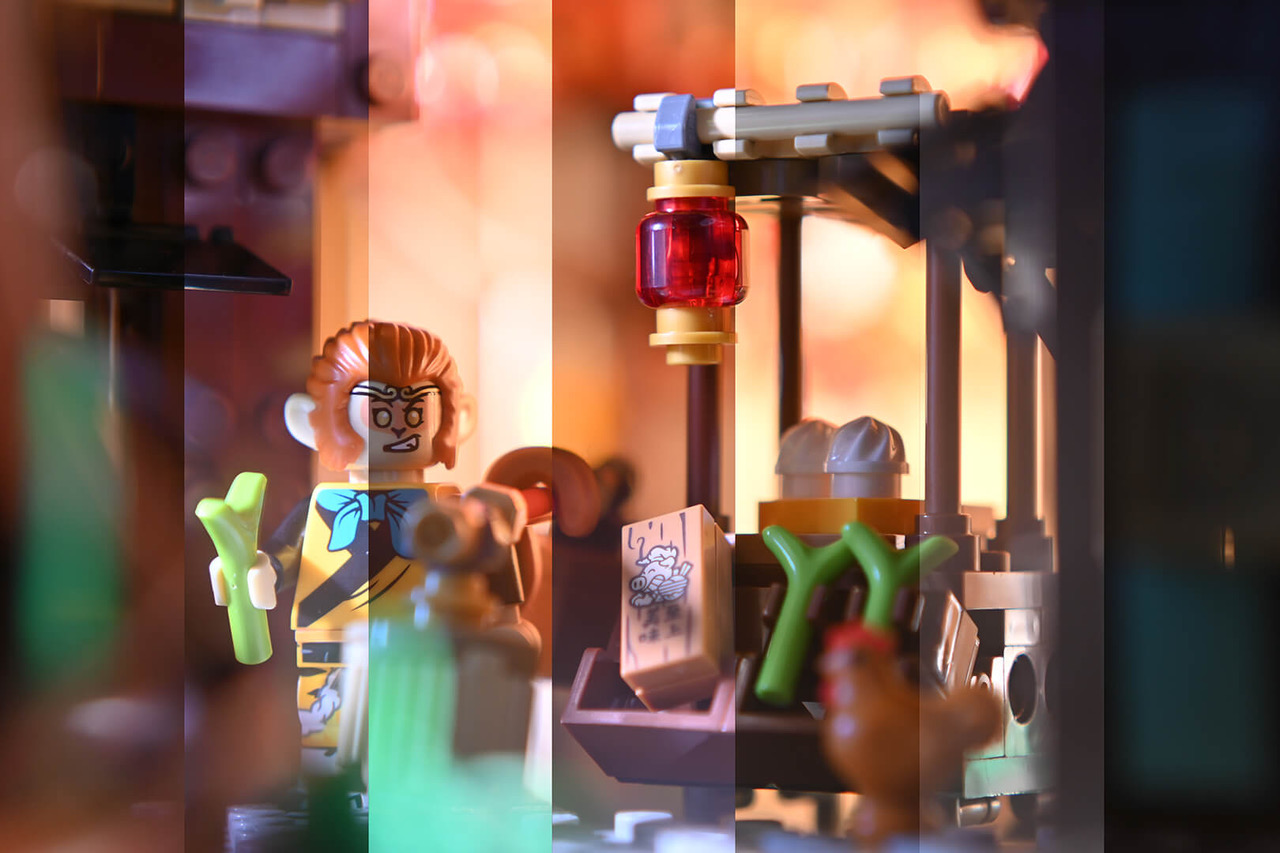
More Examples
Below you can see additional examples I created by combining multiple photos in Photoshop.
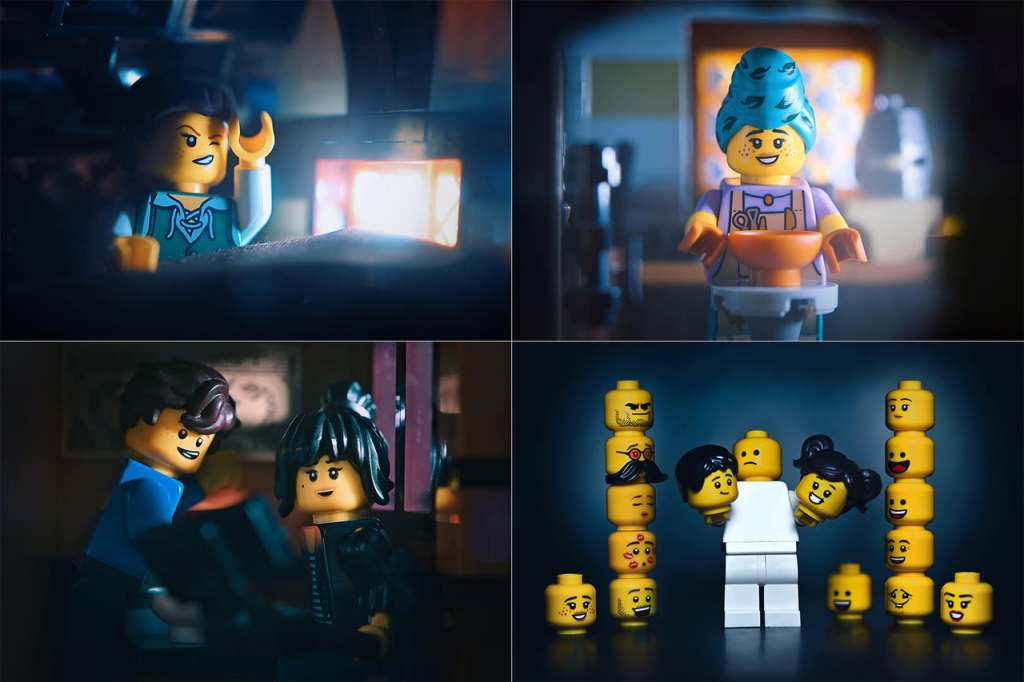
You can also apply these tricks if you want to focus on multiple objects that are not in the same line. Sometimes I prefer to edit photos this way because I have more control, but you can also use focus stacking to expand depth of field.
Thanks for reading!
Zoran Pesic (IG: Bricktoygrapher)


Excellent article, Zoran! Thank you.
And thank you, Ruby!
Great explanation, Zoran!
Thank you, Mary!