Whenever, I get an opportunity to review a LEGO set, I try to review them with toy photography in mind. What would I toy photographer do with this set? What would someone who loved the IP want to see done with this set? What do I want to see out of a LEGO review based on a movie I love? Naturally, recreating the whole thing in toy photographs. Sounds simple, right? Turns out it was not so easy.
The last article I wrote was a review of The LEGO T.REX Breakout 76956 set in it I mention I recreated the 9 mins and 12 seconds that make up the actual scene the set is based on. This is that story.
Before, I get into the details here’s the scene in question.
The Actual Scene from Jurassic Park (1993)
The Concept: Recreate The Breakout Scene
If you are like me then you didn’t need to watch the scene above to see the still frames in your mind of the T. Rex attacking the kids in the car.
When LEGO comes out with a new set I am always so impressed by the tiny details hidden within their T. Rex breakout set that made recreating this scene so easy. It provided me with a movie set piece. It gave me everything. The characters, a T. Rex, the cars, a flare, and a paddock. Well almost everything but, I’ll get there. LEGO did such a good job, that the set itself is the scene. You can see the whole entire 9 mins and 12 seconds flash before your eyes in its completed form just looking at it on display.
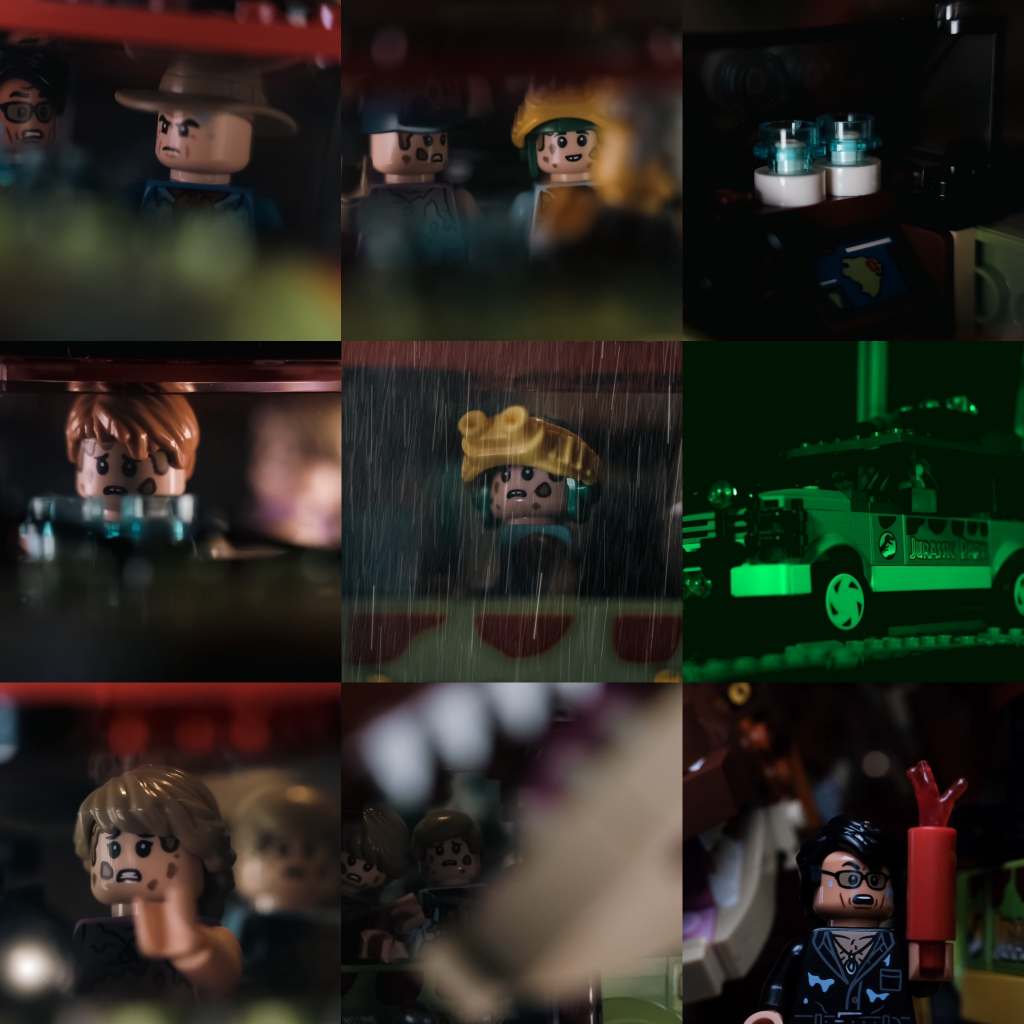
Starting Small: The First Nine Photos
When I set out to take photos for the LEGO review my original goal was to show off how accurate the LEGO designers Casper Glahder (Graphics), Atticus Tsai McCarthy (LEGO Designer), and Woon Tze Chee (LEGO Senior Designer) made the set. I wanted to showcase what a toy photographer can do with a well-crafted LEGO set. I wanted to prove to people that you could recreate the whole scene with just this one set. And it seemed doable. Like, I said before the designers of the set, provided me with pretty much every element I would need to be as visually accurate to the movie as possible.
A Six Nine Image Narrative
If you read the blog often you’ll see all these articles on six-image narratives. Six images tell a story because we are a toy photo blog that works with photos. We aren’t taking 36 photos to create one second of films like stop animation or actual videos. So it’s obvious that for my original intent I would at least need take 6 images to fully embody the set. Turns out nine would be enough to tell the whole story.
When editing for film or television we’d think of these as story beats. They are natural places to cut a scene. The question is which images are the most important?
$99 Divided By $9 Equals $11 Dollars Per Photo: Breaking Down What’s Most Important: My Mistake
If I was just going to take product photos “badly” of this LEGO Jurassic Park Set based on the original movie. I might take these nine photographs. Nine photographs tell you what this set has to offer.
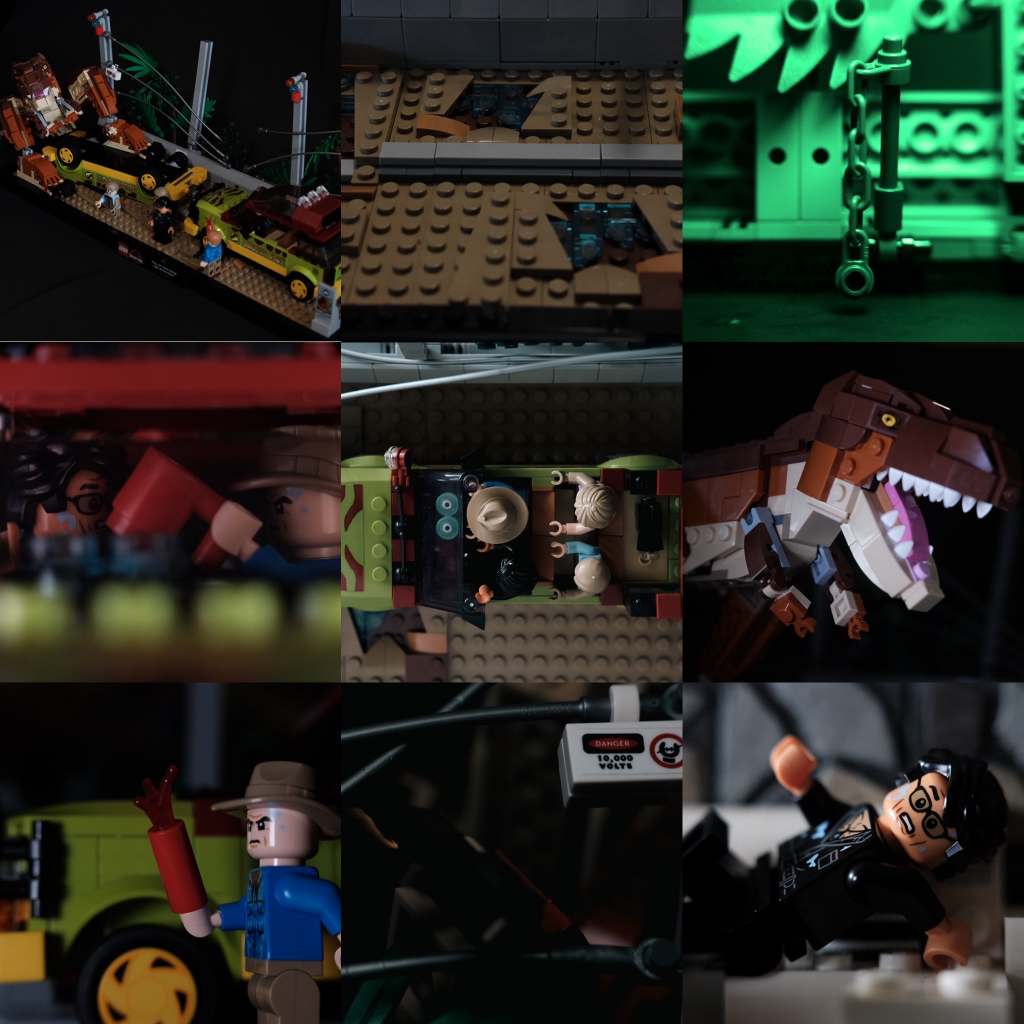
- A picture of the set itself on a black background.
- A detailed shot of the muddy footprints.
- A detailed shot of the electric fence.
- A shot of the interior of the Ford Explorer showcasing all four minifigures fit inside.
- A shot of the back of the set with a chain showcasing the missing goat.
- A photo of the T. Rex
- A photo of Dr. Alan Grant and Ian Malcolm
- A Photo of Dr. Alan Grant and a flare.
- And A recreation of that Jeff Goldblum Meme
These Nine Photographs are not worth the price of the set or at least it wouldn’t convince anyone on the fence about spending $99 dollars on the set.
They wouldn’t showcase the awesomeness of this set at all. It doesn’t do the set or the movie justice. While the nine photos above tell you what you get with the set they don’t “show” you what you can do with it. It’s a bunch of random photographs that vaguely connect and have a little bit in common. Are these photos cool? Yes. Do they showcase what you can do with the set? Yes. But, it also feels unsatisfying. I showed you the muddy details, but I didn’t use them for anything.
You might be wondering why I just wasted a few minutes of your time talking about what nine photographs in a failed 9 image narrative looks like. This is because in order to know what you need, you have to first figure out what you don’t need.
The Actual Nine Images: Breaking Down The Story
Creating a good six-image narrative or in this case, nine image narrative is knowing the story you want to tell. And what are the images needed to tell that story?
When I got the set I wanted to re-create the scene as best I could. What makes that specific scene great is that it is its own mini-movie within the movie. It’s 9min and 12 secs of pure tension.
Before re-watching the scene I asked myself these questions.
What do I remember most about the Breakout Scene?
– The water shaking and everyone realizes they are in trouble
What are my favorite parts about the Breakout Scene?
The kids see the dinosaur through the window.
What is the point of the scene?
Showing that John Hammond doesn’t have the dinosaurs under control and there’s a T. Rex on the loose.
These questions helped me pick out what images I thought mattered most. It is how I narrowed down the nine images I needed to take for a collage on Instagram.
The next set of questions I asked myself is
What do I need to do to re-create these scenes?
What type of lighting setup do I need?
How am I going to edit these photos to look like a Steven Spielberg production?
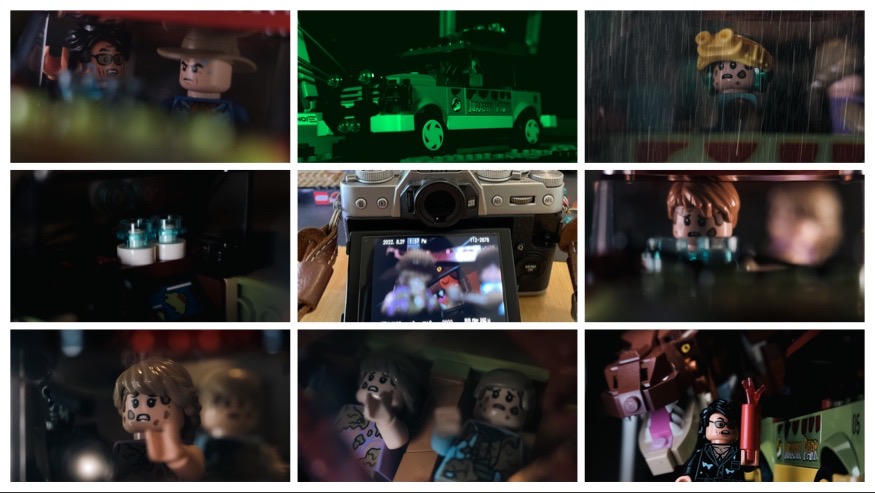
Now here are nine photographs that break down the famous scene with story beats in mind. A true nine-image narrative. This is the scene broken down in such a way that it tells the whole story of the T. Rex Breaking out in as few photos as possible. When describing the T. Rex Breakout scene to someone it might go something like this. With these nine-story beats. Nine photos worth $11 dollars each.
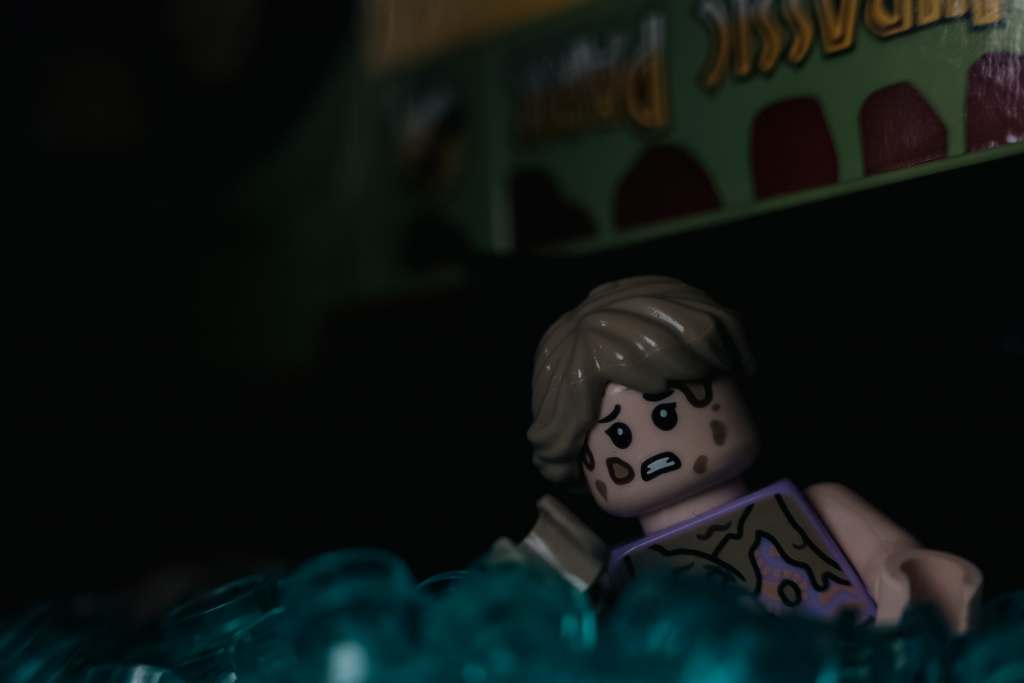
- Dr. Alan Grant and Dr. Ian Malcom Are in one car bored
- Lex, Tim, and Gennaro are in another car also bored
- The Glasses of Water Start To Shake
- Tim Noticed The Water Shaking
- Tim looks out the car window
- They Notice The Goat Is Gone
- Lex finds a flashlight
- The flashlight attracts the dinosaur
- Dr. Ian Malcom uses a flare to distract the dinosaur and draw it away from the kids.
Okay, so I lied. I know nine photos aren’t enough for me to justify buying a set worth $99 US dollars. For some, $11 a photo would not be worth it. For others taking these nine photos would be enough to satisfy their wallet. It would be enough for a toy photographer to recreate what many people say is the best scene in Jurassic Park with these nine photos. I thought it would be enough. But, one quick IG reel edit later and I was unsatisfied. I was left with a 6 image narrative plus 3 extra filler photos. These nine photos did not create a satisfying reel worthy of the tension, dread, and atmosphere that Steven Spielberg created with his 9 mins and 12 seconds.
Don’t get me wrong 9 Images are enough to tell the story of the scene. Am I missing important beats like Gennaro leaving the kids in the car, getting eaten by a dinosaur, and Dr. Alan Grant throwing a flare before Ian Malcolm tries to sacrifice himself? Yes. Which is why I ended up doing the whole thing.
And that is where the true story begins.
T. Rex Breakout Scene A Toy Photographers Version: By The Perry Adventures
Now you can watch my version below first before you read the rest of the article. Or you can finish the article and watch the scene first totally up to you.
Watching The Scene and Recreating The Story Beats In Real Time
The Process
After, I created the original 9 images. I realized there was so much more I wanted to do. So, many more little moments to re-create. I knew eventually I wanted to create a video on IG reel or a TikTok with whatever images I ended up with. So, I cut a short video of 30 seconds with the 9 images it was slow, boring, and not at all like the film. I didn’t post it. I hated it. There weren’t enough photos to create the same feeling and vibe of the movie.
Since I’ve never done anything like this before and I have only done two stop-motion animation films I knew this was going to be a long process. What made this different from any other time I’d be recreating a scene from a film was the fact that I knew in the end I was going to turn it into a video. This made my process and setup slightly different from my normal. For one thing, I knew that because this was going to take way longer than my 15 mins a day mentality I knew I’d have to actually leave this thing set up. Or at least it would have to be set up in a way I can take it down and put it back together without much trouble.
The First Thing I Did
Realizing, if I wanted to make something worthy of Steven Spielberg I’d need to re-watch the scene on YouTube a thousand times. I downloaded and then uploaded the audio from the clip to CapCut which is what I was going to use to edit the photos into a movie. This really helped me with the pacing of the scene. Once, I had the audio, I uploaded the 9 images I’d already taken and put them into where they’d go in the actual scene itself. It made me realize just how long the scene actually is. The first couple of minutes of the scene is just talking. There is no music. And everyone seems bored. Two minutes in Tim get night vision goggles. I realized then I was in for a long haul.
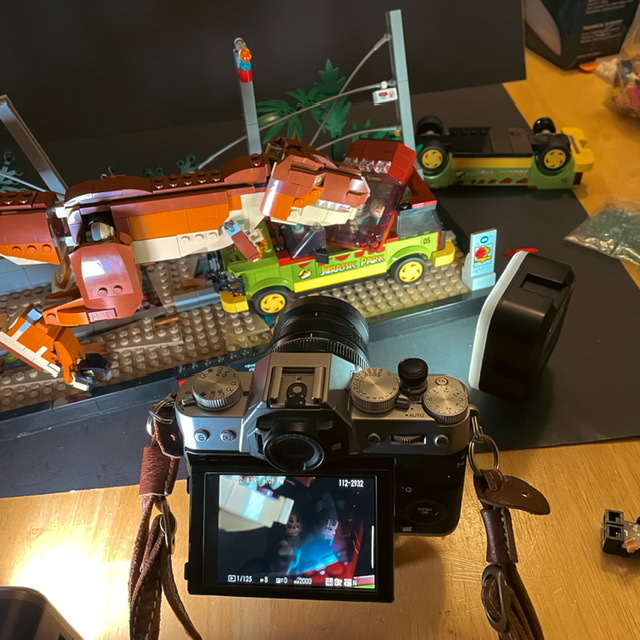
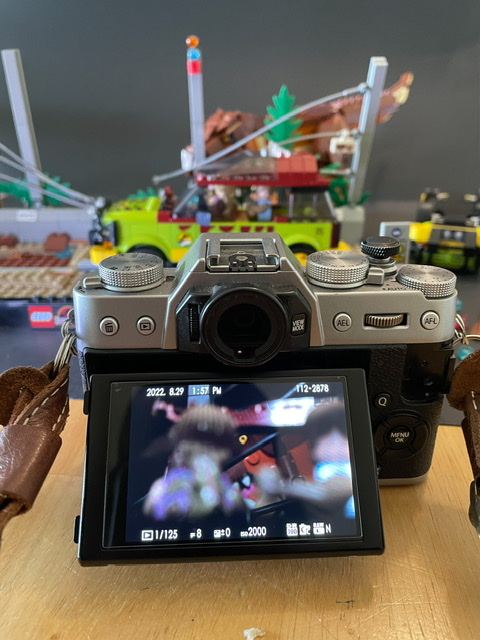
The Set and The Gear
Once, I committed to recreating the whole scene I started the slow process of recreating it shot for shot. Lucky, for me, the LEGO set itself is the only thing I really needed to create the atmosphere and scene for the photos. I basically had the LEGO set on my dinner table on top of a black poster board, and a black poster board leaning up against a box, being held up by chip bag clips, and a hanger. For the most part, I used two Ulanzi lights, and a 10mm extension tube with my 35mm Fuji Lens. Minimal setup made it easy to take down and put back together every night.
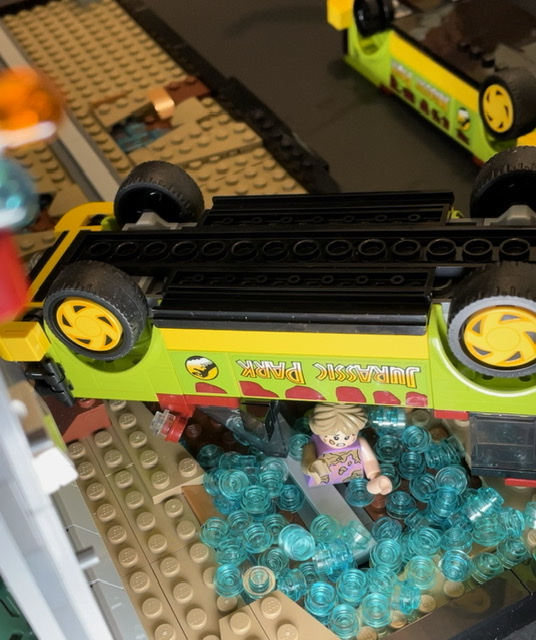
As for what LEGO I needed to add to recreate the whole thing, was a fake – not a real LEGO goat, some extra transparent blue 1×1 circles for water, and the LEGO Harry Potter Hogwarts : Polyjuice Potion 76386 set to use as the toilet and hut Gennaro runs into, and of course a bald LEGO minifigure in a vest for Gennaro and that is it.
Recreating The Film
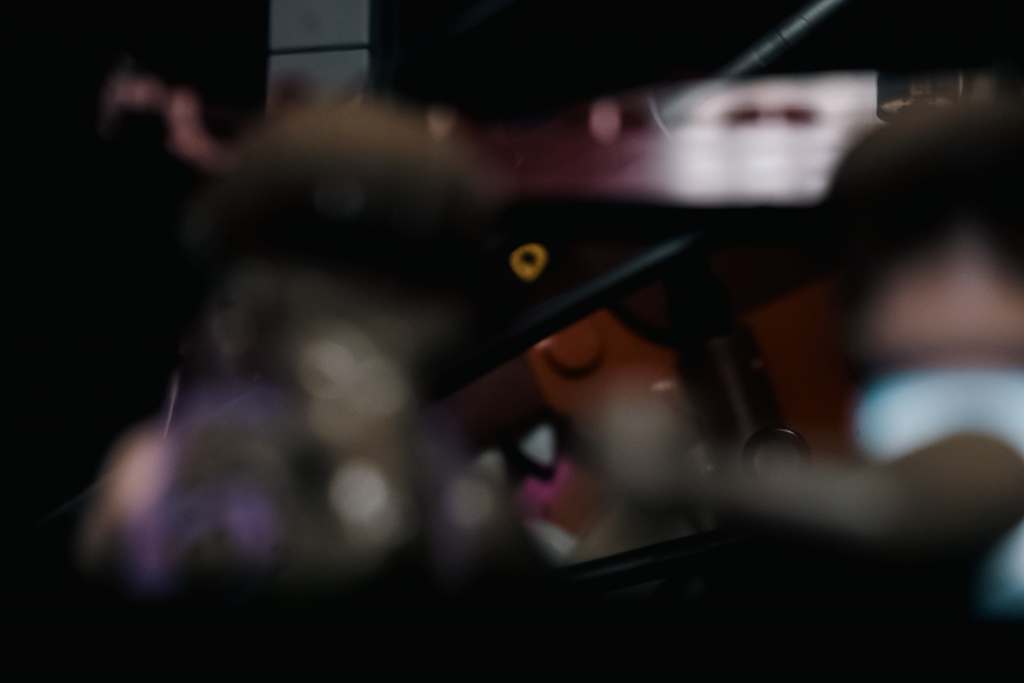
The easiest part of this whole process was the actual re-creating and taking of each scene. Because I already know my toy photography process and my gear setting up each shot was a simple task. I’d watch a clip of the 9 min scene. Do a setup. Take The photo. I’d download the photo color edit it, upload it to CapCut and do the whole thing again. I used over 600 photos to create the video and honestly, I think I could have used more. But, I am happy with the actual result. I won’t go into detail on how I took every one of these photos so here is some examples.
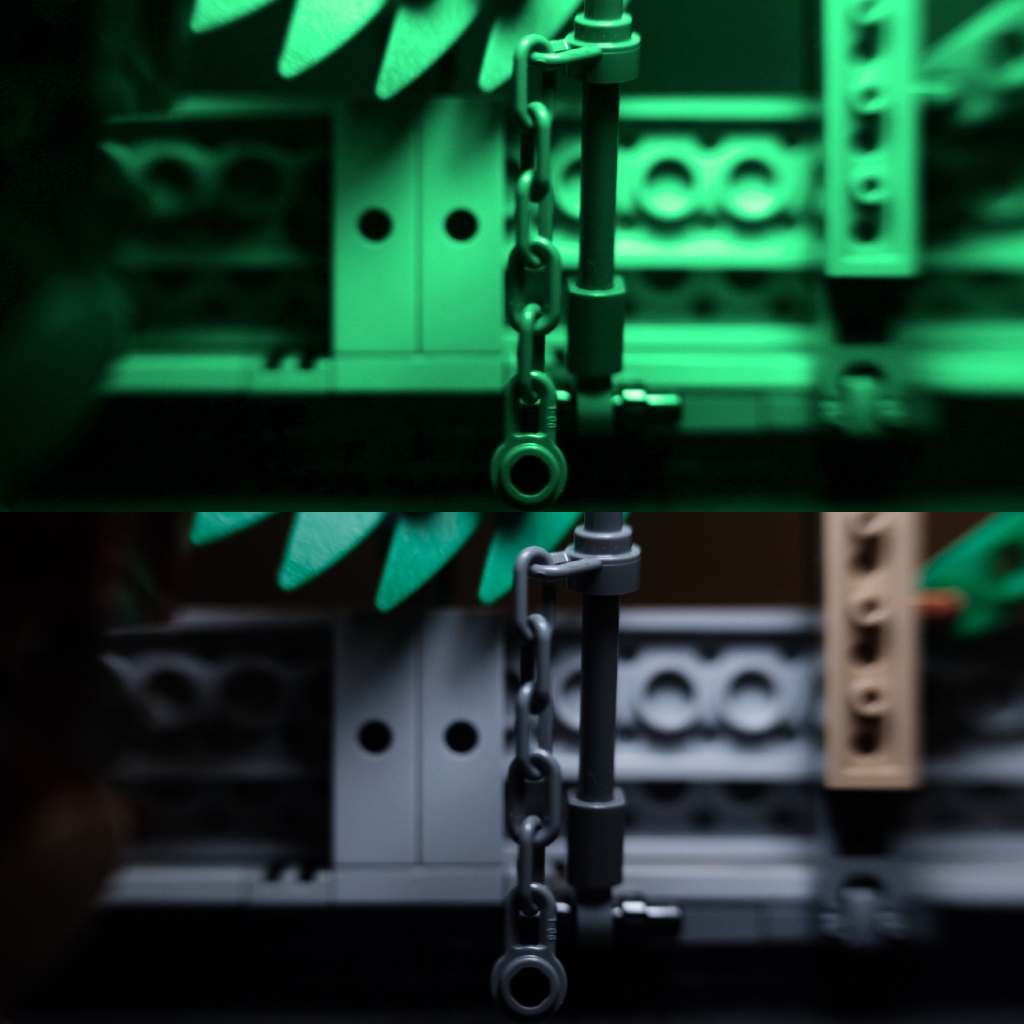
In editing the film I knew that I wanted to make sure to add night vision to some of the photographs of the car. To make it more movie accurate.
Editing The Film and The Photos
I used Adobe Lightroom and Adobe Photoshop Express and CapCut to process all my photos and edit the film. I was editing the film as I went. Uploading the photo to the film after every shot. This was so that I could nail down the pacing. Because, I knew I didn’t have time for stop-motion animation, I wanted to take enough photos to fill the time. I added transitions, rain, camera shake, and zoom to the photos to make them look like real film and to add interest. Without those tiny details, the 5 photos used in the first two minutes of the edit would be boring. In Lightroom, I would color the film to look like Jurassic Park and in case you are wondering I used the Cinema 15 Preset as the standard for the color of the film.
Lighting
I used a similar lighting setup to the actual way they lit Jurassic Park after watching several BTS interviews and reading several articles. This really made it easier to edit my photographs to match the aesthetic of the actual film. A couple of lights one in the front and one in the back. The hardest part was getting reflections on the LEGO faces and hard light on the plastic. But, a well-placed small piece of foam board and paper taped to lights go a long way.
Lessons Learned
The whole process from taking photos and editing the film took a month and a half. I didn’t take any other toy photos aside from the ones used in the video. I spent most of my free time working on this project while watching movies in my living room. I can’t say that taking photos, quickly editing the color, and uploading it to the video you are editing right away is efficient but it worked for me and it might work for you too. Lighting these photos like Spielberg did teach me about his process and even editing and recreating his film shot for shot taught me about pacing and creating tension. Copying Spielberg taught me his style of composition. What elements does he find important to a scene? With a few lights, a couple of LEGO sets and my camera, and some editing software I was able to recreate 9 mins and 12 secs from one of my favorite movies. The biggest lesson I learned was with time, and effort you can accomplish anything.
Do I recommend you recreate 9 mins and 12 seconds of Jurassic Park for yourself. Maybe.
Should you recreate other artists’ you admire? Yes. If only for the reason you discover their techniques or your own way to accomplish a similar result. That is what happened to me.
What film or show should I recreate next? What film or show do you want to do? I’d love to know.
My Deep Dive: Research
CorridorCrew Remakes Jurassic Park
The Movie That Made Us : Jurassic Park Episode On Netflix
Steven Spielberg Directing Style
The Grace Of Gods Light – Toy Photographers Article Tom Milton


Awesome work! Sabrina you outdid yourself!
Sabrina, this is amazing work. I think I may have been more riveted watching your remake than I was watching the original clip. Great Job!