Lighting the miniature scene
Light might be the actual hero in most of my toy photographs. But like heroes in a movie, lights are constantly changing position while I shoot. There is a lot of improvisation during the hours I spend behind the camera. This is why I find it difficult to talk about setting up or answer question about how I do it.

Setting the stage for improvisation
A few things can be said though. When I photograph miniature scenes, I start with darkness and then bring on the light. Not literally, but that’s the process. It’s the opposite of using a black pencil on a white piece of paper. In the end, darkness—utter blackness—will add abstraction to the picture. This approach can be compared to something I often do with brightness in my rather abstract work (see, for example, The Berlin Train series or Le città e la memoria).
Light and shadows are great means of composition. Lighting can turn an average scene into an exciting one. It spotlights the action, creating drama along with the contrasts. So planning and building a set usually involves planning and building light sources, as the examples on this page demonstrate. (I’ve covered this aspect in a recent post.)
Advanced planning does not preclude improvising once the ‘decisive’ moment has finally come. Rather, it provides the basis for everything else; consider it a framework. It’s a starting point from which I might go into any direction. In the end, only few of my toy photos are exactly what I had planned. There are simply too many nuances to play with.
But let’s get back to setting up. Once the buildings are in place, offering both lighting opportunities and limitations, I ask myself a couple of questions: Should the light be realistic or expressive (or both)? How much drama do I want? How do lights and shadows define the composition? Where would the light come from in reality? (I’ve written about scaling down the light before.) Do I need certain light sources for the sake of continuity while shooting a sequence? Are there things I need to highlight—or hide?
Spontaneous decisions
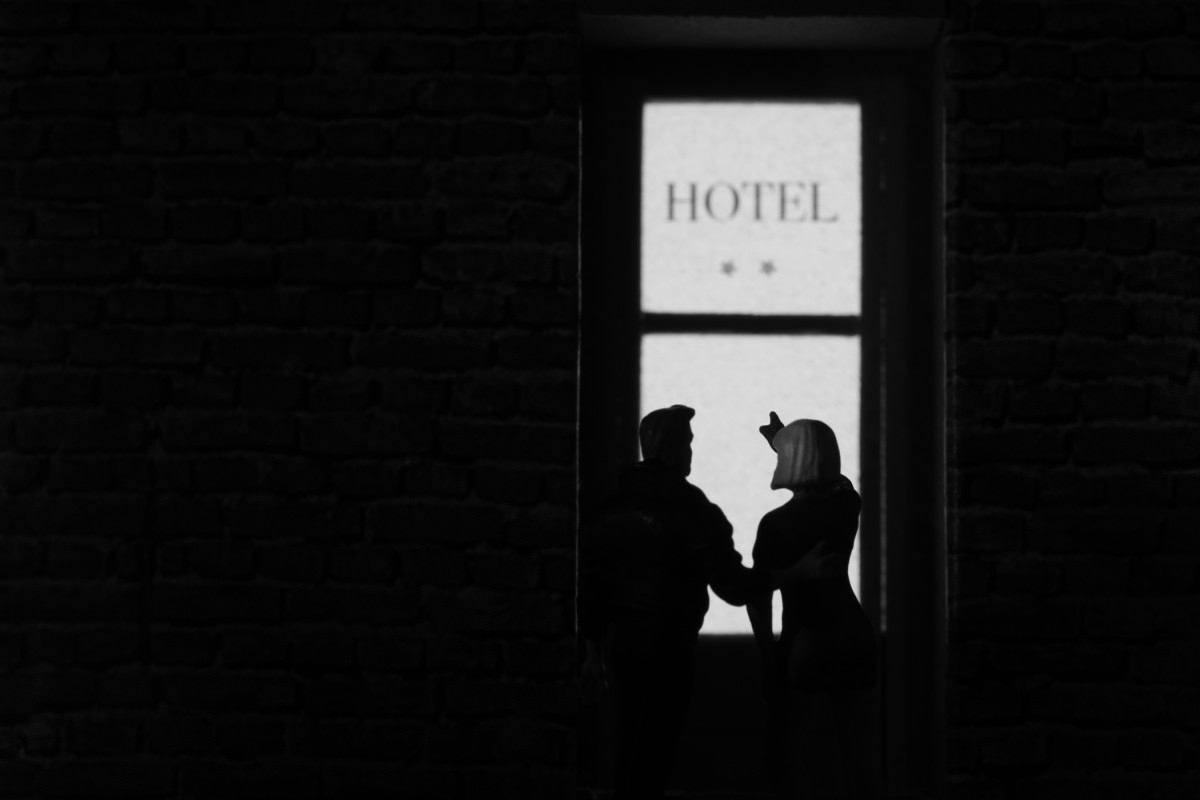
Take the above scene in front of a hotel as an example: The setup is simple. The backlit door emphasizes the dialogue taking place in front of it. That’s something I had planned in advance. But I had not pre-visualized ‘drowning’ much of the surrounding walls in darkness; this was a spur-of-the-moment decision. And when I found the picture lacking depth after doing so, I quickly set up a tiny LED light to the left, softly illuminating the lady’s hair … just enough to show she is blonde.
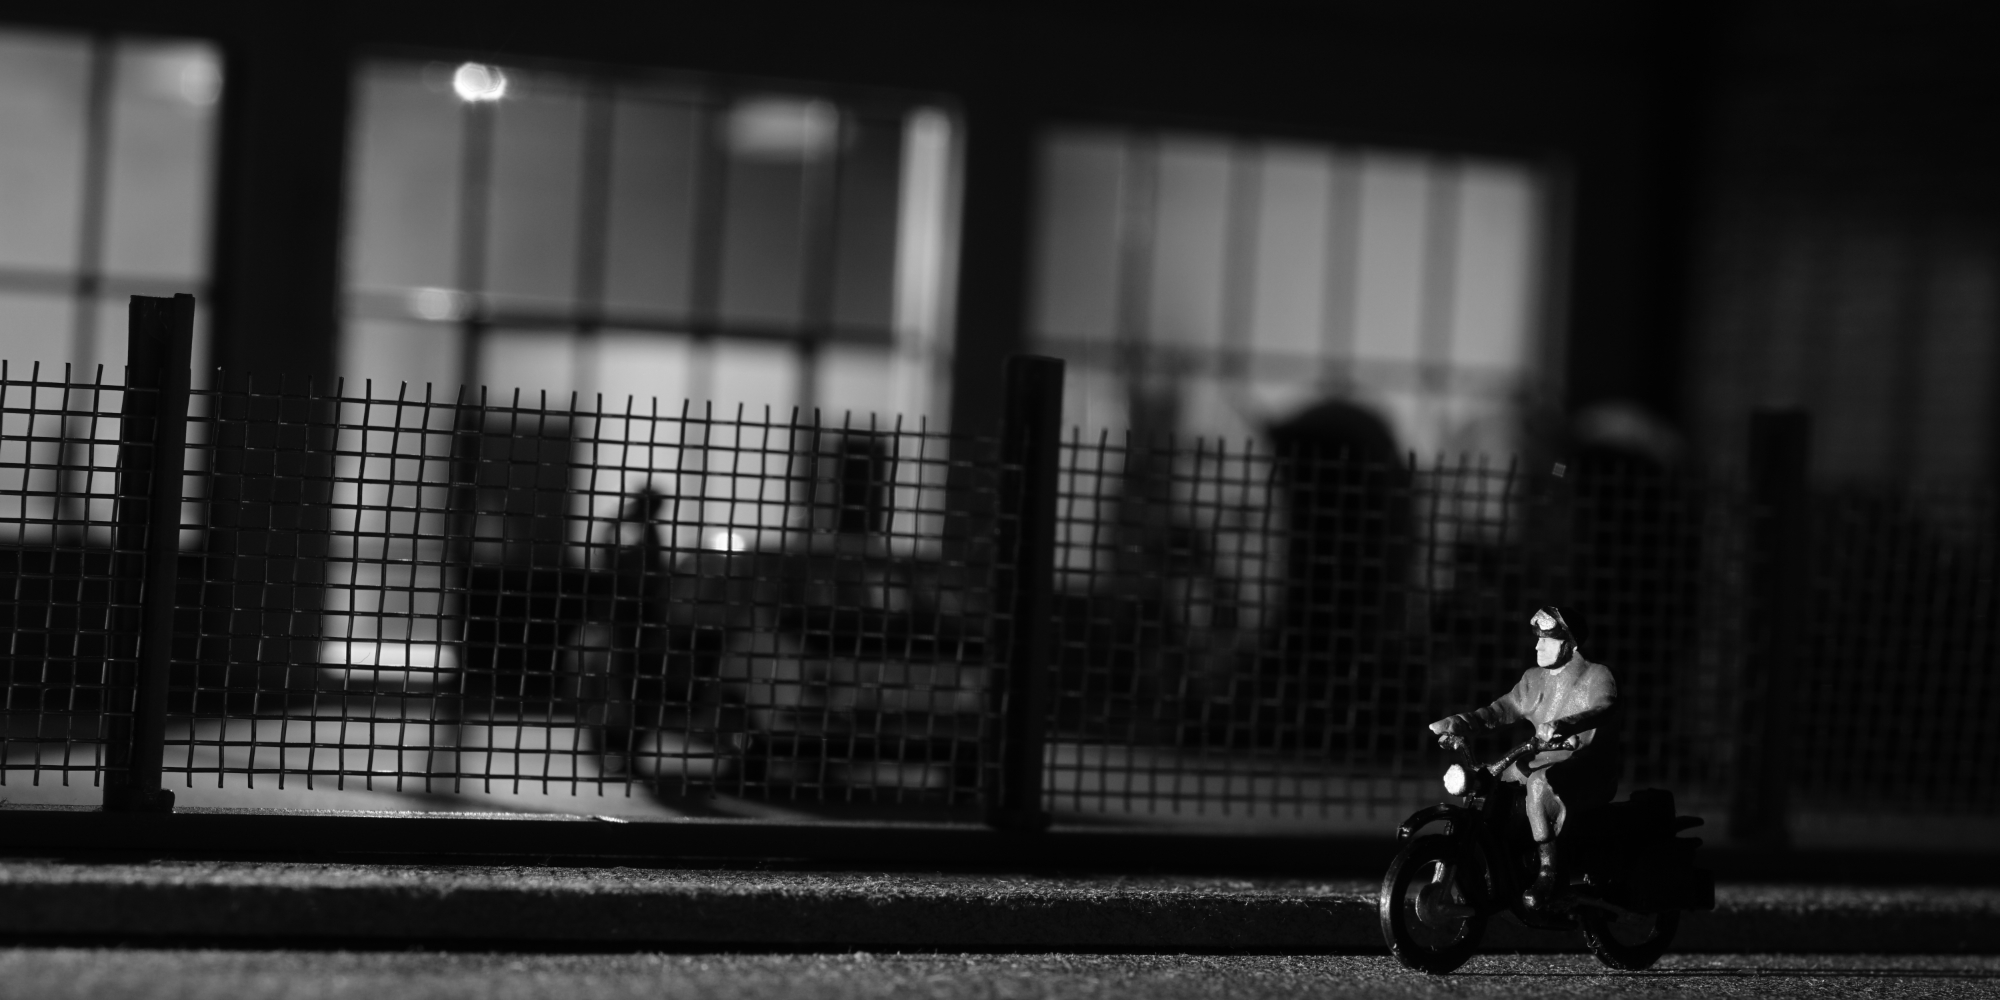
Both this picture and the one above result from simple setups which rely on small light sources, like miniature lightbulbs and LEDs, the kind you might find in a mini Mag Lite, in a Fischertechnik or LEGO construction kit, or in H0 scale miniature streetlights. Anything small goes, really—and in black and white, the light’s color does not matter much. Speaking of simple setups, I’ve lately come to appreciate my desk lamp (with a 77W bulb)—the light it sheds is beautifully sunny, and I have set my white balance to that lamp.
Hiding the unwanted
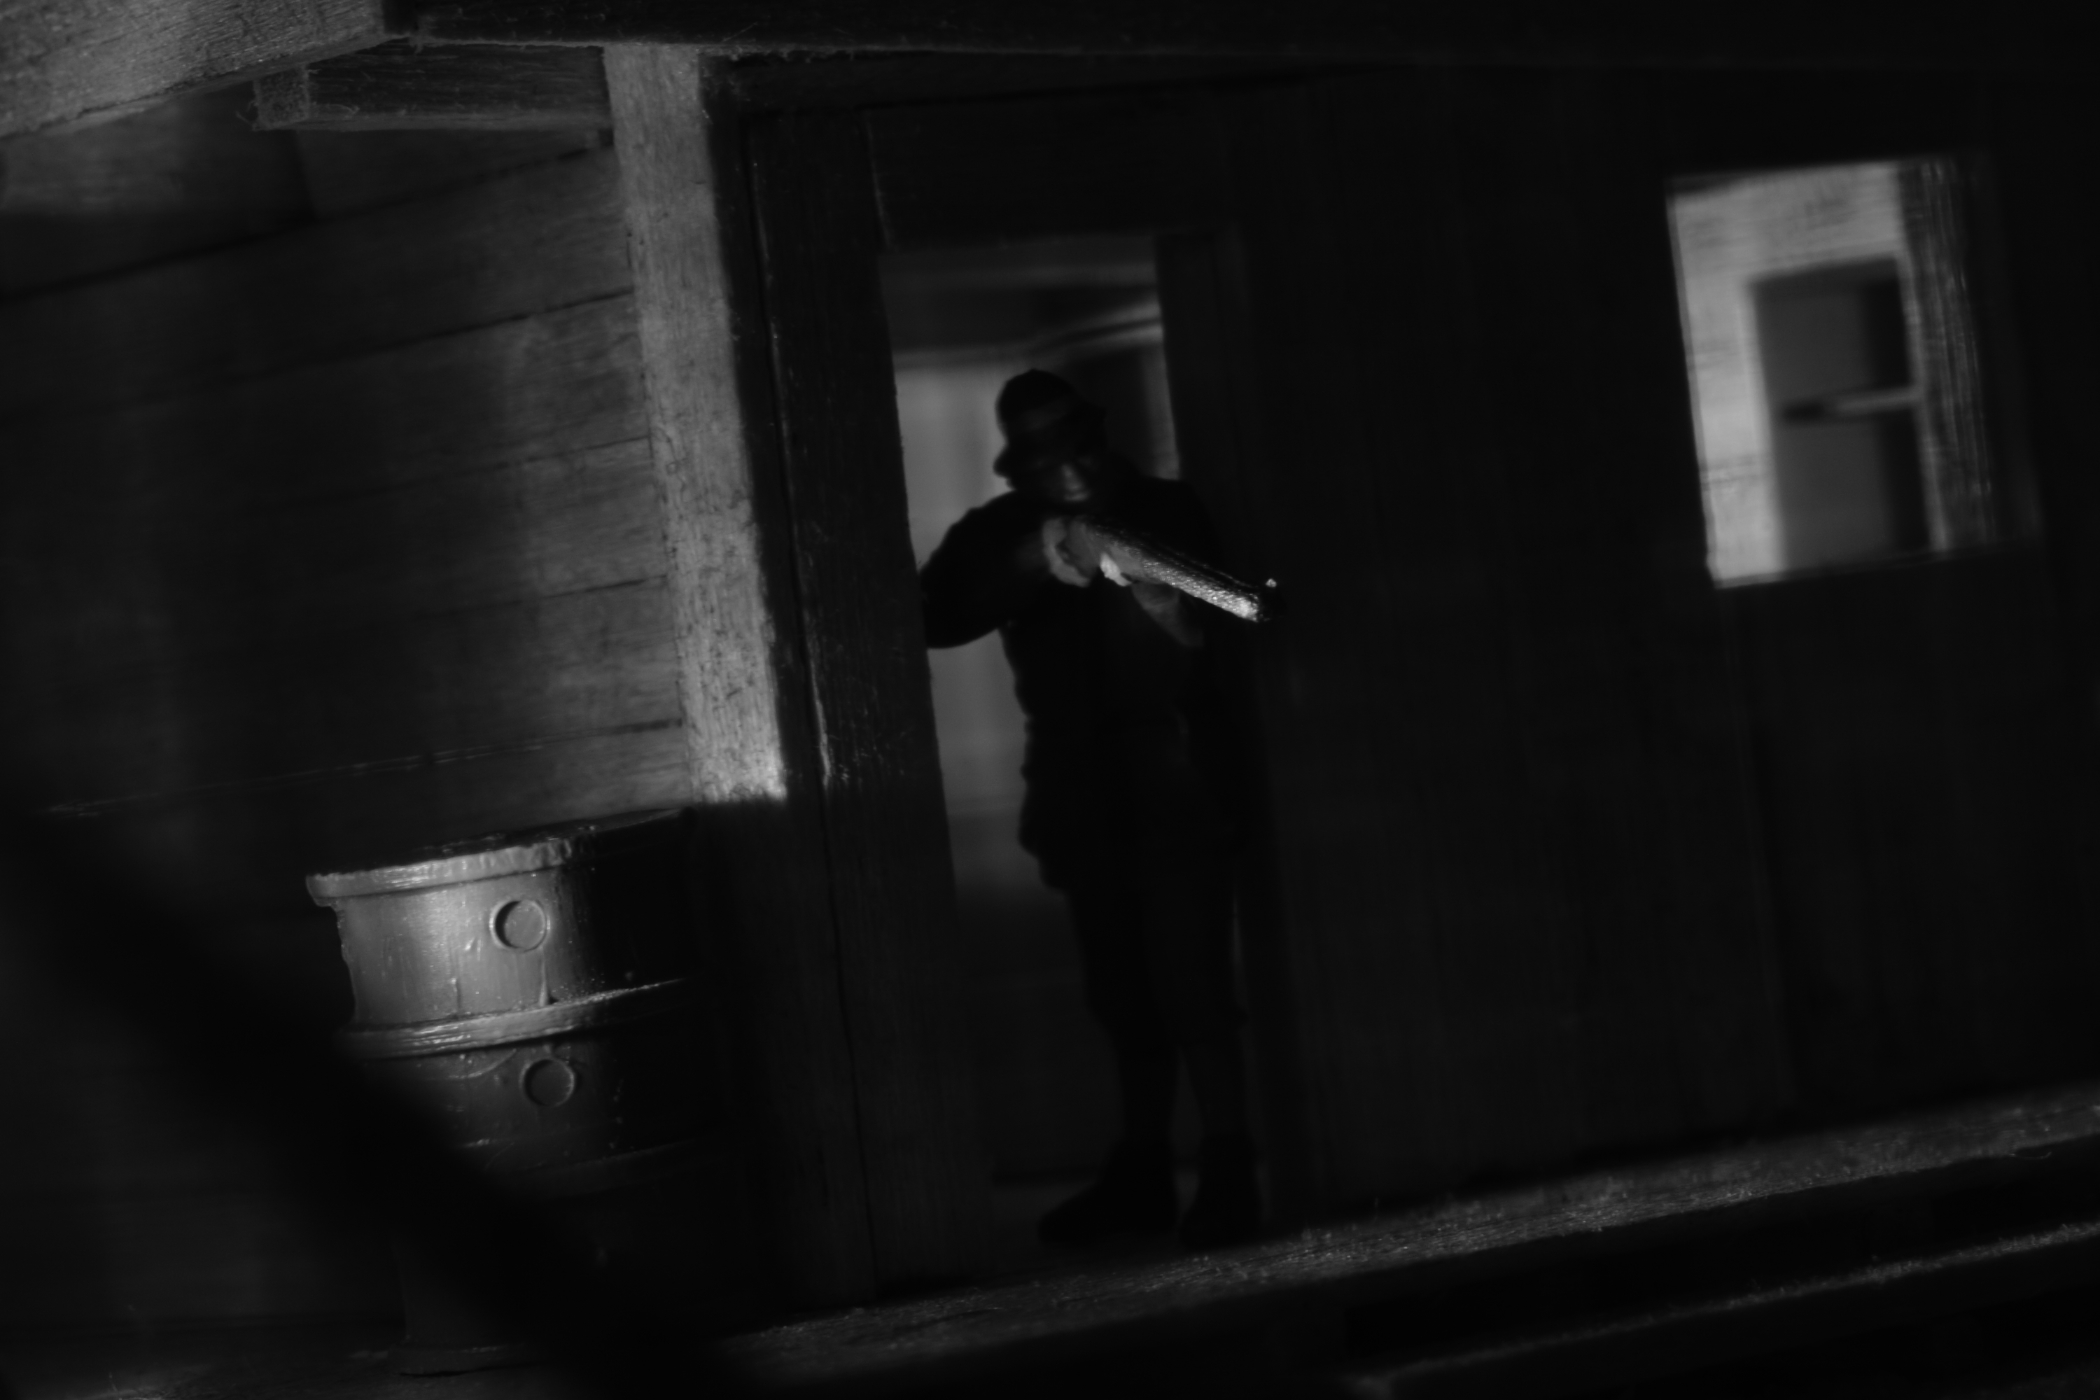
One more thing before we look at a more complex setup: Light also helps me hide things. Like when I wanted to make the above picture of just an old guy (Wendell Walker) with a rifle. All I had in terms of figures was a hunter in his typical hunter’s outfit. So I used the light to show the weapon and a small part of his face, leaving his garb in the dark. I used two small LED lights here, one illuminating the rifle from the left, and one for the interior of the hut. So light also helps working with the figures at hand.
Less improvisation, more planning
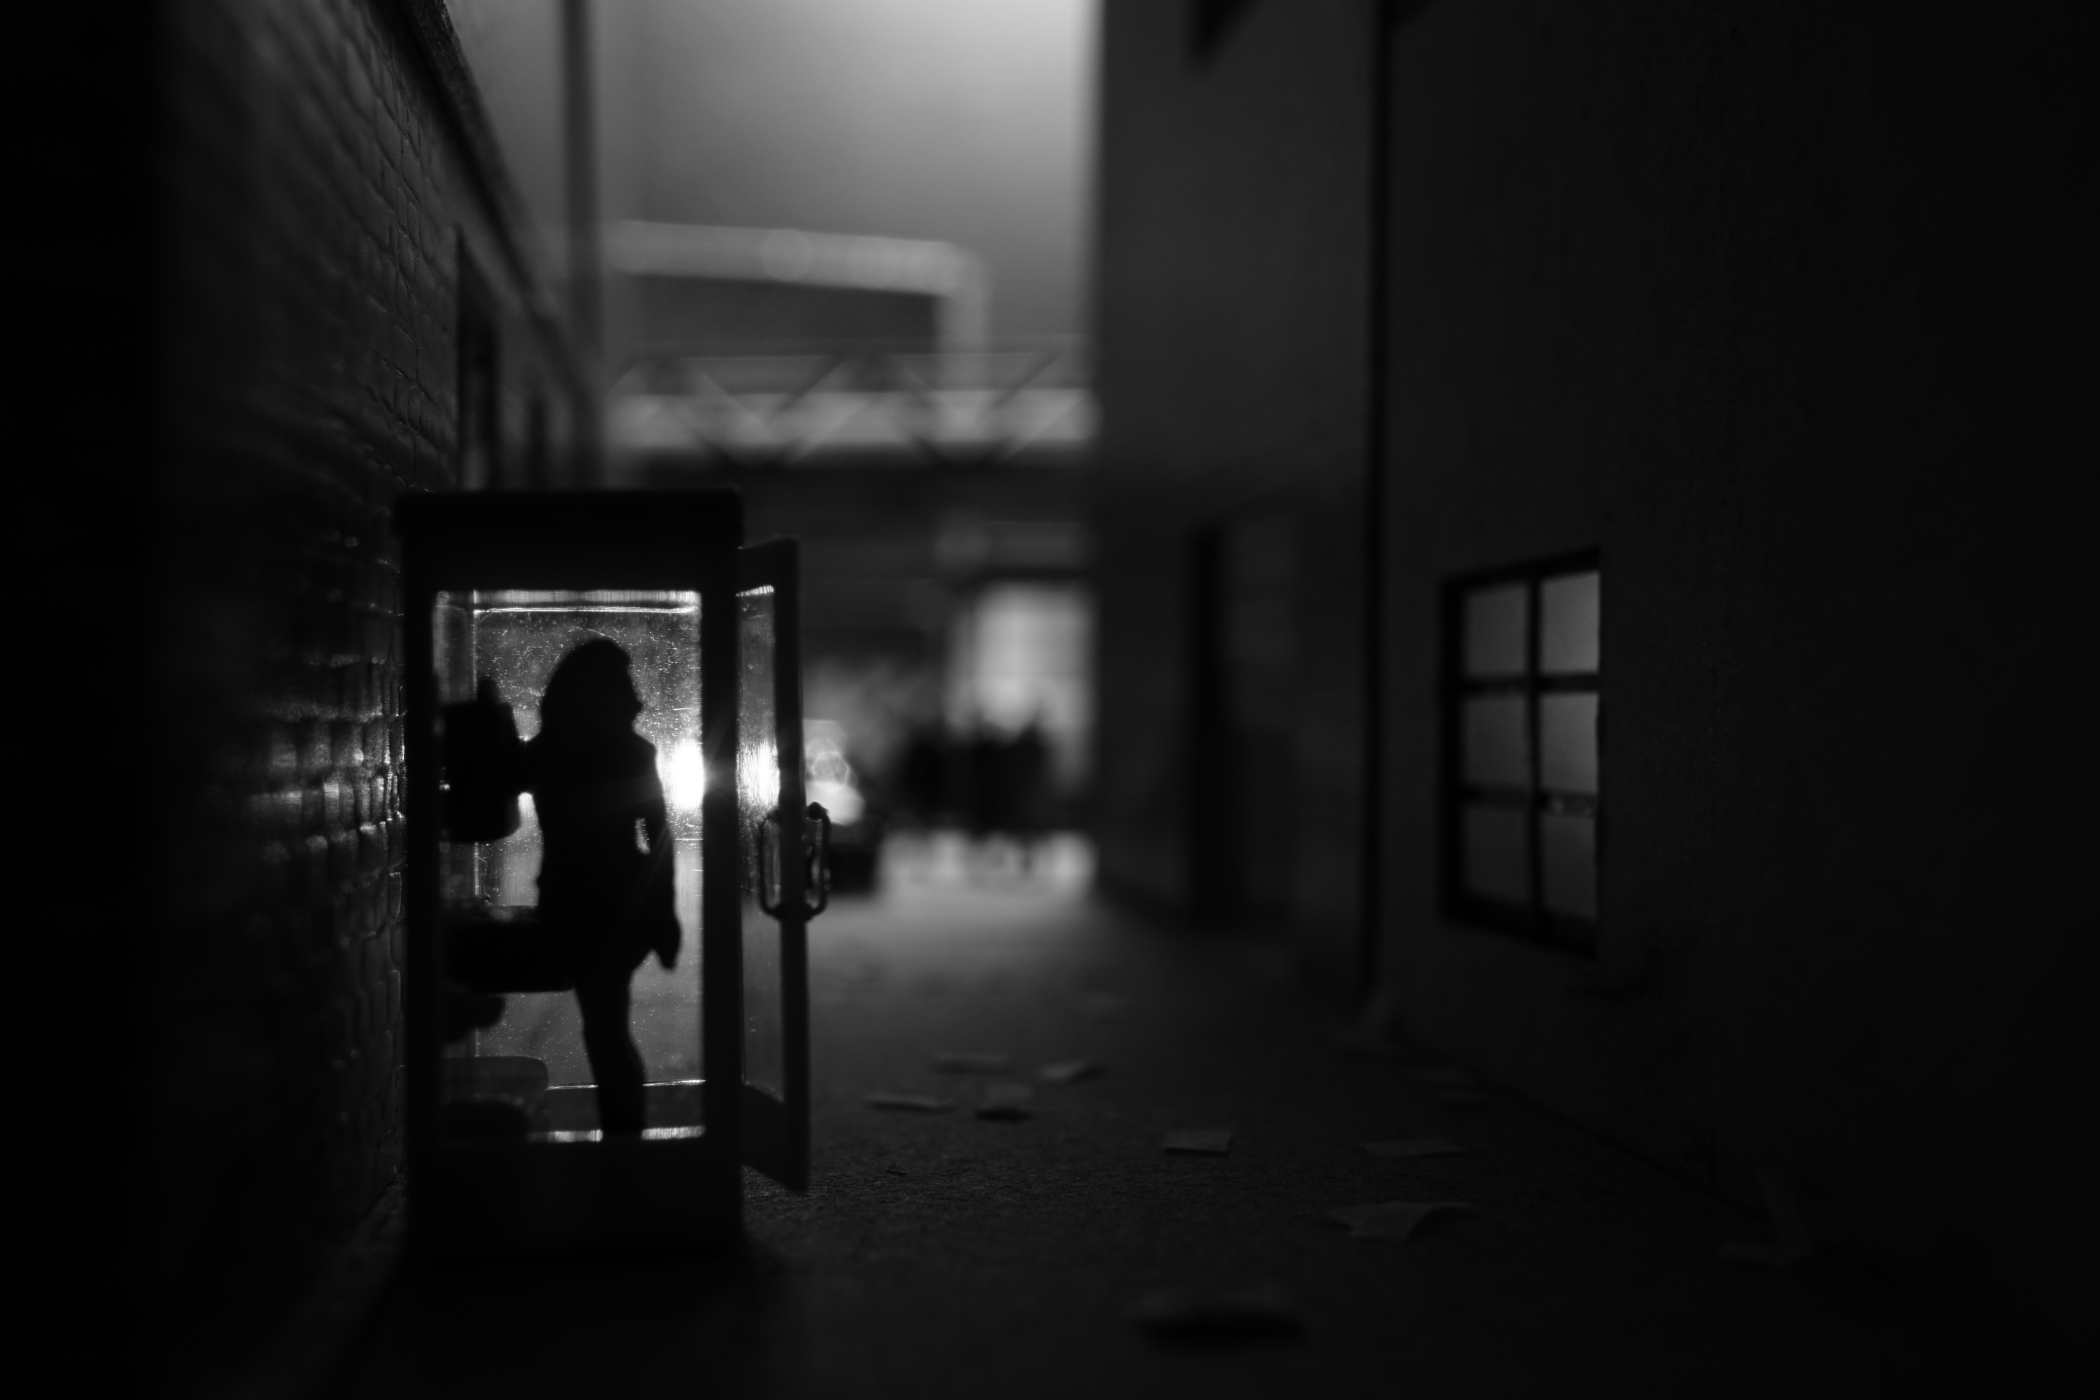
Let’s look at a more complex setup that uses various kinds of light sources. Five, to be exact. To make these more visible, I added the color version of the final photo. So what have we got?
To begin with, there’s the rather white light at the right top. It’s my desk lamp. It’s there because while shooting, I found it resembles the shine of a street light, hidden behind the wall. It also seems to add some mist in the background, which was welcome.
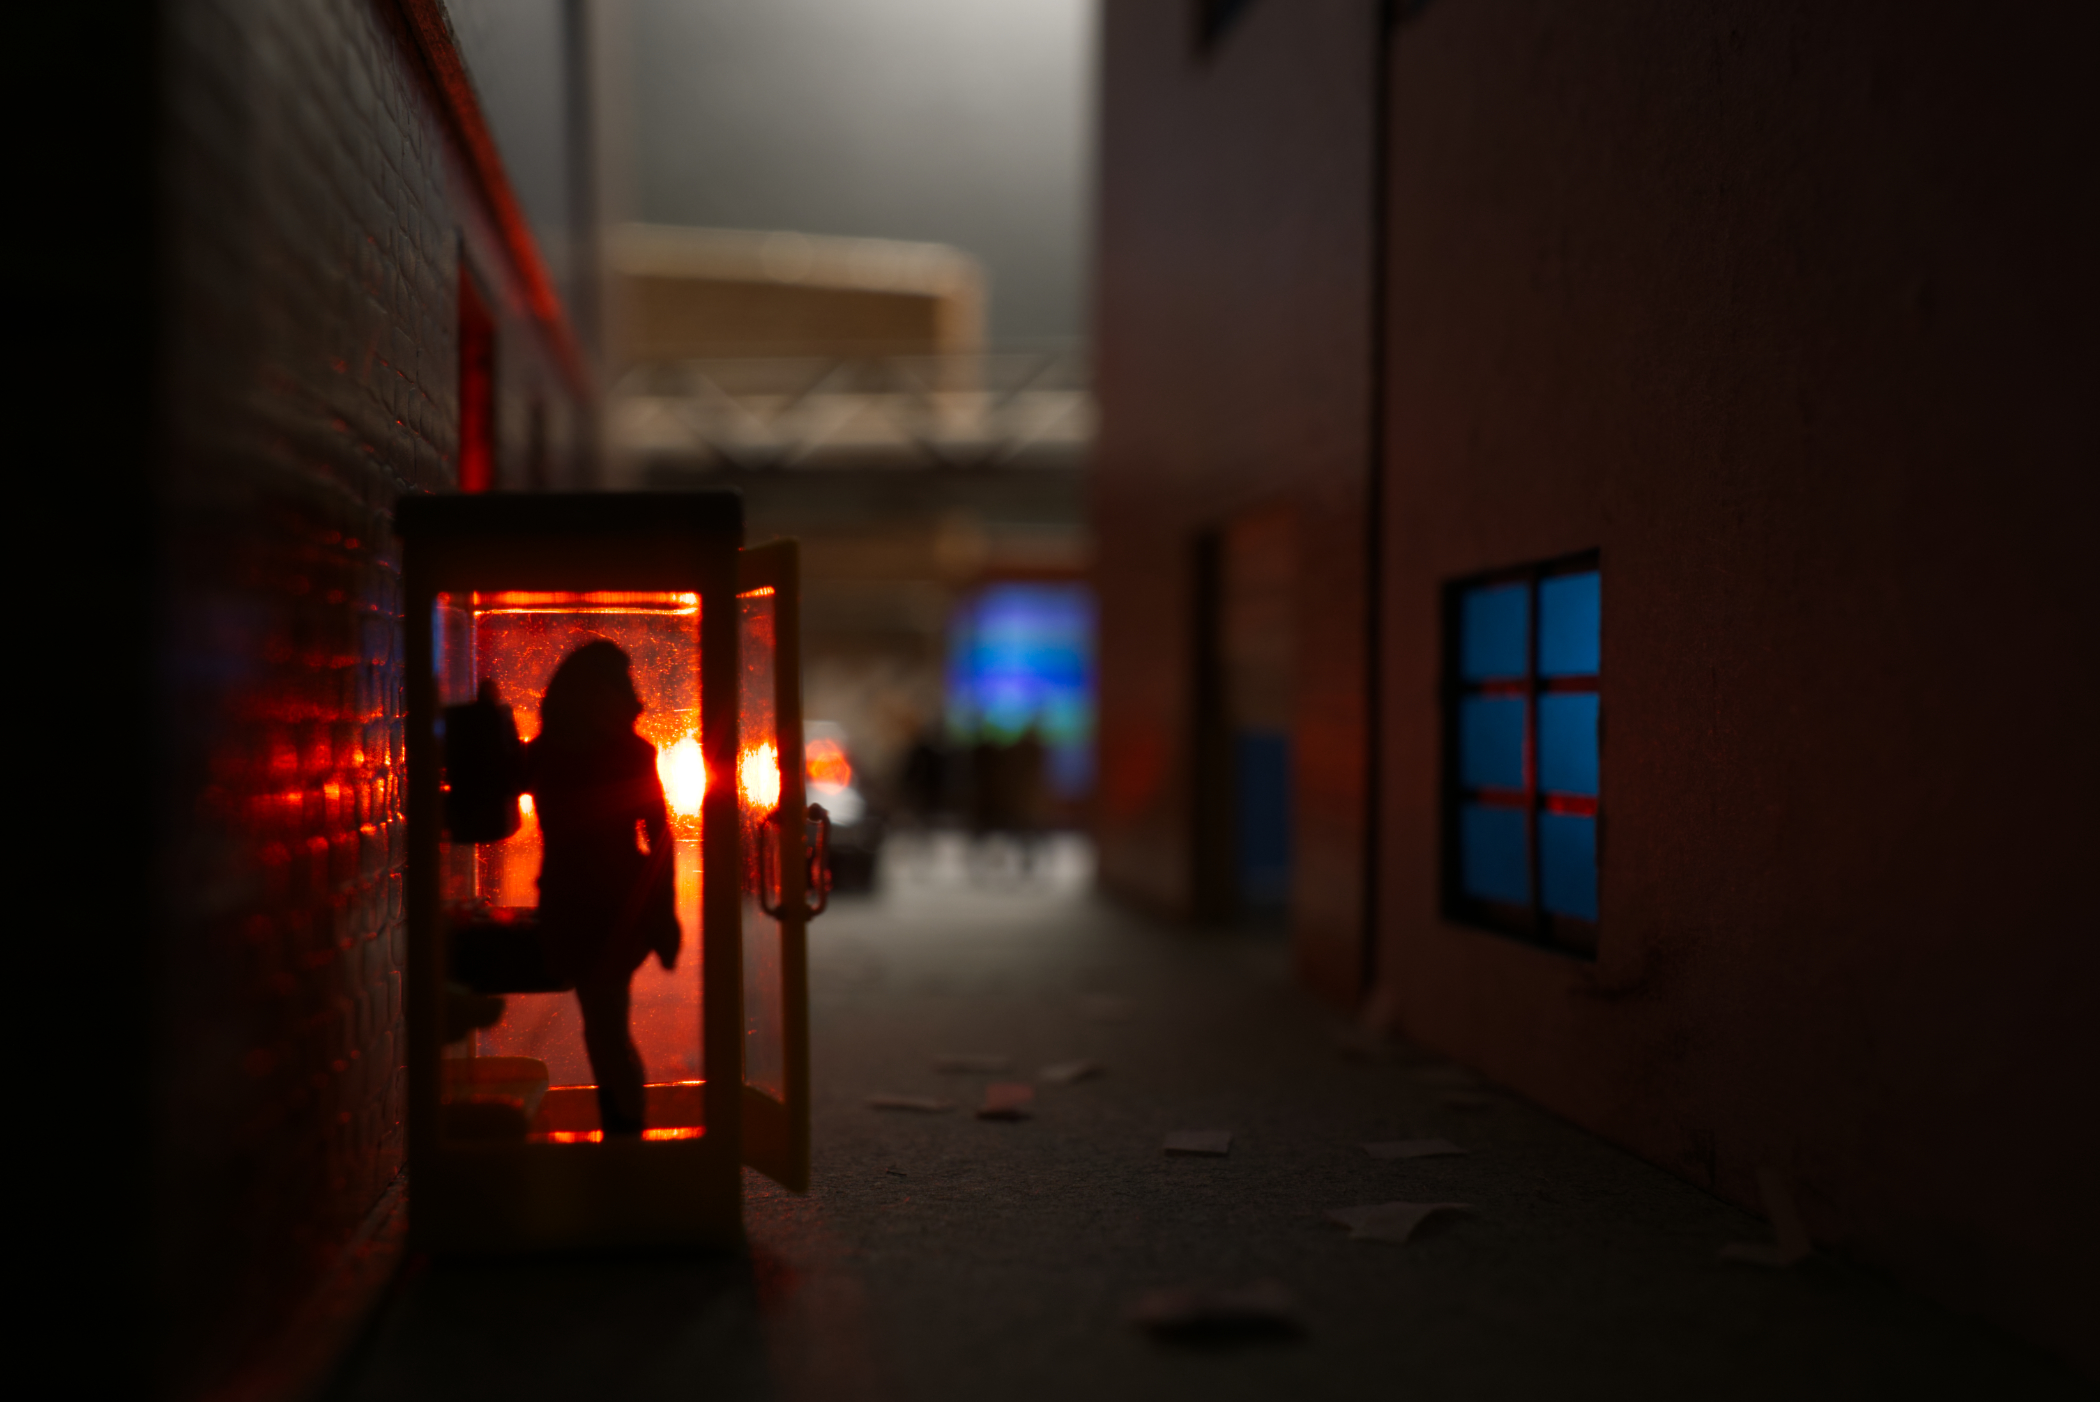
There are also lights to the left and the right of the three figures in the background – they appear as red and blue in the color version. On the right side, we have the blue illuminated windows of a shop, or bar (it’s actually the ‘bar minuscule’ I described in this post.) On the left side, there’s a red LED light; it’s a mini tail light for a bicycle. I pointed it directly towards the camera because this was the central idea of the picture: A phone booth, lit from behind, with its glass walls sparkling with light. I chose the red light for a simple reason: It had the strongest batteries at the time, so it was the brightest miniature light I had.
The remaining two lights are to the left and to the right in the foreground, illuminating the window in blue and—barely visible but still there—the entrance to the left, just behind the phone booth: See the red light there?
The picture is pretty much what I’d had in mind. It is intended to show one of the shabbier neighborhoods in my fictional town. I think much of its effect derives from the fact that the lights are in scale and shine through doors and windows. Also, it illustrates why black and white sometimes is simpler than color photography: You can throw in all the light sources you have and don’t need to worry about white balance.
Low tech lighting
Which kind of takes me to the last point—for all those who are like me and feel reluctant to buying expensive equipment. None of the lights I use can be dimmed electronically. They are as bright as they are, until the batteries run down. But there are, in fact, ways of dimming and altering these lights:
- Increase the distance between the light source and the object it illuminates
- Turn the light beam away from the object (which is what I did with the hair highlight in the hotel scene above).
- Put something in front of the light source to change the intensity, form and direction of the beam (e.g. the frame of a window in one of your buildings).
I think it is both fun and satisfying to just make do with these simple tricks.
This is the best I can do to describe my process. The rest is experimenting, improvising, trying again, failing again…


Thanks for sharing your tips Tobias and I thoroughly enjoyed reading this. The last image tells a thrilling story and it was wonderful to learn about where you place all the lights. I get a very therapeutic sense of you crafting this scene together. “Light and shadows are great means of composition” – definitely the quote of the day!
Thanks for sharing your thoughts and giving feedback, Janan. Maybe your sense is right…
It’s very fantastic and informative ideas. i just love this ideas and will share this blog with my all groups. Thanks for sharing this great stuff!