The background I want for an image depends entirely on what story I want to tell. Sometimes I want an elaborate, realistic image. Other times I want something simple. Sometimes I want pure black.
Pure black has all sorts of benefits. I like it because black sets a certain mode and emotion. It can also be handy as a starting point for adding other elements to an image. As the old adage says, work smarter not harder. So it is better to get pure black in-camera so I can get to the fun parts of post-processing instead of the tediousness of cleaning up light leaks first.
There are many techniques to get pure black backgrounds. Depending on the situation, those techniques sometimes work well, and sometimes don’t work at all. I have come up with a way to get black backgrounds when the normal techniques fail.
How to get black normally, and why it fails.
Black is simply the absence of light. So the quickest and easiest way to get pure black backgrounds is to simply not shine any light on the background. One can turn the whitest background pure black with the clever application of no light.
For this technique to work, however, one needs to be able to control the light enough to ensure it doesn’t bounce off the background. This is often done in portrait studios by having the model stand well forward of the background, then feathering the light on the model so it misses the background.
In my studio I often shoot in a light box, and the size doesn’t allow me to separate the figure from the background. I usually need to add lights onto a figure to enhance a special effect or get a certain shadow that requires shining light directly onto my figure. This light often spills over and hits the background as well.
The next obvious solution is to use a black background. The problem is, that black is often not black.
Um…what?
What makes something white, black or shades of grey depends on how much light gets reflected off the object. This is called albedo. White has a high albedo as most of the light is reflected. Black objects have a lower albedo, but most black objects still reflect a large amount of light—sometimes up to 30%. If you think about it, this is why you can see black things.
To show what I mean, the image below was taken with a Lume Cube pointed directly at the figure in front of the black background that came with my light box. This is straight out of camera. As you can see, there is a fair amount of light spill on the background.
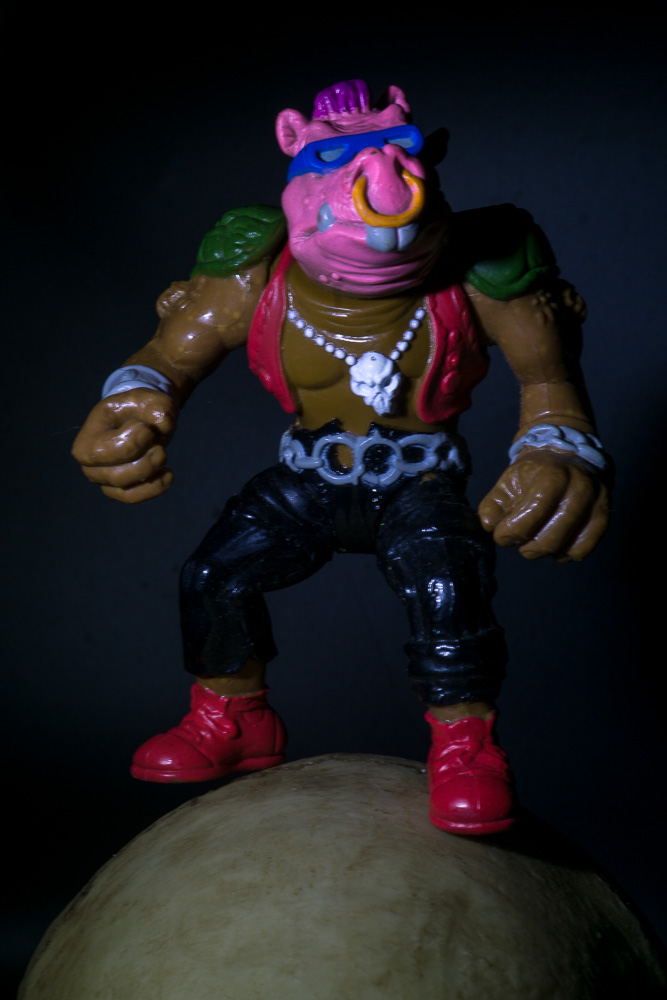
The Blackest Black
A year or so ago I heard about a Kickstarter from an artist who was trying to make a very black paint. The history is detailed and hilarious, but it basically comprised a feud between two artists, novel paint and overly restrictive licensing. I supported the Kickstarter, because I like supporting feuds that leads to better things becoming accessible to the public at large. Art should be accessible to everyone.
The paint is called The Blackest Black 3.0, and is available from Culture Hustle.
When the paint finally came in I decided to make a background out of it. I grabbed the cheapest 12″ x 16″ canvas my local craft store had to offer, and slathered on the paint. It takes three days for the paint to gain maximum light absorption, so I waited impatiently for 36 hours (ain’t no one got time for three whole days) and tossed the canvas in my light box to test it.
The following image was taken with the exact same light setup and camera settings. In fact they were taken 30 seconds apart. The only difference is the background. It is also straight out of camera.
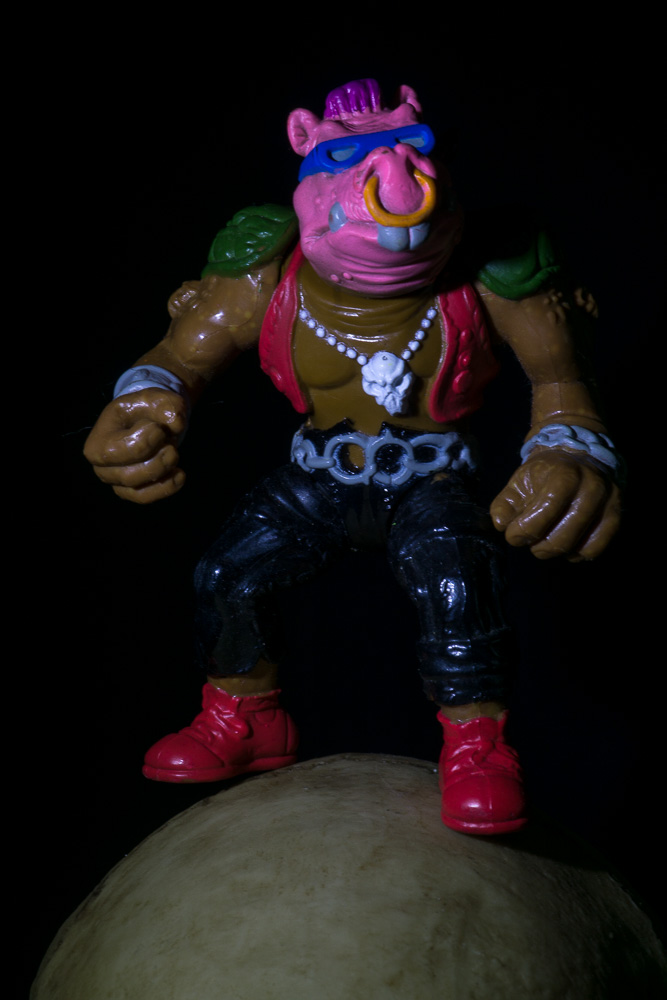
As you can see, the second image doesn’t reflect any light off the background. It’s a nice image ready for further processing without being polluted by light leaks.
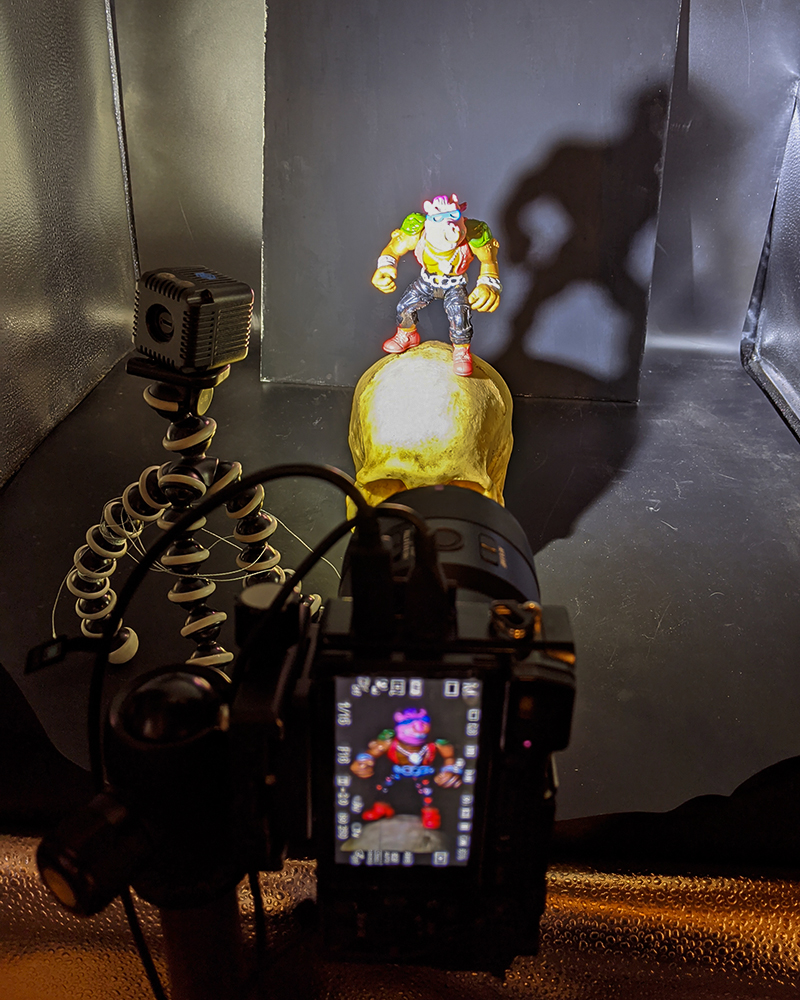
The setup
If you are curious, my setup looked like this:
And in conclusion…
I am calling this experiment a success!
I don’t think I’ll use the Blackest Black background all the time, but it is one more tool in my toolbox for when traditional techniques fail me.
Really, that’s what homegrown solutions are meant to be: Building a toolbox of unique solutions when traditional tools fail to get the job done. This one works, and it’s going to be used in many of my images to come.
[dave]
Want more toy photography goodness? Subscribe to our weekly email round up so that you never miss a post. You can also listen to episodes of the podcast!



Did it cover in one coat or take multiple coats, and how much did you use to cover that canvas?
Hey Matt
I did it in two coats. However the manufacturer says multiple lighter coats would be better. If I was going to do it again I’d have thinned the paint a bit and done 4-5 coats to get a nicer coverage. The paint is thick so if you put down too much at once it tends to ball up a bit.
I actually painted two 12×16 canvases worth of space, and I still have about a 1/4 bottle left.
What i want the black for is painting figures rather than backgrounds. It takes all the dimensionality out of objects. 3D objects become 2D silhouettes, even in real life. I remember the vanta black guy did an installation with a hole in the ground that was painted black and it just looked like a flat circle painted on the ground. I think someone tried to step on it and fell in.
Never thought of painting figures with this paint. That would make silhouettes easy!
Hi Dave. I love your sense of adventure and experimentation in your work — and it shines through in your writing, too. I’d never considered the varieties of “black” and appreciate the true black you used here. Fun read. Thanks. (And hope your 2020 is off to a great start. All the best my friend.)
Thanks Doug!