I have always been fascinated by the way different photographers go about making their images.
Some like to do as much as possible in-camera using practical effects. Others, like myself, rely heavily on post processing and Photoshop to get the look we want.
I mentioned this to the editing crew at Toy Photographers, and Alan jumped in on the conversation. Since we are polar opposites—he is a practical kind of guy, and I’m a Photoshop junkie—we decided to challenge each other.
The challenge
The challenge is simple. We agreed on a theme to shoot, go off and create an image for that theme, and then come back and compare notes. The theme we agreed on was an image that showed a wizard conjuring magic.
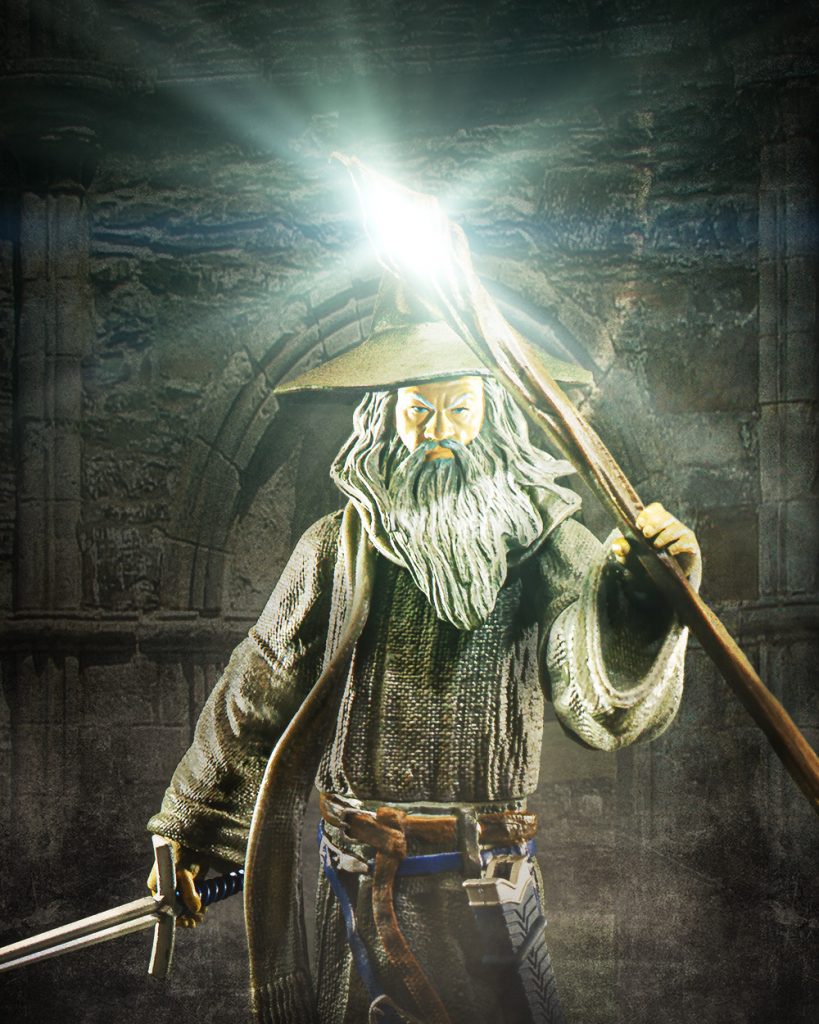
This is the image I came up with:
The Photoshop approach
My concept was basic wizardry: Gandalf the Grey wielding his sword and staff, and conjuring a magic in defense of… well, that’s left to the viewer’s imagination.
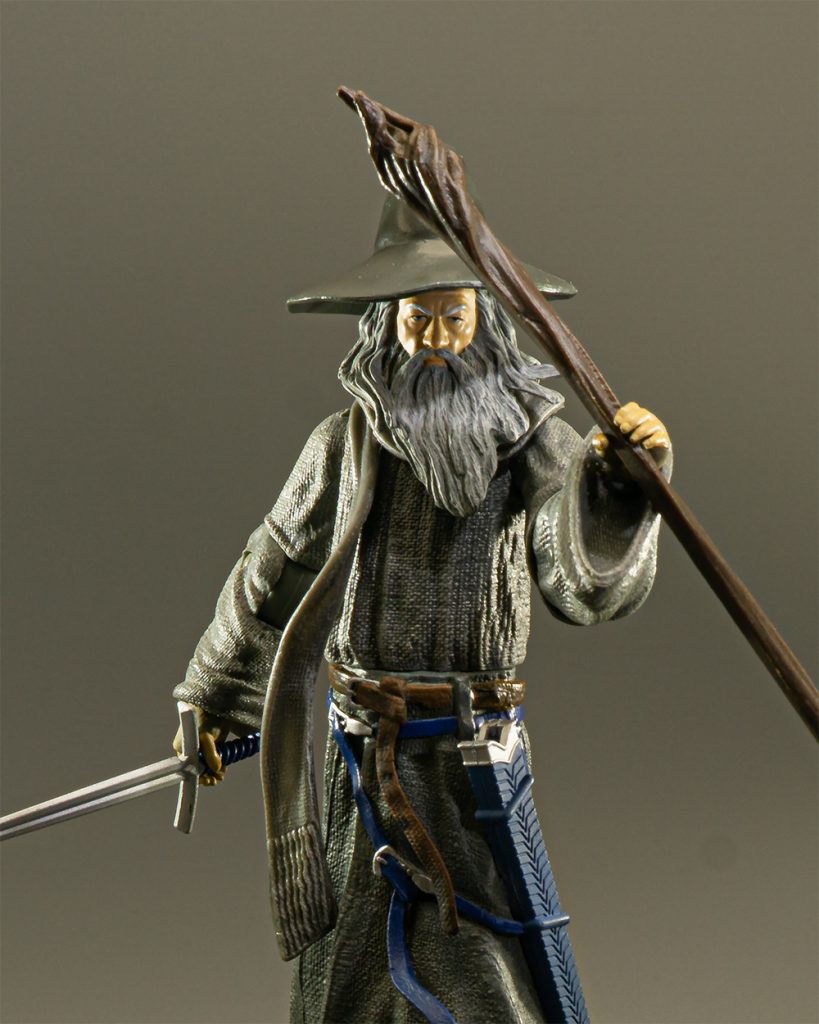
I had three elements I needed: Gandalf, a background, and some magic. I planned on creating the magic in Photoshop, and the background would require some research, so I started by taking an image of Gandalf in my studio’s light box. The straight-from-camera shot looked like this:
Finding the background
So now that I had the foreground element, I needed to place him in a scene. For this I decided to spelunk through my photo archives looking for a suitable location.
Gandalf often finds himself in stone cities, dwarven underground passageways, and in forests. I wasn’t feeling woodsy, and I’d have remembered if I ever visited a dwarven passageway, so I decided a castle was my best bet.
I went to Google Photos and looked up castles. I love Google Photos because they use AI to categorize my images uploaded there. This means that if I want to search for “old castles in the spring,” it would return a list of all images I’ve ever taken of old castles in the spring. It isn’t perfect, but it’s good enough for my purposes.
A quick search later and I had a lot of candidates. This one caught my eye because of the arches. (The guy napping in the background is just a guy napping in the background.)
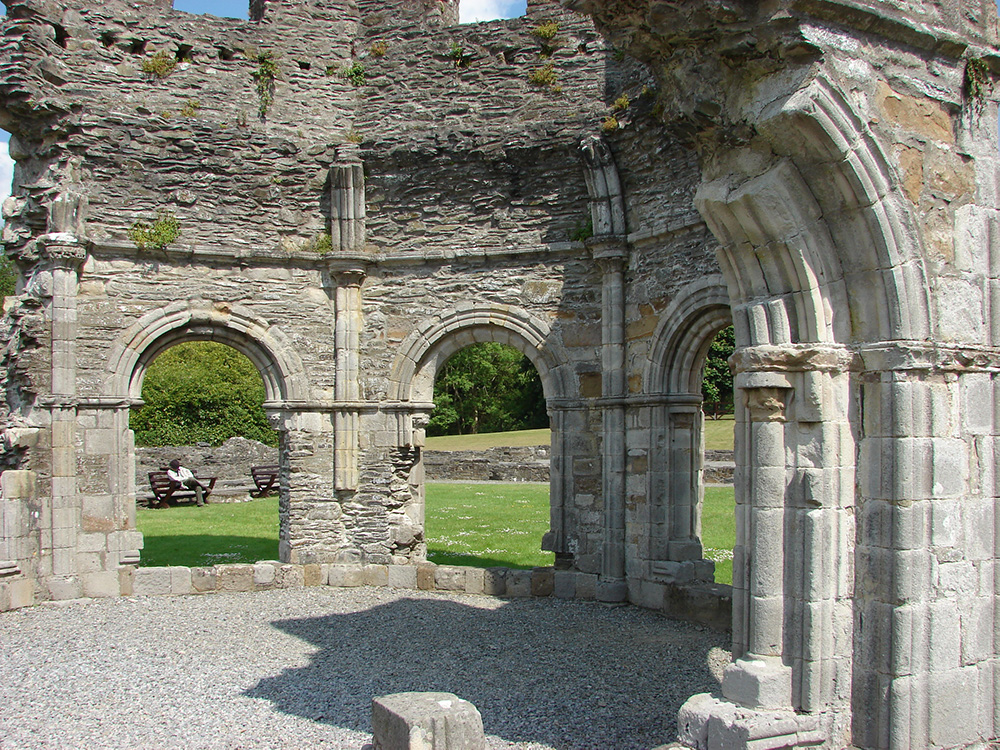
This background was taken back in 2018 during an extended work trip to Dublin. I forgot I had the image, but it was perfect for my needs. So I downloaded it from Google Photos, then got to work in Photoshop.
The Photoshop Finish
This is the thing I love about doing composite work in Photoshop. I don’t need everything to fall into place all at once to get the shot I need.
Sometimes it can be more than a decade between shooting elements, and the pieces can still fall together nicely to create the images in my head. There is no practical way I’d get this shot in-camera. However, by taking one shot in Dublin, waiting 12 years while I develop Photoshop skills, then taking a Gandalf shot in my studio, I can bend my creations to my will.
To create the final image, I started by blending the background and foreground together in Photoshop. I then used a light-burst element from my library of special effects for the magic bolt. Finally, I did some colour correction, added some shadows, and added some textures to make it all fit together seamlessly.
Alan’s thoughts
The first thing that struck me about Dave’s image is how similar our interpretations of the theme were, yet how different our end results are. The best compliment I can think to pay is that the image doesn’t strike me as being Photoshopped at all.
The light from the staff is incredibly convincing, as it appears to be the light source of the image. The figure’s pose and expression create a wonderful sense of tension and drama, as if something big is about to go down.
I never would have known that the background was added in Photoshop, had Dave not told me. Even better, the background is a photo taken 12 years ago during his travels. I’m not sure what the original image looked like, but it matched the scene perfectly. Such an epic photo, and a great shot for the challenge.
Final thoughts
Whether you use post processing, practical effects (or both), the important thing is that you are creating something magical.
Both Alan and I would love to see any wizard shots you have taken. Post them in the comments below, and let us know how you did the effects.
[dave]
Want more toy photography goodness? Subscribe to our weekly email round up so that you never miss a post. You can also listen to episodes of the podcast!


Very clever composite, Dave! Well done, and really enjoyed seeing the BTS on it. Fun to see you take photos 12 years apart and bring them together!
Thanks Teddi!
I find the ability to capture backgrounds at different times than the toys to be a big bonus. Lately when I travel I’ve been capturing backgrounds for use later. Its a nice way to keep ones head in the game even if the toy box was left at home.
Loved this post Dave. As you know, I’m almost entirely “straight out of the camera,” so the Photoshop world seems mystical and beyond me. What you created is really cool — and 12 years in the making! Well done and thanks for sharing. I really enjoyed both your and Alan’s pieces and takes.
Thanks mate!
Awesome shot, Dave! I love how similar yours and Alan’s ideas were despite using totally different methods and toy lines.
Thanks for sharing the process, I think it’s so smart to dig into your archive for old photos to use as backgrounds. That hadn’t occurred to me before but now I think I’ll go out and start building my own collection of them. I often have specific backgrounds in mind but often don’t feel right about using images I find online.
Thanks James
Spelunking the archives for either backgrounds or other elements for composite fodder is very handy.