In this post I want to show you the bounce board and how to use it in toy photography. Every photographer has one tool in their kit that they can’t do without. For me, that tool is the bounce board, bounce card or reflector. This handy tool can extend my light set up, soften an existing light, fill in shadows on my subject or even minimize light on a subject. This simple, and inexpensive tool extends and modifies my light source. They give me the power to bend, bounce and soften the light on the scene.
A bounce board defined
A bounce board is any reflective surface that you can use to bounce light onto your subject. This bouncing of the light softens and modify the light thereby controlling the effect on the subject. Modifying the light source helps reduce reflections and control how shadows fall on the subject. Bounce boards can be made from a variety of surfaces found at your local hardware or office supply store. You can even make several depending on what kind of light you want to create. Here’s a list of surfaces to consider when creating a DIY bounce board.
- Smooth white – most common and reflects a smooth white light
- Pebble – reflects an even softer, more diffused light
- Silver – harder reflective light
- Gold – warm reflective light
- Checkerboard silver and gold – mimics daylight
- Black – stops light from bouncing back to subject
Why use a bounce board
Bounce boards are a cheap and useful tool that can be used by themselves or with an existing light source. I love how I can expand one light source to cover an entire scene in the studio. Or more commonly for me, to fill in shadows when my subject is backlit by the sun when I’m outdoors.
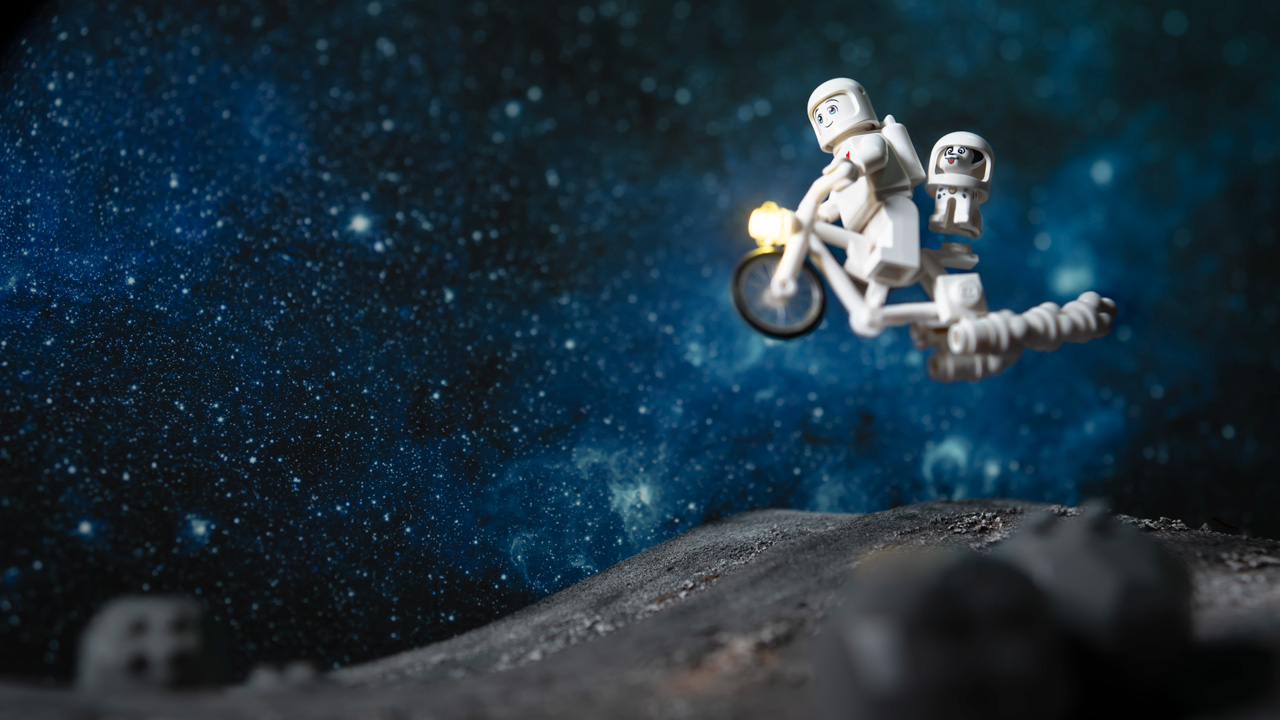
In this example from 2016, you can see how the shadows on the figure are filled in by simply bouncing the light from the setting sun back onto the figure. This way the details are maintained in the shadows are maintained. If I didn’t have a bounce board I would be at the mercy of whatever light I’m presented outdoors. But with this little tool I have the power to bring light into the shadows, thereby bringing more dimension to the scene. By controlling the light and shadows on the figure I can also determine the mood of the image. Light and airy or dark and moody.
The humble bounce board gives me control over light both outdoors and in the studio. I don’t think there is a tool that a photographer or cinematographer can use that is as useful for the price point.
How to use a bounce board
There are four main ways to use a bounce board. Each one will change how the light falls onto your subject as well as the quality of the light.
Creating a two light setup with one light
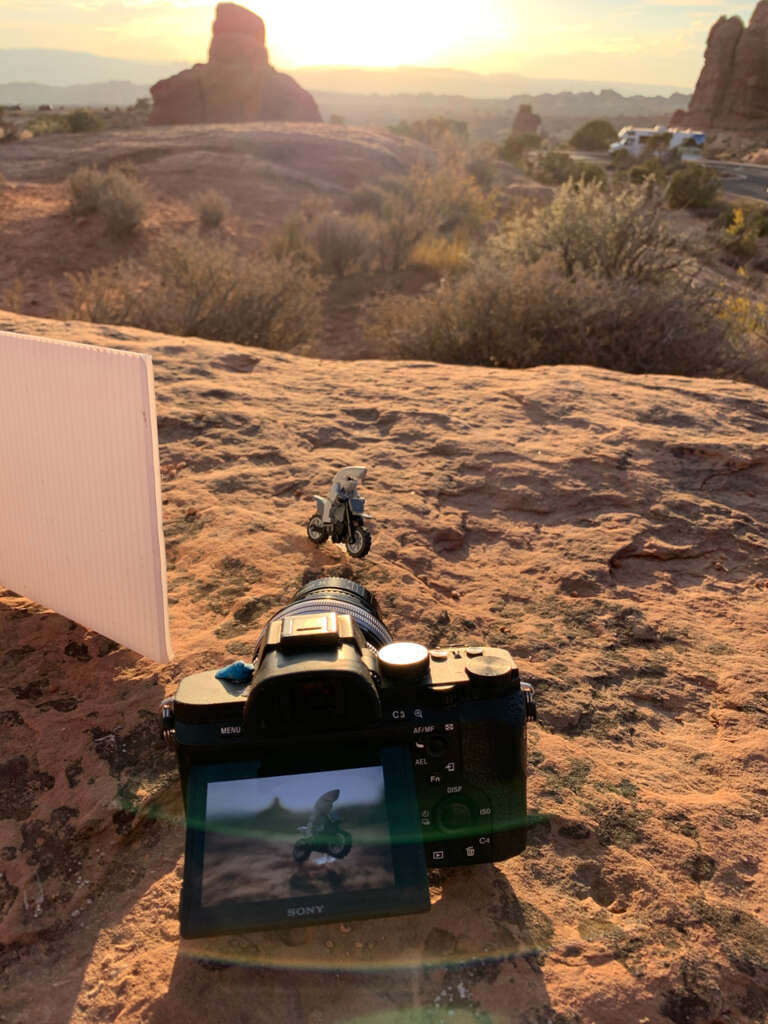
This is the method I use the most. When I maximizing my light by doubling whatever light is available with the bounce board. Invariable this is the sun, but can also work in the studio.

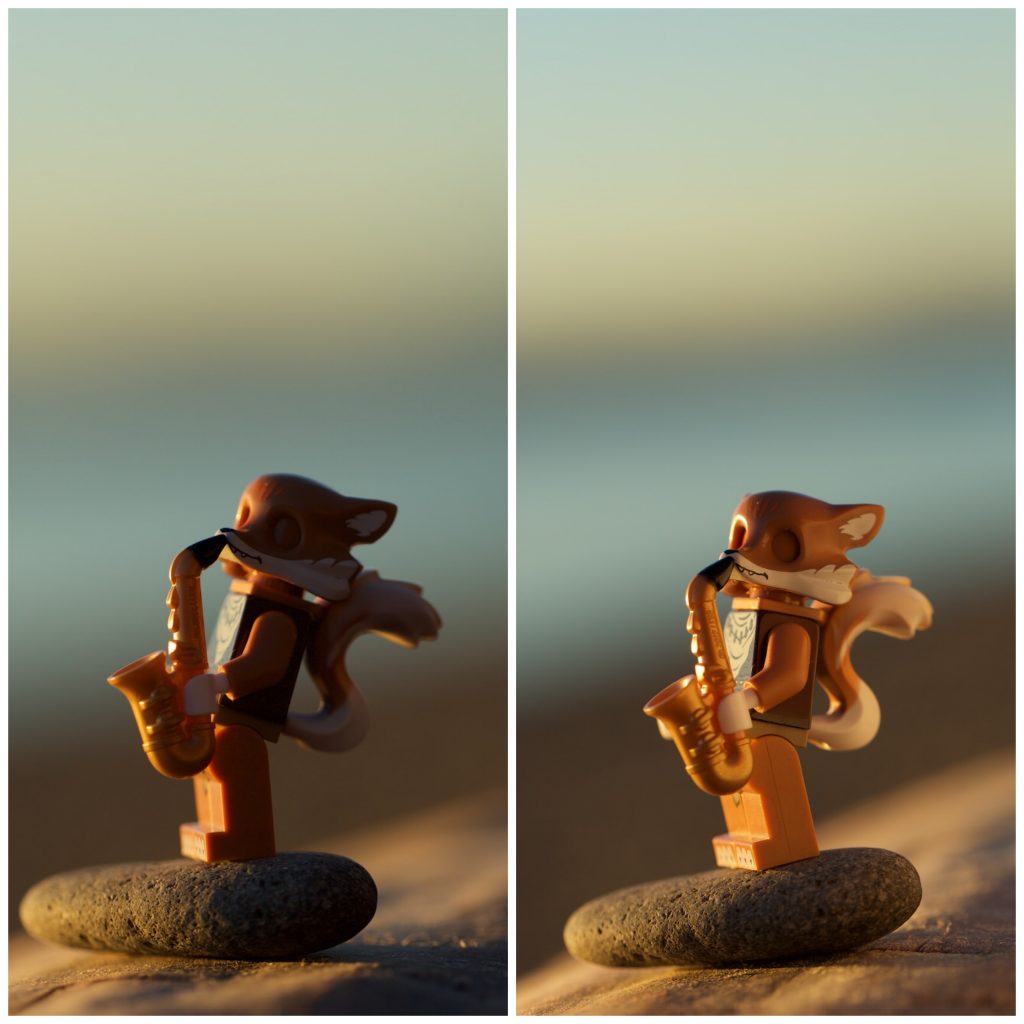
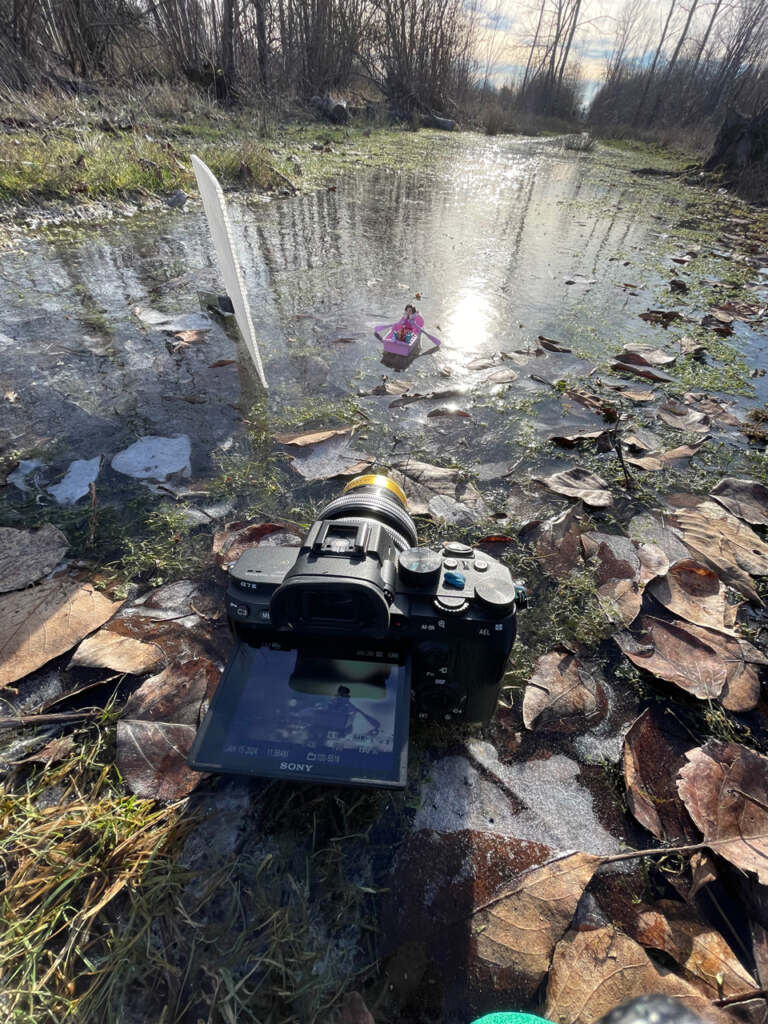
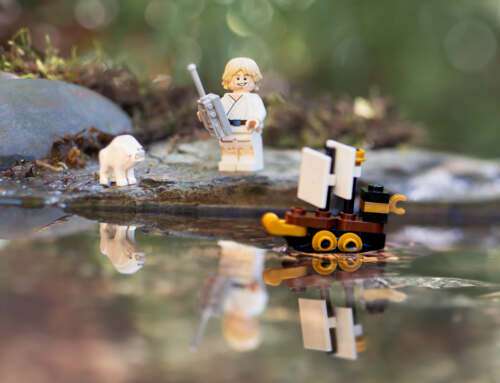
Here’s another example but this time with a low winter sun over a frozen pond. Some of my favorite light!

Bouncing light back into a scene to soften it
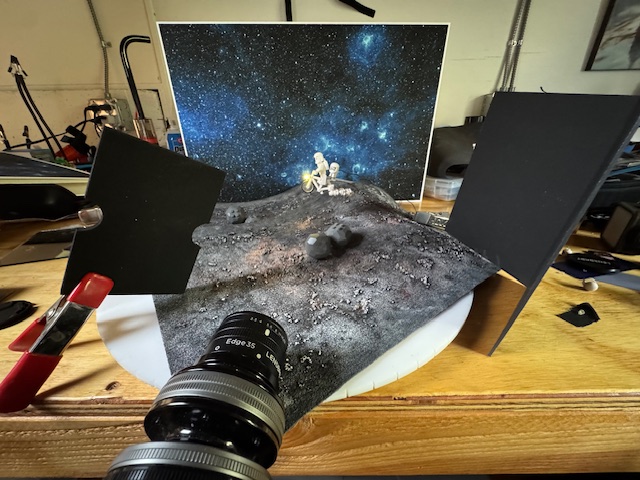
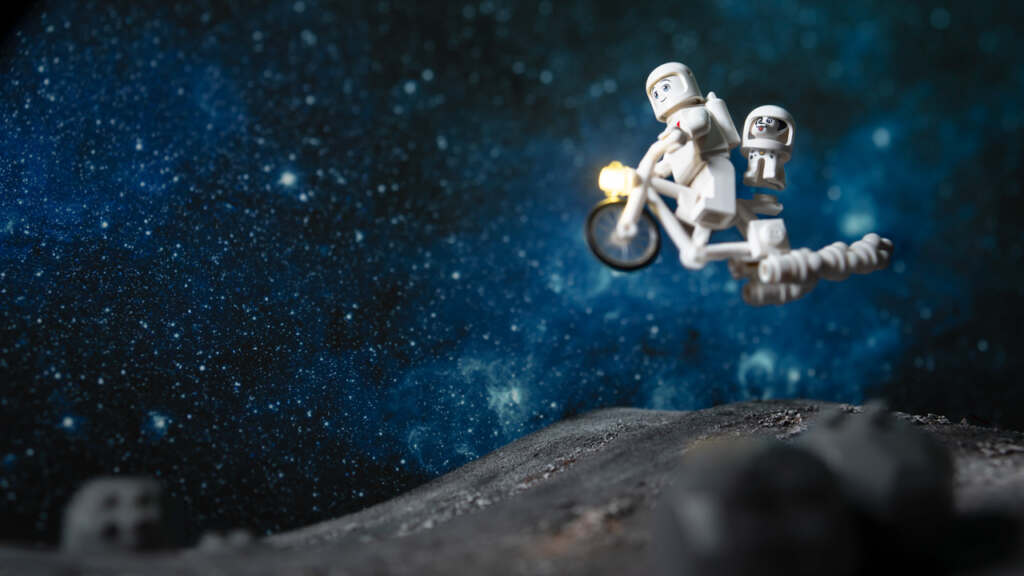
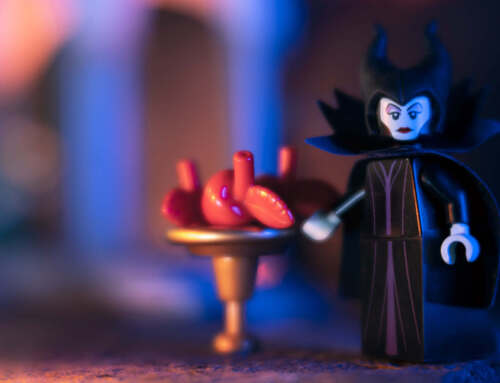
Because my main subject is made with a highly reflective plastic, I have to get clever about my light placement. In this scene from a couple of years back, I pulled out all my tricks to minimize hotspots and post production edits.

Bouncing light through silk to create a ‘book’ light
This is not a method I’ve tried myself. Mostly because I simply don’t have the studio space. But if you’re looking for an incredibly soft light that wraps around your scene or main subject, this is the method for you. You build a ‘book’ light set-up by sandwiching one light between a bounce board and a piece of silk. The layered set up is pointed away from the subject. When you use this much diffusion on a single light you create a super diffused and soft light that literally wraps around the subject. The shadows are soft and diffused.
Imagine the scene above but with a layer of semi-opaque white silk hanging in front of the box. The already softened light would be dispersed even more and create a soft, even illumination. This is a great choice for highly reflective surfaces or if you want to create flat lighting often used by cinematographer Wes Anderson.
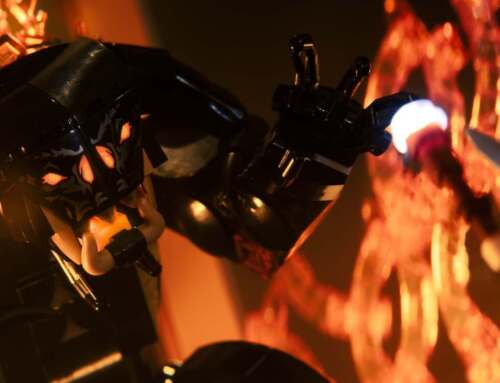
Negative bounce to keep light from reaching the subject
A negative bounce board might not be a tool I use very often, but I love having this tool available to me. The negative bounce board is usually a flat black, non-reflective surface that blocks light and keeps light from bouncing back onto the subject. This is a simple trick that can help increase mystery on a menacing figure. I use it to keep any light for a part of my scene to create more dimension. It’s also helpful minimizing unwanted light spillage.
In conclusion
I started using a DIY bounce board about about ten years ago when I got tired of doing the same edits in post. I was always lighting the front of the figures to bring out the details. Because I love backlighting to create a natural rim lighting effect, my figures are often left in the shadow. Using a bounce board helps me solve this problem in camera and minimize my edits in post. Less time editing my images means more time for photography. Win win!!
I love how big the impact of this simple tool is compared to the cost. I make my boards from materials commonly found in the hardware and craft stores. Aluminum foil and emergency blankets provide inexpensive reflective material to wrap around scrap cardboard. And what’s cool about creating my own tools is that I can make boards in various sizes and types. Then I always have the right size and type of board on hand to help me bend, bounce and minimize the light in my scene. I HAVE THE POWER!
I hope you have a better idea of how to use a bounce board in your own toy photography. If you have any questions, feel free to leave them in the comments below and I will answer them for you.
Thanks for reading!
Thanks for the ideas Shelly – I may use it to push myself back into some toy photography! Very helpful!
Mary Im glad you find this useful. I love this technique because it saves me a ton of time and effort in editing. The fall is a great time for toy photography!!
Thanks that’s great. I have not long gotten into toy photography.
You’re welcome Gina. I will post other tips and tricks along the way. If you want to take a deeper dive into toys and photography I offer many different workshops to improve your skills. Check out my website (shellycorbett.com) or more details. Cheers!
Hi Shelly! I loved this piece and your perfect photographic examples. The bounce card is such a simple and hugely impactful tool in our toolbox. Thanks!!!
Thanks Doug for reading and commenting. I truly feel that this is the one tool everyone should have and understand. Its indispensable!
excellent piece shelly! i carry a variety of bounce boards/discs with me even in the field when shooting toys. after a major break, i am getting my little studio back in shape and have collected a myriad of new vintage toys.
lara
Lara – its so good to hear from you. I look forward to seeing photos of your new (to you) toys. And what a great suggestion – carry several types of boards into the field. I can see how having hard vs soft bounced light could be very useful. Thank you for reading and commenting. 😀