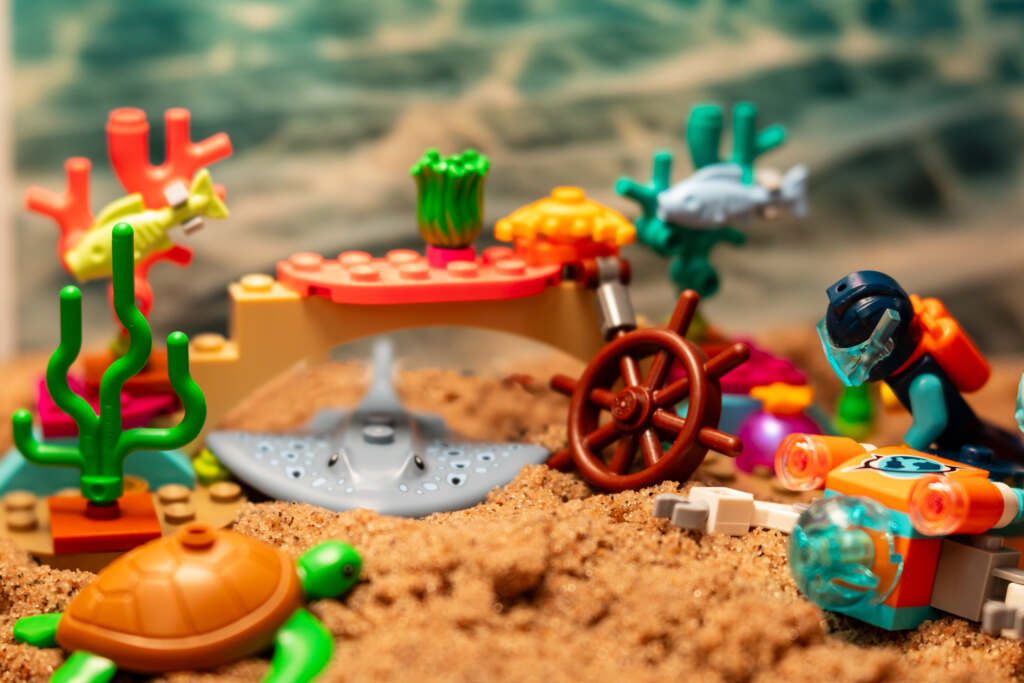
My first impressions of this set when I saw it on LEGO.com were how cute all the sea creatures were that are included in the set. The turtles, manta ray and hammerhead shark were the main attractions of this set for me.
Thank you to LEGO, who sent me this set for the purposes of reviewing it from a photographer’s point of view. Although LEGO provided me with the set, the opinions in this review are my own. Thank you to the ToyPhotographers.com for arranging this review.
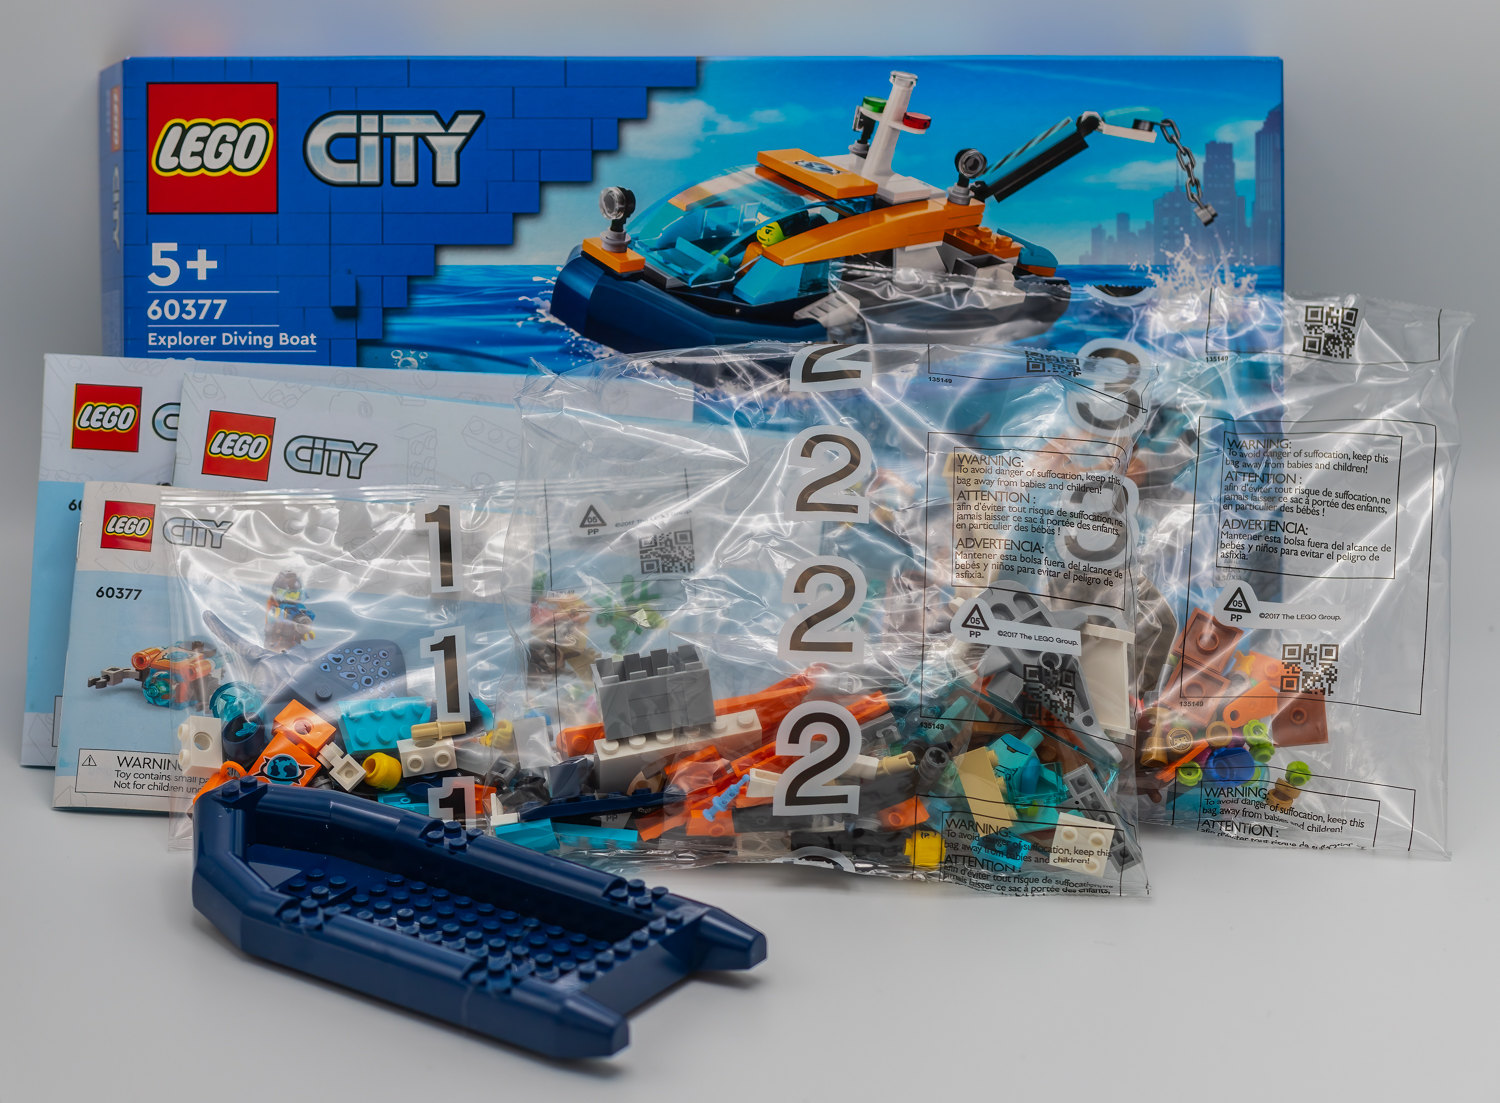
Explorer Diving Boat Through the Lens
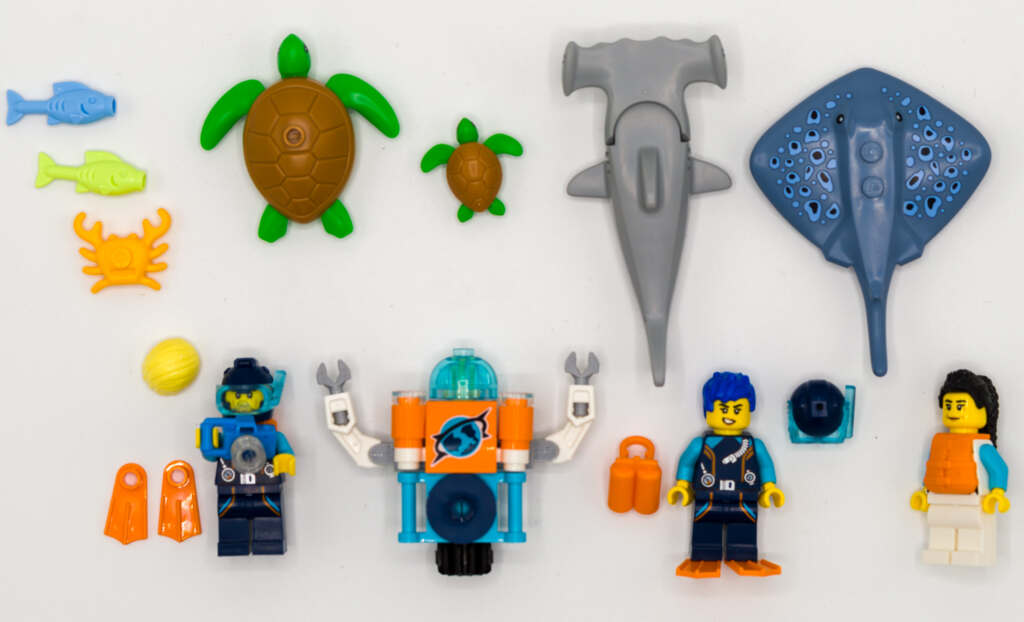
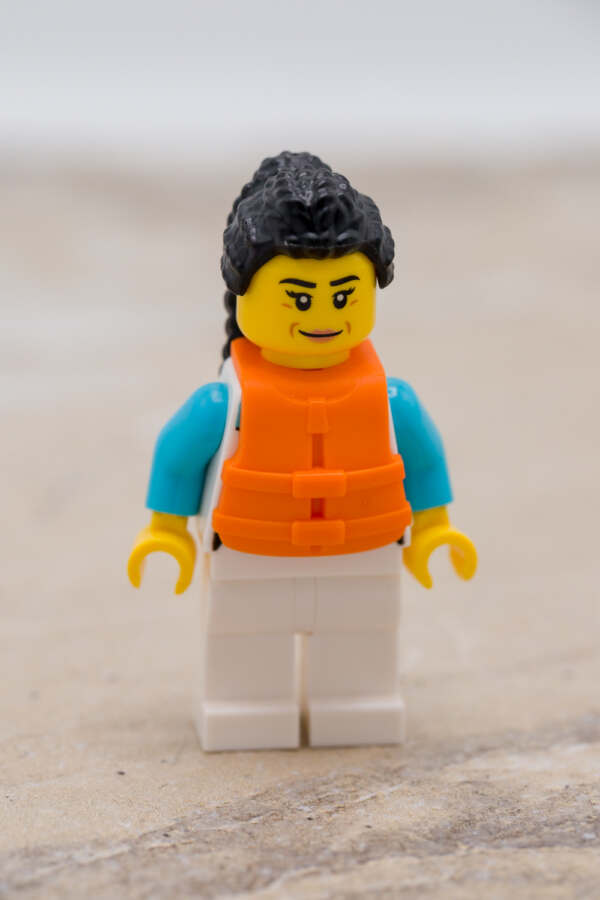
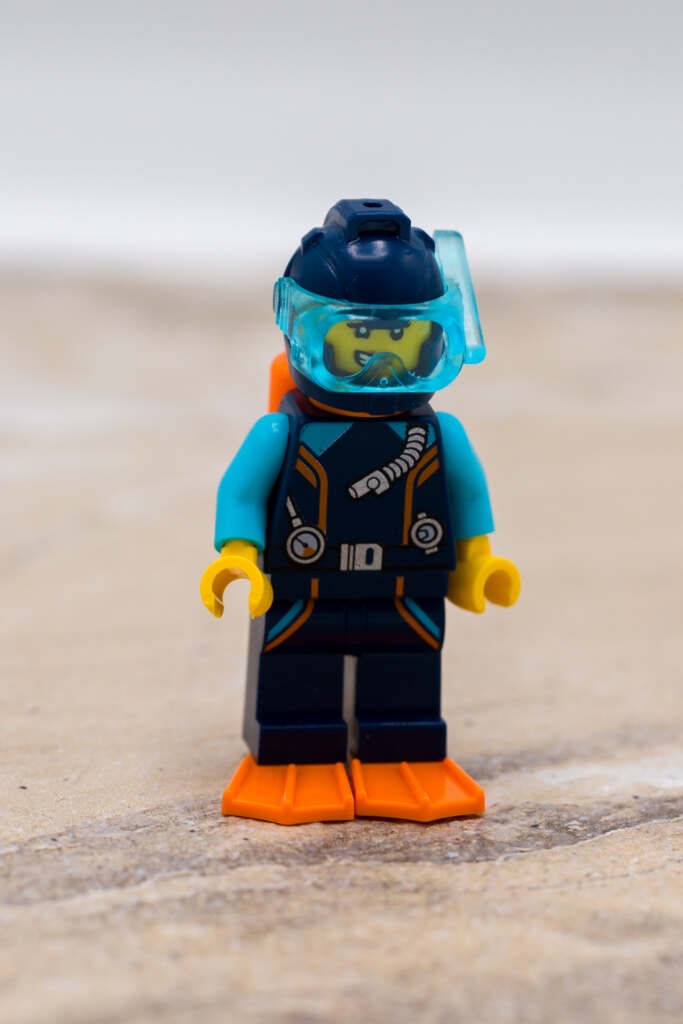
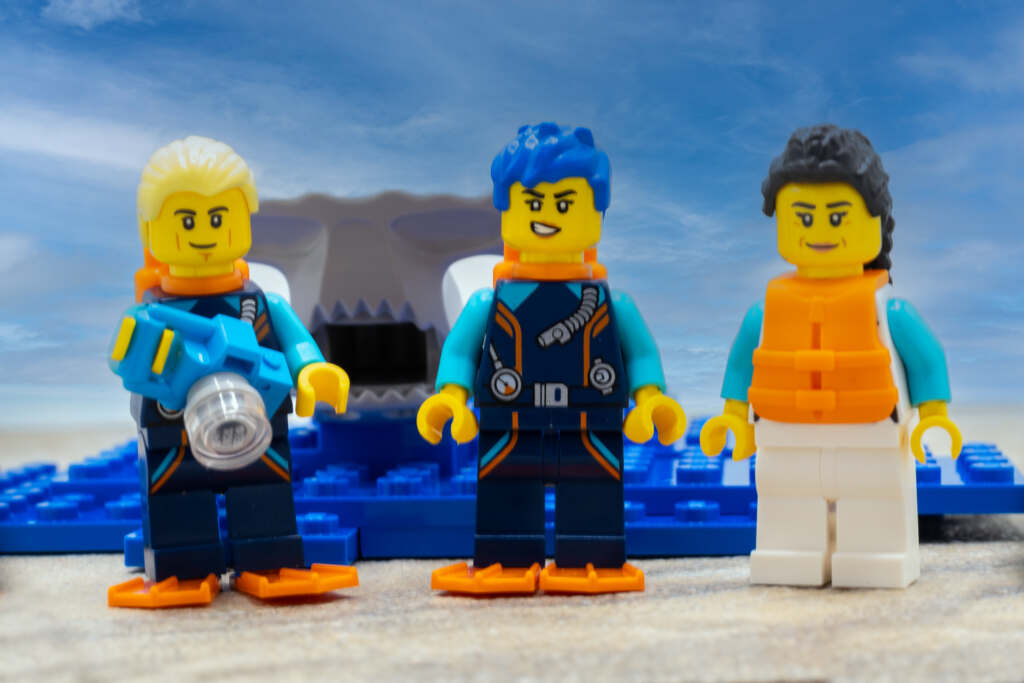
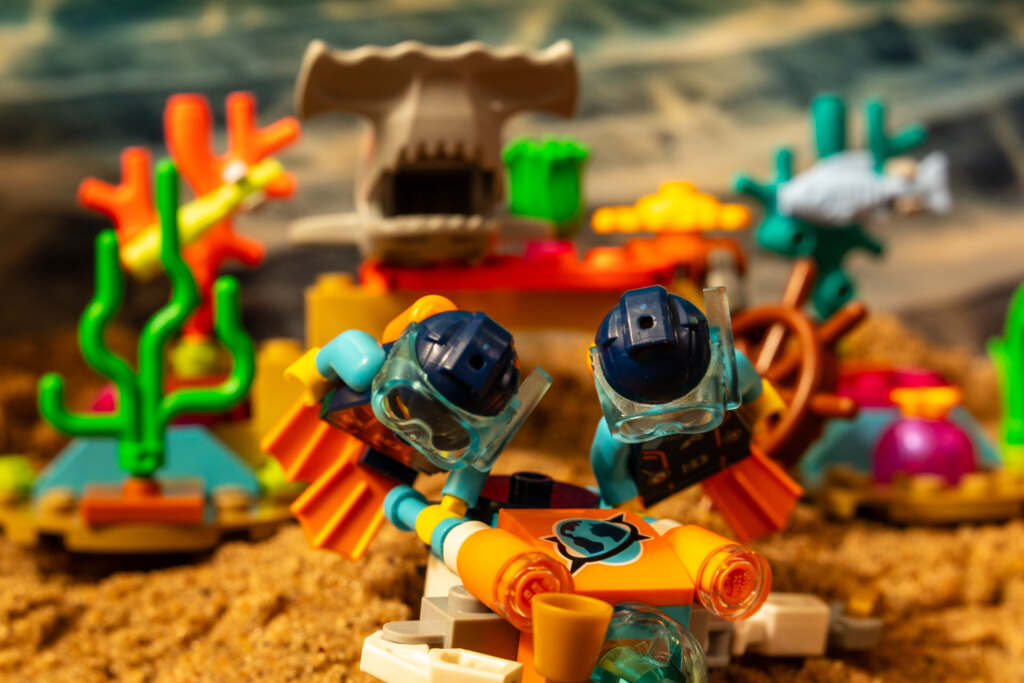
Along with the boat, this set contains 3 mini figures – two of which are divers with helmets, oxygen tanks, and hair pieces, and one other figure which includes a life vest. Two fish, a crab, adult and baby turtle, Hammerhead shark and a manta ray. One diver is equipped with a camera for documenting their underwater exploration – the other has an option for another face.
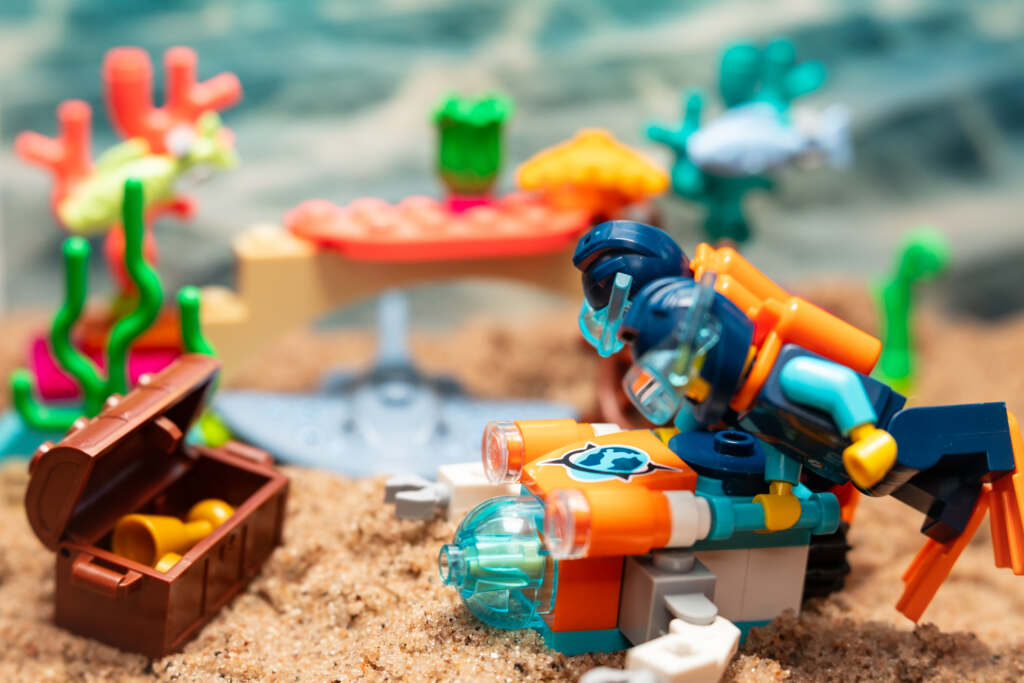
The set itself is divided into three smaller builds, the diver and submersible, the boat and shark, and the coral reef.
This set has no stickers, but several pre printed pieces, which in my opinion adds to the enjoyment of this set.
Group 1: Mini submarine, Manta Ray and Diver with camera

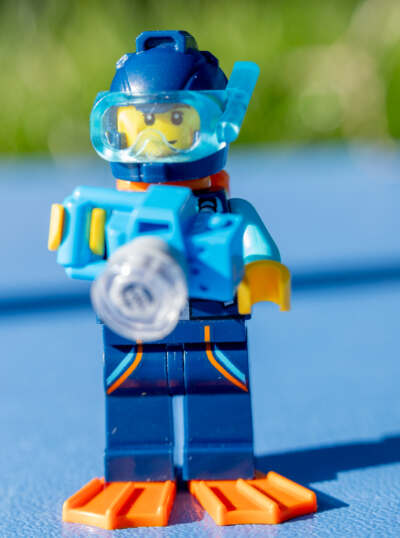
Top Left: Taken indoors with a sky replacement added, is the first diver figure. He only has one face but is equipped with a camera. The second image, with his helmet on – was taken outside in bright sunlight.

The mini submarine, directly to the left, can be held onto by the two divers and is put into the water by a winch on the back of the boat.
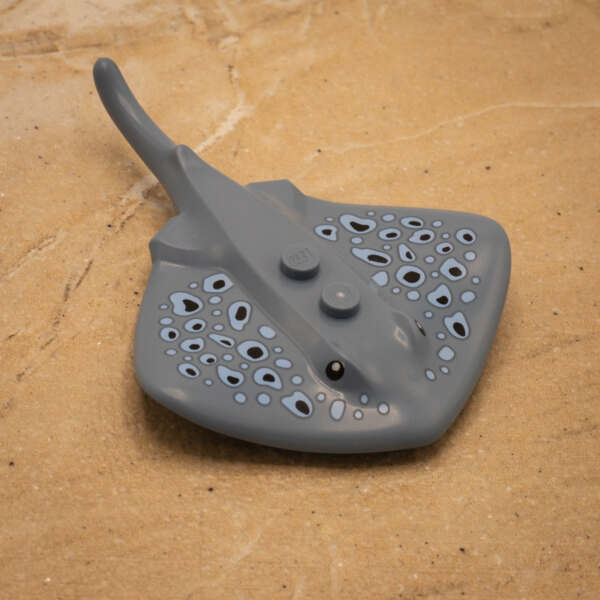
The Manta ray (below) is a delightful addition to this set.
As you can see all three figures can be photographed from a variety of angles from the tops and sides.
Group 2: The boat, driver of the boat, and the shark
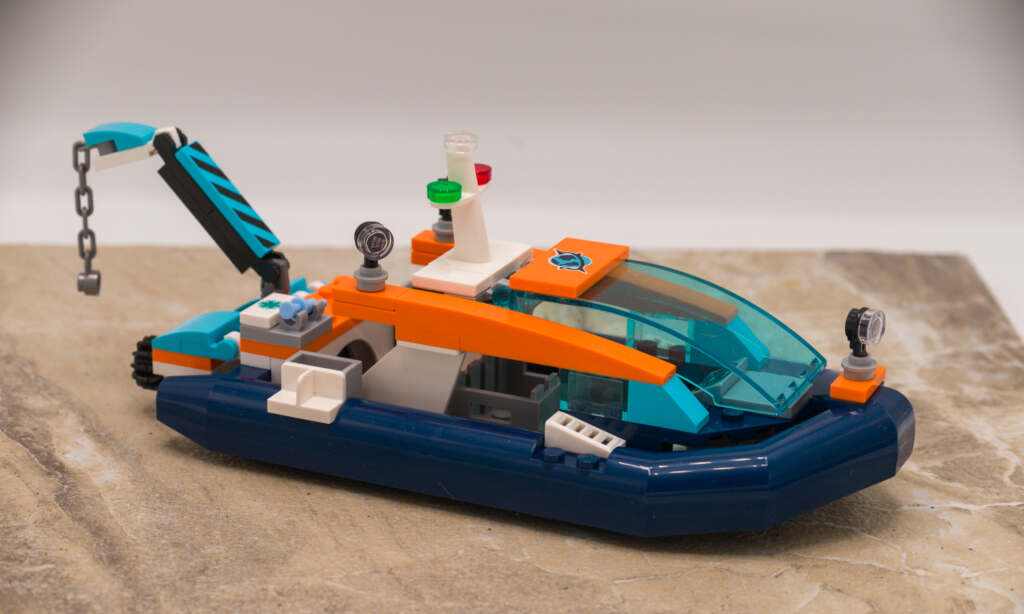
The boat has a working crane to lower the mini submarine into the water. The boat can be photographed from a variety of angles and has several areas to keep your photographs interesting.

The shark was definitely a draw for me to select his set. Due to the hinged jaw you will need to be selective in the angles it can be photographed. It also cannot be photographed from the bottom. (The blue Lego plates do not come with the set and are for photographic purposes only).

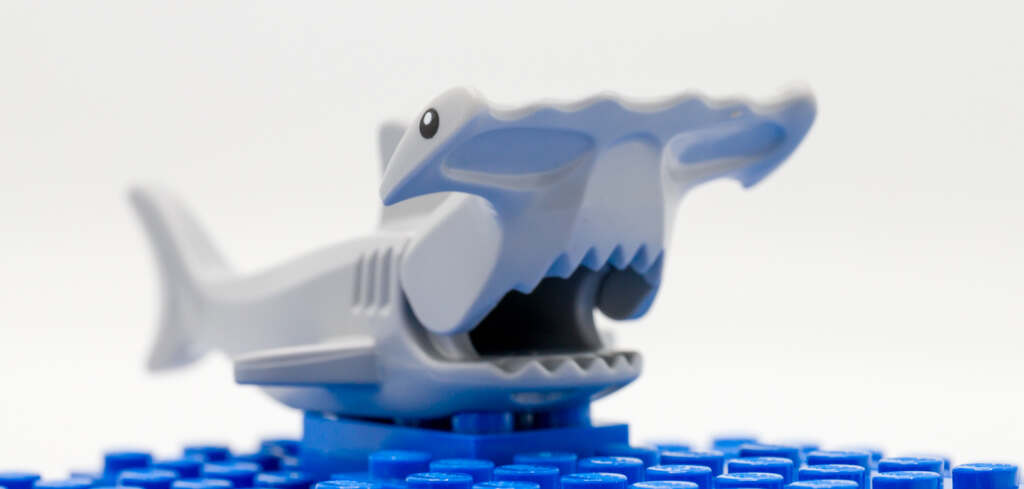
The shark can be captured from a variety of angles, from the side with its mouth open or closed. The boat has a number of ‘extras’ including a syringe so the divers may treat injured animals and a storage box to keep equipment in.
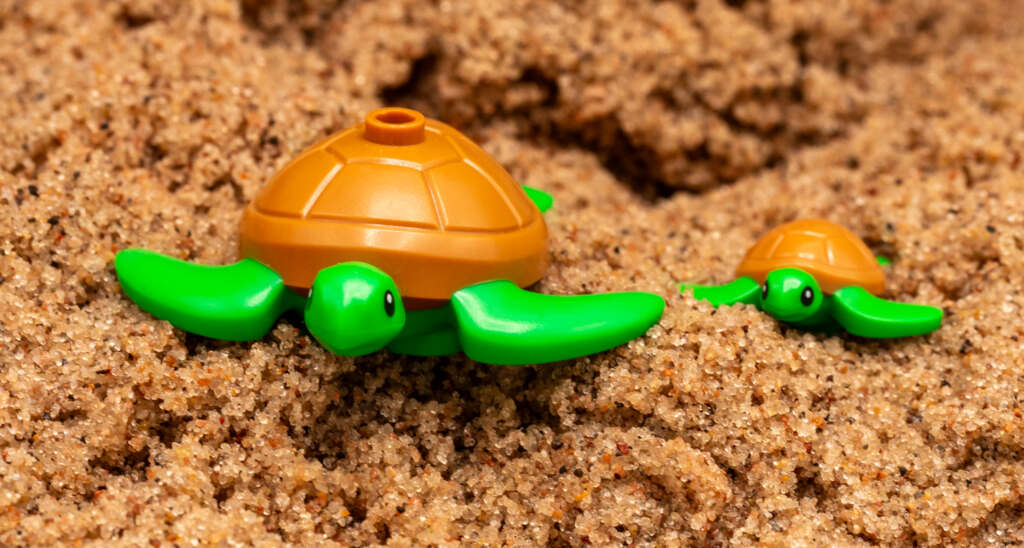
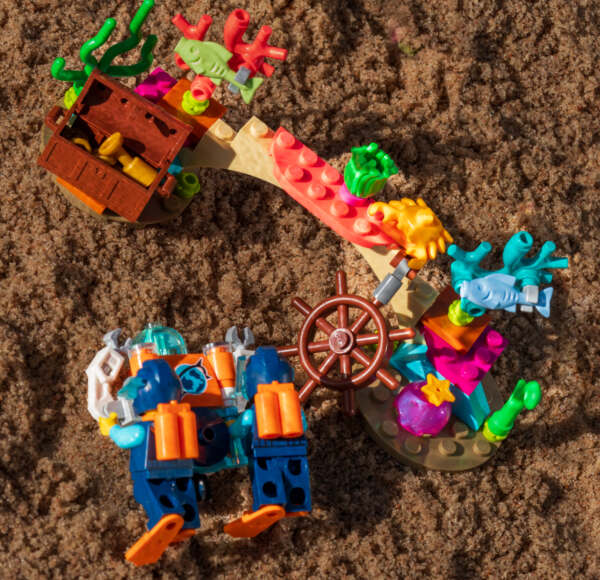
Group 3: The coral Reef and the turtles and second diver
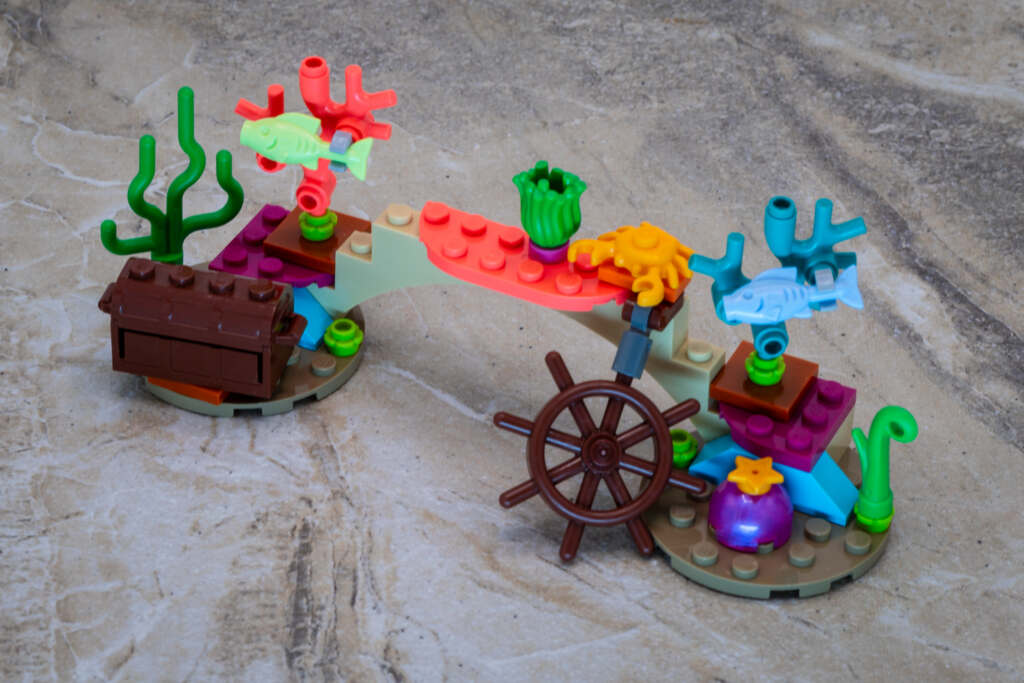
The coral reef, with its vivid bright colors makes a great subject for your photographs.
The adult turtle and the baby turtle were definitely a draw for me, and everyone I showed this set to seemed to be drawn to the turtles and the manta ray.
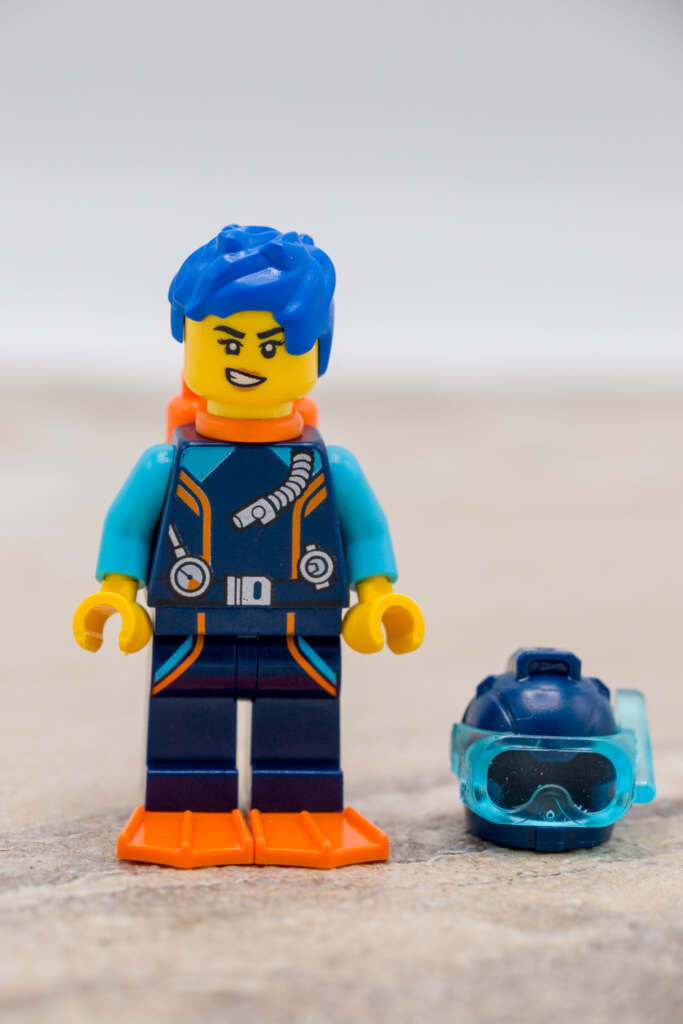
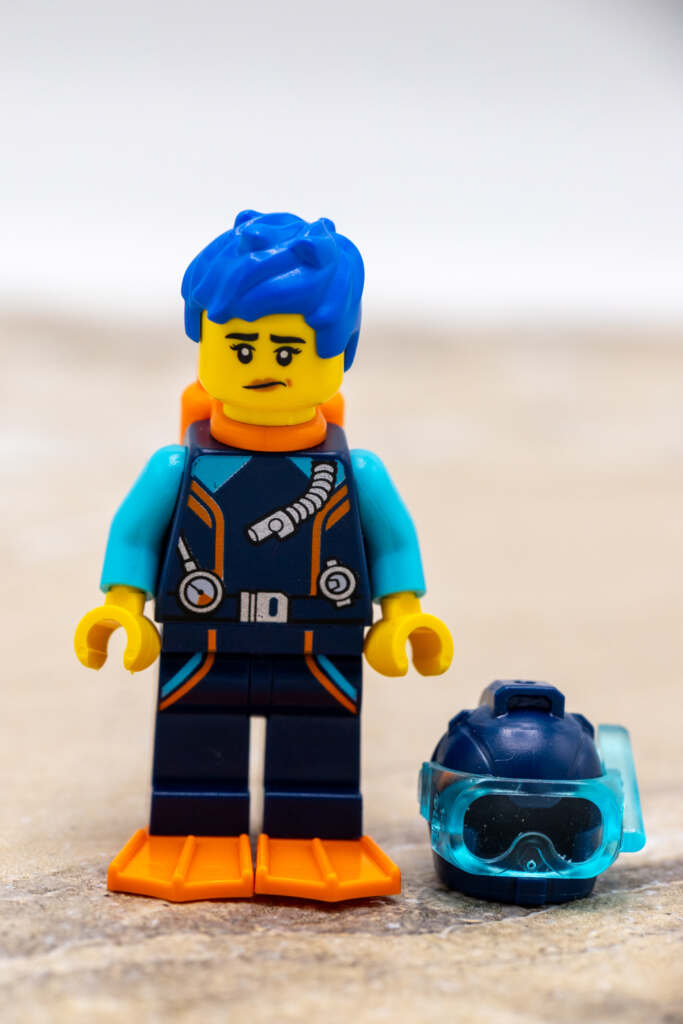
The second diver has two faces and blue hair.
Waterless water – a journey of through my own exploration using this set
I had several ideas that I wanted to try with this set, that I would normally not be able to do because I wanted to experiment with different techniques to simulate the boat being in the sea without actual contact with water on the LEGO pieces itself.
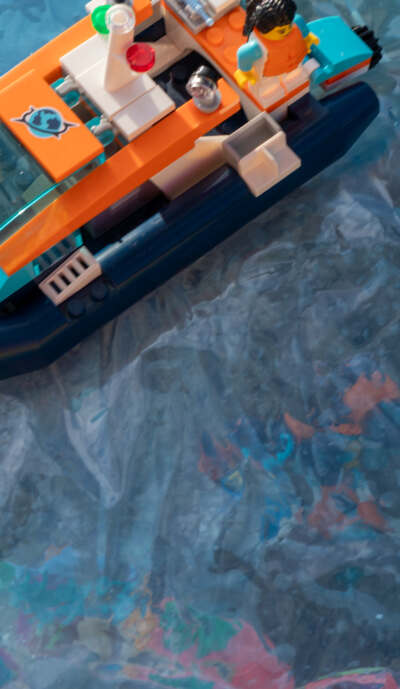
My first idea was to use a large plastic bag with slightly blue tinted water. For obvious reasons I was very hesitant in this one. (Side note: I do not recommend this)
The first attempt: at taking an image directly overhead – indoors was not a success. To avoid the possibility of a leak, the water was double bagged and the inside bags edges were taped, the whole setup was then placed on plexiglass and the reflection of the lights from the bag would not allow anything below the bag to be seen with any detail – not to mention the inner bag started to leak, and I had to clamp the corner.
The Second attempt with this method: (left) Was taken outside in bright sunlight – with one of the bags removed and placed over plexiglass on a clear box that contained the coral reef, divers and mini sub. This way if the bag continued leaking all the water would go to the ground, not the LEGO set.
The image on the left is one of the results of this setup, and I would not recommend it as there are other, safer ways to get similar results.
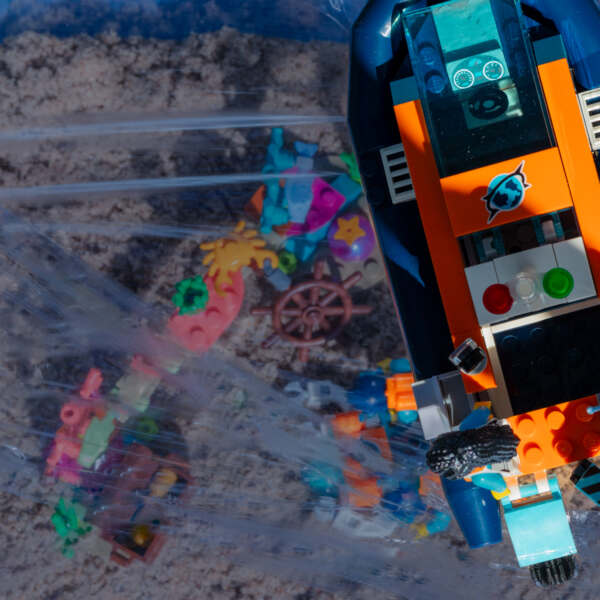
After posting the question on ToyPhotographers.com for a safer way to get water effect from above I received several comments, the effect on the right was from a response from Janan Lee, who suggested using plastic wrap. This effect needed some post processing to finish the effect, I have limited experience, but feel that the saran wrap was successful.
The image on the right was taken in sunlight in the evening hours. As you can see the vivid colors of the set itself were a definite help to making these photos have ‘splashes of color.
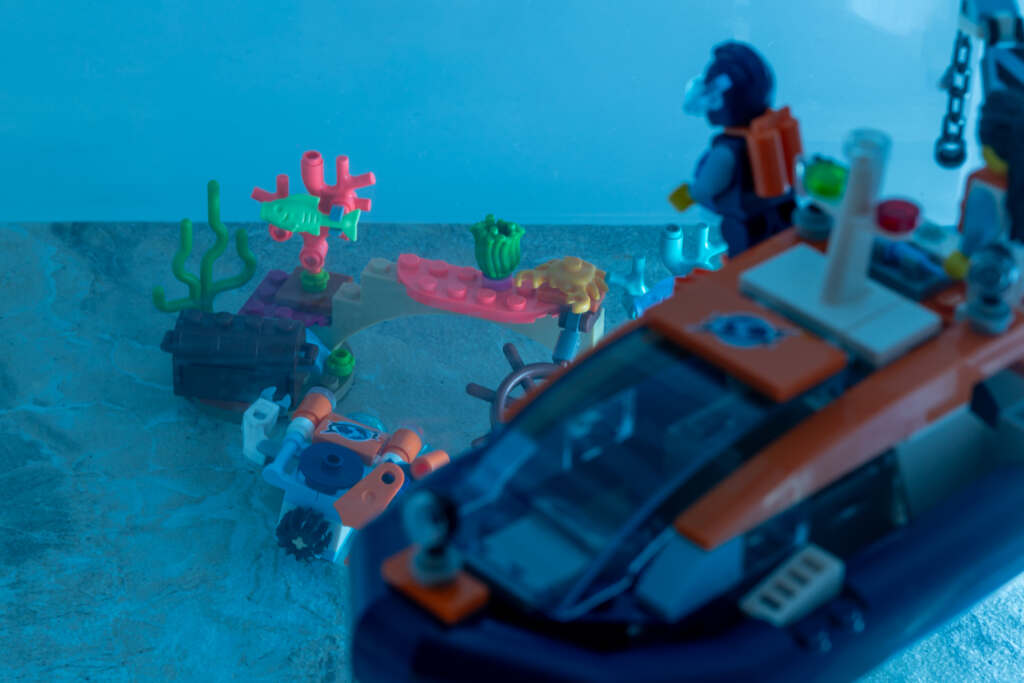
A third effect, which includes water reflected onto the model from the side, which is an adaptation of a method used by Robert Whitehead. This one was taken outside under bright sunlight.

A second attempt using the bag filled with water, taken in bright sunlight, which allowed the ocean reef to appear to be submerged. But the bubbles in the bag take away from the effect, but again the vivid colors of this set allow some of the model to show up nicely. But the unevenness of the bag and air bubbles (due to water steadily dripping out of the leak) allowed air bubbles to appear inside the bag, diminishing the effect.
Twilight on the reef: I took this one with a blue tube light on the right hand side. The vibrant colors of the coral reef stand out nicely.
My take on this experiment of waterless water? It was great fun, and thank you for letting me share what (for me) worked well, and what worked… less well.
A quick recap, the bright colors of this LEGO set show up nicely through the various effects of what I tried. As they are Legos made of plastic, if they get wet, they will dry. However, for the purpose of this review and because of my personal preference, I did not want them to get wet. Maybe down the road I will be more comfortable with putting my LEGO in water. They are plastic after all.
Hopefully this gives you, the reader, some inspiration on what to try in your own photoshoots – or even what not to try.
Moving on
Photobomb!
Should someone warn the divers to look behind them? …on second thought. Maybe not.
Teeth!
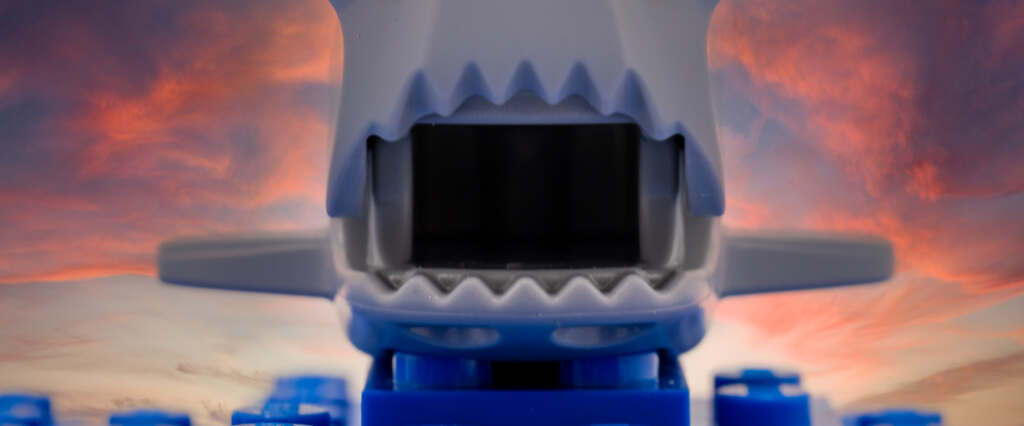
Having the whole head in the photo from underneath, with the mouth open, did not quite work, but oh… those teeth.
Reflections – Experiment with reflections from water
Underwater marine life
Discovery!
Underwater ripple effect – idea shared by Robert Whitehead.
To get the soft glow and hopefully achieve somewhat of an underwater effect, on these last images, I used a Lensbaby velvet and focused carefully on the part of the model I wanted in focus. I also set up a small water tank, over the models to mimic what may be happening with the lighting underwater.
I really enjoyed taking pictures with the set. The thing I enjoy about toy photography is your model is always waiting for you the next day. I am looking forward to adding this set to my LEGO Community riverfront I am in the process of building and getting more pictures in the future.
Thank you for sharing this adventure with me.
Beth O’Meara
LightProofBox.art / OMearaPhotography.net


Excellent review and I think I now want this set. 😀. I love how you worked through your water techniques and what not to do. Always a challenge working with water real or fake so thanks for sharing.
Thank you, Barbara. I thought it would be fun to share those techniques.
It’s good to see a review of a smaller set like this and I liked the chance to see how you worked through your issues with photographing the different components. Funny how so many of us wind up getting a set for just a small part of it like the turtles & manta ray! Good review!
Thank you, Mary. Thank you for sharing your input. Looking forward to further experimentation in the ‘water’ department.