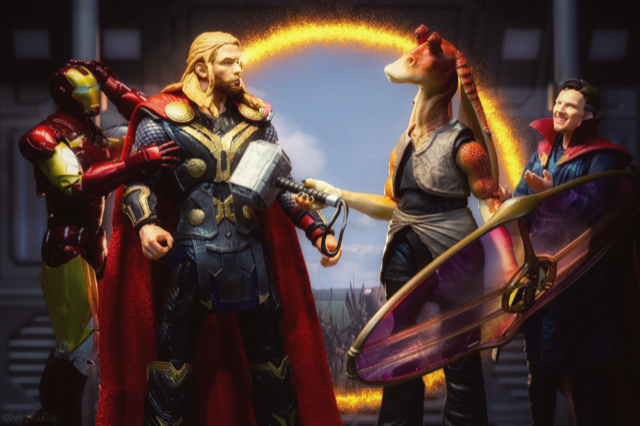
Good day Toy Photographers! I did a shot last year which was equally fun and frustrating to pull off. The real annoyance was that I spent hours trying to remember how I made Dr. Strange’s portal that he conjures with his sling ring. This was an effect I had done previously, but I spent hours trying to remember what I had done. So why not write about it so it’s easier to remember for next time.
The idea behind this image was a personal challenge I gave to myself to try and shoot as many new figures as I could in the month of May. I’ve had a boxed up Jar Jar for months, and had this shot in mind since I got him. I thought it would be an amusing scene to have Dr. Strange having some fun with some of the Avengers. Knowing all, he of course knew of a particular Gungan in a galaxy far far away who would be worthy.
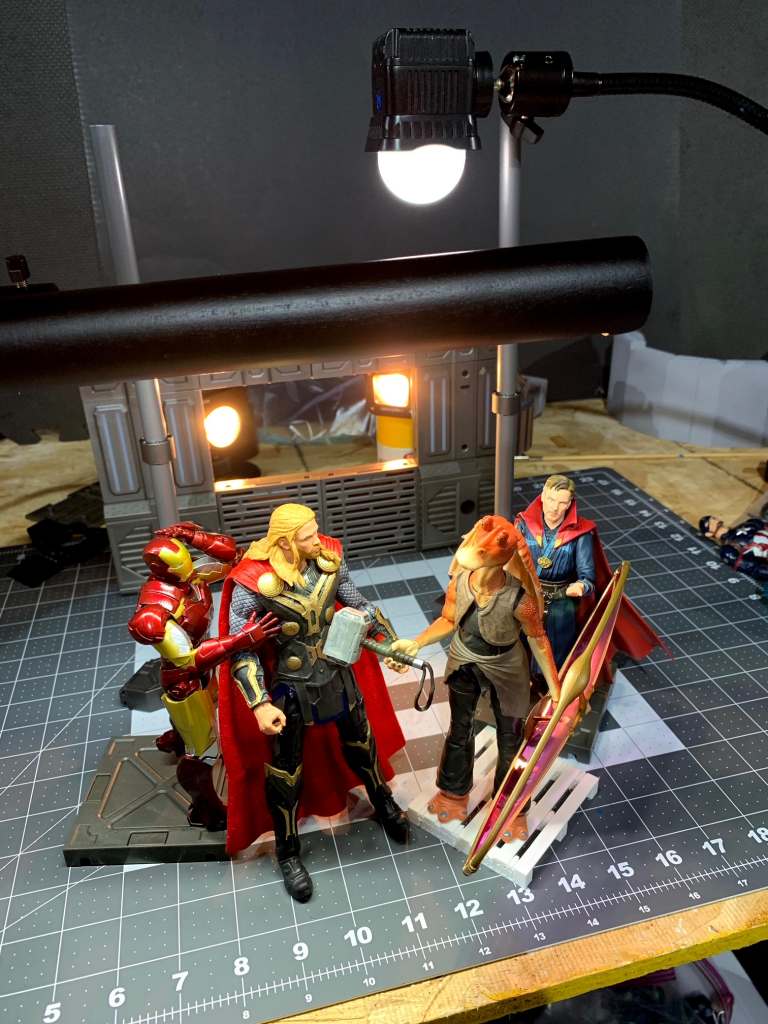
The setup was pretty simple. If you follow me, then you know how much I like to use my Ubiquitous Dio set for sci-fi shots. This post was no exception. When lighting this shot, I was trying to think ahead. The foreground lighting I wanted to be cold and harsh, but I knew I wanted the warm glow of Naboo coming through Strange’s portal, so I used my warming filters on my back lighting.
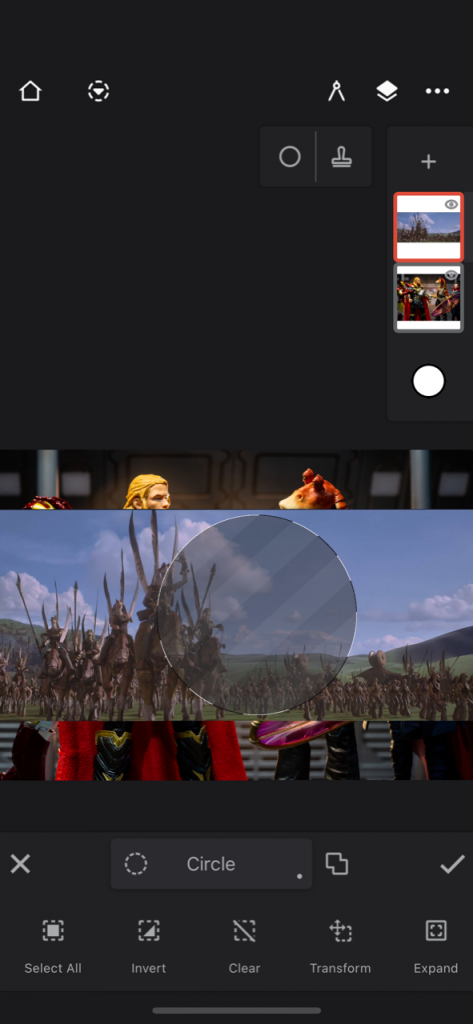
After some quick adjustments to the photo in Lightroom mobile, I opened the picture with Infinite Painter. A pretty powerful app that I’m still trying to figure stuff out in. And in full disclosure, I purchased this app a while ago, but I think the tasks I’m about to go over should be available with the free version. Now that I’ve imported the shot as a layer, the task was now to scour the interwebs to find a good scene that Jar Jar would have been walking out of. I finally found an acceptable screen grab from the Gungan-Droid battle from Star Wars: Phantom Menace and imported that into Infinite Painter as another layer. Select the Naboo layer, and choose Edit->Select->Circle. I then drug my circle to the most appealing section of the scene and then chose Invert Selection. This will keep your area safe as you use the eraser to remove all the photo outside of the circle. Now I used Edit->Transform to resize and move the circle to where I needed it to be. At this point you can select the Naboo layer and choose Edit->Filter. I didn’t go crazy with this part, I just added a little blur to give it some depth.

Now it’s time to add some Magic. Create a new layer and add some sparks! Edit your brush and select Glow->Sparkler and select your desired color, I went with a light yellow. Now trace around the Naboo circle as much as you want. Get crazy playing with direction, size, adhesion, all the settings! Now me personally, when I’m able to keep everything separated in layers I like to do that. So I added a second sparks layer where I simply changed the color to add a bit more orange and also increased the size/spray.
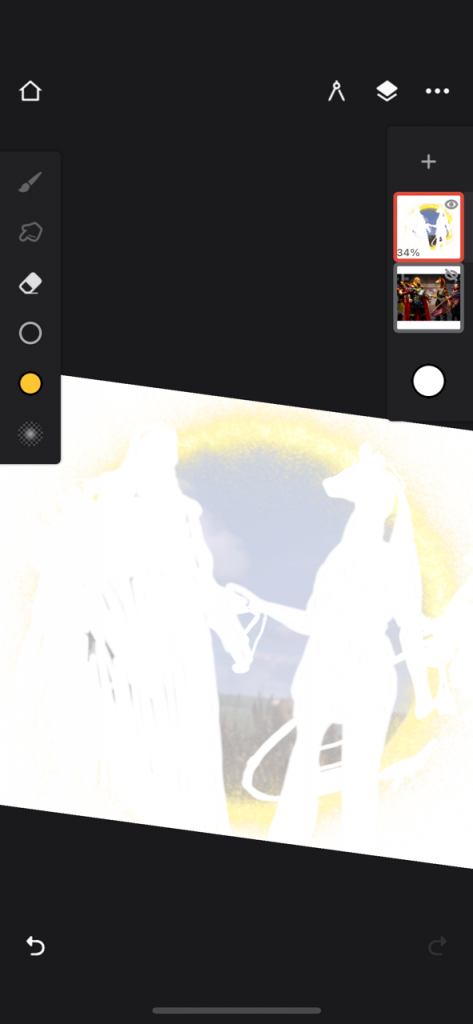
Now it’s time for the fun or frustrating part, depending on your point of view. I merged the Naboo and Sparkles layers into a single layer and turned down the opacity. This is where the fun begins. I take my time and attempt to be meticulous at removing all the overlap. This is definitely where most of the work is spent. When I think I’m done, that’s when I hide the front layer and it exposes all the areas missed (as seen above). Jar Jar’s translucent shield posed a particular challenge as some of the Naboo scene needed to be visible. I went through several iterations of playing with the eraser’s opacity to get this right. When you’re satisfied with how it’s looking, export and you’re ready to post.
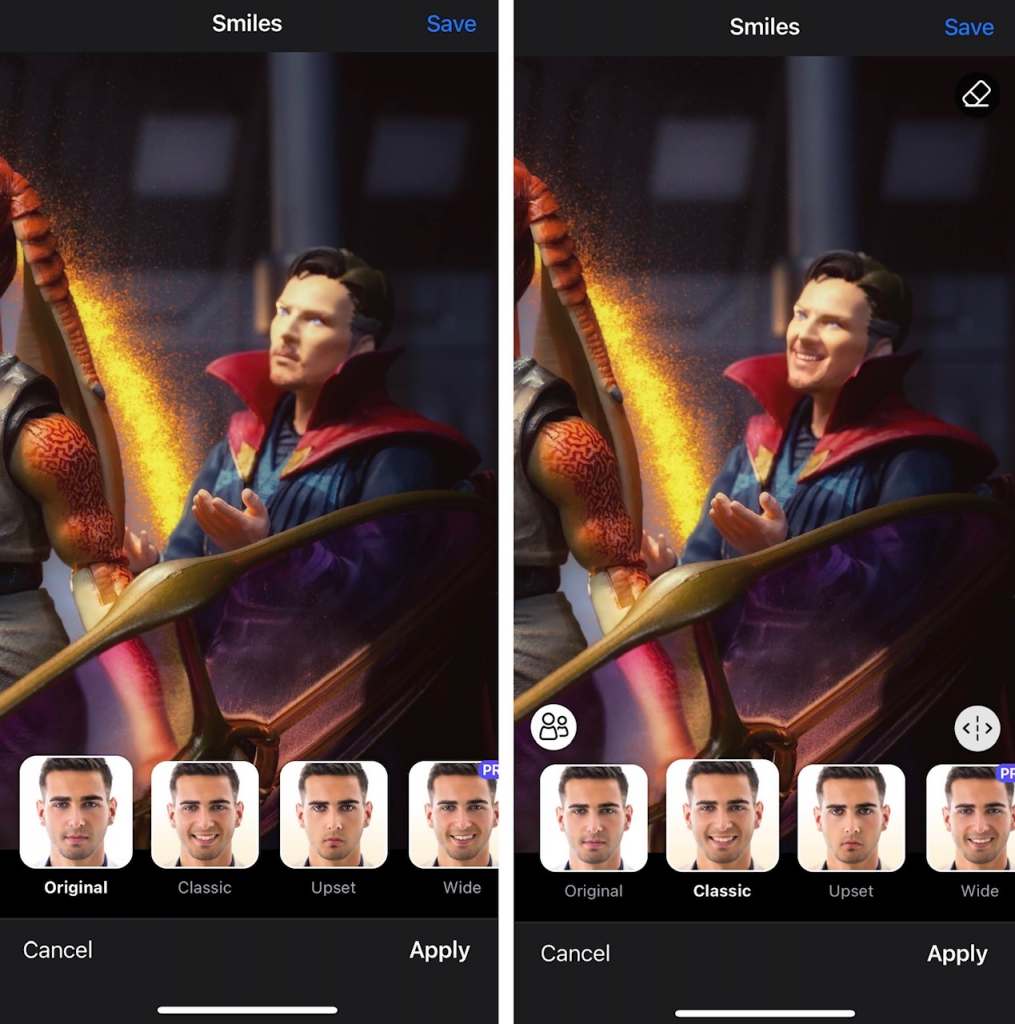
Unless you want to have a little more fun, enter FaceApp. I’ve talked about this app before. I try not to over use it, but I thought Strange laughing at the situation gave the image that last little push that it needed.
Hope you enjoyed! Thanks for reading
-Adam (@burkeheadtoys)


Leave A Comment