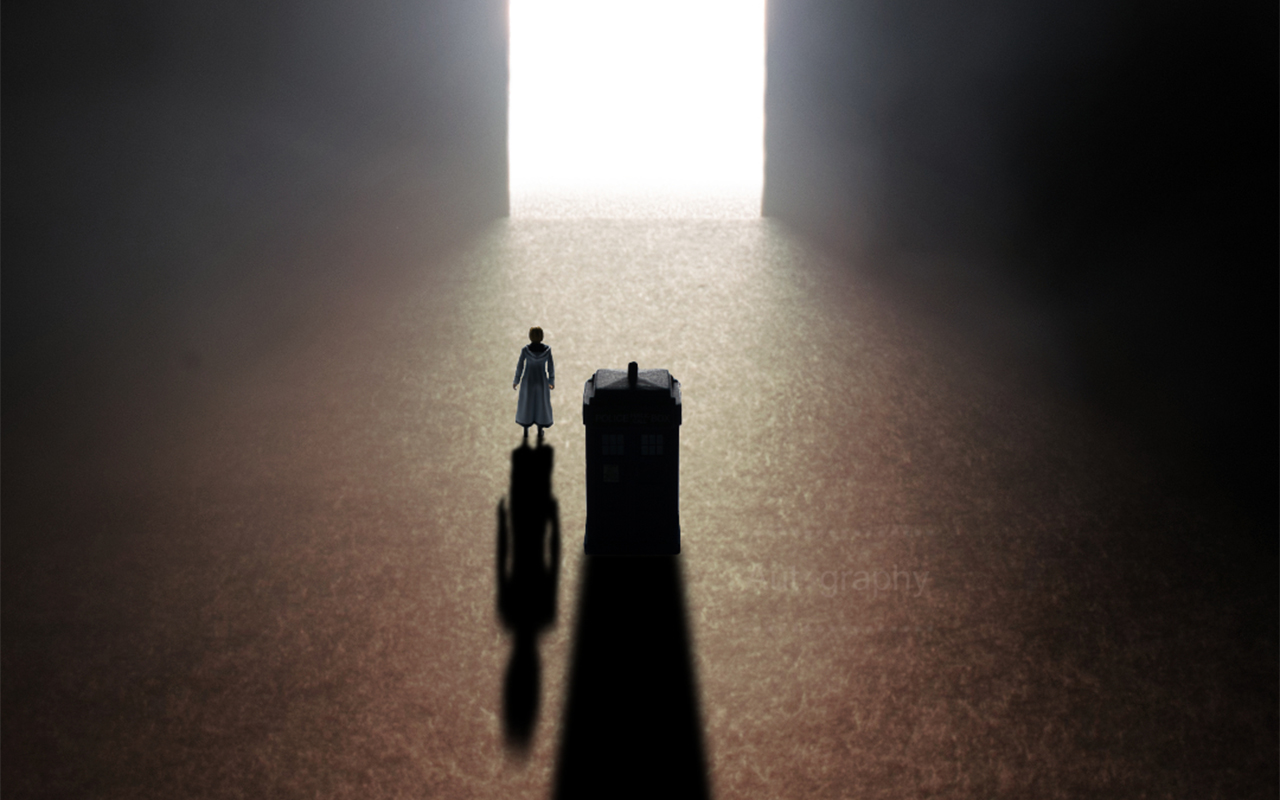
A couple of years ago I created an image I call The Infinite Beyond the Gateway. The image is inspired by The Timeless Child storyline in Doctor Who. It’s a photo I’m proud of. Not only because it’s won a couple of competitions, but it’s a surprisingly simple setup. In this article I will walk you through, step by step, the creation of this photo.
Before I get started I would like to mention that I use Affinity to edit my photos. The principles and techniques are similar to other programs uch as Photoshop. Whatever program you decide to use, having a powerful editing software on hand is important when tackling a project that requires assembling various images together.
The Infinite Beyond the Gateway by Ian Palmer
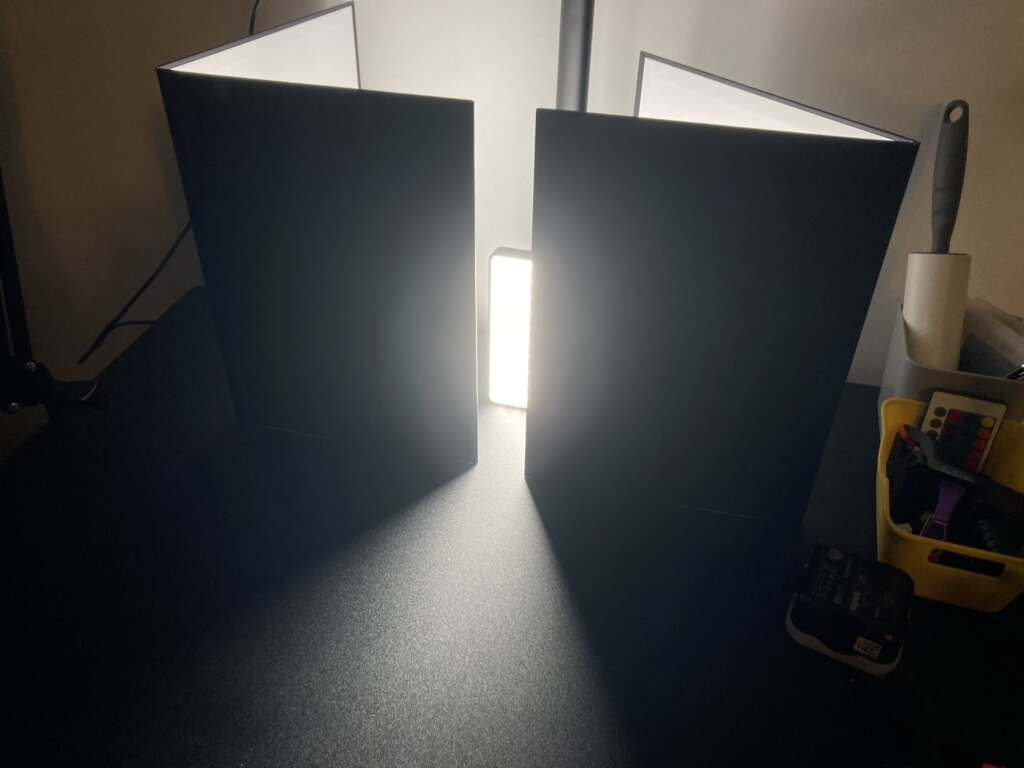
Creating the base image
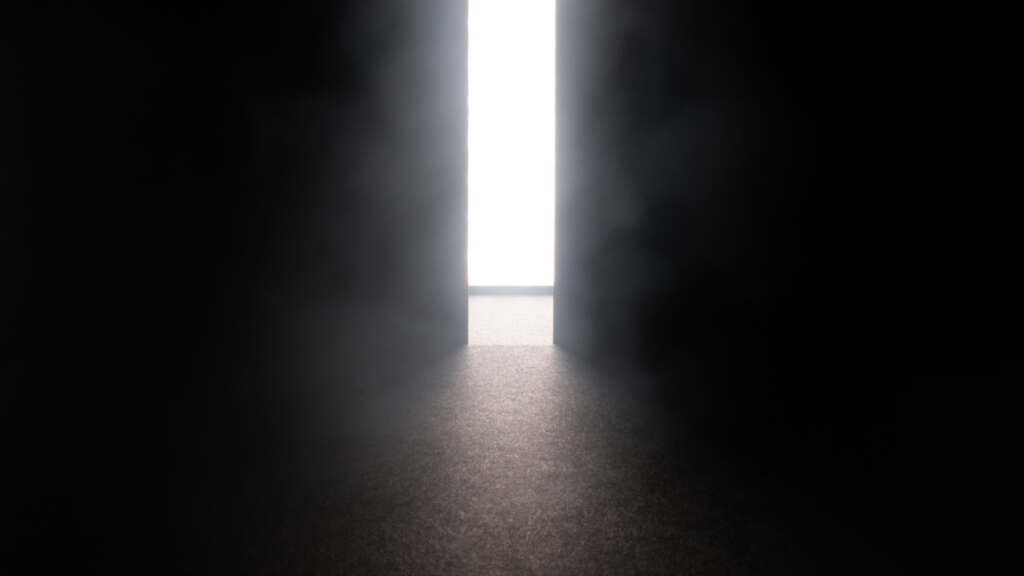
My initial setup is straightforward and consistes of two pieces of black card with a panel light behind them.
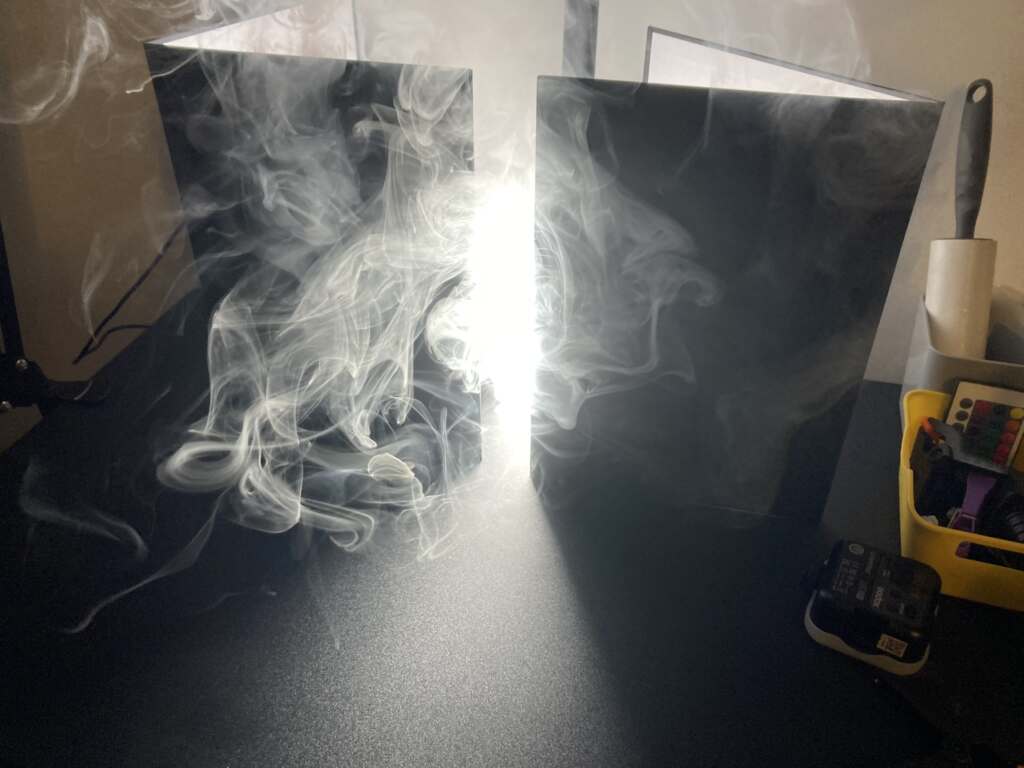
I added smoke using an Ulanzi FM02 portable fog machine. While I’ve upgraded my tools, I began adding smoke to my images using a vape and a straw. This method is still a very effective without much cost. [For more about adding smoke to your images, check out this post.]
I wanted to create an image that shows the huge size of the gateway. To do this I will need to get into some camera settings, which can be a little hard to understand at first. Here is an excellent diagram showing the Exposure Triangle and how settings will affect the final photograph.
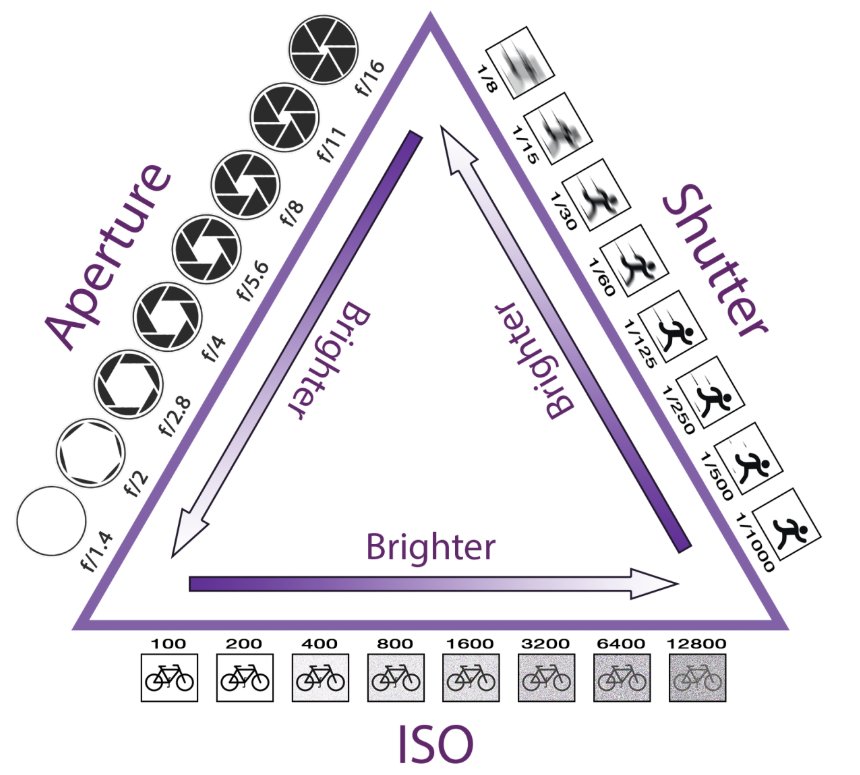
To create the image that I had in myead, one where the table and light source are both in focus requires me to capture a photo with a large Depth of Field (DOF). To acheive the desired results I will need to adjust my f-stop to a high number. For the final image I chose f29.
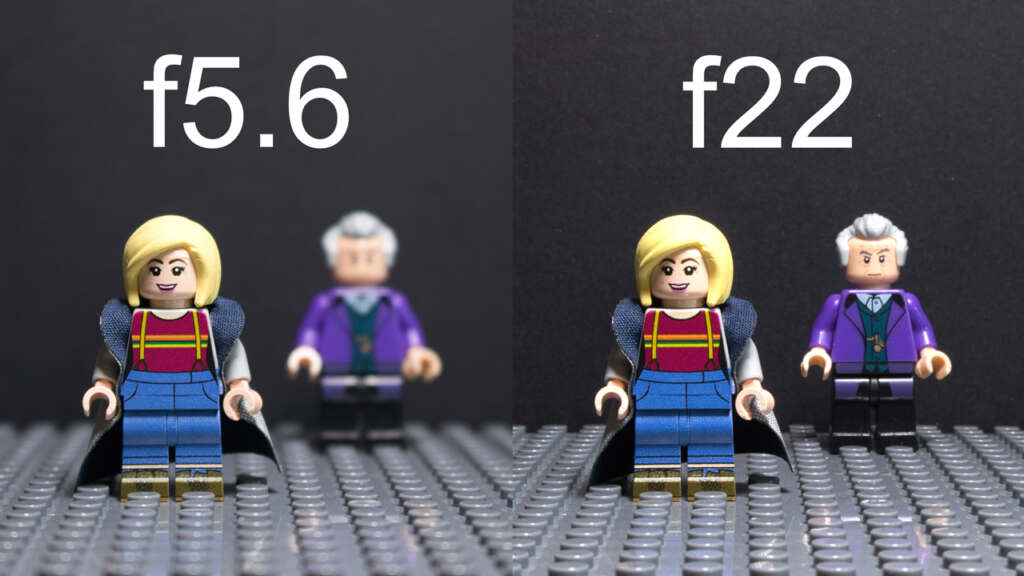
F stops, or F numbers, control the size of the aperture of the lens, which in turn controls the DOF. It’s far more noticeable and important when working with small objects such as toys compared to say a landscape photo. Here’s an example that shows the difference in focus between two F stops.
Another setting I needed to pay attention to was the ISO. I find this one to be simpler to understand. The lower the number, the less sensitive the sensor is which will result in a less noisy (pixelated) image. For my image, I used a relatively low (ISO 100).
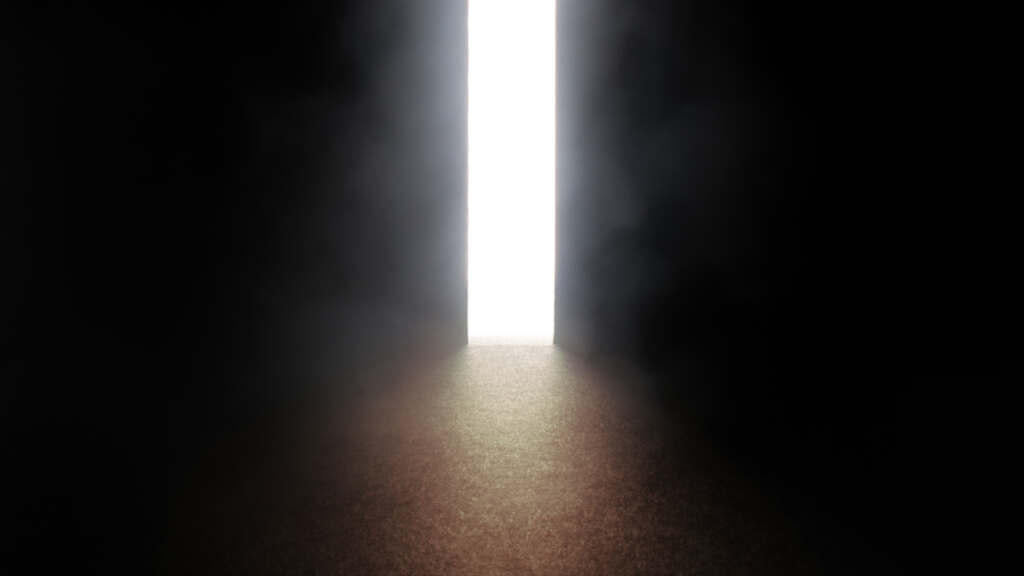
Adjusting the length of the exposure was the last decision I had to make. How long would I leave the shutter open? The longer the length of exposure means that more light will reach the sensor. Because I choose a very small aperture to capture a large DOF and my sensor isnt very sensitive I knew that I would be using a long exposure.
I choose to set my exposure time to four seconds. Not only would this allow enough light to hit the sensor to capture the necessary information. But it also allowed the smoke to move and become less wispy with details and more mist like.
This is the image that I captured to create my base image.
Editing the base image
Because my table is black I knew I needed to do some color adjusting. To do this I added a brown coloured shape to the image using Affinity. By reducing the transparency and changing the blend mode to Colour Dodge I’m able to adjust the color of the ground to a more realistic warm brown.

My next step is to remove the black strip from the bottom edge of the panel light. To do this I created a white shape using Affinity and blurred the edges. This is placed it over the white light and the black lined dissapeared behind the white block.
Adding the Doctor and Tardis
I photographed the Thirteenth Doctor and the TARDIS separately. It was important to match the angle of the camera and the lighting of my background image. I find it’s best to use a similar coloured background for this step. Because light wraps around objects, I wanted to make my life easier when it came time to cut out my subjects.
Once I had them cut out, placed on the background image and resized I landed on this. I to take care on resizing the subjects to to create the scale difference that I was trying to achieve.
To create the elongated shadows I did a little copy and pasting.
- copy The Doctor and TARDIS
- flip the duplicates vertically
- reduce exposure until they appear black
- blur the edges little
- stretch out the copies to simulate a long the shadow
In conclusion
While the final image utilizes a fairly simple setup I used intermediate level photography and post-production techniques to bring it all together.
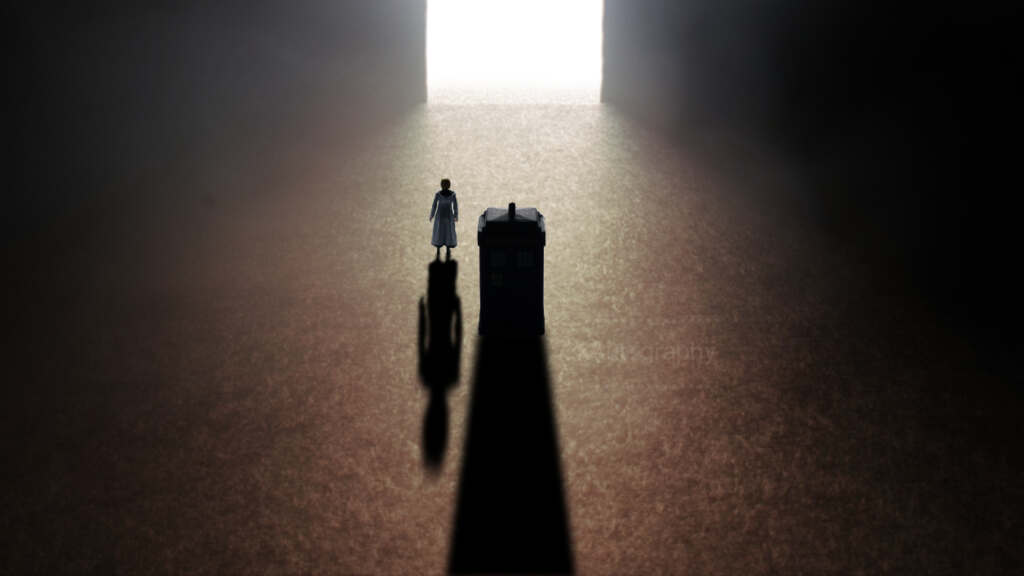
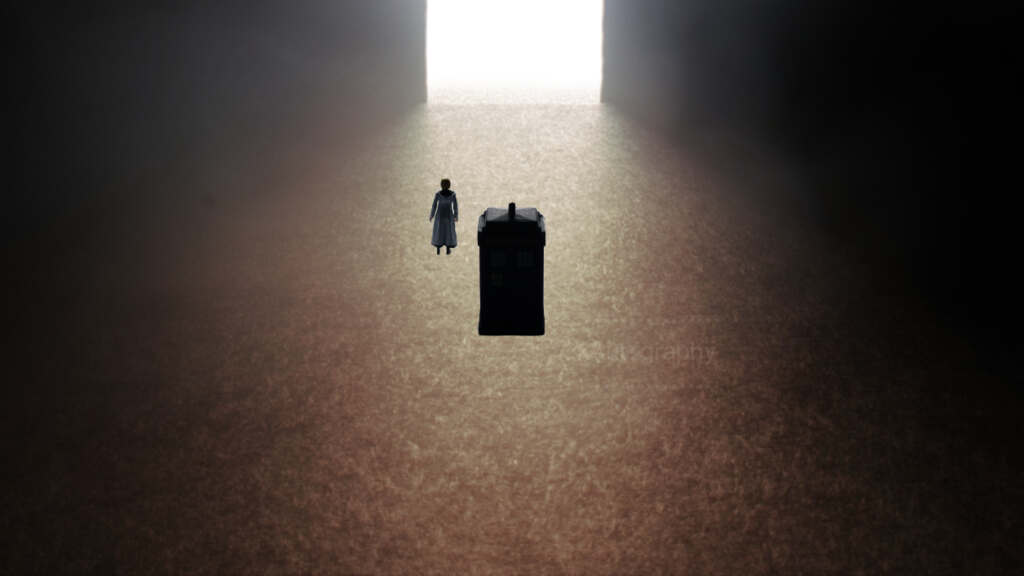
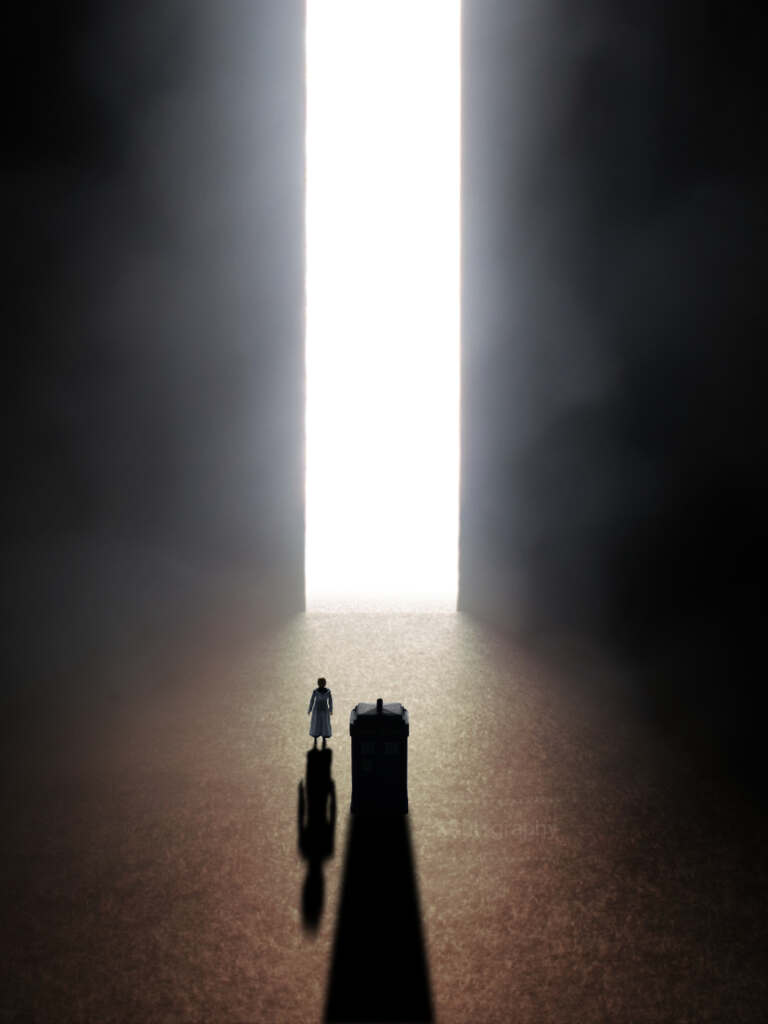
But to really sell the scale of this image I had to use my understanding of composition. While using a human shape will instantly signal scale to the viewer I wanted to reinforce the effect. To do this I had to choose between presenting the image as either landscape or portrait. Choosing a landscape orientation will create two large blank areas on each side. This is called Negative Space and using this technique will make the scale of the gateway more effective.
As you can see, using a portrait orientation means I lose a lot of the space that helps to sell the landscape orientation as immense. In the landscape orientation the sense of scale helps polish off the composition.
vs
I hope you found this breakdown of The Infinite Beyond the Gateway interesting. I love learning new techniques and sharing them. Toy Photography is a rich photographic genre, full of different techniques that can take years to master. Which is why I’m learning new skills all the time.
Have you done anything like this yourself? Please feel free to make any comments and suggestions below.
About the artist
Hello all, my name is Ian Palmer and I live in south Wales. I got into photography in 2019 as I needed a new hobby, I’d always had a passing interest and had a decent bridge camera, but I really wanted to get into it properly. So, I bought a DSLR and joined a camera club. I discovered toy photography after my wife asked me to take some photos of her Japanese figures. I then thought I could take photos of my various Doctor Who figures and my passion for the genre was born


Love all the detail, Ian – that is a very cool final image. Thanks for the article.