Certain parts of North America have been getting dumped on in the last few weeks. Which is the perfect opportunity to take the toys outside for some cold weather fun! Here are a few tips that you can use to make your efforts a little more comfortable as well as assuring your efforts wont be wasted.
Lighting
In the Pacific Northwest, it’s a rare day to get snow and blue sky at the same time. If there is snow in the forecast, the grey clouds are sure to follow. In fact photographing in snow in my part of the world is an exercise in flat and dull light. Which is why I always take a light as well as a bounce card / reflector with me.
Because I have several types of small portable lights, I choose the waterproof one for my snowy adventures. It doesn’t take being in snow long to remember that it’s just frozen water. Which is good to remember that water and electronics don’t mix. While my camers is weather sealed I dont want to put it to the test.
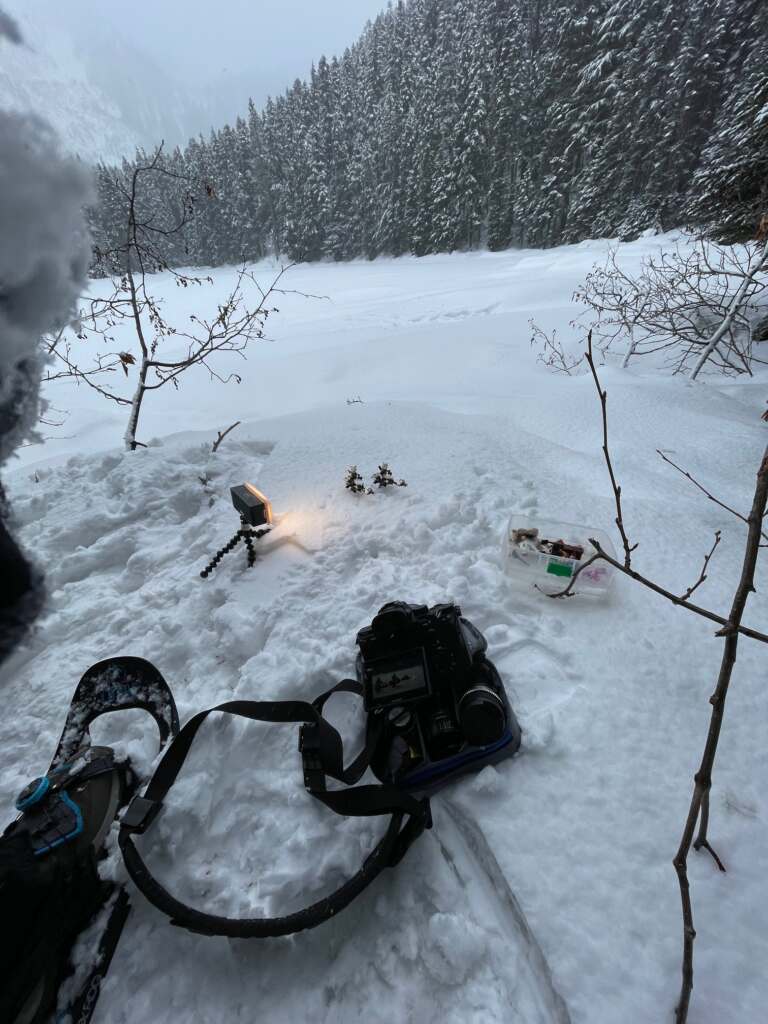
I always have a flexible portable tripod on my lights. This helps to stabilize it on pretty much any surface. Fro mud puddles to poking it into the snow. I want to pe able to put my light just wear I need it.
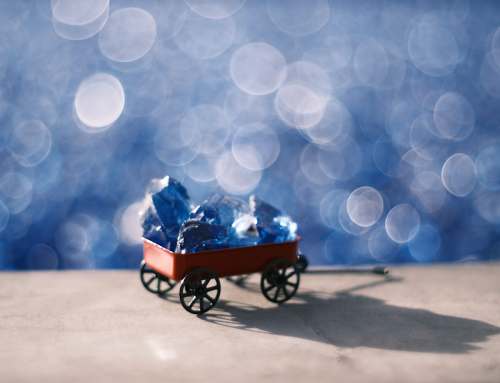
Winter light tends to be cool, which is why I put a warm gel on my light. If I happen to be using RGB lights (riskier because they aren’t always water resistant) I adjust them to a warm light. In my experience a figure bathed in warm light is more appealing. And since I will probably be adjusting the color balance when I edit, it’s nice to get a head start at this stage.
You can also adjust your white balance to help counteract the strong blue / cool cast found in the winter.
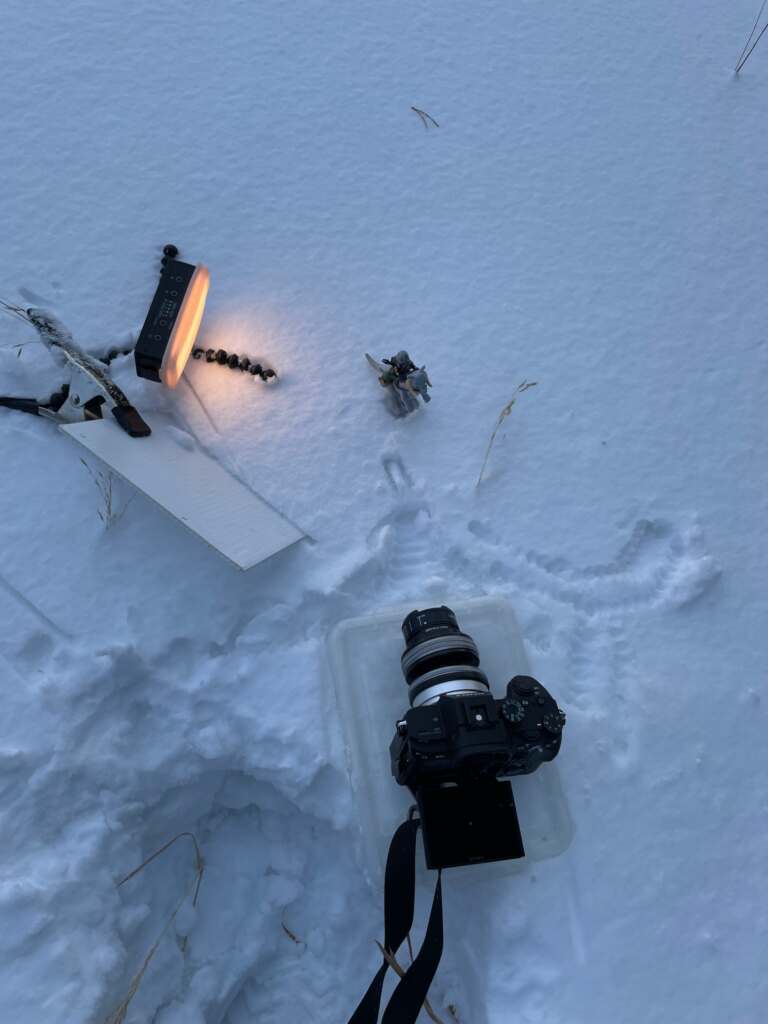
I always carry a bounce card (or reflector) in my camera bag. With this simple tool I can maximize any available sunlight. Being able to control your light helps to bring more dimension to any set-up. My reflectors are DIY. You can use white, silver or gold reflectors expand the reach of any portable lighting.
Another good reason to have additional lighting is that in winter the days are shorter. This means that blue hour tends to start in my latitude around 4pm (in the heart of winter) so having additional lighting extends my play time.
Snow is water
While this seems pretty explanatory, I often forget this inconvenient truth. Especially when the snow invades my toy box and starts to melt. I do my best to keep the snow off the toys and equipment, but it always finds a way. Especially if I’m out playing in falling snow.

Because of this I plan for a snow session the same way I plan for playing around a mud puddle. I make sure I have a plastic lid to put toys or camera on. I also keep a gardening knee pad in my camera bag that I can kneel on in all types of terrain – snow, mud, rocks etc. This simple foam pad works great as a staging area for toys or camera.
Dress appropriately
Playing outside in the snow is fun, but also a fast way to get cold. Especially since setting up a scene isn’t the type of activity that works up a sweat. I’ve found that dressing as if Im going skiing is my best approach. If im feeling lazy or want to sprint our for a quick photo, I put on waterproof pants layered with warm pants or leggings.
A word about hands – no matter what you do, they will get cold! I’ve tried fingerless gloves, photographers gloves and thin gloves used with electronics. They all have their issues. My favorite are a pair of fingerless wool gloves with a mitten pull over. But no matter what gloves I choose, I keep a pair of rechargeable hand warmers in my pockets. These are great for a quick finger warm up. For me, my fingers are my weakest link. And since I see snow so seldom, I want to maximize my photo opportunity.
The last thing I want to happen is to be in the midst of good light or a strong set up and be too cold to get the photo. So best to over dress!
Pre plan!
When I’m working outside I have to work fast. This can be because the light is changing quickly, the weather is turning on me or I simply dont have a lot of time. To make sure I can get at least one photo – I always pre plan my scenes. This can mean simply tacking a group together. Or if its multiple figures I will set the grouping on a plate that I will bury in the snow.
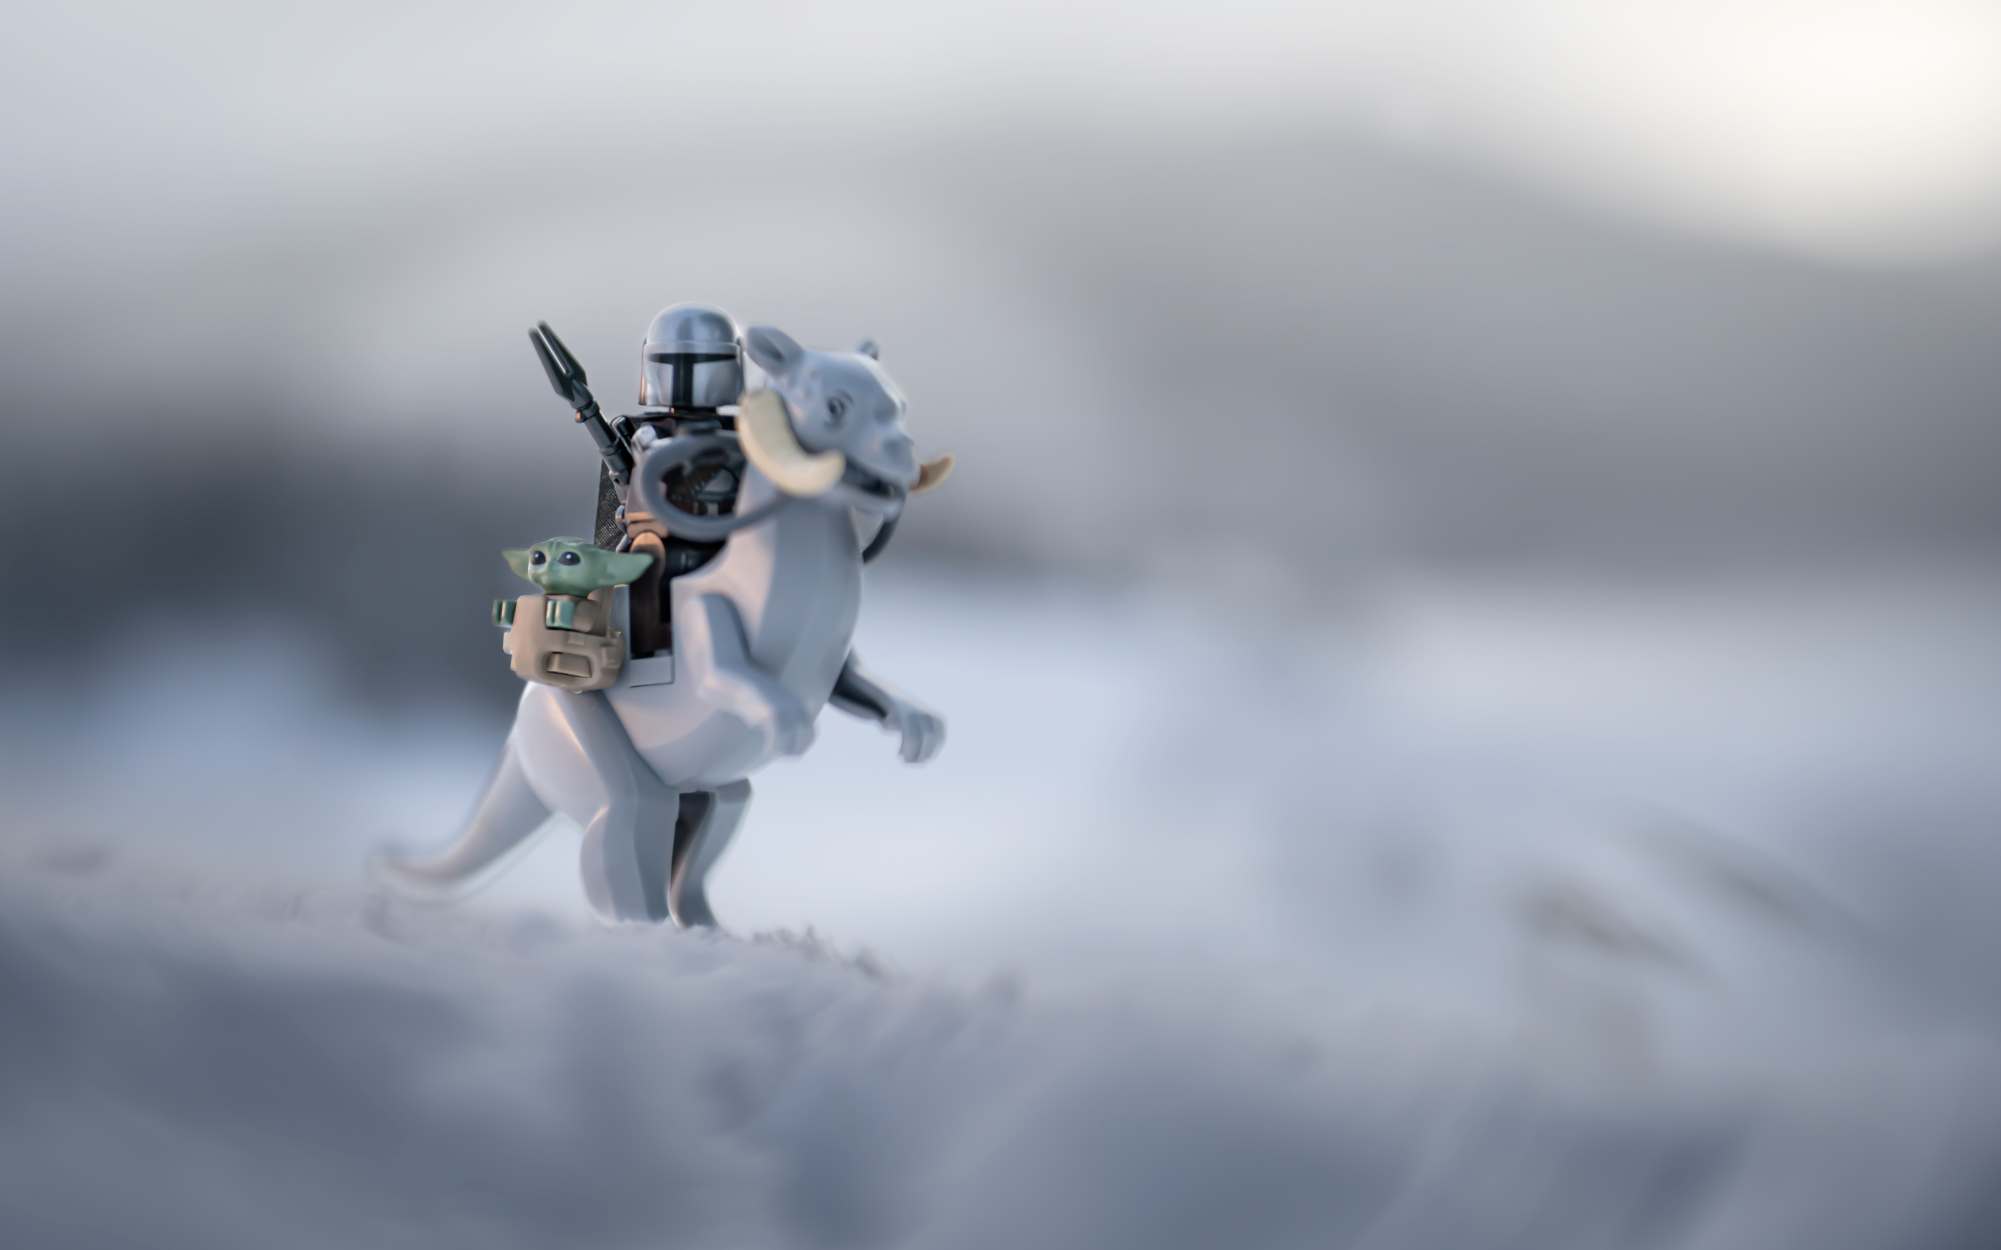
Snow comes in many varieties. In my part of the world, the snow is heavy, full of water and often icy. Which means I can usually simply place a figure on the crusty snow. But when I travel to areas where the snow is fine, a LEGO minifigure will drop into the fine snow up to its waist. So I always have pins in the feet of figures who will be standing on the snow. I also carry clear bricks and wire with a single stud tacked on the end for additional support.

When I start photographing I know that time is my biggest enemy. I plan on about 30 minutes before I get too cold to think. So if I want to maximize this time, as well as the light, I need to move fast. Creating mini vignettes or set-ups in advance has helped me to capture photos I’m proud of.
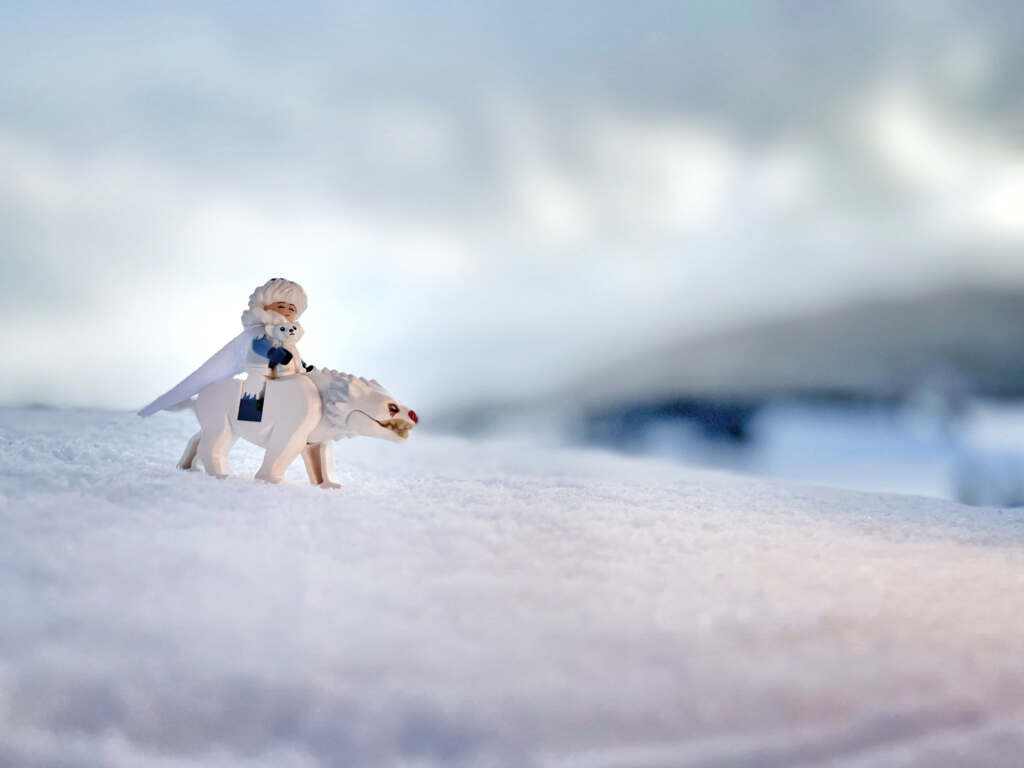
Don’t be afraid to play in the snow
While I don’t recommend that you go outside to capture toy photos in a blizzard, there are still plenty of opportunities for winter fun. I love being able to go outside mid day to take advantage of the soft winter sunlight. Especially if I can pose my figures with the sun behind them. In the summer, at a similar time of day, I would be fighting a harsh midday sun.
If you’re lucky enough to live in a part of the Americas being pummeled by snow, I hope that you will take a moment to pack a few toys and head outside for some winter toy photo fun!
I cant wait to see photos of your toys recreating your favorite winter activities. Snowball fights, making snowmen, snow angles, participating in all the winter sports – even ice skating! The toys are calling you…
Shelly


I love snow, and winter lights specially in January – but I always forget how cold I get. Snow is frozen water and the fingers as you point out so neatly will get COLD. But it’s lovely to work with snow, you have bouncing card all around… Love the way you work with your toys in snow.
I love the blueish, cold light as well – that is winter ….
Thanks for reading Kristina! You’re the one who taught me to appreciate the snowy landscape that can be winter. I’m glad you pointed out that the entire landscape will bounce the light. The cool blue light is a pleasant break from the warmth of spring or the vibrant reds of fall. I think I like adding the warm light because I get that lovely bi-color light that adds contrast and depth. It’s all fun and games until the fingers get cold!!
What a great post!
I can relate to everything you wrote, Shelly. The weather conditions in my area are very similar. I just didn’t think of the extra light; maybe because I only take photos in the snow on weekends, and sunny weekends at that 😉
And ironically, we’ve had a thaw for the past three days, and the snow that lay there for the last two months is practically gone.
Thank Tomek! And lucky you that you have snow AND sun! Unheard of for me. Which is why I use the light. And as Kristina pointed out, photographing on snow is like being on a giant reflector. So if you have sun, rarely would you need an assist. But if its after work, late in the day, or suffering with the endless grey – a warm light is a lovely edition.
So sorry you lost your snow!! :/
Ahhhh, I recognized your signature approach long before I reached the end of the article and confirmed it was you, Shelly. Thank you so much for these tips. Our snowfall is relatively rare and the opportunities require planning for the short times snow is available. I found several of the tips really helpful!
Am I that obvious? I’m glad that you found at least one useable tip for your own toy adventures. Although Ive found there are no right or wrong approaches, only clever solutions to any set up. Have fun, where ever your toys take you!