“The secret to good lighting is to play. Move your lights around, experiment, play with your tools and think about light as an element of your image. One that is as important as the subject and your composition,” writes Shelly Corbett in her recent post on lighting – since I feel this encompasses most of my approach to lighting, I could not agree more. I strongly recommend her post because it is quite a systematic introduction, more systematic than I can muster.
Playing with my toys, and with light, I am constantly learning – but slowly, because there is a lot of trial and error. It’s a journey I would like to share with you today.
Where I come from
When I got into toy photography, I often tried to emulate the noir style of early detective movies like The Maltese Falcon. I imagined starting with a black canvas in front of me to which I had to add all shades of brightness. The resulting pictures were defined by pools of light. At that time, any light source would do as long as it was small enough to produce well defined shadows.

Looking at one of those early pictures, let’s put aside that today I would probably use a stronger lamp to get the bright parts a bit brighter (like in the picture at the very top). What’s more relevant here is the shaping of the light by means of a doorframe I‘d cut out of a piece of cardboard (I learned from Shelly’s post that this is a way of creating flags). I basically put a flashlight behind that frame to get this noir effect – the light source is invisible so it does not really matter what it was.
The underlying assumption might have been that this is a night scene and therefore the picture should be quite dark. But I guess I was not really thinking that way yet. The lighting was used to achieve a certain look, or aesthetics: I chose expressiveness over realism. To get there, I chose a small light source was small, positioned it low above ground and close to the subject which accounts for the form of the figures’ shadows.
I made many pictures like that, basically using the same approach. In 2023 for example, many elements are still the same. The night is still shown as a dark space, lit by small, local lights. But things also began to change.

I had become more aware of the world I wanted to create. The photo is supposed to show a checkpoint in the desert (Nevada?) so the dark sky makes sense. Looking closely, you’ll notice is not black anymore: I used a trace of daylight shining on my room‘s blue wall from behind the camera. That’s why the dark part of the gate can still be discerned from the sky.
In terms of realism, it also makes sense to have the flood lights in the picture as they are part of the building. They cause the well defined shadows cast by the guard and the gate. We can see how the shadows get broader and less focused with increasing distance from the light source.
The third light source is a very small lamp pointed at the soldier‘s face, I imagined this light to come from a car‘s headlights – and I used it because I wanted to show more than the guy‘s silhouette.
This picture marks the time when I started spending money on H0 scale lamps rather than building miniature lamps, e.g. from silicone buffers (like the ones you can see above the entrance of the “Downtown,” further down in this post. Being equipped with LEDs, the toy lamps have a couple of advantages:
- They can plausibly be part of the picture if that’s what I want.
- They can be quite bright, heightening the contrasts and giving shadows that extra punch.
- They do not overheat so I can shoot for hours if I am so inclined. (It happens!)
All in all this is still a dark picture – it’s night out there, so it seems right.
Here comes the sun
When I was working on that Area 23 series I felt there should also be some bright and sunny pictures as a counterpoint. That’s when I started heavily using both my desk lamp and natural light.

This railroad picture isn’t particularly bright either – I was thinking of a sunset situation – but it feels sunlit, doesn’t it?
The only light source is a desk lamp with a 100 Watts bulb. Although not that obvious in the above picture, the desk lamp has one huge disadvantage when it comes to representing sunlight: The closer the light source, the more distorted the shadows, as we saw in the two images before.
That can be a great effect in horror movies, but sunlight doesn’t do that. I’ve hence been experimenting with getting as much distance between my lamp and my subject. The following photo was extremely callenging in this respect.

In the end, I placed the lamp in the far corner of the room to achieve the effect I wanted. Now the shadows could be darker but hey, this was the best I could do. Not being exclusively “about” the shadow, the picture works for me.
Day and night in urban settings
The shifts from expressive to realistic, from extravagant to everyday apparently paved the way for something I learned over the past year. Once I had moved back to more urban settings, there was no reason to make dark pictures anymore. In general, cities are bright places even by night. Therefore a picture showing a city by night doesn’t have to be any less bright than a daytime picture. So there must be alternative ways of symbolizing night and day.
I had already tried to play with the day and night theme in the Downtown series (2023). Looking at pictures from that series today, I would say that at least I got the basics right: In the first one, the desk lamp serves as the one and only light source, and it is fairly distant from the scene. The second one, showing the same location by night, relies on multiple light sources. Some of the lamps are in the picture, some are beyond the frame.


As I write these lines, I am convinced these two pictures show a lot of potential for improvement – and truth be told, I’ve already re-shot them. But my criticism doesn’t only concern lighting. For now, I’d like to note that the underlying assumption still seems to be that “day equals brightness and night equals darkness.”
The next picture is basically lit the same way as the daytime picture above; the house fronts are pretty dark. With the narrow frame and the light shining in more laterally, it should be much easier to see this as a sunny day.


The second image is brighter than the first one, but the lighting should suggest that the lady arrives well after sundown. I think the difference lies in the number and direction of the lights.
With a single light source – desk lamp – you have one-directional light with all of the shadows pointing into the same direction. This kind of light would be what we expect to see during the day, with the length and direction of the shadows hinting at morning, noon, or afternoon.
In the night shot, you have multiple light sources, hence the uneven dispersion of light in the second picture. The shadows might point this way and that, and their lengths depend on the distance from the light source. In the picture above, there’s is no discernible shadow of the hand rail because the object is right underneath a lamp. The shadow cast by the woman is longer, and the car‘s shadow is longer still. The light above the fire exit of the building in the background causes a different direction of shadow back there.
Coda: Sometimes it does not really matter
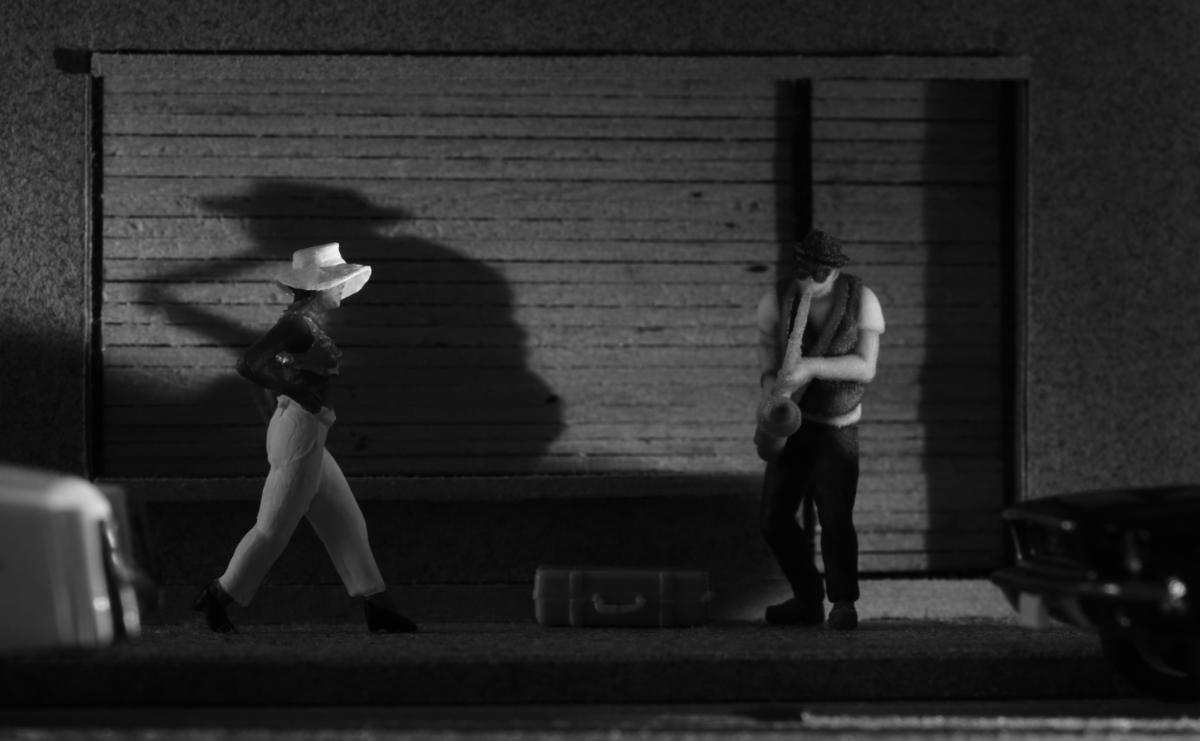
After writing all this, my next challenge was going to be a picture of a person casting multiple shadows. So I set up up a sax player I’d recently acquired to do exactly that: Light him with two LED lamps so he would cast two shadows on the building behind him. While putting everything in place and making a few test shots, I realized the guy needed an audience. So I added a passer-by, trying out different figures for that job. At one point my camera screen showed the white hat of a figure very nicely popping out while she walked into the musician‘s shadow. That was a new idea, and in optimizing this new picture accordingly, I let go of the idea of multiple shadows. This was an opportunity too good to miss! (It is now this post’s featured image, right at the top.)
I am concluding with this little anecdote to remind ourselves that in spite of all our planning and thinking, it is often that we get the best results when we allow ourselves to play. Treating all tools in our photographic toolbox as toys can take us to places we might not have expected to explore.
I am convinced that allowing things to happen, we do not have to worry about personal style or artistic development. It will just be happening, too.


As I mentioned H0-scale lamps, here are a few examples. Top: 1/87 scale-models available from (German) manufacturers Viessmann and Busch. Also available from Busch are 1/87 scale vehicles with working head- and tail-lights. Bottom: Lamps I built from scratch; they are back-lit through holes or slits I cut into the respective ceilings and walls.


Leave A Comment