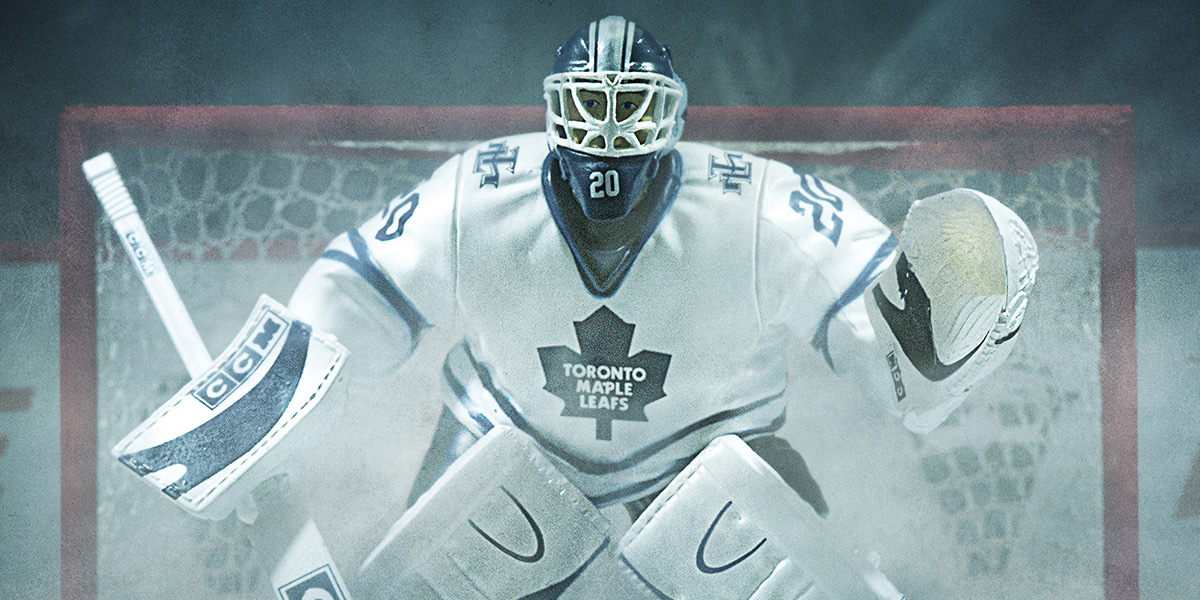
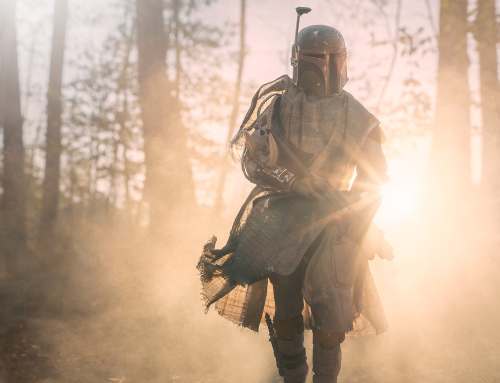
I am not much of a sports nut. The only sport I follow is hockey—I really love the game. COVID-19 forced a postponement of the hockey season back in mid-March, but now hockey is back! This warms my cold Canadian heart.
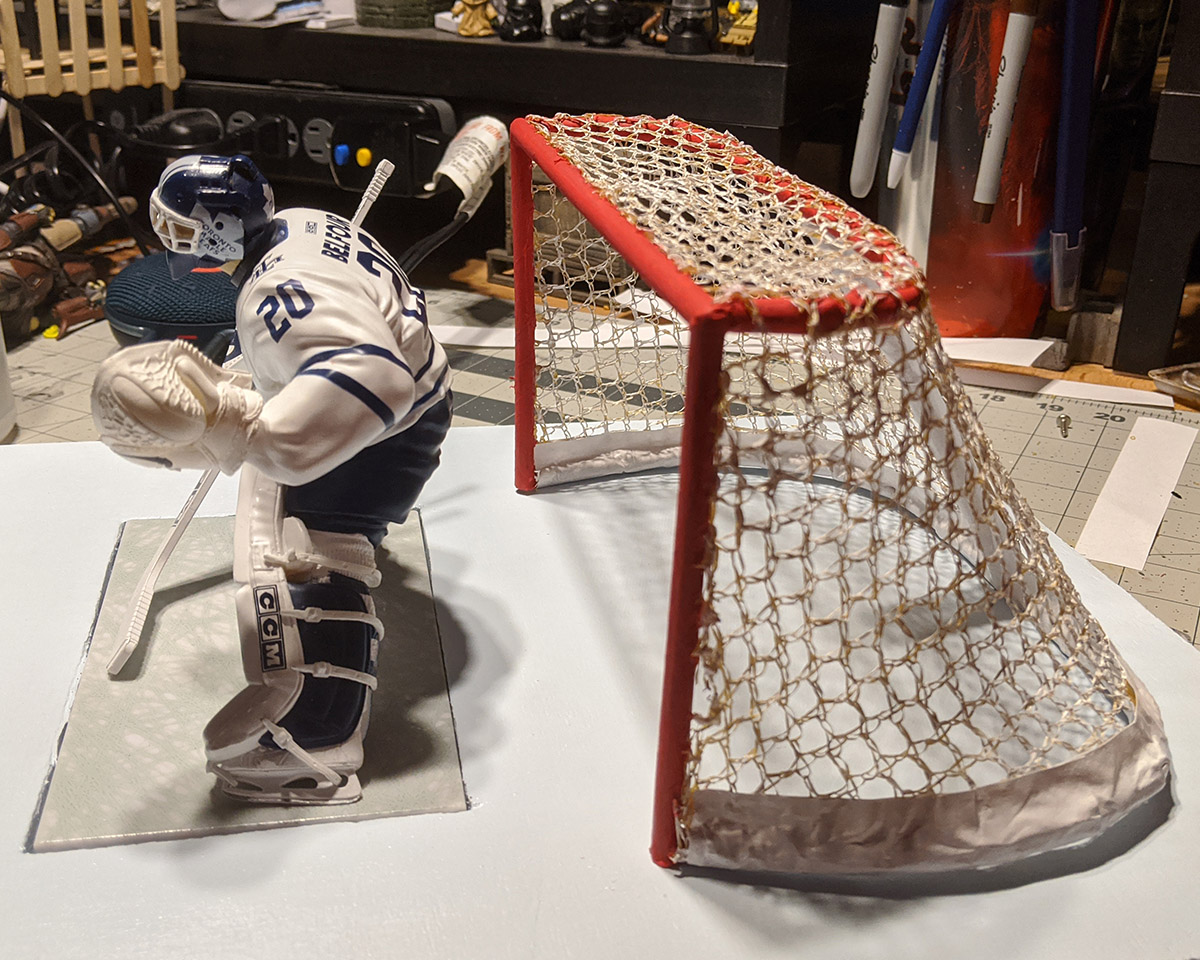
On my Shelf Of Awesomeness I have a figure of famed goalie Ed Belfour wearing the white and blue of the Toronto Maple Leafs. I decided I’d try to make an image to celebrate the return of hockey with this figure.
Goaltenders need a net to tend (hence the name), otherwise they’re just super-awkward defensemen. I didn’t have a net, so I decided to make one. (Project! Insert manly squee sound here.)
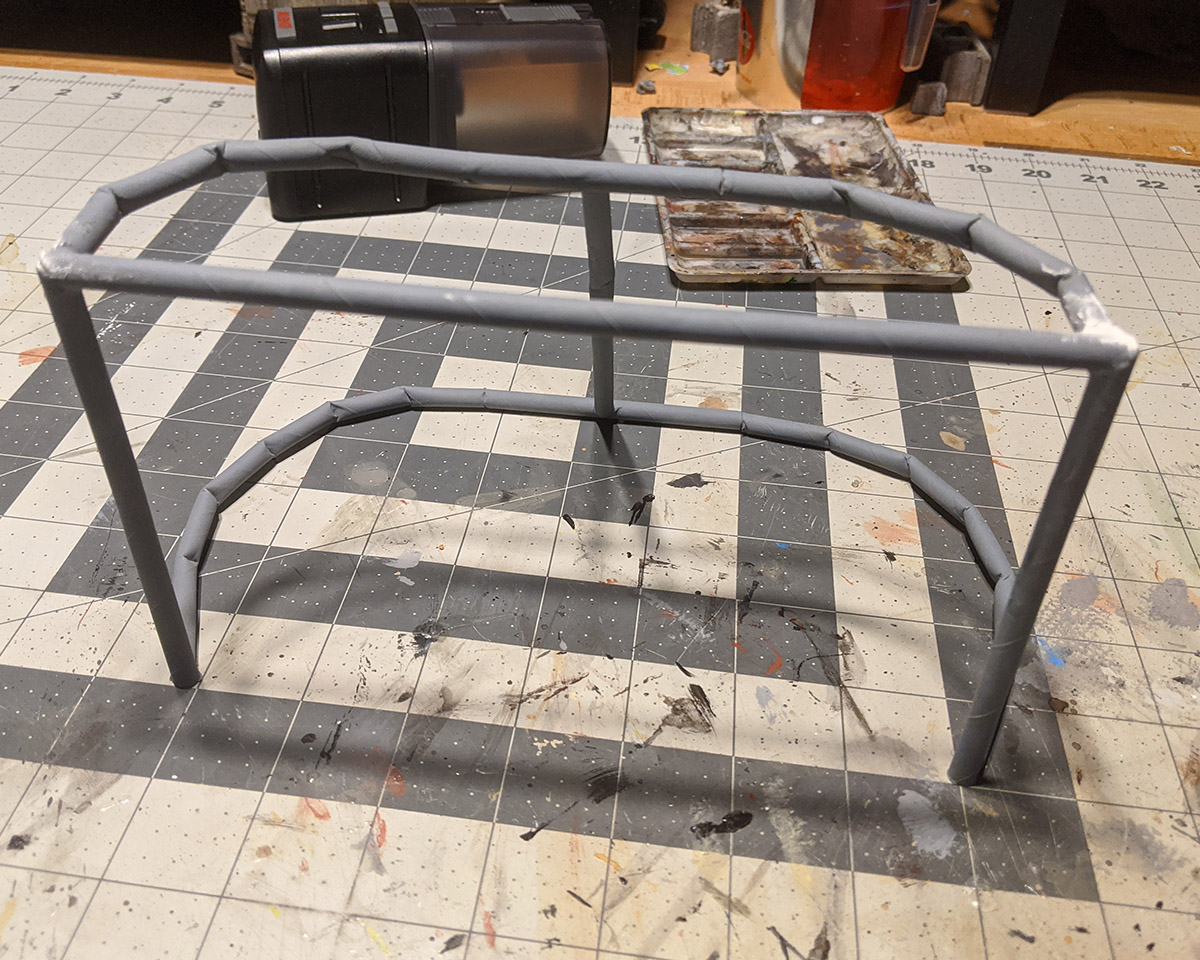
I did some research on hockey nets so I could properly scale my net to the figure’s 6-inch size. Looking at official NHL goal measurements, I decided I needed the opening to be 7 inches wide by 4.5 inches tall (a regulation net is 6′ x 4′).
Constructing the hockey net
Straws make good pipes, but plastic straws don’t glue well, so I went with paper straws. About 15 minutes and several super-glued fingers later, I had the basics of a hockey net:

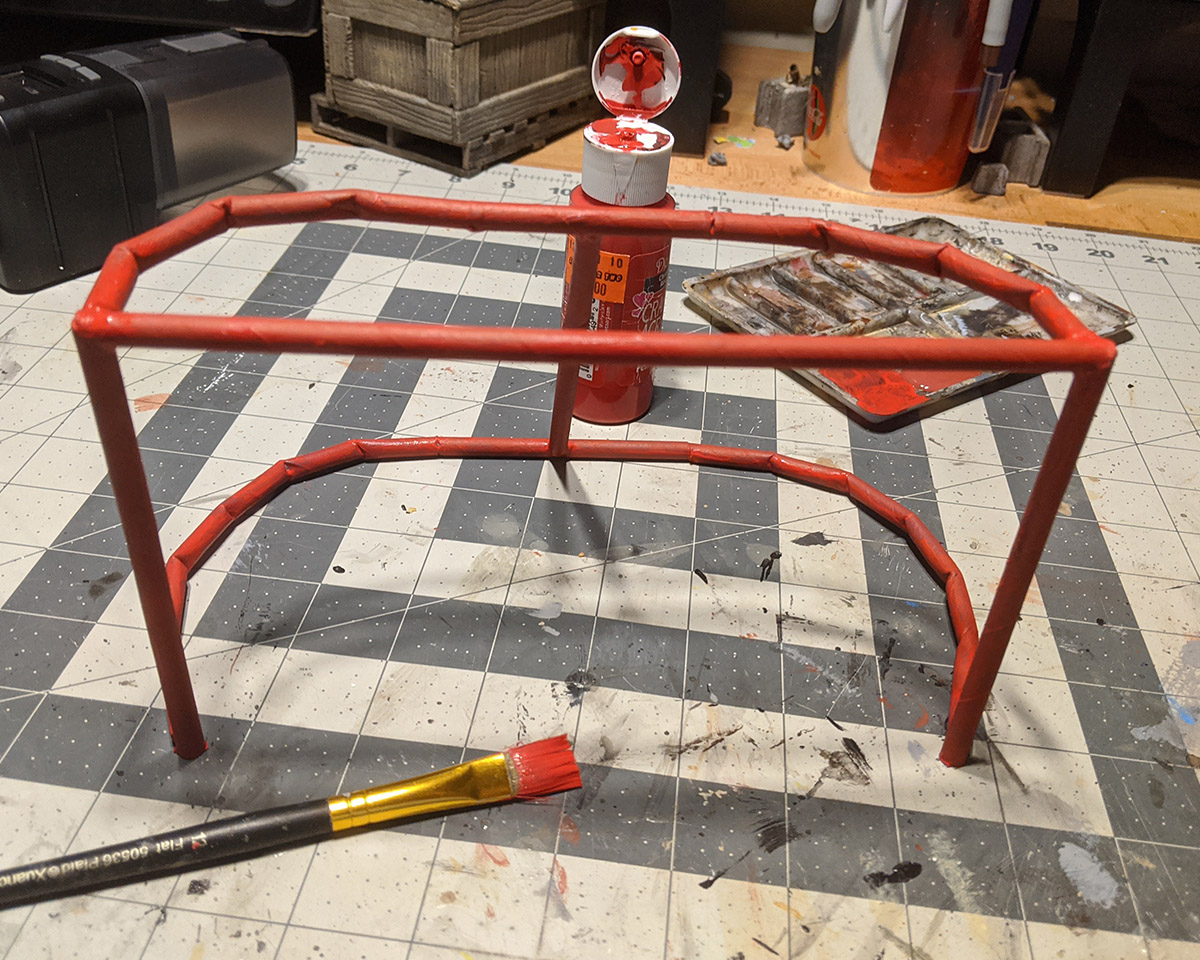
The next step was to prime it for painting. So I grabbed a can of spray primer and headed outside—to find a thunderstorm about to descend. Nerts!
This is the primer step, so a good paint job isn’t required, and it is the only thing where I needed to be outside (ventilation is your friend and keeps the wife from complaining about spray paint fumes in the house). After this I could do it all inside, so a rush job was all I needed.
I quickly got to work and sprayed the ever-living heck out of the frame—as I said, a rush job, but I finished just a few seconds before the first raindrops fell.
I brought it inside to dry, which is fume-y, but not as fume-y as the spraying itself. It wasn’t too bad. Wifey barely noticed, so I am calling this step a win.
Once the primer dried, I hit it with some classic red paint.
The next step was to find something to use as the netting. I looked high. I looked low. I even put a call out to fellow makers on the internets. I first settled on the net from the kids’ insect grabbing thinger. It was perfect. It was white. It was… 2 inches too small.
Unfortunately, that didn’t become obvious until I already destroyed the grabber thinger. Oh well. Hopefully the kids won’t miss it.
My wife eventually found the net I needed in a bag of onions. Well, specifically, it *is* the bag of onions. Not the right colour, but the right size. This is the “do I have enough?” test fit.
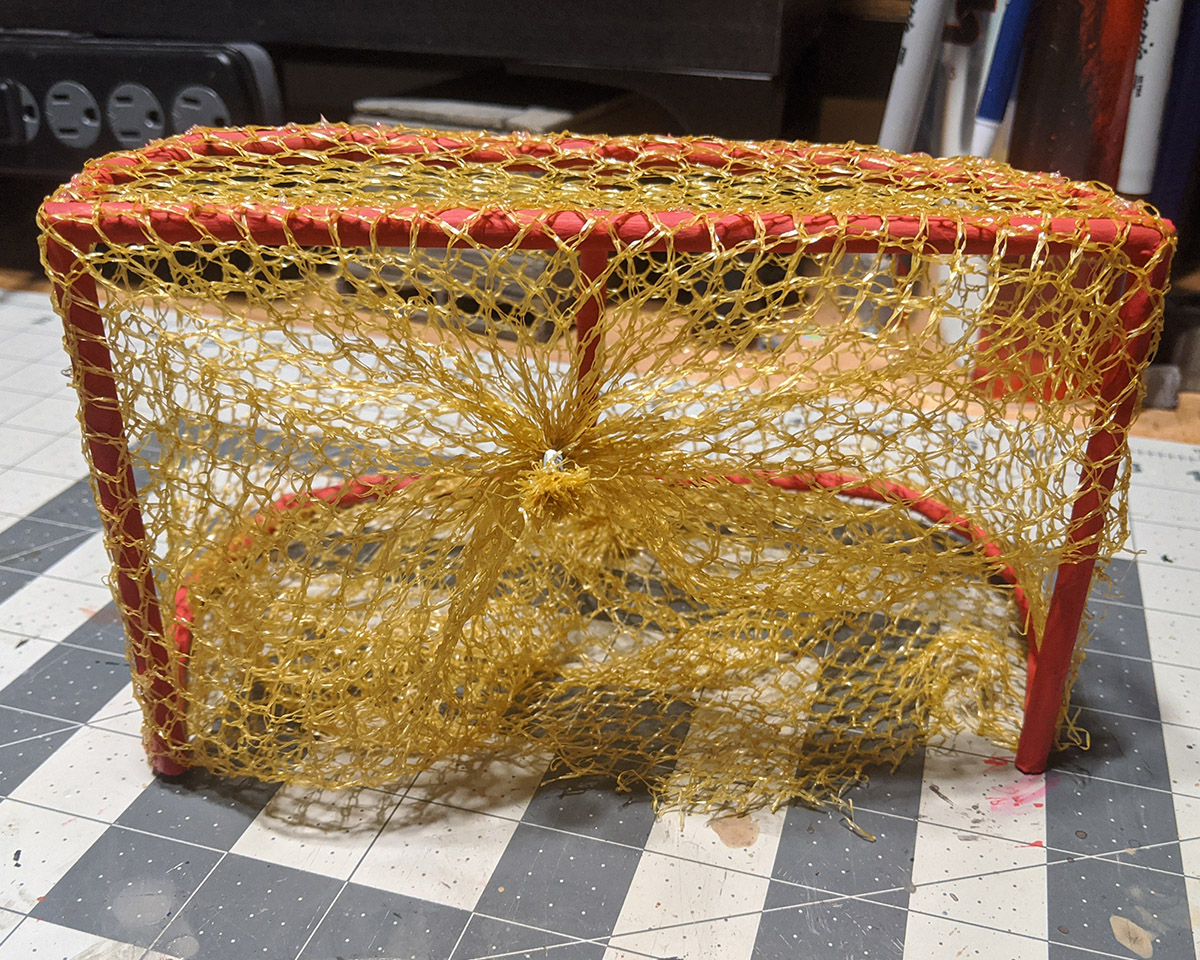
Spoiler alert: It fit like a glove (and not the O. J. Simpson “you must acquit” glove—that’s more like my first attempt, eh?).
With a clever application of an X-Acto knife, the scissors from my Leatherman and more super glue, I managed to get the net formed over the frame.
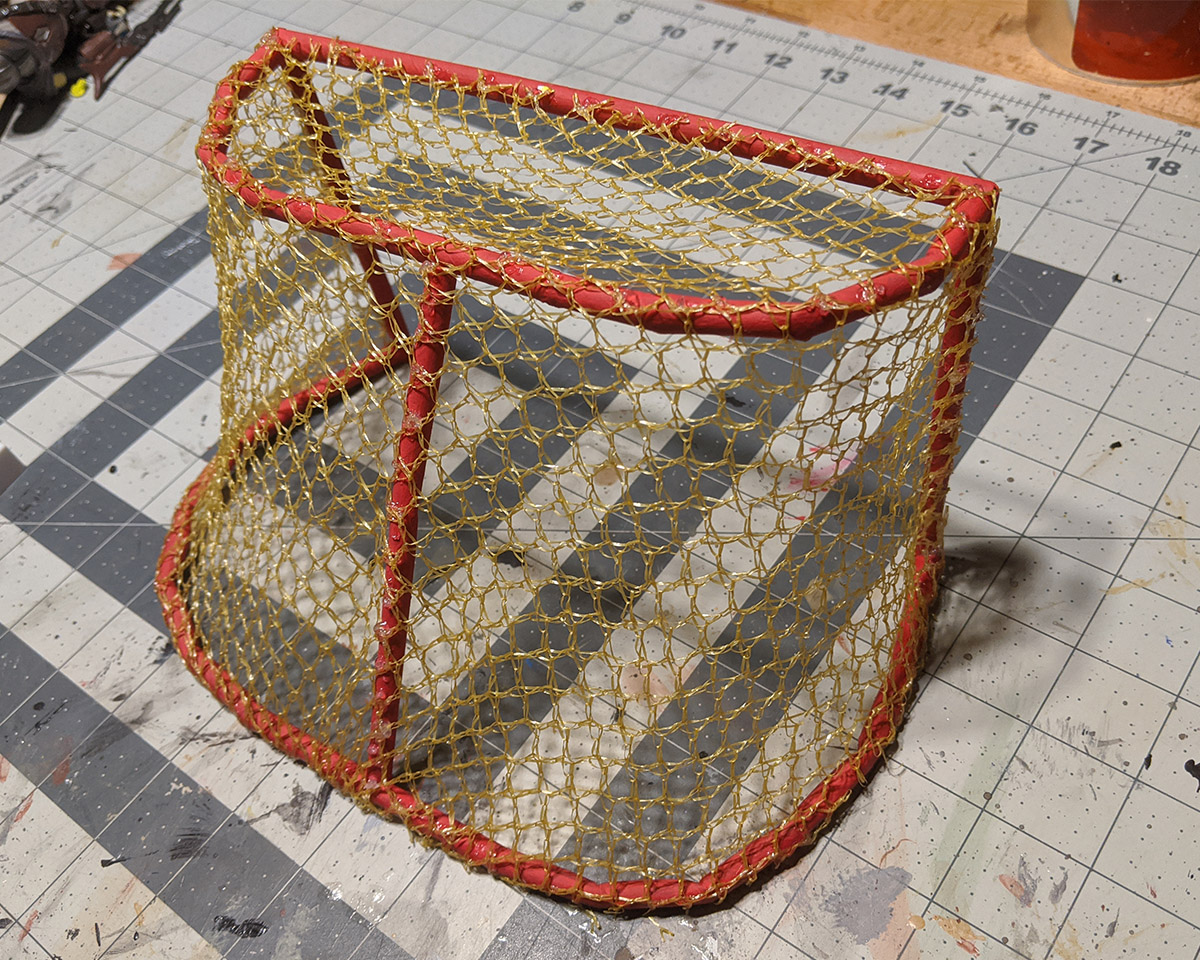
It does look dang good, doesn’t it?
NHL nets have padding along the bottom, and the back crossbar. Partly for safety, and partly to hide some electronics, like the back-of-net camera. I used some basic printer paper to mimic this.
I then covered the whole thing in a coat of Mod Podge to give the net some strength (onion bags are not structurally sound). Then I dry brushed some white paint onto the net to give it that official NHL colour scheme. Some final touch-ups to the red and I had my finished net.
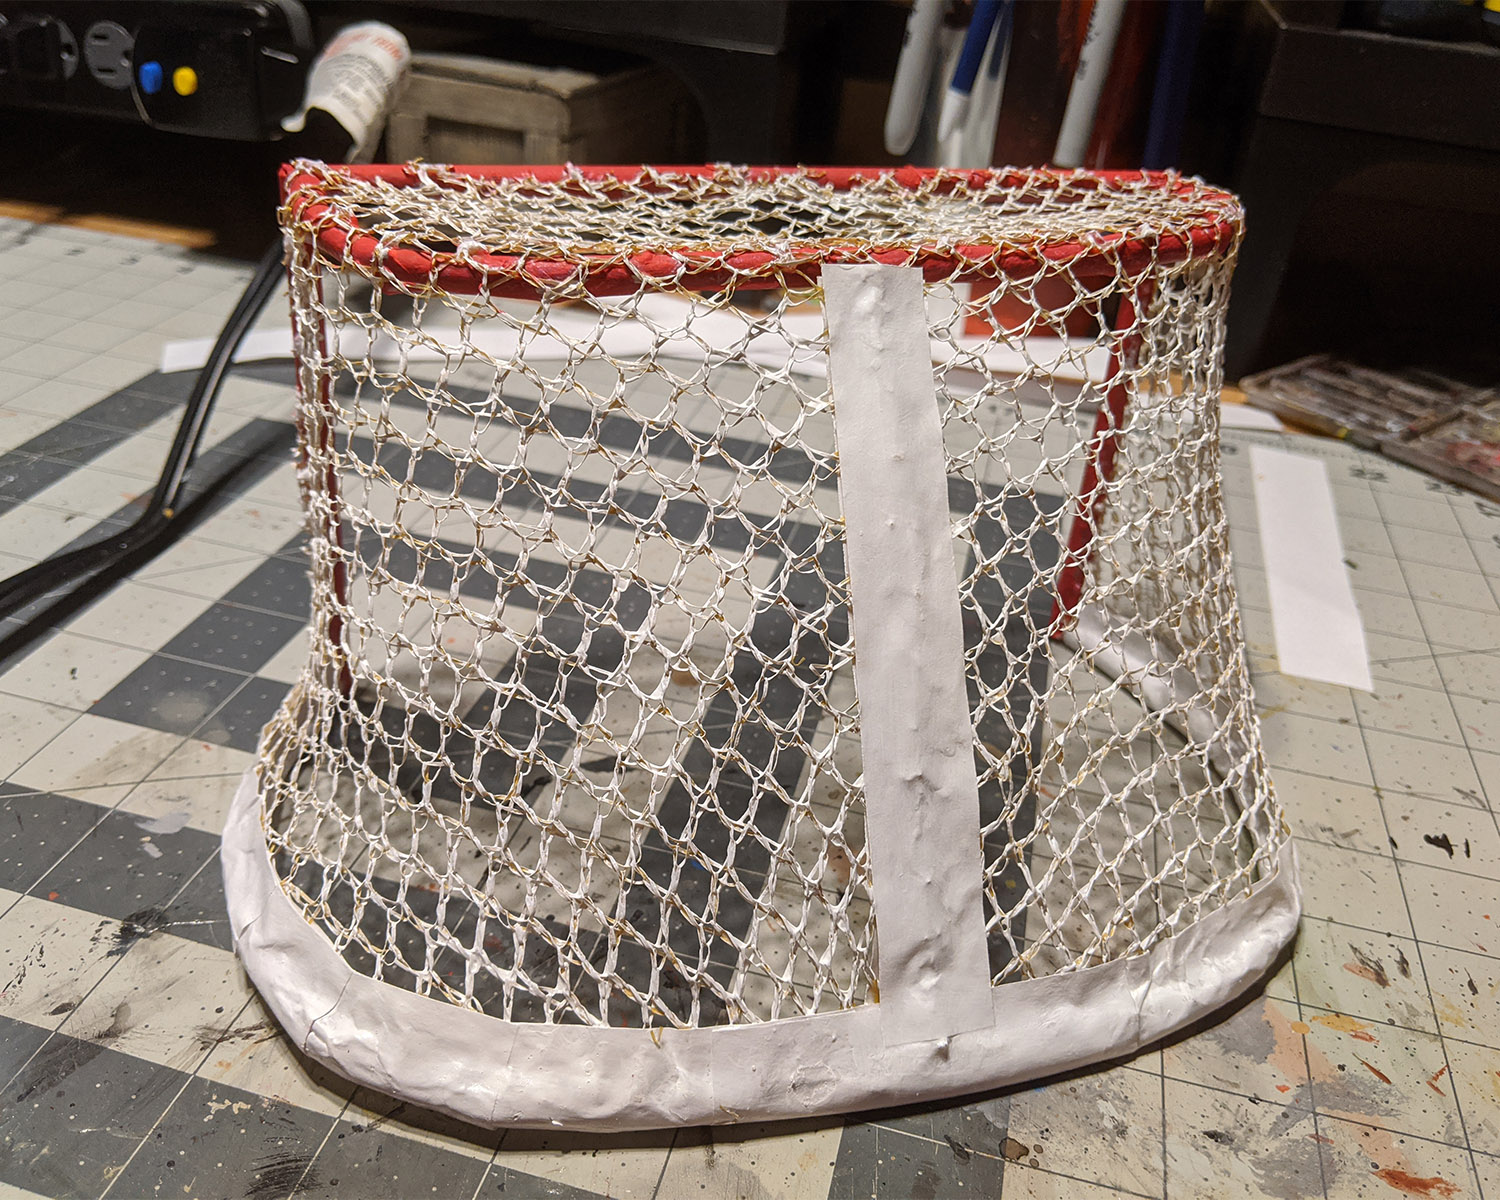
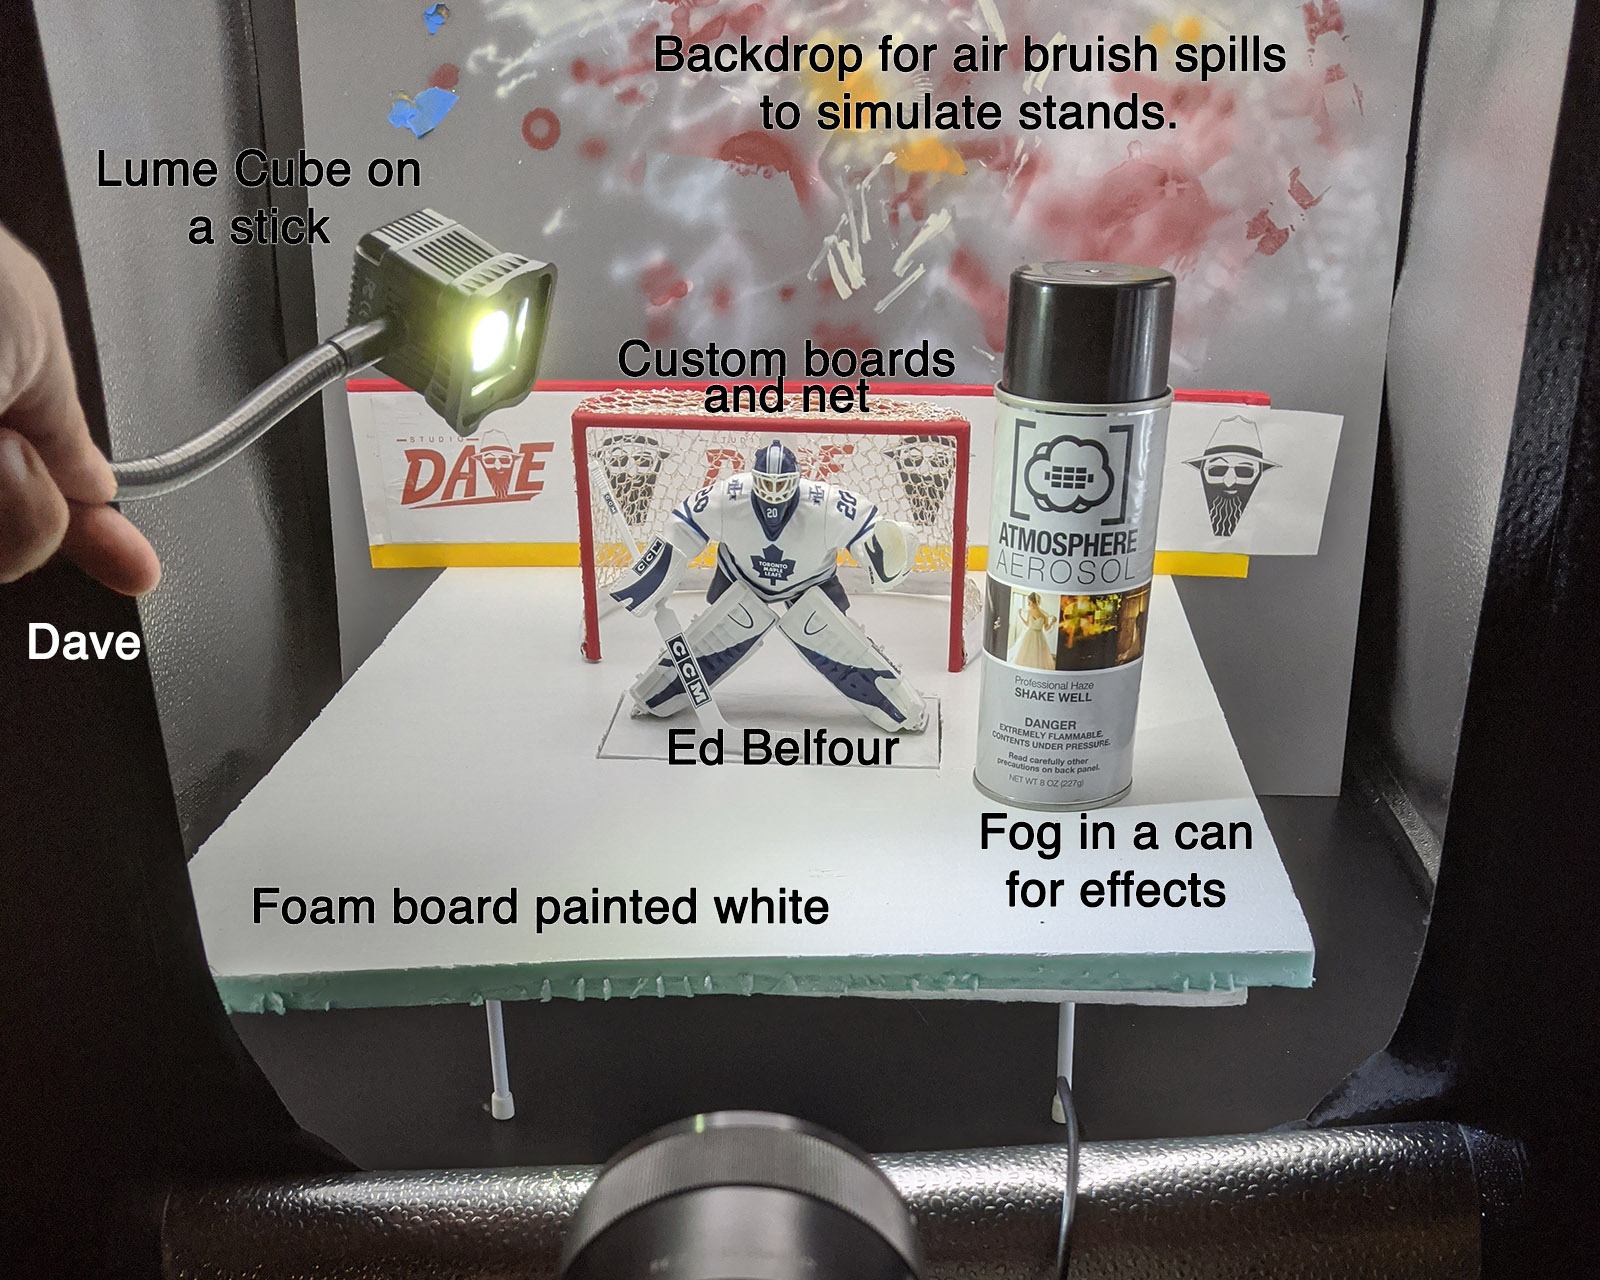
The ice was made out of a big piece of foam, painted white with a tinge of blue, and a cutout to accommodate the base of the goalie figure. I planned on adding the lines in post, as they would cross over the figure’s base. I didn’t want to paint the figure’s base as it would look odd on the shelf afterwards.
Putting it all together
I then made some simple boards out of more foam. Then placed it all in my light box. I added some rim lights with a Lume Cube, and some Atmosphere Aerosol for some, well, atmosphere. For the background, I used an old piece of foam core I use when I paint things, with hopes the weird patterns would look like the fans in the background.
The rest is Photoshop magic. I started by painting the lines and the blue goal crease. Then I added a cracked texture to give the ice that used, “skated on” look. The rest is some colour adjustments. All leading to the final image:
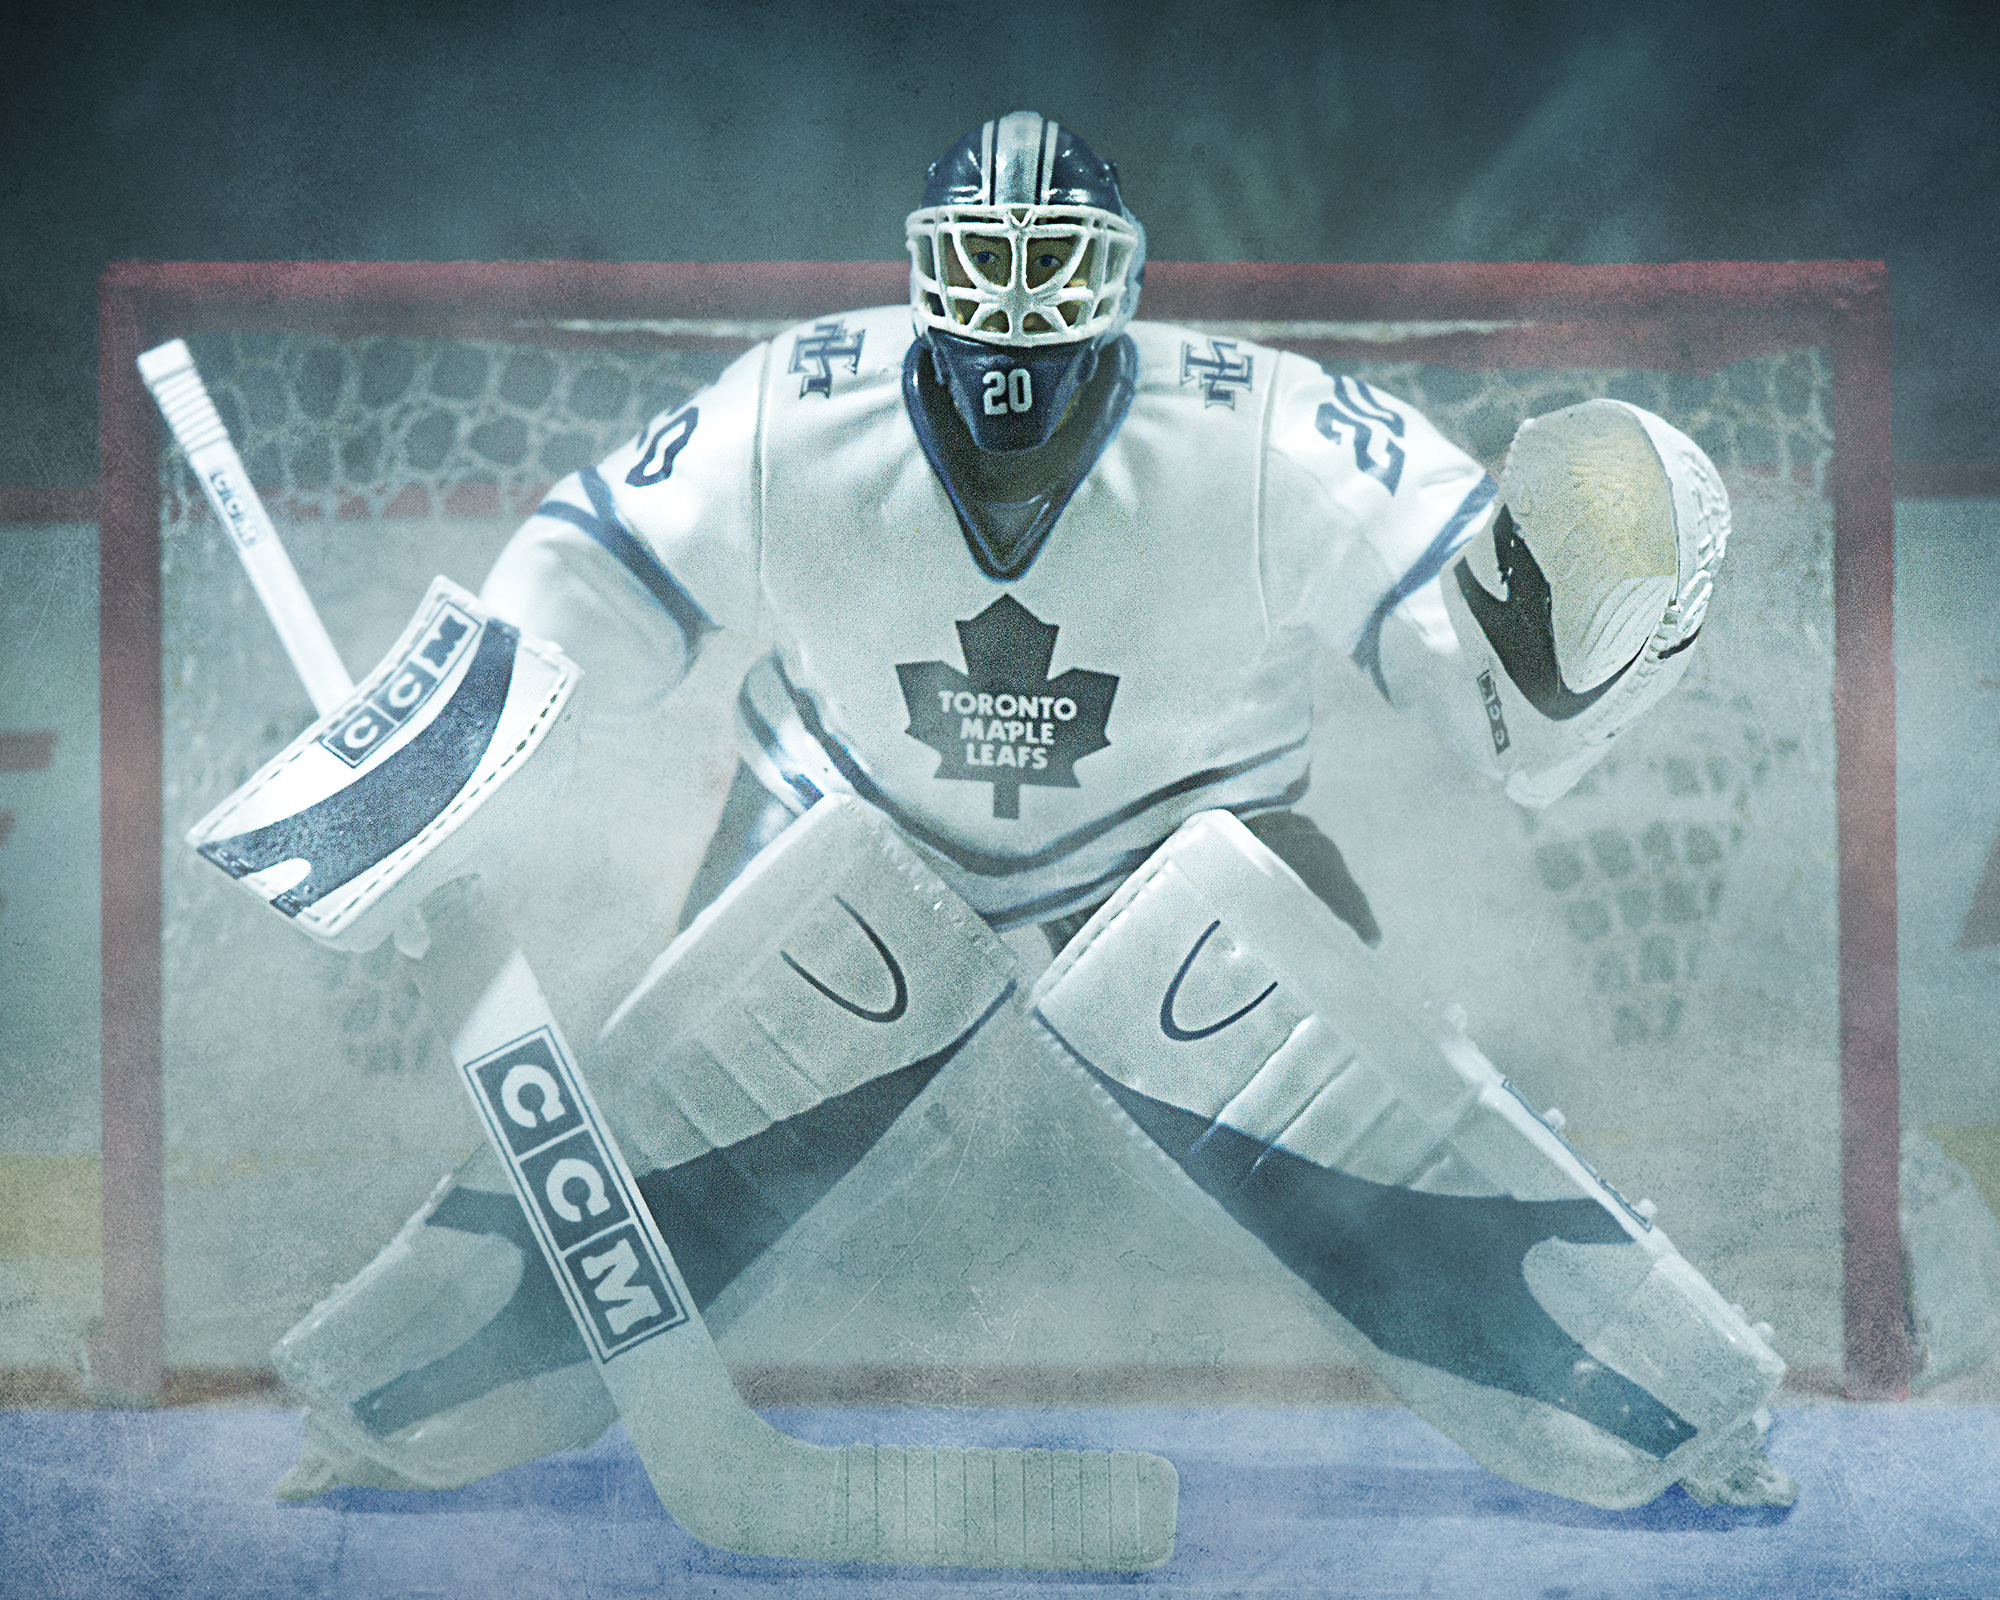
The hardest part of this shot was constructing the hockey net. After I had that, the rest fell into place, and created a pretty lifelike image, if I do say so myself.
[dave]
Want more toy photography goodness? Subscribe to our weekly email round up so that you never miss a post. You can also listen to episodes of the podcast! You can follow my work at @therealstudiodave
Good job Dave!
There was 3 great more options for you 🙂